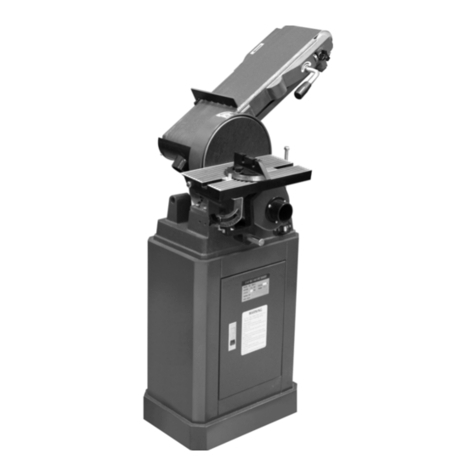
Craftex CX500 User manual

CX500
6” x 48” BELT & OSCILLATING
VERTICAL SPINDLE SANDER
User Manual

2
Table of Contents
General Safety Instructions ..........................................................................3
Specific Safety Instructions...........................................................................4
Features .......................................................................................................5
Physical Features .........................................................................................6
Un-Packing...................................................................................................7
Proper Grounding .........................................................................................7
On/Off Power Switch ....................................................................................8
Horizontal / Vertical Sanding ........................................................................8
Tilting the Belt Sanding Table.......................................................................9
Removing the Sanding Belt ..........................................................................9
Installing New Belt ........................................................................................10
Belt Tracking Adjustment..............................................................................10
Stop Fence ...................................................................................................11
Dust Collection .............................................................................................11
Mounting the Spindle....................................................................................11
Replacing the Table Insert............................................................................12
Aligning the Table with the Spindle...............................................................12
Tilting the Spindle Sanding Table .................................................................13
Test Run.......................................................................................................13
Work-Piece Inspection..................................................................................14
Maintenance .................................................................................................14
Troubleshooting............................................................................................15
Parts Breakdown & Parts List................................................................ 16 - 20
Warranty....................................................................................................... 21

3
GENERAL SAFETY INSTRUCTIONS
Extreme caution should be used w hen operating all pow er tools. Know your power
tool, be familiar w ith its opera tion, r ead through the o wner’s manual and practice
safe usage procedures at all times.
ALWAYS read and understand the
user manual before operating the
machine.
CONNECT your machine ONLY to the
matched and specific power source.
ALWAYS wear safety glasses
respirators, hearing protection and
safety shoes, when operating your
machine.
DO NOT wear loose clothing or
jewelry when operating your machine.
A S AFE E NVIRONMENT is
important. Keep the area free of dust,
dirt and ot her debris in the immediate
vicinity of your machine.
BE ALERT! DO NOT use prescription
or other drugs that may affect your
ability or judgment to safely use your
machine.
DISCONNECT the power source when
changing drill bits, hollow chisels,
router bits, shaper heads, blades,
knives or making other adjustments or
repairs.
NEVER leave a tool unattended while
it is in operation.
NEVER reach over the table when the
tool is in operation.
ALWAYS keep blades, knives and bits
sharpened and properly aligned.
ALL OP ERATIONS MUST BE
performed with the guards in place to
ensure safety.
ALWAYS use push sticks and f eather
boards to safely feed your work
through the machine.
ALWAYS make sure that any tools
used for adjustments are removed
before operating the machine.
ALWAYS keep the bystanders safely
away while the machine is in
operation.

4
MAKE SURE the sander is connected
to the matched and specific power
source instructed in the manual.
ALL THE GUARDS must be in place
while operating the sander to ensure
safety.
MAKE S URE bef ore making any
adjustments, the switch is in the “OFF”
position and the cord is un-plugged from
the power source.
NEVER sand more than one work piece
at a time.
DO NOT wear loose clothing while
operating this sander.
KEEP YO UR WORK AREA CLEAN.
Cluttered areas and work benches
increase the chance of accident.
NEVER L EAVE the sander unattended
while it is running.
KEEP CHI LDREN AWAY. All visitors
should be kept at a safe distanc e from
the work area.
DO NOT force the sander. It will do the
job better and will be safer at the
operating rate for which it is designed.
ALWAYS wear dust mask and safety
glasses while operatin g the sa nder. The
tiny piece s of dust produced by the
sander can cause serious health
problems.
ALWAYS inspect stock for staples, nails
knots or any other foreign material
before sanding.
ALWAYS operate the sander in a well-
ventilated area and use a dust collection
system fo r dust removal whenever
possible.
ALWAYS hold the work piec e firmly
when sanding. When not using the
table, i.e. sanding free-hand, grip the
work piece with both hands.
USE T HE STOP FENCE when
performing horizontal sanding on the
belt sander.
MAINTAIN AND SE RVICE your sander
regularly as instruc ted in the user
manual.
MAKE S URE y ou have read and
understood all the s afety instructions in
the manual and y ou are familiar with
your CX500 sander, before operating it.
If you fail to do so, serious injury could
occur.
WARNING
The safety instructions given above can not be complete because the environment in
every shop is different. Always consider safety first as it applies to your individual
working conditions.
CX500–6”x48” Belt/Oscillating Vertical Spindle Sander
SPECIFIC SAFETY INSTRUCTIONS

5
MODEL CX500 – 6” x 48” BELT & OSCILATING VERTICAL SPINDLE SANDER
As part of the growing line of Craftex woodworking equipment, we are proud to offer CX500 -6”
x 48” Belt/Oscillating Vertical Spindle Sand er. The Craftex name guarantees Craft Excellence.
By following the instructi ons and procedures laid out in this owner’s manu al, you will receiv e
years of excellent service and satisfaction. The CX500 is a professional tool and like all power
tools, proper care and safety procedures should be adhered to.
The oscillating sanding provides an extremely fine sanding finish
Easily interchanged spindles
Both tables can be tilted
Standard accessories can be stored at the side of the machine
Powder coated paint
Motor ................................... ..........1-HP, 60-HZ, 1720-RPM & 50-HZ, 1420-RPM
Spindle Size......................... ..........1/4”, 5/8”, 1-1/2” and 2”
Spindle Table Size............... ..........14.5” x 14.5”
Spindle Table Tilting Angle .. .......... 0° to 45°
Belt Size .............................. .......... 6” Width x 48” Length
Belt Sander Tilt .................... ..........0° to 45°
Belt Table Size .................... ..........10” x 8”
Approx Weight ..................... .......... 74 Kgs
Warranty .............................. ..........3 Years
CX500–6”x48” Belt/Oscillating
Vertical Spindle Sander
FEATURES

6
CX500–6”x48” Belt/Oscillating Vertical Spindle Sander
PHYSICAL FEATURES
Spindle
Cabinet
Table Tilting
Lock Lever
Table Tilt
Graduated
Scale
Spindle
Sander Table
Belt
Sander
Table
2”Dust
Port
6” x 48”
Sanding
Belt
Belt Tracking
Adjustment
Knob
Table Tilt
Graduated
Scale
Powder
Coated Paint
Sand
Paper 1-HP
Motor
Quick Release
Tension Lever
Feet
On/Off
Switch

7
UNPACKING
The machine is properly packaged and is
shipped c ompletely in a crate for safe
transportation. When unpacking, carefully
inspect the crate and ensure that nothing
has been damaged during transit. Open the
crate and check that the machine is in good
condition.
PROPER GROUNDING
Grounding provides a path of leas t
resistance for electric current to reduce the
risk of electric shock.
CX500 is equipped with a 120 volt single
phase motor which features a 3-conductor
cord and a 3-prong grounded plug to fit a
grounded type receptacle. See figure-1.
Make sure the cord is plugged into a
properly installed and grounded power
outlet. Do not remove the grounding prong
to fit it into a 2-pronged outlet. Always
check with a qualified electrician if you are
in doubt.
To prevent electrical hazards, have a
qualified electrician ensu re that the line is
properly wired.
This appliance is for use on a normal 120-
volt circuit and is factory-equipped with a
specific electric cord and plug to permit
connection to a proper electric circuit. Make
sure that the appliance is connected to an
outlet having the same configuration as the
plug. If an adaptor plug is used, it must be
attached to the metal screw of the
receptacle.
Figure-1 120-Volts Outlet for CX500
It is strongly recommended not to use
extension cords with your CX500. Always
try to position your machine c lose to the
power source so that you do n ot need to
use extension cords.
In case if y ou really find it nec essary to use
an extension cord, make sure the extens ion
cord does not exc eed 50-feet in length and
the cord is 14-gauge to prevent motor
damage.
WARNING
Improper connection of the equipment-
grounding conductor can result in a risk
of electric shock. Check with a qualified
electrician if you are in doubt as to
whether the outlet is properly grounded.
WARNING
CX500 is a heavy machine, do not over-
exert yourself. For safe moving method,
use fork truck or get the help of an
assistant.
8
ON/OFF POWER SWITCH
CX500 is equipped with a rocker-type
power switch which starts and stops the
motor and is loc ated on the junction box of
the motor. The switch features a removable
locking key to prevent unauthorized
operations. When the sander is not in use
for a long period of time, simply remove the
locking key and store it in a safe place.
To start the sander, insert the locking k ey
and shift the switch to the left.
Figure-3 On/Off Switch
HORIZONTAL/VERTICAL
SANDING
1. Loosen the screw securing the sander
frame to the motor bracket using a 6mm
hexagonal wrench.
Figure-4 Removing the screw
2. Remove the sanding belt table.
3. Move the belt sander to horizontal /
vertical position manually.
4. Tighten the screw securely after the belt
sander has been pos itioned horizontally
/ vertically.
Make sure to mount the stop fence when
performing flat surface sanding.
Figure-5 Installing stop fence
IMPORTANT
To prevent any type of accidental
injuries, make sure the power switch is in
the OFF position before connecting the
sander to the power source.

9
TILTING THE BELT
SANDING TABLE
The belt sander table can be tilted to front
downward from 0° to 45°.
To tilt the table:
1. Turn off the sander and disconnect the
cord from the power source.
2. Loosen the two table fix lever s located
under the right and left sides of the
table.
3. Tilt the table to t he desired angle. Look
at the graduated scale attached,
indicating the tilting degree of the table.
4. Re-tighten both fix levers.
Figure-6 Belt sander tilting scale locks
REMOVING THE SANDING
BELT
1. Turn off the sander and disconnect the
cord from the power source.
2. Loosen the 5 lock k nobs securing the
belt guard and remove it. See figure-7
Figure-7 Lock knobs to be loosened
3. Loosen the two loc k screws located
under the table and remove the belt
sander table. See figure-6
4. Remove the table-tilt graduated scale.
5. Loosen the belt tens ion by shifting the
belt tension control lever upward.
Figure-8 Releasing the belt tension
6. Remove the sanding belt from the right
side.

10
INSTALLING NEW BELT
After the old belt has been removed
proceed as follows:
1. Make sure the arrowheads marked on
the back of the sanding belt point to the
direction indicator attached on the belt
guard.
2. Place and center the new belt on both
the rollers.
3. Tighten the belt tens ion by s hifting the
belt tension control lever downwards.
BELT TRACKING
ADJUSTMENT
Belt tracking means where the belt rides on
the rollers . The belt should always be
centered on both the rollers.
To adjust the sanding belt tracking:
1. Turn the s ander on f or 2 or 3 seconds
and see c arefully if the belt tracks on a
centered path across both the rollers
and turn it off.
If the sanding belt is not riding the rollers on
a centered path, adjustment is necessary.
2. Turn off the sander and disconnect the
cord from the power source.
3. Loosen the fix nut shown in figure-9.
Figure-9 Belt Tracking adjustment
4. Check if the sanding bel t is tracking left
or right. Turn the adj ustment nut (shown
in figure-9) counter-clock to move the
belt right. Turn the adjustment nut
clockwise to move the belt left.
5. Connect t he machine to the power
source and turn it ON. Observe the
blade tracking on the rollers.
If the blade is tracki ng in the center, the
adjustment is properly done.
If the belt is still not tracking in the center,
repeat step 2 to 5.

11
STOP FENCE
When the sanding platen is set for
horizontal sanding, t he stop fence should
be used to prevent the work piece flying out
while sanding.
Install the stop fence to the sanding platen
using the two lock knobs.
Figure-10 Installing the stop fence
DUST COLLECTION
CX500 features two 2” diameter dust ports
to connect to a dust collector.
When connecting to a dust collector, use a
proper siz ed hos e and make s ure all the
connections are sealed tightly.
Figure-11 Dust Hoods
MOUNTING THE SPINLDE
CX500 is furnished with five s pindle drums
sizes:
1/4", 1/2", 5/8", 1-1/2" and 2" diameter
spindles
To mount the spindle drum:
1. Turn off the sander and disconn ect the
cord from the power source.
2. Select the required di ameter of spindle
drum.
3. Clean the spindle drum and make sure
there is no dust or debris on it.
4. Use an open-end wrench to lock the
spindle by holding its flat surface and at
the same time use another open-end
wrench to tighten the spindle drum.
5. Make sure not to over-tighten the
spindle as it could cause removal
problems later.
IMPORTANT
Always make sure the machine is turned
off and the cord is disconnected from the
p
ower source when installing/removing
any part or making any adjustments.

12
REPLACING THE TABLE
INSERT
The CX500 is supplied with 4 table inserts;
1. Select a pr oper table insert according to
the spindle drum installed.
2. Make sure to use the table ins ert that
comes closest to the spindle drum
without touching it.
3. Remove the old ins ert and clean the
insert hole on the table. Make sure there
is no dust and debris left which can
cause the insert to be out of height
alignment with the table.
4. Place the new ins ert over the spindle
drum on the table and make s ure it is
flat with the table surface.
Figure-12 Replacing the table insert
ALIGNING TABLE TO THE
SPINDLE
1. Turn off the sander and disconn ect the
cord from the power source.
2. Set the table at a 90° position
horizontally.
3. Place a s quare on the table with one
side touching against the spindle.
Figure-13 Placing the square
4. Use an open-end wrench to turn the
machine leveling adjustment nut
(located under the rear end of the table)
on the rear support screws.
Figure14- Turning the adjustment nut

13
5. Adjust the table so th at the square sits
on the table and touches the drum
correctly along its entire length without
any gap.
TILTING THE SANDER
TABLE
The spindle sander t able can be tilted t o
front downward from 0° to 45°.
To tilt the table:
5. Turn off the sander and disconnect the
cord from the power source.
6. Loosen the two table lock lev ers located
under the right and left sides of the
table.
7. Tilt the table to t he desired angle. Look
at the graduated scale attached,
indicating the tilting degree of the table.
8. Tighten both the lock levers back.
Figure-15 Graduated scale
TEST RUN
Once you have assembled your machine
completely, it is then ti me for a test run to
make sure that the machine wor ks properly
and is ready for operation.
During the test run if there is any unusual
noise com ing from the machine or the
machine vibrates exce ssively, stop the
machine immediately and disconnect from
the power source and in vestigate if you can
find out the problem with your machine.
IMPORTANT
Make sure you have done the tracking
adjustment and the belt is centered on
both the rollers before you start the
sander for a test run. See page-10 for
details on belt tracking.
Before starting the sander, make sure
that you have read and understood the
manual and you are familiar with the
functions and safety features on this
machine. Failure to do so may cause
serious personal injury.
READ THE
MANUAL

14
WORK-PIECE INSPECTION
CX500 is designed t o sand wood only. Do
not use this machine to sand m etals, glass
or stone etc.
Before sanding, make sure to inspect the
work-piece for nails, staples, small piec es
of stone or metal and any other object.
Sanding the work-piece with this kind of
objects can tear the sanding paper. Alway s
inspect your work-piece carefully before
sanding and wear eye protection.
Some woods with excessi ve finish or glue
load up the sand paper and reduce its
usefulness.
MAINTENANCE
1. It is highly recommended to clean the
machine daily after use.
2. When the machine is not in use, turn the
switch off and remove the switch key.
3. A build-up of dust i n the motor can
cause motor damage. Periodic cleaning
of the motor is not only recommended,
but also mandatory for normal sander
performance.
4. Keep the machine and attachments
clean.
5. Protect the spindle sleeves from nicks.
Clean tapered sleeves and tapered
socket before use.
6. All bearings are perm anently lubricated
and require no further lubrication.
WARNING
Make sure the machine’s power switch is
off and the cord is disconnected from the
power source when installing/removing
any part or servicing the sander.

15
TROUBLESHOOTING

16
CX500 PARTS BREAKDOWN

17

18

19
PART# DESC RIPTION
2 Base
3 Frame
4 Spindle
5 Helical Bevel Gear
6 PU Helical Bevel Gear
7 Right Oil Box
8 Left Oil Box
9 Connection Rod
10 Right Bracket
11 Left Bracket
12 Working Table
13 Bearing Fix Plate
14 Table
15 Auxiliary Left Scale Plate
16 Auxiliary Right Scale Plate
17 Dust Hood
18 Short Spacer
19 Long Spacer
20 Right Graduated Scale Base
22 Hand Knob 1/4"-20UNC X 3/8"
23 Motor
24 Switch Box
25 Switch (125/250V.20/12A 4POLES)
26 Indicator
27 Tilting Fix Bracket
28 Connection Block
29 Dust Hood
30 ARBOR
31 Guide Rod
32 1/4"-24 UNC * 1/4" soc set screw
33 Handle M6X1X15
34 Worm Gear
35 CAM
36 Copper Sleeve
37 Ball Bearing 6001zz
38 Worm Gear Shaft
39 Worm Gear Housing
40 Connection Piece
41 Side Cover
42 Front and Rear Cover (2PCS)
43 SPACER
44 Spindle (5/8")
45 6mm x 50mm Key
46 1/4" Spindle
47 2" Rubber Drum
48 1-1/2" Rubber Drum
52 SANDING SLEEVE(2",1-1/2",5/8",1/4")
57 Right Graduated Scale
58 Left Graduated Scale
59 Sanding Belt Pressure Plate
60 Sanding Platen
61 Upper Pressure Plate 2"
62 Upper Pressure Plate 1 1/2"
63 Upper Pressure Plate 2"
64 Flat Washer 5/16 X 2 X 18
65 5/16"-18UNC Hex Nut
66 2" Table Insert Elliptical
67 2" Table Insert Round
68 3/4" Table Insert Round
69 3/4" Table Insert Elliptical
71 Spring Pin 3 x 12mm
72 Open End Wrench 17mm
73 Open End Wrench
74 Spacing Collar
75 Strain Relief bushing 6N3-4
76 Power Cord
77 Graduated Scale
78 Positioning Rod
79 Spindle Washer
80 Foot Pad
81 SCREW 5/16 X 1/2 X 18UNC
82 Spring Washer 5/16"
83 5/16"-18 UNC Hex Nut
84 5mm x 15mm Key
85 6mm x 30mm Key
86 Hex Nut 3/8"-16UNC
87 Ball Bearing6804zz
88 C CirClip S-27
89 Ball Bearing6006zz
90 C CirClip S-27
91 Locking Nut M5
92 Washer 3/16"
93 Connection Shaft
94 C CirClip STW-12
95 C CirClip R-28
96 4mm x 15mm key
97 Rear Oil Cover
98 Pan Hd Screw 3/16"-24UNC x 1/4"
99 Spring washer 1/*4"
CX500 PARTS LIST

20
100 Cap Screw M6 X 1 X 15
101 Micrometer Indicator
102 Toothed Washer 1/4"
103 Pan Head Screw M5 X 0.8 X15
104 Flat washer 1/4 X 16
105 Graduated Scale
106 Cap Screw 5/16"-18UNC x 1"
107 Spring washer 5/16"
108 Washer 5/16 X 2 X 18
109 Cap Screw M5 X 0.8 X 15
110 Cover
112 Socket Set Screw M4 X 0.7 X 6
113 E CirClip 4mm
114 Hex Screw M8 X 1.25 X 16
115 Socket Set Screw M6 x 1 x 5
116 Hex Screw 5/16"-18UNC x 1"
117 Pan Head Screw 3/16"-24UNC x 1/2"
118 Locking Nut 3/16"-24UNC
119 Hex Screw 5/16"-18UNC x 3"
120 Locking Nut 5/16" -18UNC
121 Hex Screw 1/4" -20UNC x 1/4"
122 Hex Screw M10 X 1.5 X 25
123 Flat washer 1/4"
124 Screw Driver
125 Hex Screw 5/16 X 1 X18
126 Spring Washer 5/16"
127 Flat Washer 5/16"
128 Bearing 6201
129 Driven Roller
130 Nylon Nut 1/4-20UNC
131 C CirClip STW-12
132 Driven Roller Bracket
133 Washer 3/8"
134 Bracket Shaft
135 Drive Roller
136 Screw 1/4 X 3/8 X20
137 Belt Change Handle
138 Handle Knob
139 Spring
140 Dust Guard A
141 Dust Guarcd Base
142 Stop Fence
143 Screw M8 X 1.25 X35
144 Spring Pin 4 x 16
145 Bearing 6202
146 Bearing Cap 6202
147 Round Cross Head Screw 3/16" x 1/4"
148 Sanding Belt 6 x 48
149 Hex Hd Screw 1/4" x 3/4"
150 Micrometer adjustment Screw
151 Steel Ball
152 Hex Soc Hd Screw 5/16" x 1"
155 Base
156 Right & Left Plate
157 Front & Rear Spacing Plate
158 Bearing 6003ZZ
159 Coupler
160 Compound Block
161 Set Screw 1/4" x 1/4" x 20
162 Coupled Axle
163 Flat Washer 5/16 X 18
164 Hex Hd Screw 5/16 X 1/2 X 18
165 Key 5 x 5 x 30
166 Hex hd Screw 1/4" x 1/2" x 20
167 Hex Soc Hd screw 1/4" x 1/2" x 20
168 Plate
This manual suits for next models
1
Table of contents
Other Craftex Sander manuals

Craftex
Craftex CX509 User manual

Craftex
Craftex B2022 User manual

Craftex
Craftex CT148 User manual

Craftex
Craftex CX507 User manual

Craftex
Craftex CX505 User manual

Craftex
Craftex CX502 User manual

Craftex
Craftex CT174 User manual

Craftex
Craftex CX506 User manual

Craftex
Craftex CX503 User manual

Craftex
Craftex CT170 User manual

Craftex
Craftex CT125 User manual

Craftex
Craftex CT094 User manual

Craftex
Craftex B1954 User manual

Craftex
Craftex B2269 User manual

Craftex
Craftex CX508 User manual

Craftex
Craftex CT170N User manual

Craftex
Craftex CX501 User manual

Craftex
Craftex CX series User manual

Craftex
Craftex CX510 User manual

Craftex
Craftex B318N User manual