manuals.online logo
Brands
  1. Home
  2. •
  3. Brands
  4. •
  5. Craftsman
  6. •
  7. Power Tools
  8. •
  9. Craftsman 101.03622 User manual

Craftsman 101.03622 User manual

I
I
OPERATING INSTBUCTIONS
AND PARTS LIST FOR
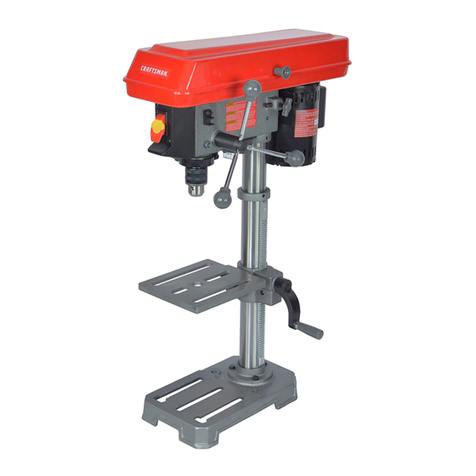
CRAFTSMAN DRILL PRESS
MODET NIIMBER 10I.03622
This is the Model Number of your Drill Press. lt will be found
on the rear center of lhe Base Top. Always menlion this
Model Number when communicating with us regardir;g your
Drill Press or when ordering Pails.
This lisi is valuable. li will assure your being able to obtain proper parts
service at all times. We suggest you keep it wiih other valuable papers.
SEARS, ROEBUCK AI{D CO.
OPERATING INSTRUCTIONS
When unpacking, be very careful ro 9o through all papers thorouqhly
as no+ to mi* any parts.
This drill press is desiened io be used {or all ordinary work with a
motor havinq " speed of approximately 1750 R.P,M. and with s,c\ a
mo+or will have n:ne dif{"rent speeds as {ollo*s: s80, 1300,2440dnd 5200
R.P.M. wilh moior in ro'mal pos;rion (pulleys in line); 1000, 1750 and
3300 R.P.M, with motor lowereo on molor base so thdt +op step o{
mofor pulley lines up wiih the secoid sreP on the spindle pulleyr 760
rnd 4,000 R.P.M. with motor .aised on moior base so rhai the top step
on tho spindle pulley lines r:p with the lhird s+eP on rho motor pulley.
l{ +he direct motor drive sef'up is r:sed, the moror should re'
'olve in a cloctwke dnection when facins ihe pulley end. lf it revolves
in the opposite directio., .everse this accordins to the manu{acturer's
instructions. When you are ,ure the motor revol"es properly, bolt it lo
ADIUSTMENTS AND CONTROLS DRILLING
(t) The eui k tocked in pos}ion by ru,n;rq rhe small lever located ,.,The prcper speed_ Ior drillins depends upo.' l. The malerial to be
"t +i,"'t.*", i,""i p"*-.iil" ti."a. drilled; 2. the size of the hole; 3. +he kind o{ drill. Generelly speakine,
(2) rhe rwo knurted nu*s on rhe.spindte srop sa!qe can be,er ar.aly li: lJjj;i. the material and the lareer the drill' the slower siould be
desired position and locked. ln this .ay a definite "mount of spindle
havel can be obtained ard dny rumoer of holes con be drilled +o a de-
sired deprh. Make sure tha+ the drill runs true when startin-g-ii may he necessary
(3) spindre Adiusrmenr-rr ronsi+udinar pr.y deveropes in rhe.spindre l:flll::ii!r-i:"';l;r"ti"1"';l''.,'1""'l',"T l;r"':l"".,tx,: :*;t:
it may be eliminared as foilows: {ll Re-mc,e spindle 9Lr..d a-n! the two hiqI a speed, 'esp.ciatty'*trh rhe la,ser d,ilts-exclssi'e speed wear ofl
lock nut5 on the {eed srop bracket, (21 Remove th; drill'coriex, dra*J th" +".per-"f rhe drill, and |n"v "*" f,ri .,
:prinq housinq by loosenine the set screw on the b.""k th. d,ili ii"-
unoe*:de of the boss, (3) Remove {eed lever and
pinion s[d{t d{ter roosening +he set screw in the
:ortar ad:acen+ -o +he heai, l4) putt spindle and Note: W[en drilline bruss, aluminum, lead and other so{t maierials
",rli a.-'"1",J "ia ,"-.," i.J.'r,""a. ist Loosen -hkh .cause. +he drill ro 'hoe-in", reduce_ the rEke dnel€ o+ the curtins
,J ,** r" ""rt", ai,""rrv "r.," qui d;d while edee by srindine rhe drill as shown in Fis. a. This reduced roke .nsle
i..i"s *. ,pindte up ag!in+ fhe Lolom of rhe is alrc delirable vhen,drillins very hard materials because i+ lessens the
o,rit, iioii." il" ."tt"'. ,p'.q"i,'+ rhe inner race of strain on the.drill. Thir chanee males drilline easier and ,esults in a
il" l1ifi s"",iis. o" -i .ll" this adius+dlent roo more accuratelv drilled hore'
fhs mounting braclet. localins it csntrally on lhe provided slots. Atlach
the molor pulley to +he shaft wi*h the large s+ep on top. Since +hk drill
press is a bench model, it should be securely bolted in+o position. l{ the
base does not iouch rhe bench top evenly, place shims whe,e requned.
lf +his p"ocedure is nof followed the Sase may be sprung, and unsatis-
iactory cond;tions may result.
lr +he coun+erehaf+ and idle. pulley are +o be used rl,e motor
should revol'e ii d counreFcloclwise direc+ion when {acin9 +he pulley
end. Bolt rhe Drill Press to the bench 6nd attach the counterohafl
in position as shown. Locate the molor pulley on the sh.ft wirh +he
large end oul and directly under the counrersha{t. Bolt the motor +o
lhe bench, put +he belt in the desired groove, and the Drill Press is
roady for operation. When usinq the belr in one of rhe smaller motor
pulley 9roc,ves, pull out the counfershaft +o keep the bel+ tigh+.
ihe quilr bearine. Do not maIe thk adius+ment loo more dccurarerv drrrred hc
tishr, (6) Put spindle back inio rhe drill head and Lubrication: A cultins compound is
reassemble. essenrial when drillins pracfically any
lal To Reno,e ChucL {'or Spirdre-See Fieure me+al- The {ollowing compor:nds will
l. Use the -edqe pro,ided fo' this pr:rpose. grve best r.u'ts:
Fio. I ,N.r\,k'Ar\,-.rev'e,.abu,e yoL, a,,., e,.t,,"i; I *':1"::""t '' 31---t""n'Ftin" d l"-'
- Do no+ strike ;+ wi+h d h6mne", bump rt, or drop rt - -
ar any time. u* *" *,"""i i,,ii't"a *iri ri" "t',"1. sofrer sreels-lard oil or equivalent.
ls) To adiust tension on Quill Return Spring-Turn the spring hous AJuminum 'nd other so{t al'ovs-kero-
r"o '*,"+.,"r.j"1,r'" i. i"",""i" +" tensionj To',elease +he tensiin. pull
,ri*".J "" +.-,"tli"r-p."t 1,.u. Brass-drill dry or use parafiin oil.
l6) T.ole Adi,r#,-ert-To ti t the ble, pul. ou+ the krurled \an e Die canings-drill drv or use le'osene'
r"""ili i"""rir- i""""ii rr," r"si.'""a rernserf afrer ad;u*ment ras casr iron-drilr dry.
been made. If the rable is tilted 90 desrees right or left, t}e knuled Do not aftemPt to make large holes
shourd the followins repla:e.m.ent.e.yel bicome necessarv, +he fottow- '".,"']r'";:L"'ftil:;:il;t.:;:r,;!
ine irstalra+ioi c199ed19 s!r91ld 1._.f9ll.iy:d, ,pi,ar" a"", ".+ .:u" enrir;ty ouroflhe
( I I QUILL BUMPER REPLACEMEN I:-
l.'nJ..," +i",pr"Jr"-q,irr ,"it +.- *" r""a as described ,"r". :l1li,; ?fl"l":l::'*il"Jfll #ll:i
section 4 of "spindle adiusrmen+.' ,",,triu* .sr"i"ua by ;,i"s .,; ";b. Remo,e old bunper and {orce ne" bumPer ;nto Posiiion bv ,io"-ro""a "++""t.."t showri inria.z.
m"ars of d lone, slir .od. Maie.sure. rhe. bunper seats ilselt ProPerrv This "'ri"+;""1 ;,;,td; " i.;;p1;;
belore re-installins tle spindle quill unit inio the head. o{ 200 R.p.M. t+ can be a*ached o.
"i" "."-s" t,,"*.a in Ihe holes p-"ia.i. io: iny internediate are e in a smali pieco or in thin -rarerial Fig'
il,e tubt" -,+ he locled in pldce by tishten:ns the nu'. wilhoL,t first clampins the .ork securely
to the table. For ma:rimum accuracy,
IMPORT'ANT_LUBRICATION derached in ress rhan iwo minures.
USE S.A.E. No.20 MACHINE OIL
A. Upper Spindle Pulley Bear;n9-Oil l'e- DRILLS: Afrer the drill point is dulled {or ihe lirst lime, i+s ,)ffs..
.'eness depends entirely upon how :r is .e9roLnd. For clean. accurate
drilling, the operator rusr rerharpen tre d,i.l prope,ly. The cone+haped
su{ace dt the end o{ the drill is cdlled the "point', and the edqe at
rhe extreme rip end is.ihe "dead center'.
c.
D.
E.
Quill Bedrincs-Oil frequenlly. (Note:
Sp ndle must be in lowes+ posi+io. tc
unccver oil hole)-
Pinion Sha{+ Hub-Oil occasionally.
Lower Quill Bearine-Oil {requenily.
Lower Spindle Pulley Bearins-Fill erease
cup with Lubrico M-6 Grease every+hree
Quill Surface-Oil should frequently be:p
plied to the olrlside sur{ace of +his quill. The
spindle cap .hould 6e removed frequen+ly end
oil applied to tie splined spindle also.
FIG.3
DEAD
BODY
-2 -
OPERATING INSTRUCTIONS (Continued)
MORTISING .i
' Fig. 5 Fig. 5 Fis. 1
ln order to penet ate the qor[ the cuttihg edse must ha"e the cor
rect cuttins angle and "1ip clearance" at the cenier of the drill {Fi9.7}.
Fig.5 shows a drill ground with no lip clearance. The portion of the
drill behind the cuftinq lip k bearins on +he me+al being cut and cre-
ven+s the cuttihs lip froh bifirs in. The cutting Iip and heel "5' are ;n
the same plane. This drill will cut very poorly, i{ at all. Fie.6 shows}ov
fhe "heel", +he part directly back of cu+ting angle, must be ground away.
THE PROPERLY GROUND DRILL: Two '.rles are especially impor
tan+ when grinding drill poink. l. The Iip clearance angle {Fi9. 8A)
should be between l2 and l5 degrees. 2. The two cutiins edges must
ue of equal length and an9le. ln Fies.8A,8B,8C, rhe p,operly ground
dr;ll poink is sho*n. Re{er to these ligures when srinding a drill-they
will aid in grinding drills which will cut rrue*ized holes with a minimum
Fig.88
Fig.8
Use rhe hollow chi,el morti,ins Bi.
tachment and acce*ories as slown in
To 'et up the mortking attachment,
firs+ remove feed stop bracket and put
chisel socket in its place. See Fig. 9.
Remo"e +he {eed stop eause, and in-
sert in the chisel holder. Thisfeed stop,
in addilion to servinq as a depfh sause,
prevents rotalional play in the quilt.
Select a mortisinq chisel and bi+ o{
desired siue. lnsert chisel in socker'
Slide the bit up rhrouqh rhe chisel and
{asten in collet <hucl, leavins l/15"
clearance beiween the rPur o{ the bir
and the lo.er edse o{ the chisel. rhis
adiustment must be care{ully made ot
a damaqed bi+ and chisel will result.
Turn the spindle by hand to make sure
that the bi+ runs {reely.
-z:-1-.
(A
u.-/.,\.,,;L^"..
ffiP.+71..
>;q.*.*
Fi9.9
Set the ouide {ence in position and clamp the holder do'n lishtlv
aoainst the i"" .,*"". .f +h" *",k. AdiL,st ihe lock nuls on +le reed
+'"o ".,". snd iake the first cut slowlv, Raise the chi5el frequeirlv to
dis;ha.qe-the chips. Move the work alons +he guido fence about t*o'
thnds ihe *idth o{ the mortis;ne chisel and take a second cut This
and succeedino cuts mav be taken more rapidlv. RePedt +he abo"e oPe'
aiion un+il the desired hole is completed DO NOT FORCE THE CHISEL
THROUGH THE WORK TOo IIAPIDLY. Too rapid {eed will cause
burned chisels and b+s.
USE THE SLOWER DRILL SPEEDS FOR MORTISING.
Fig.8A Fi9.8C DOVETAILING
Use do"etailing attachmen+ ar sho*n
i;ons turaished wjrh attachment.I ;n our catalog. (See lnstnrc-
REAMIN6: Wlen a hole mr:st be accuraie to wit}:n.002 inch or
iess, ii is first <iriileri a iew iirous.r<iihs or i'r ii..l uiii",size.;iiJ tiea
hand-reamed or reamed with ihe drill press to the finkh'diame+er. For
besl results, Jollow 'the same rules irl reamins as {ot drilling. Use slo*
speeds, feed in evenly and be sure lhere are no burr on +he reamer+eerh'
' A rearinq allo.ance be+.een .ol0 and l/64 lnch is t,sually sufficient
{or machine-ieamins Ioles with diamete's o{ t lnch or les-an " lo''
ance oI t/64 ot th2 nch k recommended {or machine-reamine holes
be+ween I and 2 inches in diameter. .OO3 +o .005 inch k usually allowed
for hand reamins operations.
CAUTION! L usins the dr;ll press for any PUrPose o+her than driil'
ine, it is necessary to make use o{ special chucks and adap+ers.
In usino the various tvpes o{ mortisinq bi1s, router b;ts, do'elailing
b;rs etc., ihe op"r"ro- MAY use a collet-chucL rather than the Jacobs
c\uck. On those drills equipped -:th d laPered sPiidle, it is ne.essBrv
to remove the Jacobs chuck and rhe rhreaded collar immedialely above
't. To remove Jacobs chuck from spindle, place +he sleel wedse bet*een
the chuck ano the knurled collar and sirike tle wedee a sharp blow *rrh
a hammer. {See Fiq. l.} The chuck should be caush+ wirh rhe le{} hand
in perlormins 'thk operalion. The coller chuck L PIaced on the taDer,
and +he thre;ded coilar k rhen replaced. There is a small flanse on rhe
inner side of this collar which vill hold the collet chuck securely in
oosition on tie ta Der.
l{ rhe Jacobs chucl is useo wilh any tyPe o{ cutter vhere ther" ir d
thru+ cominq on from rl"e side, the chuck .ill be pulled ofi the taper'
Th.s can be-quite dangerous. Then +oo, most o{ rhese operd+ion, a'e
done ar a hieh speed, and a collet chuck k much lieh+er and is pre{-"r
able {or +he Iiqher sp"ed. The coller chuck grips the cutter shank all the
*ay around instead ot at ius+ tFree poink.
Eractiy the same p.ocedure is {ollo*ed in irstal'ins the shapi"g
adapter wh;cl k used on +he tapered spirdle drirls lo cary the shapi"s
WOOD CARVING AND INLAYING
For this work, use the special router or woodcdrying birs shown in
our cataloq. The d.'ll press should run at a speed o{ about 5,000 R P.M.
or hiqhe". Hold the piece to be wo*ed firmly ;n one hand and .un thp
bit into +he work ihe proper dep+h. Clamp +he spindle securely at ih;,
point. No* holdinq the work wirh bo'h hands quide i+ throush the
desi"ed desiqn. FreqL,eatly in car":ns the wo* is 9r:ided by a i;q sa*
paitern cul our of plywood. This Pattern is Ias+en"d to fhe r.rnde*ide
o{ +he work itsel{. A pronq pin proiec+inq up {rom rhe table runs in +he
paitern and guides +he work.
SHAPING
The head nav be used in the normal position or in"erted as shoan
ir Fiq. 10. Use the special extension rable and spring cl;ps l;sted in our
catal;q. when the dr;ll is equipped *ith d tdPered spindle, a special
shopinq adapter is mounted on rhe sPindle and heid by the collar abo'e
the ch;ck. Be sure to use +he collar to hold the shapins adapter in place.
See 'Cauiion" above.
Seleci the proper cutters and lock
securely on rhe arbor. IMPORTANT:
The direc+ion o{ rotation should he
TOWARD the wo* to be cut. Always
set the wood {aclnss as close to ihe
cutter as possible to secure maximum
safety. To feed worl from ihe oppo-
'ire siCe: L T!rn c!t+er or cutierr
over. 2. Reverse direction of rotarirn
o{ spindle. 3. Place hold.downs o"
opposiie side. (A re,ersing swhch
wil 6e found to be convenient.)
one thin inner collar slightly higher than the other collars. Ou+side of
rhis ;s a bronze hearing <ollar and ou+'ide o{ lhe bearing collar are a
series o{ steel colldrr. ln oper.t:on rhe wo+ resr, a9a;n5t the outer rteel
collar whkh remains pracficdlly +ationary while lhe spindle revol"es.
These collar may he mounfed abo"e or belo- the cutfer. The collars
serue as a depih siop {or the work preventinq the cutter from "hosging-
in". They should always be used on irregular work.
ln commencinq the cul on iresular wo* use +he stadins pin as a
{ulcrum to prevent rhe work from gefting caughi. Bring tie work sradu-
ally in contact wirh the cut+er. Hold +he work firmly and keep i+ in
contact wi+h rhe depfh collar. The shape o{ the piece will be soverned
by its con+ouri hence +lle worl mus+ 6e sawed ro the desired shape
be{ore shapinq. USE ONLY THE HIGHER SPEEDS FOR SHAPINO.
ln shaping circular or irregular wo* | .i i -n- |
tfik shapins fence and hold downs
.re disp.n,"d wirh. For +his work've Fig. l0
recommend and seii a sef o{ nened deprh collars. ln rhese sefs }here is
-3-
HOW TO ONDER PANTS EQB
CFAFTSMAN DBITL PRESS
MODEL NUMBER 10I.03622
All parls listed here may be ordered through any Sears relail store or the mail order slore which serves lhe lerritory
in which you lire. When ordering, always gire the {ollowing:
'1. Part number in +hi;list, 2. Pari name and price in this list'
3. Model number, which is 101.03622, and which will be found on ihe plate on the base o{ +he drill.
ALI, PARTS ARE SHIPPED PBEPAID
6a-29
E1D:R, 60 9A
ea3402 60 3l
- 62-5a 5a-20-
6a-24
6A 25
9-729 63-62
60-3A'-
63-64.
6l-65 I
iTi
HEAD ASSEMBLY
splined splndl€ .. .. .. . .. .. .. . .. 2.50
Spiidle ouill . 3.25
Spindle Pu ley ...... ............ 1.55
Spindle Pullei cuard t.1o
spi.ole Feed oilion S-dfl .ro P niol 2 25
ch..k R.l.Eie Co .r '55
ati"dh A;iri Bearins (2 req.) each 2.05
soindr. PJI €v slee'e 2.40
Spirdle P- le; Sleeve Bedi.e (5m ' l) 2 aa
llea re.er da ance Sp ins ' .50
Feed Lever Salan.e Sprini Housinq 25
Soind € ThrLr Col ar '30
;;;;4,". a;,d t.2i
S.i.ar" P,t .r Bed'inq P ate '40
iii""i" p,l.i s.eevi Be.-rra (",ce) 2.t0
ili"J." s"",i"" spdce, .... ' . '45
s;i'd," Bedan; L;ck Nrt .lo
i",cr neteare -Nrt 40
Feed stoD Srud NJ (2 req.) ed(' .. .. 4)
at;;; i'"#; . .75
O-_ll. Cl..p n""al" (il Ls. ds 5o_2ll 55
swirch rtaie ... .. 25
switch .. ,-' t5
g,iti r".l .. ... 20
Column Lock .. . .. 30
SDird e gLd'o 95
o. ii l"cr stee'e .70
c"l"mn Lo(^ S eeve '40
Feed srop Bra<ke_ '75
F..d rld.ole riub .. l'50
;;;; ii;;;i; i4 ';;.) *.h .40
Hub Pin...... ..... ... 20
h"- " spi'"c Holsinq cap ' ' '55
ii.a 'r.ilai"- e"tt tr ;"q.t ... '20
Quitt e,.p.. .. . 60
i"*i g"arri'e 45
Ratchei Pawi 40
Pjnion shalt Collar '. .. . .45
Fe;d Hande Hub Lock Soew ... .25
Name Pldie (Mdster) .... ... .. ....... .20
R;bber B$hi;q .. .t2
sb,ino lnol il ;si.led)
i""."oin" cord s5
Ratcher Piwl Knob .20
TABLE ASSEMBLY
63- 48
-63'66
BD3A 5
BD3A 53 50 taj
6a-32
6C-5
51 52
BD3C. A
50,48
605
60.6A
8D2B-7
63-t4A
60-t7
50-18
50-20
6l-21
63-22
60-24
60 25
60-26
50-31
60-32
50-38
60-3t
50.4t
60-42
BDIA.42
4t-43A
BD] 44
50-44
4l-45
803-45
50-45
63.45
BrJIA-51
st 52
BD3A.53
60-55C
5t-55
63.62
6l-64
63 65
63-66
5l,99
sD3-105
j-ls7
9-2r4
1-729
PARTS LIST \^uind Pti..
.... .. $ .30
.15
.30
.40
40 36
60-42
50-44
50-45
60-29
803M"34
60,40
60 55
5t 57
40-60
40-6t
Column Lock
Column LDck 5 eeve
Molor Bdse
MOTOR BASE ASSEMBLY
BD2-t0
62 50
BD3A.3
Motor Bdse Pin (2 ,eq.) edch
BASE
M ISCELLANEOUS t.55
t.50
4.50
.55
.20
8-45
.55
.30
.75
.55
.55
.24
.55
3.50
.30
t.00
Beli
801-8
50-9
BD t- 10
50,! I
BD t- t2
BDIA.23A
6r-34
8Dt-37
BD3-54
Chuck Releale Wedse
Drill Chu.k 0' io %"
Drill Chuck wren.h
lDLER ASSEMBLY (Accessorv)
Motor Ease B,.cket Pin (2 req.) each
ldler Pulley (2 req.) each
ldler Pul ev Eracket ..
ldler P!lley Brack€i 5ha
ldler Pulley Shafi...
i;i:; iill'"i i;;;i c..;;;," c,p ti ."q.i "(...w wilh Ha nd le
Spind e Lock Sc.ew with Ha
ldler Pu lley Bushinq
ldler Pulley adi. B,a(ket
Sears, Roebucl and Company
Enclosed flnd my checL ror $1.8s {o'which plea'e *nd ne bv
parcel post rhe followins parts for my Craf+sman Drill Pres, Model
Nunber 101.03522.
I ea. 60-29 Molor Pulley
I ea. 5o-44 Column Lo.k
5.75
2,2A
_40
60-2
62 2A
40-15 All Pticet Arc Stbiecf ta Chdhse Without Notice
NOTTCE: This i3 NOT a pa.kinq rlip. The pads shown .nd lkred include acce$ori€s thal are not n€celsrilv part of thi3 tocl.
\OTE: Siandad parts, such ai bolts, .ut!, wnsh€B, €tc., are not listed .bove at such pd.ts .an be obtdiied locallv'
eo A:az l /,"
BD3-45 /,/
Bor l2s, Richmond, lnd.

Other Craftsman Power Tools manuals

Craftsman BOLTON 34976 User manual

Craftsman

Craftsman BOLTON 34976 User manual

Craftsman 152.219110 User manual

Craftsman

Craftsman 152.219110 User manual

Craftsman 875.199860 User manual

Craftsman

Craftsman 875.199860 User manual

Craftsman 113.213090 User manual

Craftsman

Craftsman 113.213090 User manual

Craftsman 315.175170 User manual

Craftsman

Craftsman 315.175170 User manual

Craftsman 137.219000 User manual

Craftsman

Craftsman 137.219000 User manual

Craftsman 320.23465 User manual

Craftsman

Craftsman 320.23465 User manual

Craftsman 315.175342 User manual

Craftsman

Craftsman 315.175342 User manual

Craftsman CMPBN18SB User manual

Craftsman

Craftsman CMPBN18SB User manual

Craftsman 103.24521 User manual

Craftsman

Craftsman 103.24521 User manual

Craftsman 124.34985 User manual

Craftsman

Craftsman 124.34985 User manual

Craftsman 351.217030 User manual

Craftsman

Craftsman 351.217030 User manual

Craftsman 315.17473 User manual

Craftsman

Craftsman 315.17473 User manual

Craftsman CMCE565 User manual

Craftsman

Craftsman CMCE565 User manual

Craftsman 320.37599 User manual

Craftsman

Craftsman 320.37599 User manual

Craftsman 875.191173 User manual

Craftsman

Craftsman 875.191173 User manual

Craftsman 320.28102 User manual

Craftsman

Craftsman 320.28102 User manual

Craftsman 9-19905 - 1/2dr 1/4npt 500ft/lb Sq Dr Impact... User manual

Craftsman

Craftsman 9-19905 - 1/2dr 1/4npt 500ft/lb Sq Dr Impact... User manual

Craftsman 315.175170 User manual

Craftsman

Craftsman 315.175170 User manual

Craftsman 315.115860 User manual

Craftsman

Craftsman 315.115860 User manual

Craftsman 315.172281 User manual

Craftsman

Craftsman 315.172281 User manual

Craftsman CMCE030 User manual

Craftsman

Craftsman CMCE030 User manual

Craftsman 315.25791 User manual

Craftsman

Craftsman 315.25791 User manual

Craftsman 152.229020 User manual

Craftsman

Craftsman 152.229020 User manual

Popular Power Tools manuals by other brands

Cleco 48EA Series parts manual

Cleco

Cleco 48EA Series parts manual

Toolex 597438 instruction manual

Toolex

Toolex 597438 instruction manual

Hilti TE 30-A36 operating instructions

Hilti

Hilti TE 30-A36 operating instructions

Sealey AK6290 instructions

Sealey

Sealey AK6290 instructions

Sienna SPP-0669 instruction manual

Sienna

Sienna SPP-0669 instruction manual

Bosch GBH 36 V-EC Compact Professional Original instructions

Bosch

Bosch GBH 36 V-EC Compact Professional Original instructions

Porter-Cable 643 instruction manual

Porter-Cable

Porter-Cable 643 instruction manual

Makita RP0910 instruction manual

Makita

Makita RP0910 instruction manual

Makita DTR180 instruction manual

Makita

Makita DTR180 instruction manual

Campbell Hausfeld AF010400 operating instructions

Campbell Hausfeld

Campbell Hausfeld AF010400 operating instructions

Beteze Isabelle Assembly instructions

Beteze

Beteze Isabelle Assembly instructions

Racing RAC52CDORG instruction manual

Racing

Racing RAC52CDORG instruction manual

Hilti DX460 operating instructions

Hilti

Hilti DX460 operating instructions

TJEP CN 70 manual

TJEP

TJEP CN 70 manual

Laguna Tools DAKE 33-672 instruction manual

Laguna Tools

Laguna Tools DAKE 33-672 instruction manual

Draper 63220 instructions

Draper

Draper 63220 instructions

Ryobi RMT200 Original instructions

Ryobi

Ryobi RMT200 Original instructions

Ferm FBF-6E user manual

Ferm

Ferm FBF-6E user manual

manuals.online logo
manuals.online logoBrands
  • About & Mission
  • Contact us
  • Privacy Policy
  • Terms and Conditions

Copyright 2025 Manuals.Online. All Rights Reserved.