----------------------------------------------
t,Yl?J;@W1
The operation
_of
any
power
tool can result
in
foreign ob-
jects being
thrown
into the eyes, which can
result in severe eye damage. Always wear
safety glasses or eye shields before
com-
mencing
power
tool operation. We recom-
mend Wide Vision Safety Mask for use
over
spectacles,
or
standard safety glasses
..
.
available at Sears retail or catalog stores.
j
Operation
r•W/]jkjj~[Cj
ALWAYS UNPLUG YOUR
--·····,,··-
TOOL
WHEN CHANGING
COLLETS OR INSERTING ACCESSORIES
trVlf.!·W@ij
DO
NOT
ATTEMPT
TO
OP-
• " ERATE CHUCK LOCK PIN
WHILE (ROTARY TOOL) IS RUNNING.
CHUCK -Consists of a
chuck
cap and
collet. Depress
chuck
lock
pin and rotate
chuck
cap by hand until
lock
pin snaps into
place and stops the
chuck
cap from turning.
Place
chuck
wrench
over
chuck
cap
and
loosen as shown in the illustration below. The
chuck
lock
pin must be kept depressed
during
this operation. Any
accessory
or
drill
should be inserted into the collet as far as
possible to prevent
wobble
during
operation.
Now
tighten
chuck
cap
as shown keeping
lock
pin depressed. Avoid excessive tight-
ening of the
chuck
cap.
I
\0
LOO
SEN
f•
f@
·
W@ij
SAFETY -PROTECT YOUR
b ' EYES WHEN GRINDING OR
ROUTING WITH THE ROTARY TOOL
..
.
ALWAYS WEAR AN APPROVED TYPE OF
SAFETY GLASSES.
t•W4iM@eJ
~~E~~~
ci'iEER
~~
1
1~D~~A~
METER OTHER THAN THE NO. 53088 CUT-
OFF
WHEEL
ROTARY TOOL'S HIGH SPEED
CAN CAUSE LARGER WHEELS TO FLY
APART AND CAUSE INJURY.
BALANCING ACCESSORIES -For preci-
sion work, it is important that all accessories
be in
good
balance
(much the same as
the
tires on
your
automobile). To true up or
balance an accessory, slightly loosen collet
cap and give the accessory or collet a
1/4
turn. Retighten
co
llet cap and run the Rotary
Tool. You
should
be
able
to tell by the sound
and feel if
your
accessory
is running in
balance. Continue adjusting
in
this fashion
until best balance is achieved. To maintain
balance on abrasive wheel points, before
each use, with the wheel point secured
in
the
chuck, turn on the Rotary Tool and run a
Dressing Stone lightly against the revolving
wheel point. This removes high spots and
trues up the wheel point for good balance.
USE ONLY RECOMMENDED
ACCESSORIES
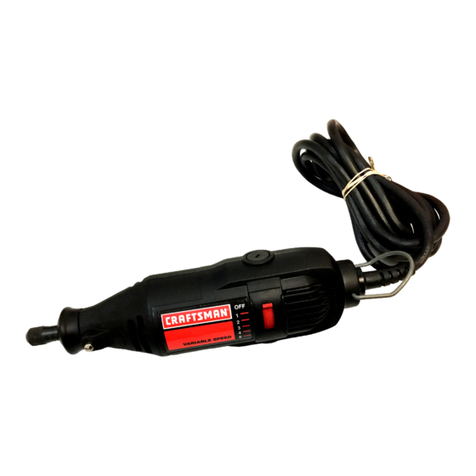
Craftsman
Rotary
Power
Tool
The
Sears
Craftsman Rotary Tool is a handful
of
high-speed power. II serves as a carveT,a
grinder, polisher, sander, cutter,
power
brush, drill, and more.
The real
secret
of the Craftsman Rotary Tool
is its speed. To understand the advantages of
its high speed, you have to
know
that the
standard portable electric drill runsatspeeds
up to 2,800 revolutions per minute.The Rotary
Tool operates at speeds up to 30,000 revolu-
tions
per
minute. The typical electric drill is a
low-speed,
high-torque
tool; the Rotary Tool
is
just
the opposite - a high-speed,
low-
torquetool.
The
chief
differenceto the user is
that in the high-speed tools, the speed
com-
bined with the accessory mounted in the
chuck
does the
work
. You
don't
apply
pres-
sureto the tool,butsimply hold and guide
it.
In
the low speed tools, you
not
only
guide
the
tool, but also apply pressure to
it,
as you do,
for example, when drilling a hole.
It is this high speed, along with its
compact
size and wi
de
variety of
spec
ial accessories,
that makes the Craftsman Rotary Tool
dif-
ferent from
other
power
tools. The speed
enables it to
do
jobs
that
low-speed
tools
cannot
do, such as cutting of hardened steel,
engraving of glass, etc.
Getting the most
out
of
your
Rotary Tool is a
matter of le
arning
how
to let this speed
work
for you.
You should
not
th
ink of the Rotary Tool as a
small version of a standard electric drill.
While it does
do
some
of
the same
jobs
as an
electric
dr
ill, it is basically different in
con-
cept, design and use. Craftsmen
who
have
used itforyears
th
ink of it as a"specialtool for
special jobs", and as "the tool that does jobs
which the others don't."
For
example, if you
want
to
cut
a neat
2-inch
square holein a furnace duct, the Rotary Tool
will
do
the
job
quickly
and easily.
Or
if a
door
in
your home is slightly misaligned because
the house has settled, the latch bolt may no
longer
enterthe strike plate properly, making
the
door
difficult to close or lock. Use the
Rotary Tool to cut
away
just enough of the
strike plateso the latch boltoperates properly.
You can
do
it
in
minutes. There are literally
hundreds
of special
applications
such as
these for the Rotary Tool in every home.
In
addition to these special applications,
think
of
your
Rotary Tool for shaping or removing
wood, metal and plastics. This is
how
wood
carvers usethe tool, and whileyou may
not
be
interested in wood carving, there are many
times when you
want
to
cut
a recess, round a
sharp corner, or enlarge
an
opening.
And then there are the
grinding
and polishing
jobs
done
by
the
Rotary
Tool. You
can
sharpen tools, scissors and cutlery, get rid
of
burrs and unwanted sharp edges,
accumu-
lated rust, grind
new
shapes, etc.
The
point
is to
think
of the Rotary Tool for the
many
jobs
itcan
do
because ofits
own
unique
properties and capabilities. When you have a
job
to do, think of the Rotary Tool as one
possible solution.
Using
the
Rotary
Power
Tool
The first step in learning to use the Rotary
Tool is to
getthe
"feel"
of
it.
Heft itin your hand
and feel its weightand balance.Feel the taper
of
the housing. This taper permits the Rotary
Tool to be grasped much like a pen or pencil.
If you have a variable speed model,turn it on
by slowly turning the speed dial and allowing
the tool to gradually gain speed. If you have a
single speed model, turn the switch to ON.
,.
,,n,c.i'11'rS
WHEN YOU TURN ON THE
J'ur\
VJ
TOOL
FORTHE FIRSTTIME,
HOLD ITAWAY FROM YOUR FACE. ACCES-
SORIES CAN
BE
DAMAGED DURING
HAN·
DUNG,
AND CAN FLY APART
AS
THEY
COME
UP TO SPEED. THIS IS
NOT
COM·
MON, BUT IT DOES HAPPEN.
Practice on scrap materials
in
the beginning
to getthe feel ofthe Rotary Tool cuts. Keep in
mind
thatthe
work
is
done
by the speed ofthe
tool and by
the
accessory
in the chuck. You
should
not
lean on or push the tool into the
work. Instead,
lower
the spinning
accessory
lightly to the
work
and
allow
it to
touch
the
point
at
which
you
want
cutting (or sanding or
etching, etc.) to begin. Concentrate on
guid-
ing the tool over the
work
using very little
pressure from
your
hand.
Allow
the acces-
sory to
do
the work.
Usually, it is best to make a series of passes
with the tool rather than attempt to
do
all the
work
in one pass. To makea cut, forexample,
pass the tool
back
and forth
over
the work,
much
as you
would
a small
paint
brush. Cuta
little material on each pass until you reach the
desired depth. For most work, the deft, gentle
touch
is best. With it, you have the best
