manuals.online logo
Brands
  1. Home
  2. •
  3. Brands
  4. •
  5. Craftsman
  6. •
  7. Pressure Washer
  8. •
  9. Craftsman 580.768030 User manual

Craftsman 580.768030 User manual

Other Craftsman Pressure Washer manuals

Craftsman 580.752990 User manual

Craftsman

Craftsman 580.752990 User manual

Craftsman 580.752160 User manual

Craftsman

Craftsman 580.752160 User manual

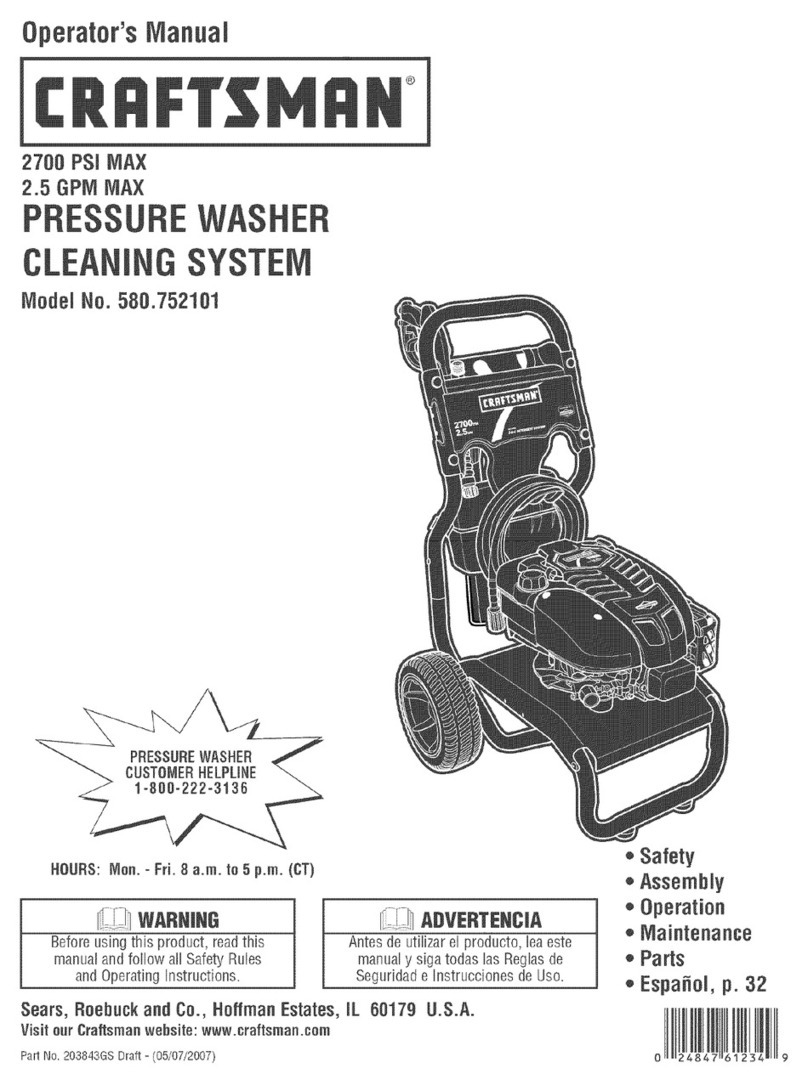
Craftsman 580.752101 User manual

Craftsman

Craftsman 580.752101 User manual

Craftsman CMEPW1700 User manual

Craftsman

Craftsman CMEPW1700 User manual

Craftsman CMCPW1500 User manual

Craftsman

Craftsman CMCPW1500 User manual

Craftsman 580.752381 User manual

Craftsman

Craftsman 580.752381 User manual

Craftsman 580.768350 User manual

Craftsman

Craftsman 580.768350 User manual

Craftsman 919.769063 User manual

Craftsman

Craftsman 919.769063 User manual

Craftsman 580.751781 User manual

Craftsman

Craftsman 580.751781 User manual

Craftsman 580.767200 User manual

Craftsman

Craftsman 580.767200 User manual

Craftsman 580.752810 User manual

Craftsman

Craftsman 580.752810 User manual

Craftsman 580.752290 User manual

Craftsman

Craftsman 580.752290 User manual

Craftsman 580.752770 User manual

Craftsman

Craftsman 580.752770 User manual

Craftsman 919.769062 User manual

Craftsman

Craftsman 919.769062 User manual

Craftsman 580.676530 User manual

Craftsman

Craftsman 580.676530 User manual

Craftsman 580.752342 User manual

Craftsman

Craftsman 580.752342 User manual

Craftsman MGP-762010 User manual

Craftsman

Craftsman MGP-762010 User manual

Craftsman 580.753400 User manual

Craftsman

Craftsman 580.753400 User manual

Craftsman 580.752060 User manual

Craftsman

Craftsman 580.752060 User manual

Craftsman 580.752710 User manual

Craftsman

Craftsman 580.752710 User manual

Craftsman 580.676630 User manual

Craftsman

Craftsman 580.676630 User manual

Craftsman 580.752872 User manual

Craftsman

Craftsman 580.752872 User manual

Craftsman 580.752011 User manual

Craftsman

Craftsman 580.752011 User manual

Craftsman 580.752591 User manual

Craftsman

Craftsman 580.752591 User manual

Popular Pressure Washer manuals by other brands

Kärcher HD 2.5 / 24 P Operator's manual

Kärcher

Kärcher HD 2.5 / 24 P Operator's manual

Kärcher K 4 Premium operating instructions

Kärcher

Kärcher K 4 Premium operating instructions

VONROC PW501AC Original instructions

VONROC

VONROC PW501AC Original instructions

Oertzen E 500-17 operating manual

Oertzen

Oertzen E 500-17 operating manual

Shark RG-232637 Service manual

Shark

Shark RG-232637 Service manual

Shakti Technology S3 user manual

Shakti Technology

Shakti Technology S3 user manual

Kärcher K 4 Pure manual

Kärcher

Kärcher K 4 Pure manual

Hamron 220-141 operating instructions

Hamron

Hamron 220-141 operating instructions

Porter-Cable D25806-025-2 instruction manual

Porter-Cable

Porter-Cable D25806-025-2 instruction manual

DeWalt DPD3100 instruction manual

DeWalt

DeWalt DPD3100 instruction manual

REM POWER HDEm 662 manual

REM POWER

REM POWER HDEm 662 manual

Landa HS-3000 Operator's manual

Landa

Landa HS-3000 Operator's manual

Kärcher K 3 Full Control user manual

Kärcher

Kärcher K 3 Full Control user manual

HIKOKI AW 100 Handling instructions

HIKOKI

HIKOKI AW 100 Handling instructions

Kärcher G 2600 VC Operator's manual

Kärcher

Kärcher G 2600 VC Operator's manual

Delco DC 1302 instruction manual

Delco

Delco DC 1302 instruction manual

BIEMMEDUE 120/10 - 170/13 Use and maintenance manual

BIEMMEDUE

BIEMMEDUE 120/10 - 170/13 Use and maintenance manual

ARKSEN 014-HG-14141-HR Operator's manual

ARKSEN

ARKSEN 014-HG-14141-HR Operator's manual

manuals.online logo
manuals.online logoBrands
  • About & Mission
  • Contact us
  • Privacy Policy
  • Terms and Conditions

Copyright 2025 Manuals.Online. All Rights Reserved.

Operators Manual
2.5 GPM
HIGH PRESSURE WASHER
CLEANING SYSTEM
Model No. 580.768030
HOURS: Mon. - Fri. 8 a.m. to 5 p.m. (CT)
CAUTION:
Before using this product, read this
manual and follow all its Safety Rules
and Operating Instructions.
Sears, Roebuck and Co., Hoffman Estates, IL 60179
Visit our Craftsman website: www.sears.GomJcmftsmen
•Safety
• Assembly
• Operation
•Maintenance
• Parts
PartNo.B3595D_tt $(4/5/1999) Pr;.rttsdin _ U.S.A.
Warranty ......................... 2
Safety Instructions ................ 2-3
Assembly ......................... 4
Operation ....................... 5-9
Maintenance .................. 10-13
Storage ......................... 14
Troubleshooting ................... 15
Replacement Parts .............. 17-25
Emission Control
Warranty Statement ............. 26-27
How to order parts and
request service ............. Back page
LIMITED ONE YEAR WARRANTY ON CRAFTSMAN HIGH PRESSURE WASHER
For one year from the date of purchese, when t_is Craftsman Cleaning System ismaintained and operated
according tothe instructions in the owner's manual, Sears will repair, free of charge, any defect in material and
workmanship.
Ifthis washer is used for commemlal purposes, this warranty applies for only 90 days from the date of
purchase. Ifthis high pressure washer is used for rental purposes, this warranty applies for only 30 days after
date of purchase.
This warranty does not cover:.
•Expendable items such as spark plugs, air filters, or chemical solutions.
•Repairs necessary because of operator abuse or negligence, including damage resulting from no water
being supplied to pump or failure to maintain the equipment according to the instructionscontained in the
owner'smanual.
WARRANTY SERVICE IS AVAILABLE BY RETURNING THE HIGH PRESSURE WASHER TO THE
NEAREST SEARS SERVICE CENTER OR DEALER IN THE UNITED STATES.
This warranty gives you specific legal dghts and you may also have other rights,which vary from state to state.
Sears, Roebuck and Co., Dept. 817WA, Hoffman Estates, IL 60179
,_k CAUTION: Before using this product, read this
manualand follow all Safety Rules and
Operating Instructions.
,_ DANGER: When transporting, settingup,
adjustingor making repairs to your cleaning
system, always disconnect the spark plug wire
and place itwhere it cannot contact the spark
plugto prevent accidental starting.
•Engine exhaust gases contain DEADLY carbon
monoxide gas. This dangerous gas, if breathed in
sufficientconcentrations, can cause
unconsciousnessor even death. Operate this
equipment only in the open air where adequate
ventilationis available.
•Gasoline is highly FLAMMABLE and its vapors are
EXPLOSIVE. Do not permit smoking, open flames,
sparks or heat in the vicinitywhile handling
gasoline. Avoid spillinggasoline on a hot engine.
Allow unitto cool for 2minutes before refueling.
Comply with all laws regulatingstorage and
handling of gasoline.
•Locate this cleaning system in areas away from
combustible materials, combustible fumes or dust.
, The high pressure equipment is designed to be
used with Sears authorized parts only. If you use
this equipment with pads that do not comply with
minimum specifications,the user assumes all dsks
and liabilities.
Some chemicals or detergents may be harmful if
inhaled or ingested, causing severe nausea,
fainting or poisoning.The harmful elements may
cause propertydamage or severe injury.
Do not allow CHILDREN to operate the cleaning
system at any time.
2
• Operateengineonlyatgovemedspeed.Running
theengineat excessive speeds increases the
hazard of personal injury. Do not tamper with parts
which may increase or decrease the governed
speed.
•Do not wear loose clothing, jewelry or anything
that may be caught in the starter or other rotating
parts.
•Before starting the cleaning system in cold
weather, check all parts of the equipment and be
sure ice has not formed there.
•Units with broken or missing parts, or without
protective housing or covers should NEVER be
operated,
•The muffler and air cleaner must be installedand
in good condition before operating the cleaning
system. These components act as spark arrestors
if the engine backfires.
• Check the fuel system for leaks or signs of
detedoration such as chafed qr spongy hose,
loose or missing clamps or damaged tank or cap.
Correct all defects before operating the cleaning
system.
• Do not spray flammable liquids.
• Never allow any part of the body to come in
contact with the fluid stream. DO NOT come in
contact with a fluid stream created by aleak in the
high pressure hose.
•High pressure streams of fluid this equipment
produces can pierce skin and its underlying
tissues, leading to serious injury and possible
amputation.
• Never aim the gun at people, animals or plants.
• High pressure sl_raycan cause paint chips or
other particles to become airborne and fly at high
speeds.
• Always wear eye protection when you use this
equipment or when you are in the vicinity where
the equipment is in use.
• Operate the pressure at no more thqn the PSI fluid
pressure rated for your cleaning system.
• Never move the machine by pulling on the high
pressure hose. Use the handle provided on the
top of the unit.
• Always be certain the spray gun, nozzles and
accessories are correctly attached.
Never use a spray gun whichdoes not have a
trigger look or tdgger guard in place and in
working order.
•Use a respirator or mask whenever there is a
chance that vapors may be inhaled. Read at!
instructionswith the mask so you are certain the
mask will provide the necessary protectionagainst
inhaling harmful vapors.
•High pressure spray may damage fragile items
including glass, Do not point spray gun at glass
when in the jet spray mode.
•Keep the hose connected to machine or the spray
gunwhile the system is pressurized.
Disconnecting the hose while the unit is
pressurized is dangerous.
•Hold the spray gun firmly in your hand before you
startthe unit. Failure to do so could result in an
injury from a whipping spray gun. Do not leave the
spray gun unattended while the machine is
running.
• The cleaning area should have adequate slopes
and drainage to reduce the possibility of afall due
to slippery surfaces.
Keep water spray away from electric wiringor fatal
electric shock may result.
•Do not secure trigger gun in the pull-back (open)
position.
•Do not by-pess any safety device on this machine.
•The muffler and engine heat up during operation
and remain hot immediately after shutting it down.
Avoid contact with a hot muffler or engine or you
could be severely burned.
•Operate and store this uniton a stable surface.
•Always store cleaning system with the
Dial-a-Cleaner TM knob inthe OFF position.
•High pressure hose can develop leaks from wear,
kinking, abuse, etc. Water spraying from aleak is
capable of injecting material intoskin. Inspect
hose each time before using it. Check all hoses for
cuts, leaks, abrasions or bulgingofcover, or
damage or movement of couplings. If any of these
conditions exist, replace hose immediately. Never
repair high pressure hose. Replace it with another
hose that meets minimum pressure rating of your
cleaning system.
I,_ LOOK FOR THIS SYMBOL TO POINT OUT IMPORTANT SAFETY PRECAUTIONS. IT
MEANS "A'I-rENTION!!! BECOME ALERT!!! YOUR SAFETY IS INVOLVED."
3
CARTON CONTENTS
The tollowing parts are shipped loose with your
cleaning system:
•Main Unit -- pressure washer with wheels,
chemical tanks, guide handle.
• High Pressure Hose (already attached to pump)
•Parts Box (which includes items listed below)
•Spray Gun
• Wand Extension with Hi/Lo Adjustable Nozzle
• Engine Oil
Three-pack of chemical concentrates
• Manual Bag (which includes the items listed
below)
•Owner's Manual
• Nozzle Cleaner Kit
• "O"-Fling Kit
• Tank Labels
Become familiar with each piece before assembling
the cleaning system Check all contents against the
illustration on Page 5 If any parts are missing or
damaged, call the Pressure Washer Helpline at
1-800-222-3136.
TO REMOVE PRESSURE WASHER FROM
CARTON
•Remove loose parts and parts box included with
your cleaning system.
•Slice two comers at guide handle end of carton
from top to bottom so the panel can be folded
down flat
Uft the handle to
upright position and
slide the locking
caps into place
•Raise guide handle, secure in place.
Roll the cleaning system outthe open end of the
carton.
• Check cartonfor additional loose parts
HOW TO SET UP YOUR PRESSURE
WASHER
For the mostpart, yourCraftsman High Pressure
Cleaning System has been assembledat the factory
You must, however, assemble the spray gun, and
attach the highpressure hose to the spray gun
•Cut the tie wraps on the high pressure hose and
connecthigh pressure hose to gun Tightenby hand
•Attach nozzle extension to spray gun
Place assembled spray gun on holder
4
KNOW YOUR HIGH PRESSURE WASHER
Read this owner's manual and safety rules before operating your cleaning system. Compare the
illustrationswith your cleaning system to familiarize yourself with the ocations of various controls and
adjustments.
Gas Cap
k
Detergent and Chemical
Reservoirswith Filter & \
Baffle
System Rinse
Reservoir
SprayGun
/
Water Inlet Air Filter
Dial-A-CleanerTM
SelectorKnob Choke Lever
0il Fill Cap
Adjustable Nozzle
Pressure
CommendTM
Pump
High Pressure Hose
Adjustable Nozzle - Adjust for high or low nrassure;
narrow or fan spray.
Air Filter - Dry type filter element limitsthe amount of
dirtand dust that gets in the engine.
Choke Lever - Used to start a cold engine.
Dial-A-Cleaner TM Selector Knob - Selects any one
of three chemicals or selects the clean water system
rinse.
Gas Cap - Fill engine with regular unleaded gasoline
here.
High Pressure Hose - Connect one end to the spray
gun.
Oil Fill Cap - Fill engine with oil here. See page 7 for
oil recommendations.
Pressure Command TM - Sets outputwater pressure.
Pump - Develops high pressure water.
Spray Gun - Controls the applicationofwater onto
cleaning surface with trigger device. Includessafety
latch.
System Rinse, Detergent and Chemical Reservoirs
- Used to provide detergent or other chemicals to the
low pressure water stream.
Water Inlet - Connection for garden hose.
5
HOW TO USE YOUR CLEANING SYSTEM
Read these instructionsand learn how to use your
cleaning system before you attempt to start your
cleaning system. If you have any problems operating
your cleaning system, please call the pressure washer
helpline at 1-800-222-3136.
How To Use the Adjustable Nozzle
A ARNING: Never adjust spray pattern when
spraying. Never put hands infront of the nozzle
when adjusting the spray.
•Push the nozzle forward for low pressure_Pull the
nozzle backward until it "snaps" intoplace {o
achieve high pressure.
Pull nozzle Push nozzle forward
backward for high for low pressure.
pressure.
•Twisting the nozzle adjusts the spray pattem from a
narrow to a =fan" pattern.
Cleaning With The Adjustable Nozzle and
Applying Chemical
IMPORTANT: Use soaps designed specificallyfor
pressure washer cleaning systems. Household
detergents could damage the pump.
IMPORTANT: You must attach all hoses before you
start the engine. Startingthe engine without all the
hoses connected and without the water turned ON will
damage the pump.
Up to three (3) different solutionscan be carried on
the cleaning system at one time. To apply detergent
follow these steps:
•Dilution is necessary when usingthe supplied
chemical packets. Simply snip one comer of the
plastic pouch, pour the chemical into the tank, then
fillthe tank with clean water. Label tanks with the
provided tank labels.
Pour chemical into one of
the tanks labeled A, B, C.
If using another chemical designed for use with
pressure washers, prepare the chemical solutionas
required by the chemical manufacturer. Fill
chemical reservoir(s)with the prepared solutionas
needed.
•Rotate the DiaI-A-CleaneF" selector knobto the
letter correspondingto the desired reservoir.
•Push the adjustable nozzte forward to towpressure
mode. Detergent cannot be applied with nozzle
in high pressure position.
•Review the use of the adjustable nozzle.
•Connect garden hose to water inlet, check that
high pressure hose is connected to spray gun and
pump (see ASSEMBLY on page 4), and start
engine.
Connect garden hose here.
Twist nozzle
clockwise for
narrow spray.
Twist nozzle
counterclockwise for
"fan" pattern.
For most effective cleaning, keep spray nozzle
between 8 to 24 inches away from cleaning
surface.
Damage to the surface may occur if you get spray
nozzle too close to it.
CAUTION: Before startingyour CleaningSystem, make sure you have read and followed
the instructionsin the sections =Before Starting
the Cleaning System" on page 7 and "To Start
the Cleaning System"on page 8.
6
,_ Warning: Be extremely careful ifyou must use •
the cleaning system from a ladder, scaffolding
or any other relatively unstable location.When
you press the trigger, the recoil from the initial
spray could force you to fall, or ifyou are too
close to the cleaning surface, high pressure •
could force you off a climbing apparatus.
• Start at lower portion of area to be washed and
work upward, using long, even overlapping strokes.
•Allow detergent to 'soak in' (between 3-5 minutes)
before washing and rinsing.Reapply as needed to
prevent surface from drying.
Wash and Rinse Surface
This Craftsman Cleaning System permits regulatLonof
output water pressure by varying the engine speed.
The Pressure CommandTM found on the front panel
may be set, as follows:
Pressure Low to _High
Duty Light Medium Heavy
Application Auto Concrete Paint removal
Boat Driveway Degreasing
Furniture Deck
After you have applied detergent, scour the surface
with the high pressure water stream and then dnse it
clean, as follows:
•Pull adjustable nozzle backward until itsnaps to get
high pressure mode. Chemical will not flow when in
the high pressure mode.
•Adjust Pressure CommandTM controlto obtain
desired water pressure.
•Expand the spray pattern for a more gentle rinsing
action. Start at top of area to be dnsed, working
down with same action as for cleaning.
,_ CAUTION: Test asmall area of the surface to
be cleaned. Make sure there is no damage
caused by the high pressure spray.
RINSE SYSTEM AFTER EVERY'USE
it is imperative that the chemical selector system be
rinsed after each use to prevent clogging or leaks:
•Fill the System Rinse reservoirwith clean water.
•Before disconnecting the water supply, siart your
cleaning system.
ACAUTION: Before startingyour Cleaning
System, make sure you have read and followed
the instructionsin the sections =Before Starting
the Cleaning System" on page 7 and =To Start
the Cleaning System" on page 8.
•Push adjustable nozzle forward to get.low pressure
mode.
Rotate the Dial-A-CleanerTM selector knob to the
letter correspondingto the System Rinse tank. As
clean rinsewater is drawn through the system,
continue the flow until no detergent foam is
observed.
Rotate the Dial-A-Cleaner TM selector knob to the
OFF position.
BEFORE STARTING THE CLEANING
SYSTEM
To operatette engine youwillneed to dothe following:
Add Engine Oil
Only use high quality detergent oil rated with API
service classification SF or SG. Select the oil's SAE
viscositygrade according to your expected operating
temperature:
colder -<----- 32°F ._ warmer
I
5W30 SAE 30
Although multi-viscosityoils (5W30, 10W30, etc.)
improve starting in cold weather, these multi-viscosity
oilswill result in increased oil consumption when used
above 32°F. Check your engine oil level more
frequently to avoid possibledamage from running low
on oil.
Place pressure washer system on a level surface
Clean area around oil filland remove oil dipstick.
Pour oil from enclosed bottle into the oilfill opening
until oil reaches the full mark on the oil dipstick.
Stop and check the oil level periodically. Do not
overfill.
•Install oil dipstick, hand tighten securely.
Add Gasoline
•Use regular unleaded gasoline with the cleaning
system engine. Fuel tank capacity is3 U.S, quarts.
,_ DANGER: Never fillfuel tank indoors.Never fill
fuel tank when engine is running or hot. Do not
smoke when filling fuel tank.
AAUTION: Do not overfillthe fuel tank. Always
leave roomfor expansion.
,_ CAUTION: Experience indicates that alcohol
blended fuels (called gasohol or using ethanol
or methanol) can attractmoisture which leads to
separation and formation of acids during
storage. Acidic gas can damage the fuel system
of an engine while in storage.
7
Toaddfueltoengine:
•Clean area around fuel cap, remove cap.
•Add regular unleaded gasoline, slowly,to the fuel
tank.
Important: Never mix oilwith gasoline.
•Installfuel cap and wipe up any spilledgasoline.
TO START THE CLEANING SYSTEM
The best way to start your cleaning system engine for
the first time is to follow these instructionsstep-by-
step. This starting information also applies whenever
you start the engine after you have let the cleaning
system sit idle for at least a day.
•Place the cleaning system in an area close enough
to an outside water source that can flow at ;_rate of
at least 3 gallons per minute. Connect a garden
hose to the water spout.
•Check that the high pressure hose istightly
connected to the spray gun and to the pump. See
ASSEMBLY section on page/4.
•Check inlet screen on the water inlet. If the screen
isdirty, clean before attaching a garden hose. Ifthe
screen is damaged, do not connectto the garden
hose. Replace with screen provided in maintenance
kitor call 1-800-366-PART to order areplacement
inletscreen.
•Attach the the garden hose to the water inlet.
•Tum on the water.
Important: Do not run pump without the water supply
connected and turned on. You mustfollow this
caution or the pump will be damaged.
•Remove the adjustable nozzle extension from the
spray gun.
•Pullthe trigger on the spray gun and hold until a
steady stream of water appears.
•Engage the safety latch on the spray gun.
Safety Latch
•Attach adjustable nozzle extension onto spray gun.
•Pull choke lever all the way out to the =FULL
CHOKE POSITION."
Choke Lever
in =Full Choke
Position"
Note: If restarting a warm engine after a short
shutdown, move choke lever to =NO CHOKE
PosmoN."
•Move Run/Stop switch to the "1" or on position.
8
•Grasp starter handle and pull slowly until you feel
some resistance. Then pull cord rapidlyto
overcome compression, prevent kickback and start
the engine. Let rope return to starter slowly.
Note: The Pressure CommandTM may be placed in
any positionduring starting or operation.
•When engine starts, move choke lever to "1/2
CHOKE" until engine runs smoothly and then to
"NO CHOKE POSITION." If engine falters, move
choke lever to =1/2 CHOKE" untilengine runs
smoothly and then to "NO CHOKE POSITION."
Note: If the engine fails to start after 3pulls, move
choke lever to "NO CHOKE POSITION" and pul!
starter rope again.
Note: If engine fires, but does not continue to run,
move choke lever to "FULL CHOKE" and repeat,
starting instructions.
• Once the engine has started, disengage the slSray
gun safety latch.
HOW TO STOP YOUR PRESSURE
WASHER
Important: Do not runpump without the water supply
connected and turned on. You must followthis caution
or the pump will be damaged.
•Move the Run/Stop switch to the "0" or OFF
position.
• Simply shutting off the engine will not release
pressure in the system. Squeeze trigger on the
spray gun to relieve pressure in the hose.
Note: A small amount ofwater will squirt out when
you release the pressure.
•Rotate the Dial-A-Cleaner TM selector knob to the
OFF position to prevent chemical leakage.
SIPHONING
We recommend that you DO NOT siphonstanding
water for your water supply. Contaminated, brackish or
dirtywater can damage the pump. Connect only to
household water supply.
TIPS
•Never use the garden hose inlet to siphon
detergent or wax.
•Ifyou hold the spray nozzle too far away from the
object being cleaned, washing will not be as
effective.
•Always store the cleaning system with the Dial-A-
Cleaner TM selector knob at the OFF position.
9
CUSTOMER RESPONSIBILITIES
MA|t_RENANCESCHEDULE
RLL iN DATESAS YOU COMPLETE
REGULARSERVICE
MAINTENANCE TASK
PRESSURE WASHER
Check/clean water inlet screen
onquick-connect.
Checkhighpressurehose.
Check detergent hose,
Check spray gun and assembly for leaks.
Purgepumpofairandconterninants.
ENGINE
Checkoillevel.
Change engine oil.
Serviceaircleaner.
Clean/replace spark plug.
Prepare for storage.
HOURLY OPERATING
INTERVAL
J Eve/'] 50 Evee/100
Before Es_tl HOURS or Hours O_
Use Yearly Yearly
xt
x '
x
x
x
xx*
x'*
x
Prepare unitforstorageifitisto
remainidleforlonger than30days.
SERVICE DATES
"t C_ean i1 clogged. Re_ if perforated ortorn.
Change oil after the first (2) opera_ng hours and every 50 hours thereafter. Change sooner when operating under dirty or dusty
conditions.
"* Replace more often under dirty or dusty conditions.
PRODUCT SPECIFICATIONS
Pressure Washer Specifications
2250 psi
2.5 GPM
Use as directed
PRESSURE
FLOW RATE
CHEMICAL MIX
WATER SUPPLY
TEMPERATURE Not to Exceed 140°F
Engine SpecificaCdons
ENGINE MODEL Tecumseh
RATED HORSEPOWER 6
SPARK PLUG: Type: Champion RN4C
or equivalent. Set
Gap to:0,030 inch
(0.76mm)
3 U.S. quarts
SAE 30 weiaht
0.(_125 inch
GASOLINE CAPACITY
OIL
SOLID STATE
IGNITION AIR GAP
In the State of California a spark arrestor is required
by law (Section 4442 of the Califomia Public
Resources Code). Other states may have similar laws.
Federal laws apply on federal lands.
Note: if you equip the engine of yourcleaning system
with a spark arrestor muffler, the spark arrestor must
be maintained in effective working order by the
owner/operator.
You can order a spark arrestor (P/N 36085) through
your Sears Service Center.
GENERAL RECOMMENDATIONS
The warranty of the cleaning system does not cover
items that have been subjected to operator abuse or
negligence. To receive full value from the warranty,
operator must maintain cleaning system as instructed
in this manual.
Some adjustments wilt need to be made periodicallyto
properly maintain your cleaning system.
All adjustments in the Service and Adjustments
section ofthis manual should be made at least once
each season.
Once a year you should clean or replace the spark
plug and replace the air filter and check the gun
and wand assembly for wear. A clean spark plug
and new air fitter assure properfuel-air mixture and
help your engine run better and last longer.
10