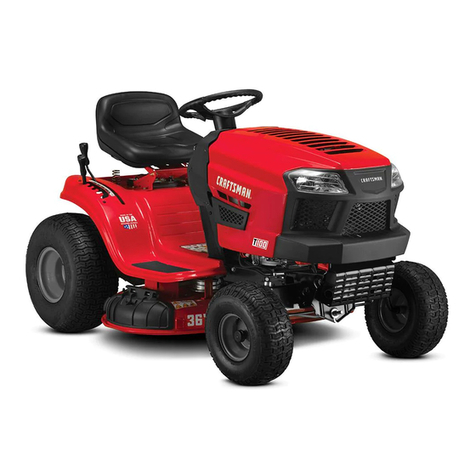
Craftsman 247.203730 User manual

perator's
I:RnFrSMAN°
T1400 LAWN TRACTOR
17.5 HI:),Variation Speed
42" Deck
Model No. 247.203730
•Espanol, P. 33
This product has a low emission engine which operates differently
from previously built engines. Before you start the engine, read and
understand this Operator's Manual.
Before using this equipment,
read this manual and follow
all safety rules and operating
instructions.
For answers to your questions about
this product, call:
1-800=659=5917
CraftsmanTractorHelpLine
7 am =7 pm CT, Mort. =Sun.
Sears Brands Management Corporation, Hoffman Estates, IL 60179 U.S.A.
Visit our website: www.craftsman.com FormNo.769-09445
(November1,2013)

Warranty Statement .......................................................... 2
Safety Instructions ............................................................ 3
Slope Gauge ..................................................................... 8
Assembly ........................................................................... 9
Operation ........................................................................ 11
Service and Maintenance .............................................. 17
Off-Season Storage ........................................................ 25
Trou bleshooting .............................................................. 26
Espa_ol ............................................................................ 33
Service Numbers ............................................. Back Cover
CRAFTSMAN FULL WARRANTY
FORTWOYEARSfromthedateofpurchase,allnon-expendablepartsofthis ridingequipmentarewarrantedagainstanydefectsin materialor
workmanship.A defectivenon-expendablepartwillreceivefreein-homerepairor replacementif repairisunavailable.
BATTERYLIMITEDWARRANTY
FOR90 DAYSfromthedateof purchase,thebattery(anexpendablepart)ofthis ridingequipmentiswarrantedagainstanydefectsin materialor
workmanship.A newbatterywillbesuppliedfreeofcharge.Youare responsibleforthe laborcostofbatteryinstallation.
ADDITIONALLIMITEDWARRANTIES
inthefollowingadditionalwarranties,youare responsibleforthelaborcostofpartinstallationafterthesecondyearfromthedateof purchase.
FORFiVEYEARSfromthedateofpurchase,theframeof thisridingequipmentiswarrantedagainstanydefectsin materialorworkmanship.A
newframewillbe suppfiedfreeof charge.
FORTENYEARSfromthedateofpurchase,thefrontaxleofthisridingequipmentiswarrantedagainstanydefectsin materialor workmanship.
A newfrontaxlewillbe suppliedfreeofcharge.
FORASLONGASITiSUSEDbytheoriginalownerafterthetenthyearfromthedateofpurchase,thecastironfrontaxle(ifequipped)ofthisriding
equipmentiswarrantedagainstanydefectsinmaterialorworkmanship.Withproofofpurchase,anewcastironfrontaxlewillbesuppliedfreeofcharge.
WARRANTYSERVICE
Forwarrantycoveragedetailstoobtainfree repairor replacement,carl1-800-659-5917or visitthewebsite:www.craftsman.com
inall casesabove,ifpartrepairor replacementis impossible,theridingequipmentwillbe replacedfreeofchargewiththesameor anequivalent
model.
All oftheabovewarrantycoverageisvoidifthis ridingequipmentiseverusedwhileprovidingcommercialservicesor if rentedtoanotherperson.
ThiswarrantycoversONLYdefectsin materialandworkmanship.WarrantycoveragedoesNOTinclude:
• Expendableparts(exceptbattery)thatcanwearoutfromnormalusewithinthewarrantyperiod,includingbutnotlimitedtoblades,spark
plugs,air cleaners,belts,andoilfilters.
• Standardmaintenanceservicing,oilchanges,or tune-ups.
Tirereplacementor repaircausedbypuncturesfromoutsideobjects,suchasnails,thorns,stumps,or glass.
• Tireor wheelreplacementor repairresultingfromnormalwear,accident,or improperoperationor maintenance.
Repairsnecessarybecauseofoperatorabuse,includingbutnotlimitedtodamagecausedbytowingobjectsbeyondthecapabilityofthe
ridingequipment,impactingobjectsthat bendtheframe,axleassemblyor crankshaft,orover-speedingtheengine.
Repairsnecessarybecauseofoperatornegligence,includingbutnotlimitedto,electricaland mechanicaldamagecausedbyimproper
storage,failuretousethepropergradeand amountofengineoil,failuretokeepthedeckclearofflammabledebris,orfailuretomaintainthe
ridingequipmentaccordingtotheinstructionscontainedin theoperator'smanual.
• Engine(fuelsystem)cleaningor repairscausedbyfueldeterminedtobecontaminatedor oxidized(stale).ingeneral,fuelshouldbeused
within30 daysof itspurchasedate.
• Normaldeteriorationandwearoftheexteriorfinishes,or productlabelreplacement.
Thiswarrantygivesyouspecificlegalrights,and youmayalsohaveotherrightswhichvaryfromstatetostate.
SearsBrands ManagementCor
Engine Oil: SAE 30
Fuel: Unleaded Gasoline
_oration,Hoffman Estates,IL 60179
Model Number:
Serial Number:
Dateof Purchase:
Recordthemodelnumber,serialnumber,
anddateof purchaseabove.
© SearsBrands,LLC 2

Thissymbolpointsoutimportantsafety instructionswhich,if not
followed,couldendangerthe personalsafetyand/orpropertyof
yourselfandothers.Readandfollow all instructionsinthis manual
beforeattempting tooperatethis machine.Failuretocomplywith these
instructionsmayresultinpersonalinjury.Whenyouseethissymbol,HEED
ITSWARNING!
CALiFORNiA PROPOSITION 65
EngineExhaust,someof itsconstituents,andcertainvehidecomponents
containoremit chemicalsknownto StateofCaliforniatocausecancerand
birth defectsor other reproductiveharm.
Batteryposts,terminals,and relatedaccessoriescontain leadandlead
compounds,chemicalsknownto the StateofCaliforniatocausecancerand
reproductiveharm.Washhandsafter handling.
Thismachinewasbuilt to beoperatedaccordingtothesafeoperation
practicesinthis manual.Aswith anytype of powerequipment,
carelessnessorerroronthe partoftheoperatorcanresultinseriousinjury.
Thismachineiscapableof amputating fingers, hands,toesandfeet and
throwingdebris.Failuretoobservethefollowing safety instructionscould
resultinseriousinjuryor death.
Your Responsibility--Restrict theuseofthis powermachineto
personswho read,understandandfollow thewarningsand instructionsin
thismanualandonthemachine.
SAVETHESEINSTRUCTIONS!
GENERAL OPERATION
Read,understand,andfollowall instructionsonthemachineandinthe
manual(s)beforeattemptingtoassembleandoperate.Keepthismanualin
asafeplaceforfutureandregularreferenceandfororderingreplacement
parts.
Befamiliarwith allcontrolsandtheirproperoperation.Knowhowtostop
themachineanddisengagethemquickly.
Neverallowchildrenunder14yearsoldtooperatethismachine.Children14
yearsoldandovershouldreadandunderstandtheoperationinstructions
andsafetyrulesinthismanualandshouldbetrainedandsupervisedbya
parent.
Neverallowadultstooperatethismachinewithout properinstruction.
Tohelpavoidbladecontactorathrownobjectinjury,keepbystanders,
helpers,childrenandpetsatleast75feetfromthemachinewhileitisin
operation.Stopmachineifanyoneentersthearea.
Thoroughlyinspecttheareawheretheequipmentistobeused.Remove
allstones,sticks,wire,bones,toys,andotherforeignobjectswhichcould
bepickedupandthrownbytheblade(s).Thrownobjectscancauseserious
personalinjury.
Planyourmowingpatterntoavoiddischargeofmaterialtowardroads,
sidewalks,bystandersandthelike.Also,avoiddischargingmaterialagainst
awallorobstructionwhichmaycausedischargedmaterialto ricochetback
towardtheoperator.
Alwayswearsafetyglassesorsafetygogglesduringoperationandwhile
performinganadjustmentor repairtoprotectyoureyes.Thrownobjects
whichricochetcancauseseriousinjurytotheeyes.
Wearsturdy,rough-soledworkshoesandclose-fittingslacksandshirts.
Loosefitting clothesandjewelrycanbecaughtin movableparts.Never
operatethis machineinbarefeetorsandals.
Beawareofthemowerandattachmentdischargedirectionanddonotpoint
itatanyone.Donotoperatethemowerwithoutthedischargecoverorentire
grasscatcherinitsproperplace.
Donotput handsorfeetnearrotatingpartsor underthecuttingdeck.
Contactwiththe blade(s)canamputatehandsandfeet.
Amissingordamageddischargecovercancausebladecontactorthrown
objectinjuries.
Stoptheblade(s)whencrossinggraveldrives,walks,orroadsandwhilenot
cuttinggrass.
Watchfortrafficwhenoperatingnearorcrossingroadways.Thismachineis
not intendedforuseonanypublicroadway.
Donotoperatethemachinewhileunderthe influenceofalcoholordrugs.
Mowonlyindaylightorgoodartificiallight.
Nevercarrypassengers.
Disengageblade(s)beforeshiftingintoreverse.Backupslowly.Alwayslook
downandbehindbeforeandwhilebackingtoavoidaback-overaccident.
Slowdownbeforeturning.Operatethemachinesmoothly.Avoiderratic
operationandexcessivespeed.
Disengageblade(s),setparkingbrake,stopengineandwait until the
blade(s)cometoacompletestopbeforeremovinggrasscatcher,emptying
grass,uncloggingchute,removinganygrassordebris,ormakingany
adjustments.
Neverleavea runningmachineunattended.Alwaysturnoffblade(s),set
parkingbrake,stopengineandremovekeybeforedismounting.
Useextracarewhenloadingor unloadingthemachineintoa trailerortruck.
Thismachineshouldnotbedrivenupordownramp(s),becausethemachine
couldtipover,causingseriouspersonalinjury.Themachinemustbepushed
manuallyonramp(s)toloadorunloadproperly.
Mufflerandenginebecomehotandcancauseaburn.Donottouch.

Checkoverheadclearancescarefullybeforedrivingunderlowhangingtree
branches,wires,dooropeningsetc.,wheretheoperatormaybestruckor
pulledfromthemachine,whichcouldresultinseriousinjury.
Disengageallattachmentclutchesanddepressthebrakepedalcompletely
beforeattemptingtostartengine.
Yourmachineisdesignedtocutnormalresidentialgrassofaheightnomore
than10".Donotattempttomowthroughunusuallytall,drygrass(e.g.,
pasture)orpilesofdryleaves.Drygrassorleavesmaycontacttheengine
exhaustand/orbuilduponthemowerdeckpresentingapotentialfire
hazard.
Useonlyaccessoriesandattachmentsapprovedforthismachinebythe
machinemanufacturer.Read,understandandfollowallinstructions
providedwiththeapprovedaccessoryorattachment.Foralistofapproved
accessoriesandattachments,call1-800-659-5917.
Dataindicatesthatoperators,age60yearsandabove,areinvolvedina
largepercentageofridingmower-relatedinjuries.Theseoperatorsshould
evaluatetheirabilitytooperatetheridingmowersafelyenoughtoprotect
themselvesandothersfromseriousinjury.
Ifsituationsoccurwhicharenotcoveredinthismanual,usecareandgood
judgment.
SLOPE OPERATION
Slopesareamajorfactorrelatedtolossofcontrolandtip-overaccidentswhichcan
resultinsevereinjuryordeath.Allslopesrequireextracaution.Ifyoucannotback
uptheslopeorif youfeeluneasyonit, donotmowit.
Foryoursafety,usetheSlopeGuideincludedaspartofthismanualtomeasure
slopesbeforeoperatingthismachineonaslopedorhillyarea.Iftheslopeisgreater
than15degreesasshownonthe SlopeGuide,donotoperatethis machineonthat
areaorseriousinjurycouldresult.
Do:
Mowupanddownslopes,notacross.Exerciseextremecautionwhen
changingdirectiononslopes.
Watchfor holes,ruts,bumps,rocks,orotherhiddenobjects.Uneventerrain
couldoverturnthemachine.Tallgrasscanhideobstacles.
Useslowspeed.Choosealowenoughspeedsettingsothat youwill nothave
tostoporshiftwhileontheslope.Tiresmaylosetractiononslopeseven
thoughthebrakesarefunctioningproperly.Alwayskeepmachineingear
whengoingdownslopestotakeadvantageofenginebrakingaction.
Followthemanufacturer'srecommendationsfor wheelweightsor
counterweightstoimprovestability.
Useextracarewith grasscatchersorotherattachments.Thesecanchange
thestabilityofthemachine.
Keepallmovementontheslopesslowandgradual.Donotmakesudden
changesinspeedordirection.Rapidengagementorbrakingcouldcause
thefrontofthe machineto lift andrapidlyflip overbackwardswhichcould
causeseriousinjury.
Avoidstartingorstoppingona slope.Iftireslosetraction,disengagethe
blade(s)andproceedslowlystraightdowntheslope.
Do Not:
Donotturnonslopesunlessnecessary;then,turnslowlyandgradually
downhill,if possible.
Donotmowneardrop-offs,ditchesorembankments.Themowercould
suddenlyturnoverira wheelisovertheedgeofacliff,ditch,orifanedge
cavesin.
Donottry tostabilizethemachinebyputtingyourfootontheground.
Donotuseagrasscatcheronsteepslopes.
Donotmowonwetgrass.Reducedtractioncouldcausesliding.
Donotattempttocoastdownhill.Over-speedingmaycausetheoperatorto
losecontrolofthe machineresultinginseriousinjuryordeath.
Donottow heavypullbehindattachments(e.g.loadeddumpcart,lawn
roller,etc.)onslopesgreaterthan5 degrees.Whengoingdownhill,the
extraweighttendstopushthetractorandmaycauseyoutoloosecontrol
(e.g.tractormayspeedup,brakingandsteeringabilityarereduced,
attachmentmayjack-knifeandcausetractortooverturn).
CHILDREN
Tragicaccidentscanoccuriftheoperatorisnotalerttothe presenceofchildren.
Childrenareoftenattractedtothemachineandthemowingactivity.Theydonot
understandthedangers.Neverassumethatchildrenwill remainwhereyoulastsaw
them.
Keepchildrenoutofthemowingareaandinwatchfulcareofaresponsible
adultotherthantheoperator.
Bealertandturnmachineoff ifachildentersthearea.
Beforeandwhilebacking,lookbehindanddownforsmallchildren.
Nevercarrychildren,evenwith theblade(s)shutoff.Theymayfall offand be
seriouslyinjuredorinterferewith safemachineoperation.
Useextremecarewhenapproachingblindcorners,doorways,shrubs,trees
orotherobjectsthat mayblockyourvisionofachildwhomayrunintothe
machine.
Toavoidback-overaccidents,alwaysdisengagethecuttingblade(s)before
shiftingintoReverse.Ifequipped,the"ReverseCautionMode"(blades
operatewhilemachineridesinreverse)shouldnotbeusedwhenchildrenor
othersarearound.
Keepchildrenawayfromhotorrunningengines.Theycansufferburnsfrom
ahotmuffler.
Removekeywhenmachineisunattendedto preventunauthorized
operation.
Neverallowchildrenunder14yearsofagetooperatethismachine.Children14and
overshouldreadandunderstandtheinstructionsandsafeoperationpracticesin
thismanualandonthemachineandshouldbetrainedandsupervisedbyanadult.
TOWING
Towonlywith amachinethathasa hitchdesignedfor towing.Donotattach
towedequipmentexceptatthehitchpoint.
Followthe manufacturersrecommendationforweightlimitsfortowed
equipmentandtowingonslopes.
Neverallowchildrenorothersinorontowedequipment.
4

Onslopes,theweightofthetowedequipmentmaycauselossoftractionand
lossofcontrol.
Alwaysuseextracautionwhentowingwith amachinecapableofmaking
tight turns(e.g."zero-turn"ride-onmower).Makewideturnstoavoid
jack-knifing.
Travelslowlyandallowextradistancetostop.
Donotcoastdownhill.
SERVICE
Safe Handling of Gasoline:
Toavoidpersonalinjuryorproperty damageuseextremecarein handling
gasoline.Gasolineisextremelyflammableandthe vaporsareexplosive.
Seriouspersonalinjurycanoccurwhen gasolineisspilledonyourselforyour
clotheswhichcanignite.Washyourskinand changeclothesimmediately.
Useonlyanapprovedgasolinecontainer.
Neverfill containersinsideavehicleoronatruckortrailerbedwith aplastic
liner.Alwaysplacecontainersonthegroundawayfromyourvehiclebefore
filling.
Whenpractical,removegas-poweredequipmentfromthetruckor
trailerandrefuelit ontheground.Ifthisisnotpossible,thenrefuelsuch
equipmentonatrailerwitha portablecontainer,ratherthanfromagasoline
dispensernozzle.
Keepthenozzlein contactwith therimofthefueltankorcontaineropening
atalltimesuntilfuelingiscomplete.Donotuseanozzlelock-opendevice.
Extinguishallcigarettes,cigars,pipesandothersourcesofignition.
Neverfuelmachineindoors.
Neverremovegascaporaddfuelwhiletheengineishotor running.Allow
enginetocoolatleasttwominutesbeforerefueling.
Neveroverfill fueltank.Filltanktonomorethan1/2inchbelowbottomof
fillernecktoallowspaceforfuelexpansion.
Replacegasolinecapandtightensecurely.
Ifgasolineisspilled,wipeit offtheengineandequipment.Movemachineto
anotherarea.Wait5minutesbeforestartingtheengine.
Toreducefirehazards,keepmachinefreeofgrass,leaves,orotherdebris
build-up.Cleanupoilorfuelspillageandremoveanyfuelsoakeddebris.
Neverstorethemachineorfuelcontainerinsidewherethereisanopen
flame,sparkorpilotlightasonawaterheater,spaceheater,furnace,clothes
dryerorothergasappliances.
Allowamachinetocoolatleastfiveminutesbeforestoring.
General Service
Neverrunanengineindoorsorinapoorlyventilatedarea.Engineexhaust
containscarbonmonoxide,anodorless,anddeadlygas.
Beforecleaning,repairing,orinspecting,makecertaintheblade(s)andall
movingpartshavestopped.Disconnectthesparkplugwireandground
againsttheenginetopreventunintendedstarting.
Periodicallychecktomakesurethebladescometocompletestopwithin
approximately(5)fivesecondsafteroperatingthebladedisengagement
control.Ifthebladesdonotstopwithinthethistimeframe,yourmachine
shouldbeservicedprofessionallybyaSearsorotherqualifiedservicedealer.
Checkbrakeoperationfrequentlyasit issubjectedtowearduringnormal
operation.Adjustandserviceasrequired.
Checktheblade(s)andenginemountingboltsatfrequentintervalsfor
propertightness.Also,visuallyinspectblade(s)for damage(e.g.,excessive
wear,bent,cracked).Replacetheblade(s)with theoriginalequipment
manufacturer's(O.E.M.)blade(s)only,listedinthismanual.Useofparts
whichdonotmeettheoriginalequipmentspecificationsmayleadto
improperperformanceandcompromisesafety!
Mowerbladesaresharp.Wrapthebladeorweargloves,anduseextra
cautionwhenservicingthem.
Keepallnuts,bolts,andscrewstight tobesuretheequipmentisinsafe
workingcondition.
Nevertamperwith thesafetyinterlocksystemorothersafetydevices.Check
theirproperoperationregularly.
Afterstrikingaforeignobject,stoptheengine,disconnectthesparkplug
wire(s)andgroundagainsttheengine.Thoroughlyinspectthemachinefor
anydamage.Repairthedamagebeforestartingandoperating.
Neverattempttomakeadjustmentsorrepairstothe machinewhilethe
engineisrunning.
Grasscatchercomponentsandthedischargecoveraresubjecttowear
anddamagewhichcouldexposemovingpartsorallowobjectstobe
thrown.Forsafetyprotection,frequentlycheckcomponentsandreplace
immediatelywith originalequipmentmanufacturer's(O.E.M.)partsonly,
listedinthismanual.Useofpartswhichdonotmeettheoriginalequipment
specificationsmayleadtoimproperperformanceandcompromisesafety!
Donotchangetheenginegovernorsettingsorover-speedtheengine.The
governorcontrolsthemaximumsafeoperatingspeedoftheengine.
Maintainorreplacesafetyandinstructionlabels,asnecessary.
Observeproperdisposallawsandregulationsforgas,oil,etc.toprotectthe
environment.
AccordingtotheConsumerProductsSafetyCommission(CPSC)andtheU.S.
EnvironmentalProtectionAgency(EPA),thisproducthasanAverageUseful
Lifeofseven(7)years,or 270hoursofoperation.AttheendoftheAverage
UsefulLife,buya newmachineorhavethemachineinspectedannuallyby
aSearsorotherqualifiedservicedealertoensurethatallmechanicaland
safetysystemsareworkingproperlyandnotwornexcessively.Failuretodo
socanresultin accidents,injuriesordeath.

DO NOT MODIFY ENGINE
Toavoidseriousinjuryor death,donot modify engineinanyway.Tampering
with thegovernorsetting canleadto a runawayengineandcauseitto
operateat unsafespeeds.Nevertamperwith factorysetting ofengine
governor.
NOTICE REGARDING EMiSSiONS
Engineswhich arecertified to complywith CaliforniaandfederalEPA
emissionregulationsforSORE(SmallOffRoadEquipment)arecertified
tooperateonregularunleadedgasoline,andmayincludethefollowing
emissioncontrolsystems:EngineModification(EM),OxidizingCatalyst(0C),
SecondaryAirinjection(SAI)andThreeWayCatalyst(TWC)ifsoequipped.
SPARK ARRESTOR
Thismachineisequippedwith aninternalcombustionengineandshould
not beusedonor nearanyunimprovedforest-covered,brushcoveredor
grass-coveredland unlesstheengine'sexhaustsystemisequippedwith a
sparkarrestormeetingapplicablelocalorstatelaws(ifany).
Ifa sparkarrestorisused,it shouldbemaintainedineffectiveworking order
bythe operator.Inthe StateofCaliforniathe aboveisrequiredbylaw (Section
4442ofthe CaliforniaPublicResourcesCode).Otherstatesmayhavesimilar
laws.Federallawsapplyonfederallands.
Asparkarrestorfor the muffler isavailablethrough yournearestSearsParts
andRepairServiceCenter.
WARNING: Your Responsibility--Restrict the use of this power machine to persons who read, understand and follow
the warnings and instructions in this manual and on the machine.
SAVETHESEINSTRUCTIONS!
6

SAFETY SYMBOLS
This page depicts and describes safety symbols that may appear on this product. Read, understand, and follow all instructions on the machine before
attempting to assemble and operate.
P
I
I
I
0
...............j
• ®
|i
A
READ THE OPERATOR'S MANUAL(S)
Read, understand, and follow all instructions in the manual(s) before attempting to assemble and
operate
DANGER-- ROTATING BLADES
Never carry passengers. Never carry children, even with the blades off.
DANGER-- ROTATING BLADES
Always look down and behind before and while backing to avoid a back-over accident.
WARNING-- ROTATING BLADES
Do not put hands or feet near rotating parts or under the cutting deck. Contact with the blade(s)
can amputate hands and feet.
WARNING--THROWN OBJECTS
This machine may pick up and throw and objects which can cause serious personal injury.
WARNING--THROWN OBJECTS
This machine may pick up and throw and objects which can cause serious personal injury.
BYSTANDERS
Keep bystanders, helpers, children and pets at least 75 feet from the machine while it is in
operation.
WARNING-- SLOPE OPERATION
Do not operate this machine on a slope greater than 15 degrees.
WARNING-- HOT SURFACE
Engine parts, especially the muffler, become extremely hot during operation. Allow engine and
muffler to cool before touching.
DANGER- ROTATING BLADES
To reduce the risk of injury, keep hands and feet away. Do not operate unless discharge cover or grass
catcher is in its proper place. If damaged, replace immediately.

(OK) 15° Slope X
(TOO STEEP)
15° Slope
'_. _ Figure1
USETHISSLOPEGAUGETODETERMINE
IFA SLOPEIS TOOSTEEPFORSAFEOPERATION!
Tochecktheslope,proceedasfollows:
1. Removethis pageandfoldalongthedashedline.
2. Locatea verticalobject onor behindtheslope(e.g.a pole,building,fence, tree,etc.)
3. Align eithersideofthe slopegaugewith theobject(SeeFigure1 and Figure2 ).
4. Adjust gaugeupor downuntilthe left cornertouchesthe slope(SeeFigure1and Figure2).
5.
15°dashedline
If thereisagap belowthegauge,theslope istoo steepfor safeoperation(SeeFigure2 above).
Figure2
Slopes are a major factor related to tip-over and roll-over accidents which can result in severe injury or death. Do not operate machine
on slopes in excess of 15 degrees. All slopes require extra caution. If you cannot back up the slope or if you feel uneasy on it, do not
mow it. Always mow up and down the face of slopes, never mow across the face of slopes.

IMPORTANT:Yourtractorisshippedwith motoroffin theengine.However,you
MUSTchecktheoil levelbeforeoperating.RefertotheService& Maintenance
sectionforinstructionsoncheckingtheoillevel.
Attaching the Battery Cables
California Preposition 65
Batteryposts,terminals,andrelatedaccessoriescontainleadandlead
compounds,chemicalsknown tothe StateofCaliforniato causecancerand
reproductiveharm.Washhandsafter handling.
Whenattaching batterycables,alwaysconnectthe POSITIVE(Red)wireto its
terminalfirst, followed bythe NEGATIVE(Black)wire.
Forshippingreasons,bothbatterycablesonyourequipmenthavebeenleft
disconnectedfromtheterminalsatthefactory.Toconnectthe batterycables,
proceedasfollows:
fie?E:ThepositivebatteryterminalismarkedPos.(+).Thenegativebattery
terminalismarkedNeg.(-).
1. Removetheplasticcover,ifpresent,fromthepositivebatteryterminaland
attachtheredcabletothepositivebatteryterminal(+) with theboltand
hexnut.SeeFigure1.
2. Removetheplasticcover,ifpresent,fromthenegativebatteryterminaland
attachtheblackcabletothenegativebatteryterminal(-) with theboltand
hexnut.SeeFigure1.
J
J
J
J
J
J
J
Figure1
3. Positiontheredrubberbootoverthe positivebatteryterminaltohelp
protectit fromcorrosion.
NOTE:Ifthebatteryisput intoserviceafterthedateshownontopofbattery,
chargethe batteryasinstructedin theService& Maintenancesectionofthis
manualpriortooperatingthetractor.
.J
Shipping BraceRemoval
Makesuretheridingmower'sengineisoff, removetheignitionkey,and
setthe parkingbrakebeforeremovingthe shippingbrace.Refertothe
jOperatonsectonfor nstructonsonhowtosetthe parkng brake.
Locatetheshippingbrace,ifpresent,andaccompanyingwarningtagfound
ontherightsideofthemower,betweenthedischargechutedeflectorand
thecuttingdeck.SeeFigure2.
Figure2
Placethedecklift leverinthehighestcuttingposition.RefertoSettingthe
CuttingHeightintheOperationsectionofthismanual.
Whilepushingthedischargechutedeflectortowardsthemachinewithyourleft
hand,removetheshippingbracewithyourrighthandbygraspingitbetweenyour
thumbandindexfingerandrotatingitclockwise.
Theshippingbrace,usedforpackagingpurposesonly,mustberemovedand
discardedbeforeoperatingyourriding mower.
Themowingdeckiscapableof throwing objects.Failuretooperatethe
ridingmowerwithout the dischargecoverinthe properoperating position
lcoudresut nser ouspersonanjuryand/orproperty damage.
AttachingTheSteeringWheel
Ifthesteeringwheelforyourtractordidnotcomeattached,thehardwarefor
attachingithasbeenpackedwithinthesteeringwheel,beneaththesteeringwheel
cap.Carefullypryoffthe steeringwheelcapandremovethehardware.
1. Withthewheelsofthetractorpointingstraightforward,placethesteering
wheeloverthesteeringshaft.
2. Placethewasher(withthecuppedsidedown)overthesteeringwheeland
securewith thehexbolt.SeeFigure3.
3. Placethesteeringwheelcapoverthe centerofthe steeringwheeland
pushdownwarduntilit"clicks"intoplace.
9

F
\
Figure3
AttachingTheSeat
NOTE:Forshippingreasons,theseatiseitherfastenedtothetractorseat'spivot
bracketwith a plastictie,ormountedbackwardtothepivotbracket.Ineithercase,
freetheseatfromitsshippingpositionbeingcarefulnottobendorkinkthewiring
harnessandfollowtheinstructionsbelowtoattachit.
1. Removethetwo hexscrewsandnutsfromtheseatpivotbracket.
2. Alignthefront holesoftheseatmountingbracketwith theholesintheseat
pivotbracketonyourtractorandsecurewith previouslyremovedhexscrews
andnuts.SeeAinFigure4.
3. Plugthewiringharnessintotheseatsafetyswitchinthebottomoftheseat,
asshownin Bof Figure4.
flO?E:Thetractorwill notoperatewiththewiringharnessdisconnected.
Adjustingthe Seat
Toadjustthepositionoftheseat,pullupandholdtheseatadjustmentlever.Slide
theseatforwardorrearwardtothedesiredposition;thenreleasetheadjustment
lever.Makesureseatislockedintopositioninaseat-stopbeforeoperatingthe
tractor.SeeFigure5.
Beforeoperatingthe tractor, makesurethe seatisengagedinaseat-stop.
Engagethe parkingbrake.Standbehindthe machineandpull backonseat
until itclicksintoplace.
Figure5
TirePressure
Maximumtire pressureunder anycircumstancesis30psi.Equaltire pressure
shouldbe maintainedatall times. Neverexceedthe maximuminflation
)ressureshownonthe sidewallofthe tire.
Therecommendedoperatingtirepressureis:
Approximately10psiforthereartires
Approximately14psiforthefronttires
IMPORTANT:Refertothetiresidewallforexacttire manufacturer'srecommended
ormaximumpsi.Donotoverinflate.Uneventirepressurecouldcausethecutting
decktomowunevenly.
Figure4
10

.I
H
G
A
©
B
C
F
D
A ParkingBrakeLever
B Throttle/ChokeControlLever
C IgnitionSwitchModule
D Auto-drivePedal
E DeckLiftLever
Rgure6
F PTOLever(BladeEngage)
G CupHolder
H ShiftLever
I SeatAdjustmentLever
J BrakePedal
NOTE:AnyreferenceinthismanualtotheRIGHTorLEFTsideofthetractorisobservedfromoperator'sseatpositionfacingforward
towardsthefrontoftractor.
MeetsANSiSafetyStandards
CraftsmanTractorsconformto thesafetystandardoftheAmericanNationalStandardsInstitute(ANSI).
11

ParkingBrakeLever
Tosettheparkingbrake:Fullydepressthebrakepedal.Movethe
parkingbrakeleverintotheparkingbrakeposition.Releasethe
brakepedaltoallowtheparkingbraketoengage.
Toreleasetheparkingbrake:Depressthebrakepedalandmove
theparkingbrakeleveroutofthe ONpositionandintotheOFF
position.Theparkingbrakewill thenbereleased.Releasethe
brakepedal.
NOTE:Theparkingbrakemustbesetiftheoperatorleavestheseat
with theenginerunningortheenginewill automaticallyshutoff.
Throttle/chokeControlLever
m
m
mmmmmmm
SLOW
Thethrottle/chokecontrolleverislocatedonthe
leftsideofthetractor'sdashpanel.Thislever
controlsthespeedoftheengineandwhenpushed
allthewayforward,thechokecontrolalso.When
setinagivenposition,thethrottlewill maintaina
uniformenginespeed.
IMPORTANT:Whenoperating the tractor with the cutting
deck engaged, the throttle/choke control lever must
always be inthe FAST (rabbit) position.
Ignition Switch Module
Tostarttheengine,insertthekeyintotheignitionswitchandturn
clockwisetotheSTARTposition.ReleasethekeyintotheNORMAL
MOWINGMODEpositiononcetheenginehasfired.
Tostoptheengine,turntheignitionkeycounterclockwisetothe
STOPposition.
IM PORTANT: Priortooperatingthe
tractor,refertoboththe"SafetyInterlock
System"and"StartingTheEngine"laterinthis
sectionofthismanualfor detailedinstructions
regardingtheIgnitionSwitchModule.
Neverleavearunningmachineunattended.AlwaysdisengagePTO(Blade
EngageLever),moveshiftleverintoneutralposition,setparking brake,
stopengineandremovekeyto preventunintendedstarting.
SeatAdjustmentLever
Theseatadjustmentleverislocatedbelowthefront/left oftheseat.Thelever
allowsforadjustmentoftheforeandaft positionoftheseat.RefertotheAssembly
sectionofthemanualformoredetailedinstructionsforadjustingtheseatposition.
Auto-drivepedal
Thedrivepedalislocatedontherightsideofthetractor,alongtherunningboard.
Depressthedrivepedalforwardandthetractorwill moveinthedirectionthatthe
shiftleverisengagedin.Tocausethetractortotravelforward,whileatacomplete
stop,movetheshiftleverintotheForwardposition.Graduallysteponthedrive
pedalandthetractorwill begintomoveforward.TomoveinReverse,follow the
sameprocedureonlymovetheshiftleverintothereverseposition.
Thegroundspeediscontrolledwith thedrivepedal.Thefurtherforwardthat the
pedalispivoted,thefasterthetractorwill travel.Thepedalwill returntoitsoriginal
positionwhenit'snotdepressed.RefertotheOperationsectionofthismanualfor
detailedinstructionsregardingthe drivepedal.
IMPORTAflT:Always set the parking brake when leaving the tractor
unattended.
DeckLiftLever
Foundonyourtractor'srightfender,thedecklift leverisusedto
changetheheightofthecuttingdeck.Touse,movethelevertothe
left, thenplaceinthenotchbestsuitedfor yourapplication.
PTO(BladeEngage)Lever
Foundonthetractor'srightfender,thePTO(bladeengage)lever
isusedtoengagepowertothecuttingdeckorother(separately
available)attachments.Tooperate,movetheleveralltheway
forward.Movingthe leverallthewayrearwardintothe PTOOFF
positiondisengagespowertothecuttingdeck/attachment.
flOTE:ThePTO (blade engage) lever must be inthe
disengaged (PTO OFF) position when starting the engine.
CupHolder
Thetractor'scupholderislocatedonthefendertothe leftoftheseat.
Shift Lever
Theshiftleverislocatedontheleftside
ofthefenderandhasthreepositions,
FORWARD,NEUTRALandREVERSE.The
brakepedalmustbedepressedandthe
tractormustnotbeinmotionwhenthe
movingshiftlever.
IMPORTANT:Neverforcetheshiftlever.
Doingsomayresultinseriousdamageto
thetractor'stransmission.
BrakePedal REVERSE
Thebrakepedalislocatedontheleftsideofthelawntractor,alongtherunning
board.Depressthebrakepedaltoengagethediscbrakeandbringthetractortoa
completestop.
NOTE:Thepedalmustbedepressedtostarttheengine.RefertoSafetyInterlock
Switcheslaterin thissectionofthismanual.
12

Gasand Oil Fill-up
Oil
IMPORTAfl#Yourtractorisshippedwith motoroil intheengine.However,you
MUSTchecktheoillevelbeforeoperating.Becarefulnottooverfill.
Forinstructionsonhowtochecktheengineoil,refertoCheckingTheEngine0il in
theseparateEngineOperator'sManualincludedwith thistractor.
Gasoline
Thegasolinetankislocatedunderthehood.Donotoverfill.
Useextremecarewhenhandling gasoline.Gasolineisextremelyflammable
andthe vaporsareexplosive.Neverfuel machineindoorsorwhile the
engineishotor running. Extinguishcigarettes,cigars,pipes,andother
sourcesof gnt on.
NOTE:Purchasegasolineinsmallquantities.Donotusegasolineleftoverfromthe
previousseason,to minimizegumdepositsinthefuelsystem.
Thisengineiscertifiedtooperateonunleadedgasoline.Forbestresults,fill
thefueltankwith onlyclean,fresh,unleadedgasolinewith apumpsticker
octaneratingof87orhigher.
Gasohol(upto10%ethylalcohol,90%unleadedgasolinebyvolume)isan
approvedfuel.Othergasoline/alcoholblends,suchasE85,arenotapproved.
MethylTertiaryButylEther(MTBE)andunleadedgasolineblends(uptoa
maximumof15%MTBEbyvolume)areapprovedfuels.Othergasoline/ether
blendsarenotapproved.
Fillfueltankoutdoorsorinwell-ventilatedarea.
Donotoverfillfueltank.Filltankto nomorethan1/2inchbelowbottomof
fillerneckto allowspaceforfuelexpansion.
Neverremovegascaporaddfuelwhiletheengineishotor running.Allow
enginetocoolatleasttwominutesbeforerefueling.
Ifgasolineisspilled,wipeit offthe engineandequipment.Movemachineto
anotherarea.Wait5minutesbeforestartingtheengine.
ToAdd Gasoline
1. Turntheengineoffandletenginecoolat least2minutesbeforeremoving
thefuelcap.Thegasolinetankislocatedunderthehood.Removethefuel
capbyturningitcounterclockwise.
2. Fillthefueltankwith gasoline.Useonlyclean,fresh(nomorethan30days
old),unleadedgasoline.Filltanktonomorethan1/2inchbelowbottomof
fillernecktoallowspaceforfuelexpansion.
3. Reinstallthefuelcap.
/MPORTAN_Donotoverfillthetank.Filltanktonomorethan1/2inchbelow
bottomoffiller necktoallowspaceforfuelexpansion.SeeFigure7.
Figure7
Avoid Serious Injury or Death
Goupanddownslopes,notacross.
Avoidsuddenturns.
Donotoperatetheunitwhereit couldsliportip.
Ifmachinestopsgoinguphill,stopbladesandbackdownhillslowly.
Donotmowwhenchildrenorothersarearound.
Nevercarrychildren,evenwith bladesoff.
Lookdownandbehindbeforeandwhilebacking.
Keepsafetydevices(guards,shields,andswitches)inplaceandworking.
Removeobjectsthatcouldbethrownbytheblades.
Knowlocationandfunctionofallcontrols.
Besurebladesandenginearestoppedbeforeplacinghandsorfeet near
blades.
Beforeleavingoperator'sposition,stoptractor,disengageblades,engage
parkingbrake,shutengineoff,andremovekey.
Read Operator's Manual
SafetyInterlock System
Thesafetyinterlocksystemisdesignedfor safeoperationofthetractor.Ifthis
systemshouldevermalfunction,donotoperatethetractor,Immediatelycontact
1-800-659-5917to havethesystemserviced.
Thesafetyinterlocksystempreventstheenginefromstartingunless
theparkingbrakeisengagedandthePTO(BladeEngage)leverisinthe
disengaged(OFF)position.
Thesafetyinterlocksystemwill automaticallyshutoffthe engineif the
operatorleavestheseatbeforeengagingtheparkingbrake.
Thesafetyinterlocksystemwill automaticallyshutoffthe engineif the
operatorleavesthetractor'sseatwiththe PTO(BladeEngage)leverengaged,
regardlessofwhetherthe parkingbrakeisengaged.
13

Withthe ignitionkeyintheNORMALMOWINGposition,theelectricPTO
(BladeEngage)clutchwill automaticallyshutoff if thePTO(BladeEngage)
knobismovedintotheengaged(ON)positionwiththedrivepedalin
positionforreversetravel.
Donot operatethetractor ifthe interlocksystemismalfunctioning. This
systemwasdesignedfor yoursafetyandprotection.
Engagingthe ParkingBrake
Toengagethe parkingbrake:
1. Fullydepressthe brakepedalandholdit downwith yourfoot.
2. Movethespeedcontrolleverallthewaydownandintotheparkingbrake
position.
3. Releasethebrakepedaltoallowtheparkingbraketoengage.
Toreleasethe parkingbrake:
1. Depressthebrakepedalandmovethespeedcontrolleveroutoftheparking
brakepositionandintoadesiredspeed.
Setting the Cutting Height
1. Selecttheheightpositionofthecuttingdeckbyplacingthedecklift leverin
anyofthedifferentcuttingheightnotchesontherightsideofthefender.
2. Adjustthedeckwheelssothattheyarebetween1A-inchandY2-inchabove
thegroundwhenthetractorisonasmooth,flat surfacesuchasadriveway.
Toadjust Deck Wheels:
1. Removetheflangelocknutontheshoulderboltsecuringthedeckwheel.
2. Positionthewheeltothedesiredheightaslistedabove.SeeFigure8.
f
Figure8
Securetheshoulderboltwith theflangelocknut.
Keephandsandfeet awayfrom the dischargeopeningof the cutting
deck.
NOTE:Thedeckwheelsareananti-scalpfeatureofthedeckandarenotdesigned
tosupporttheweightofthecuttingdeck.RefertoLevelingintheMaintenanceand
Servicesectionofthismanualformoredetailedinstructionsregardingvariousdeck
adjustments.
Starting the Engine
Donot operatethe tractor ifthe interlocksystemismalfunctioning. This
systemwasdesignedfor yoursafetyandprotection.
NOTE:RefertotheGasolineandOilfill-up instructionsearlierinthissection.
1. Insertthetractorkeyintotheignitionswitch.
2. PlacethePTO(BladeEngage)leverinthedisengaged(OFF)position.
3. Engagethetractor'sparkingbrake.
4. Activatethechokecontrolbymovingthethrottle/chokeleverallthewayup
intothechokeposition.
5. TurntheignitionkeyclockwisetotheSTARTposition.Aftertheenginestarts,
releasethekey.It will returntotheON(orNormalMowing)position.
DoNOTholdthe keyin the STARTposition for longer than ten seconds
at a time. Doing so maycause damageto your engine's electric
starter.
6. Aftertheenginestarts,deactivatethechokecontrolandplacethethrottle
controlinthe FASTposition.
NOTE:DoNOTleavethechokecontrolonwhileoperatingthetractor.Doingsowill
resultina"rich"fuelmixtureandcausetheenginetorunpoorly.
Stoppingthe Engine
Ifyou strike a foreign object, stop the engine, disconnect the spark
plug wire(s)and ground against the engine. Thoroughly inspectthe
machine for any damage. Repairthe damagebefore restarting and
operating
1. Ifthebladesareengaged,placethePTO(BladeEngage)leverin the
disengaged(OFF)position.
2. TurntheignitionkeycounterclockwisetotheSTOPposition.
3. Removethekeyfromtheignitionswitchtopreventunintendedstarting.
Driving TheTractor
Avoidsuddenstarts,excessivespeedandsuddenstops.
Donot leavethe seatofthe tractor without first placingthe PTO(Blade
Engage)leverin the disengaged(OFF)position,depressingthe brakepedal
andengagingthe parkingbrake.Ifleavingthe tractor unattended,also
turn the ignitionkeyoff and removethe key.
14

Alwayslookdownandbehindbeforeandwhilebackingup toavoidaback-
overaccident.
1. Depressthebrakepedaltoreleasetheparkingbrakeandthenletthepedal
up.
2. Movethethrottle leverintothe FAST(rabbit)position.
3. PlacetheshiftleverineithertheFORWARDorREVERSEposition.
IMPORTANT;DoNOTusetheshiftlevertochangethedirectionoftravelwhenthe
tractorisinmotion.Alwaysusethebrakepedaltobringthetractortoacomplete
stopbeforeshifting.
4. Graduallybegintoapplypressuretothedrivepedal.Thefurtherdownthe
pedalispushed,thefasterthetractorwill travelin thedesireddirection
basedonthepositionoftheshiftlever.
5. Thelawntractorisbroughttoastopbyreleasingthedrivepedalandthen
depressingthebrakepedal.
Beforeleavingthe operator'spositionfor anyreason,disengagethe blades,
placethe shift leverinneutral,engagethe parkingbrake,shut engineoff
andremovethe key.
Whenstopping the tractor for any reasonwhile on agrasssurface,
always:
Placetheshiftleverinneutral,
I.
2.
3.
Engagetheparkingbrake,
Shutengineoffandremovethekey.Doingsowill minimizethe possibility
ofhavingyourlawn"browned"byhotexhaustfromyourtractor'srunning
engine.
ReverseCautionMode
TheREVERSECAUTIONMODEpositionofthe keyswitchmoduleallowsthetractorto
maneuverinreversewith theblades(PTO)engaged.
NOTE:Mowinginreverseisnotrecommended.
Useextremecautionwhileoperating thetractor inthe REVERSECAUTION
MODE.Alwayslookdownand behindbeforeandwhile backing.Donot
operatethe tractorwhen childrenorothersarearound.Stopthe tractor
immediatelyifsomeoneentersthe area.
Tousethe REVERSECAUTIONMODE:
NOTE:TheoperatorMUSTbeseatedinthetractorseat.
1. Starttheengineaspreviouslyinstructedonthepreviouspage.
2. TurnthekeyfromtheNORMALMOWING(Green)positiontotheREVERSE
CAUTIONMODE(Yellow)positionofthekeyswitchmodule.SeeFigure9.
3. Pressthe REVERSEPUSHBUTTON(Orange,TriangularButton)atthetop,
rightcornerofthe keyswitchmodule.Theredindicatorlightatthetop,left
cornerofthekeyswitchmodulewill beONwhileactivated.SeeFigure9.
Indicator_, ;
Light "v,,"_ z_
Reverse GR
Caution
Mode
Position
Stop
position
F
Reverse
Push
Button
Driving
Mode
position
J
Figure9
4. Onceactivated(indicatorlightON),thetractorcanbedrivenin reversewith
thecuttingblades(PTO)engaged.
5. Alwayslookdownandbehindbeforeandwhilebackingtomakesureno
childrenarearound.Afterresumingforwardmotion,returnthekeytothe
NORMALMOWINGposition.
TheREVERSECAUTIONMODEwill remainactivateduntil:
a. ThekeyisplacedineithertheNORMALMOWINGpositionor STOP
positionor
b. Theoperatorleavestheseat.
DrivingOnSlopes
RefertotheSLOPEGAUGEintheSafetyInstructionssectionofthemanualtohelp
determineslopeswhereyoumayoperatethistractorsafely.
Donot mowoninclineswith aslopein excessof15degrees(ariseof
approximately2-112feet every10feet). Thetractorcouldoverturn and
causeseriousinjury.
Mowupanddownslopes,NEVERacross.
Exerciseextremecautionwhenchangingdirectiononslopes.
Watchforholes,ruts,bumps,rocks,orotherhiddenobjects.Uneventerrain
couldoverturnthemachine.Tallgrasscanhideobstacles.
Avoidturnswhendrivingonaslope.Ifaturnmustbemade,turndownthe
slope.Turningupaslopegreatlyincreasesthechanceofa rollover.
Avoidstoppingwhendrivingupaslope.If it isnecessarytostopwhile
drivingupaslope,startupsmoothlyandcarefullyto reducethepossibility
offlippingthetractoroverbackward.
15

Engagingthe Blades
Engagingthe PTO(BladeEngage)transferspowertothecuttingdeckorother
(separatelyavailable)attachments.Toengagetheblades,proceedasfollows:
I. Movethethrottle/chokecontrollevertotheFAST(rabbit)position.
2. GraspthePTO(BladeEngage)leverandpivotit allthewayforwardintothe
engaged(ON)position.
3. Keepthethrottleleverinthe FAST(rabbit)positionfor themostefficientuse
ofthecuttingdeckorother(separatelyavailable)attachments.
NOTE:Theenginewill automaticallyshutoff if thePTOisengagedwith
theshiftleverin positionfor reversetravelwith theignitionkeyintheON
position.
Mulching
Amulchkitisavailableasanattachment.Mulchingisaprocessofrecirculating
grassclippingsrepeatedlybeneaththecuttingdeck.Theultra-fineclippingsare
thenforcedbackintothe lawnwheretheyactasanaturalfertilizer.
Amulchkitcanbepurchasedthroughtheretaillocationinwhichyoupurchased
thistractor.Formoreinformation,simplycontactSearsat 1-800-659-5917.
Usingthe DeckLift Lever
Toraisethecuttingdeck,movethedecklift levertotheleft,thenplaceit inthe
notchbestsuitedfor yourapplication.RefertoSettingTheCuttingHeightearlierin
thissection.
Mowing
Tohelpavoid bladecontactorathrown object injury,keepbystanders,
helpers,childrenandpetsat least75feetfrom the machinewhile it isin
operation.Stopmachineif anyoneentersthearea.
Thefollowinginformationwill behelpfulwhenusingthecuttingdeckwith your
tractor:
Planyourmowingpattern to avoiddischargeof materialstoward roads,
sidewalks,bystandersandthe like.Also,avoiddischargingmaterialagainst
awall or obstructionwhich maycausedischargedmaterialto ricochetback
towardthe operator.
Donotmowat highgroundspeed,especiallyira mulchkitorgrasscollector
isinstalled.
Forbestresultsit isrecommendedthatthefirsttwo lapsbecutwith the
dischargethrowntowardsthecenter.Afterthefirst twolaps,reversethe
directiontothrowthedischargetotheoutsideforthebalanceofcutting.
Thiswill giveabetterappearancetothelawn.
Donotcutthegrasstooshort.Shortgrassinvitesweedgrowthandyellows
quicklyindryweather.
Mowingshouldalwaysbedonewith theengineatfull throttle.
Underheavierconditionsit maybenecessarytogobackoverthecutareaa
secondtimetogetacleancut.
DoNOTattemptto mowheavybrushandweedsandextremelytall grass.
Yourtractorisdesignedto mowlawns,NOTclearbrush.
Keepthebladessharpandreplacethebladeswhenworn.RefertoCutting
Bladesin theServicesectionofthismanualforproperbladesharpening
instructions.
Headlights
ThelampsareONwheneverthetractor'sengineisrunning.
Thelampsturn OFFwhentheignitionkeyismovedtotheSTOPposition.
16

MAINTENANCESCHEDULE
Beforeperforminganytype ofmaintenance/service,disengageallcontrols
andstopthe engine.Waituntil all movingpartshavecometoacomplete
stop.Disconnectsparkplugwireandgroundit againstthe enginetoprevent
unintendedstarting. Alwayswearsafety glassesduring operationorwhile
performing anyadjustmentsor repairs.
BeforeEachUse
Inthe FirstFiveHours
Every10Hours
Every25hours
Every50hours
Annually
BeforeStorage
1.
2.
3.
I.
I.
2.
3.
I.
2.
3.
4.
5.
1.
2.
1.
2.
3.
4.
5.
6.
7.
1.
2.
3.
4.
5.
6.
7.
Engineoil level
Mufflerareaandcontrols
Fingerguard
EngineOil
Hood/Dashairvents
Batteryterminals
Deckspindlesandidlerbracket
Airfilter'sprecleaner*
Airfilter*
Midsteeringarms,pivotshafts,
andaxles
Frontwheelbearings
Frontdeckwheels
Engineoil/Oil filter
Muffler
Airfilter
Airfilter'spre-cleaner
Sparkplug
Aircoolingsystem*
Fuelfilter
SteeringGears
RearWheels
Hood/Dashairvents
Batteryterminals
Midsteeringarms,pivotshafts,
andaxles
Frontwheelbearings
Frontdeckwheels
Deckspindlesandidlerbracket
Pedalpivotpoints
*Servicemorefrequentlyunderdustyconditions.EngineMaintenance
Followthe maintenanceschedulegivenbelow.Thischartdescribesservice
guidelinesonly.UsetheServiceLogcolumnto keeptrackofcompleted
maintenancetasks.Tolocatethe nearest Parts& RepairServiceCenteror to
scheduleservice,simplycontact1-800-659-5917.
1. Check
2. Clean
3. Clean
1. Change
1. Clean
2. Clean
3. Lubricate
1. Clean
2. Clean
3. Lubricate
4. Lubricate
5. Lubricate
1. Change/Replace
2. Check
1. Replace
2. Replace
3. Replace
4. Clean
5. Replace
6. Clean
7. Removeandgreaseaxles
1. Clean
2. Clean
3. Lubricate
4. Lubricate
5. Lubricate
6. Lubricate
7. Lubricate
Beforeperforminganymaintenanceor repairs,disengagethe PTO(Blade
EngageLever),engagethe parkingbrake,stopthe engineandremovethe
keyto preventunintendedstarting.
Ifthe enginehasbeenrecentlyrun,the engine,muffler and surrounding
metalsurfaceswill behot andcancauseburnsto the skin.Exercisecaution
to avoidburns.
17

Maintenence
Beforeperforming anymaintenanceorrepairs,disengagePTO,moveshift [
[leverintoneutralposition,setparkingbrake,stopengineandremovekeytoI
Lpreventunintendedstarting, j
Usedoil isahazardouswasteproduct.Disposeofusedoil properly.Donot
discardwith householdwaste.Checkwith yourlocalauthorities oror contact
1-800-659-5917foralistofsafedisposal/recydingfacilities.
FuelFilter
Engine
RefertotheEngineOperator/OwnerManualforenginemaintenanceinstructions.
Checkengineoil levelbeforeeachuseasinstructedin theEngineOperator/Owner
Manualpackedwith yourunit.Followtheinstructionscarefully.
ChangingEngineOil
Theengineoilshouldbechangedinthefirst5hoursandthenevery50hoursor
onceaseason.Tochangetheengineoil,proceedasfollows:
1. WithengineOFFbutstillwarm,disconnectsparkplugwireandkeepitaway
fromsparkplug.
2. Removetheoilfillcap/dipstickfromtheoilfilltube.SeeFigure10.
Dipstick
OilDrain
Valve
Oil Drain
Sleeve
Figure10
3. Turnthesteeringwheelallthewaytotherightto betterexposethedrain
plug.
4. Cliptheoildrainsleeve(packedwiththismanual)ontotheoildrainport.
Routetheoppositeendofthesleeveintoanappropriateoilcollection
containerwithacapacitygreatenoughtocollecttheusedoil.
5. Removetheoildrainplug,Theoilwill begintodrainout oftheengine.
6. Aftertheoilhasfinisheddraining,replacetheoil drainplugandtighten.Be
carefulnottoovertighten.
Removetheoildrainsleeveandstoreforlateruse.7.
8. Refilltheenginewith newmotoroilasinstructedin theEngineOperator's
Manualincludedwith thistractor.
Gasolineanditsvaporsareextremelyflammable andexplosive.Fireor
explosioncancausesevereburnsor death.
Keepgasolineawayfromsparks,openflames,pilotlights,heat,andother
ignitionsources.
Checkfuellines,tank,cap,andfittingsfrequentlyforcracksorleaks.Replace
ifnecessary.
Beforereplacingthefuelfilter,drainthefueltankaspertheinstructions
below.
Donotdrainfuelwhentheengineishot.Allowtheengineadequatetime to
cool.Drainfuelintoanapprovedcontaineroutdoors,awayfromopenflame.
Drainanylargevolumeoffuelfromthetankbydisconnectingthefuelline
fromthein-linefuelfilter neartheengine.
RemovethefuellinefromtheIn-lineside(sidetowardsthefueltank)ofthe
fuelfilter.
Replacementpartsmustbethesameandinstalledin thesamepositionas
theoriginalparts.
Iffuelspills,waituntilit evaporatesbeforestartingengine.
Beforereplacingthefuelfilter,drainthefueltank.Otherwise,fuelcanleak
outandcauseafireorexplosion.
To Drain the fuel:
1. Locatethefuelfilter,whichisroutedontheleftsideoftheenginebetween
thefueltankandthecarburetor,andmaybeattachedtotheenginewithatie
strap.Cutthetiestrap,ifpresent,thenpinchthein-lineclamponthefuelfilter
with apairofpliers,slidetheclampupthefuelline.Pullthefuellinefreefrom
thefilterandplacetheopenendofthelineintoanapprovedcontainertodrain
thefuel.
To change the fuel filter:
1. Useplierstosqueezethetabsontheotherclamp(theout-linesideofthe
fuelfilter),thenslidetheclampawayfromthefuelfilter.Twistandpullthe
fuellineoffofthe fuelfilter.SeeFigure11.
Clamp Fuel
Line
Tab
18 Figure11
J

2. Checkthefuellinesforcracksorleaks.Replaceifnecessary.
3. Replacethefuelfilterwith anoriginalequipmentreplacementfilter. Call
1-800-659-5917topurchasetheoriginalequipmentreplacementfilter.
4. Securethefuellineswiththeclamps.
Air Cleaner
Servicethepre-deanerandcartridge/airdeanerelementasinstructedinthe
EngineOperator/OwnerManualpackedwithyourunit.
SparkPlug
Thesparkplugshouldbecleanedandthegapresetonceaseason.Sparkplug
replacementisrecommendedatthestartofeachmowingseason.Refertothe
EngineOperator/OwnerManualfor correctplugtypeandgapspecifications.
Muffler
Temperatureof muffler and nearbyengineareasmayexceed150° F(65°C).
Avoidcontactwith theseareas.
Inspectmufflerperiodically,andreplaceifnecessary.Replacementparts
forthemufflermustbethesameandinstalledinthesamepositionasthe
originalparts.
CleanEngine
Dailyorbeforeeveryuse,deangrass,chafforaccumulateddebrisfrom
engine.Keeplinkage,spring,andcontrolsclean.
Keepareaaroundandbehindmufflerfreeofanycombustibledebris.
Keepingenginecleanallowsairmovementaroundengine.
Enginepartsshouldbekeptdeantoreducetheriskofoverheatingand
ignitionofaccumulateddebris.
Donotusewaterto deanengineparts.Watercouldcontaminatefuel
system.Useabrushordry doth.
iMPORTANT: TheuseofapressurewashertocleanyourtractorisNOT
recommended.Itmaycausedamagetoelectricalcomponents,spindles,pulleys,
bearingsortheengine.
CarburetorAdjustment
Thecarburetoronthisengineisnotadjustable.
Lubrication
Beforelubricating,repairing, orinspecting,alwaysdisengage (Blade
PTO
EngageLever),moveshift [everintoneutral position,setparkingbrake,stop
engineandremovekeytopreventunintendedstarting.
Engine
Lubricatetheenginewith motoroil asinstructedintheEngineOwnerManual
packedwith yourunit.
PivotPoints& Linkage
Lubricateallthepivotpointsonthedrivesystem,parkingbrakeandlift linkageat
leastonceaseasonwith lightoil.
RearWheels
Therearwheelsshouldberemovedfromtheaxlesonceaseason.Lubricatethe
axlesandthe rimswellwith anall-purposegreasebeforere-installingthem.
Front Wheels
Thefrontwheelsshouldberemovedfromtheaxlesonceaseason.Lubricatethe
axlesandthe rimswellwith anall-purposegreasebeforere-installingthem.
DeckWash
Ascrewand plugcanbefoundonyourtractor'sdecksurfaceasseeninFigure
12.Thisplugcanbereplacedwith awaterporttobeusedaspartof aseparately-
availabledeckwashsystem.
/
//
\\
,, j
Figure12
TheDeckWashSystemTM isusedtorinsegrassclippingsfromthedeck'sunderside
andpreventthe buildupofcorrosivechemicals.
NOTE:Adeckwashsystemcanbepurchasedthroughtheretaillocationinwhich
youpurchasedthistractor.Formoreinformation,call1-800-659-5917.
19

Adjustments SidetoSide
Neverattempt to makeanyadjustmentswhilethe engineisrunning,except
wherespecified inthe operator'smanual°
leveling the Deck
NO/E:Checkthetractor'stirepressurebeforeperforminganydeckleveling
adjustments.RefertoTiresintheServicesectionofthismanualformore
informationregardingtirepressure.
FrontToRear
Thefrontofthecuttingdeckissupportedbyastabilizerbarthatcanbeadjustedto
levelthedeckfromfront torear.Thefrontofthedeckshouldbebetween1/4-inch
and3/8-inchlowerthantherearofthedeck.Adjustifnecessaryasfollows:
1. Withthetractorparkedonafirm,levelsurface,placetheleverforlifting the
platformonthesecondtothetopnotch(secondhighestposition)androtate
thebladeascloseaspossibletothedischargechannelthatisparallelto the
tractor.
2. Measurethedistancefromthefrontofthe bladetip tothegroundandthe
rearofthebladetiptotheground.Thefirstmeasurementtakenshould
bebetween1/4"and3/8"lessthanthesecondmeasurement.Determine
theapproximatedistancenecessaryfor properadjustmentandproceed,if
necessary,tothenextstep.
3. Locatetheflangelocknutonthefrontsideofthestabilizerbracket.See
Figure13.
Tightentheflangelocknuttoraisethefrontofthedeck;
Loosentheflangelocknuttolowerthefrontofthedeck.
J
Figure13
Ifthecuttingdeckappearstobemowingunevenly,asidetosideadjustmentcanbe
performed.Adjustif necessaryasfollows:
1. Withthetractorparkedonafirm,levelsurface,placethedecklift leverin
thesecondfromthetopnotch(secondhighestposition)androtateboth
bladessothattheyareperpendicularwith thetractor.
2. Measurethedistancefromtheoutsideofthe leftbladetip totheground
andthedistancefromtheoutsideoftherightbladetiptotheground.Both
measurementstakenshouldbeequal.Ifthey'renot,proceedtothenext
step.
3. Loosen,butdoNOTremove,thehexcapscrewontheleftdeckhanger
bracket.SeeFigure14.
4. Balancethedeckbyusingawrenchtoturntheadjustmentgear(found
immediatelybehindthehexcapscrewjust loosened)clockwise/upor
counterclockwise/down.Thedeckisproperlybalancedwhenbothbladetip
measurementstakenearlierareequal.
5. Retightenthe hexcapscrewonthe leftdeckhangerbracketwhenproper
adjustmentisachieved.
E
Hex Cap Screw
Figure14
SeatAdjustment
RefertotheAssemblysectionofthismanualforseatadjustmentinstructions.
ParkingBrakeAdjustment
Neverattempt to adjustthe brakeswhile the engineisrunning.Always
jdisengagePTO(bladeengage)lever,moveshift leverinto neutralposition,
stopengineand removekeyto preventunintendedstarting.
Ifthetractordoesnotcometoacompletestopwhenthebrakepedaliscompletely
depressed,orifthetractor'srearwheelscanrollwith theparkingbrakeapplied,
thebrakeisinneedofadjustment.ContactthenearestSearsServiceCenterto have
yourbrakesproperlyadjusted.
Tolocatethe nearestParts& RepairServiceCenterorto scheduleservice,
contact 1-800-659-5917.
2O
This manual suits for next models
1
Table of contents
Languages:
Other Craftsman Tractor manuals

Craftsman
Craftsman T100 Series User manual

Craftsman
Craftsman 917.98644 User manual

Craftsman
Craftsman 917.20403 User manual

Craftsman
Craftsman 917.99039 User manual

Craftsman
Craftsman 917.257572 User manual

Craftsman
Craftsman 917.203920 User manual

Craftsman
Craftsman 917.25010 Assembly and User manual

Craftsman
Craftsman 917.203930 User manual

Craftsman
Craftsman 917.20380 User manual

Craftsman
Craftsman 917.257571 User manual