Creation A243 User manual


USB
SD/MS/MMC CARD
USER MANUAL
MODEL: A243

TABLE OF CONTENTS
01-02
SAFETY PRECAUTIONS
IMPORTANT SAFETY INSTRUCTIONS 03
NOTICE 04
05
ACCESSORIES and PANEL
06-07
BASIC CONNECTION
08
REMOTE CONTROL
09
BASIC PLAYBACK
10-11
ADVANCED PLAYBACK
11-13
SPECIAL FUNCTION PLAYBACK
14-17
SYSTEM SETUP
SPECIFICATIONS
19
18
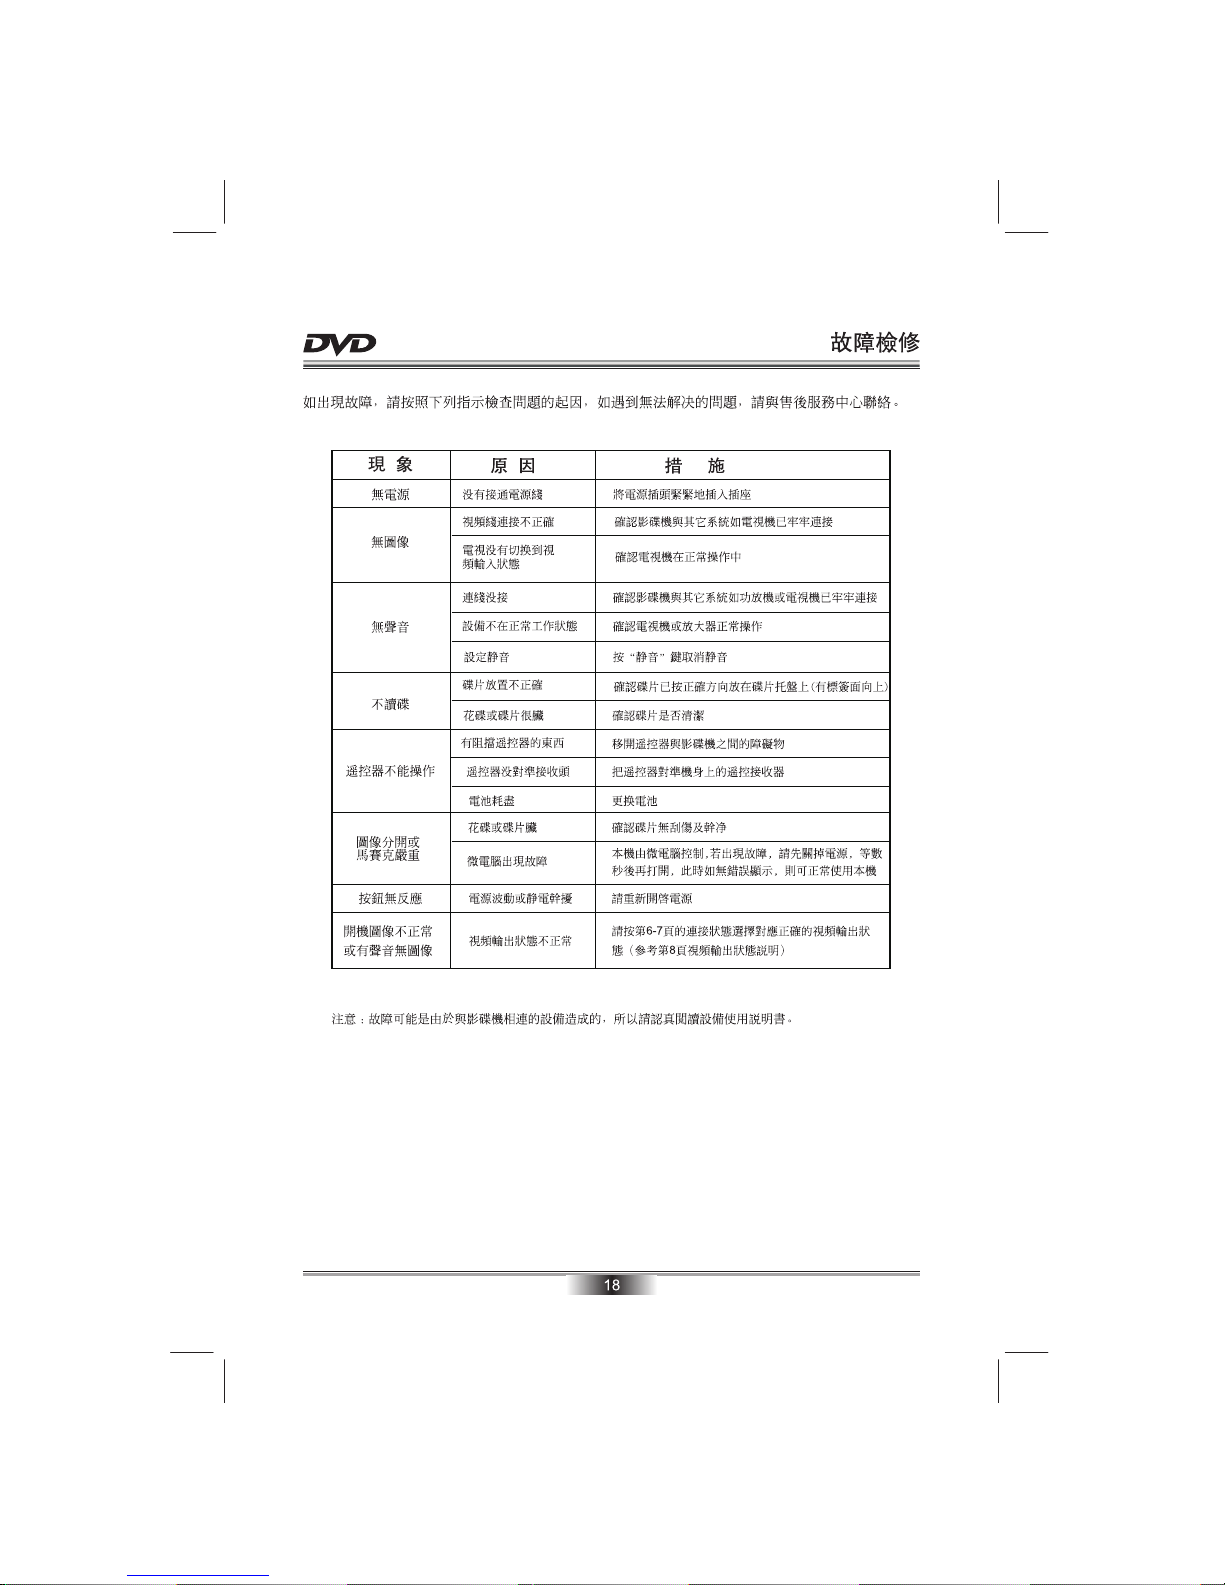
TROUBLE SHOOTING

SAFETY PRECAUTIONS
01
The lightning flash with arrowhead symbol, within an equila-
teral triangle, is intended to alert the user to the presence
of uninsulated "dangerous voltage " within the product's en-
closure that may be of sufficient magnitude to constitute a
risk of electric shock to persons.
The exclamation point within an equilateral triangle is
intended to alert the user to the presence of important
operating and maintenance (servicing) instructions in the
literature accompanying the appliance.
TO PREVENT ELECTRIC SHOCK, MATCH WIDE BLADE OF PLUG TO WIDE
SLOT, FULLY INSERT.
The symbol for CLASS II (Double Insulation).
TO REDUCE THE RISK OF FIRE OR ELECTRIC SHOCK, DO NOT EXPOSE THIS
APPLIANCE TO RAIN OR MOISTURE, DANGEROUS HIGH VOLTAGES ARE
PRESENT INSIDE THE ENCLOSURE. DO NOT OPEN THE CABINET, REFER
SERVICING TO QUALIFIED PERSONNEL ONLY.
WARNING:
When replace the direct plug in power supply or a separable, cord-connected power
supply, the replacement must be exact duplicate, or one recommended by the manu-
facturer.
CAUTION:
This product utilizes a laser.
Use of controls or adjustments or performance of procedures other than those
specified here in may result in hazardous radiation exposure.
Do not open the cover and do not repair yourself. Refer servicing to
qualified personnel.
DANGER: Visible and invisible laser radiation when open and interlock failed or
defeated. Avoid direct exposure to beam.

SAFETY PRECAUTIONS
02
Disposal of your old appliance
1. When this crossed-out wheeled bin symbol is attached to a product, it means the
product is covered by the European Directive 2002/96/EC.
2. All electrical and electronic products should be disposed of separately from the
municipal waste stream via designated collection facilities appointed by the government
or the local authorities.
3. The correct disposal of your old appliance will help prevent potential negative
consequences for the environment and human health.
4. For more detailed information about disposal of your old appliance, please contact
your city office, waste disposal service or the shop where you purchased the product.
This product incorporates copyright protection technology that is protected by U.S.
patents and other intellectual property rights. Use of this copyright protection technology
must be authorized by Macrovision, and is intended for home and other limited viewing
uses only unless otherwise authorized by Macrovision. Reverse engineering or
disassembly is prohibited.
Manufactured under license from Dolby Laboratories. Dolby and the double-D symbol are
trademarks of Dolby Laboratories.

03
CAUTION: PLEASE READ AND OBSERVE ALL WARNINGS AND INSTRUCTIONS GIVEN IN THIS MANUAL AND
THOSE MARKED ON THE UNIT. RETAIN THIS BOOKLET FOR FUTURE REFERENCE.
This set has been designed and manufactured to assure personal safety. Improper use can result in electric shock or fire
hazard. The safeguards incorporated in this unit will protect you if you observe the following procedures for installation,
use and servicing. This unit is fully transistorized and does not contain any parts that can be repaired by the user.
DO NOT REMOVE THE CABINET COVER OR YOU MAY BE EXPOSED TO DANGEROUS VOLTAGE. REFER
SERVICING TO QUALIFIED SERVICE PERSONNEL ONLY.
on a bed,

04
Table of contents


