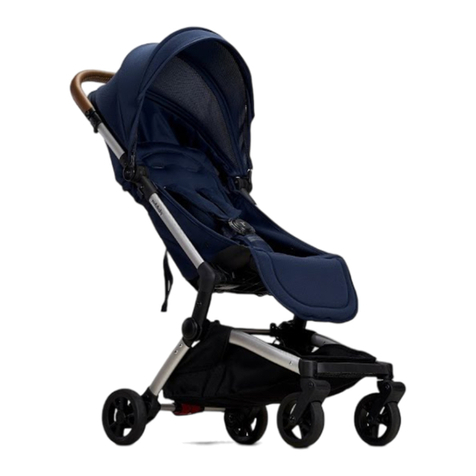
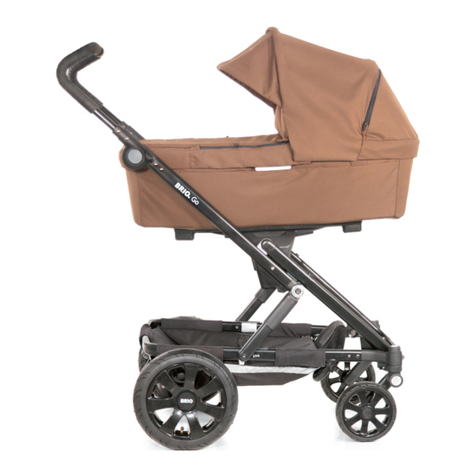
Crescent ultra User manual

classic
instruction manual
Read these instructions carefully before use.
Important - Keep these instructions for future use
city
classic
instruction manual
Read these instructions carefully before use.
Important - Keep these instructions for future use
city
ultra instruction manual

ultra instruktioner
specikationer
Storlek ihopfälld: Chassivikt: 4.6kg
B50cm x L64cm x H22cm
Storlek uppfälld:
B58cm x L79-96cm H88-105cm

• Lämna aldrig ditt barn utan tillsyn.
• Se till att alla låsanordningar och monteringsdetaljer är korrekt monterade före användning.
• För att undvika skador, se till att ditt barn hålls borta när du fäller upp och fäller ihop
barnvagnen.
• Låt inte ditt barn leka med denna produkt.
• Använd alltid 5-punkts selen till ditt barn.
• Kontrollera att chassit och sittenhetens fästanordningar är korrekt inkopplade före
användning.
• Denna produkt är inte lämplig för löpning eller skridskoåkning.
• Lås parkeringsbromsen vid parkering och ta bort barnet.
• Maxlastvikten för varukorgen är 10 kg.
• All last som är fäst vid handtaget och/eller på baksidan av ryggstödet och/eller på sidorna av
barnvagnen påverkar barnvagnens stabilitet.
• Endast ett barn får åka i barnvagnen.
• Eventuella extra tillbehör är inte tillåtna utan tillverkarens rekomendation, använd endast
reservdelar som tillhandahålls och godkänts av tillverkaren.
• Denna barnvagn ersätter inte en spjälsäng eller en säng. Skulle ditt barn behöva sova så ska
det läggas i en lämplig liggdel (*tillbehör) spjälsäng eller säng.
• Använd aldrig denna produkt på en upphöd plattform.
• Använd endast barnvagnen på horisontell och stabil väg.
• Lägg inte till en annan madrass ovanpå madrassen som tillhandahålls i liggdelen såvida
den inte rekommenderas av tillverkaren.
• Barnvagnen är testad för 32 kg eller 4 år beroende på vad som kommer först, varav 22kg i
sittdelen och 10kg i vaukorgen
• Se alltid till att sittdelens eller liggdelens låsanordningar sitter korrekt innan du
använder vagnen.
• Innan promenad, kontrollera alltid att vagnen är korrekt uppfälld, alla hjul siter som de
ska och att bromsen fungerar.
• Spara alltid denna manual tillsammans med din Crescent Ultra för framtida bruk.
VARNING!
WARNING:
• Never leave your child unattended.
• Ensure that all the locking devices are engaged before use.
• To avoid injury ensure that your child is kept away when
unfolding and folding this product.
• Do not let your child play with this product.
• Always use the restraint system.
• Check that the pram body or seat unit attachment devices are
correctly engaged before use.
• This product is not suitable for running or skating.
• Lock the stroller when place and remove the children.
• The max-loading weight for the basket is 5kg.
• Any load attached to the handle and/or on the back of the
backrest and/or on the sides of the vehicle will affect the
stability of the vehicle.
• Do not carry more than one child in this baby stroller.
• Any extra accessories aren’t allowed without the seller’s
permission, only use replacement parts supplied and
approved by the manufacture.
• This vehicle does not replace a cot or a bed. Should your child
need to sleep, then it should be placed in a suitable pram body,
cot or bed.
• Never use this product on a stand.
• Use only on a firm, horizontal level dry surface.
• Not add another mattress on top of the mattress provided or
recommended by the manufacturers.
• The vehicle is suitable up to 22 kg or 4 years whichever comes first.
2
Sitsmått:
Total längd 91cm, Rygghöjd 50cm, Sitsbredd 33cm
Innermått liggdel:
Längd 75cm, Bredd 35cm, Höjd 22cm

Brake bar
Handle bar
adjusting
button
Front bar
Basket
Seat unit
adjusting lever
4
Parts number
Fold hook
Parts number
Handle bar
Footrest
adjusting button
Rear wheels
Canopy removal
button
Canopy
Shoulder pad
Safety belt
Front wheels
3
ultra delar
Suett
Handtag
Lossa barnets handtag
Fotstödsjustering
Bakhjul
Broms
Justera
handtaget
knapp för att
ta av framhjul
Axelmuddar
Säkerhetsbälte
Framhjul
Justera sitsen
Barnets handtag
Varukorg
Fällningslås

Front wheel
removal
button
Rear wheel
removal button
Unfolding and installing
1.Unfolding the chassis: As the picture shown,Press the locker
inside and release the Chassis ,Holding the handle bar by one
hand and lifting upwards until Click sound,right locked position
of the chassis now. checking the safety of the chassis. Pressing
the button of the handle bar, then can adjust the height of the
handle bar.
2.Installing the front wheels: As the picture shown, put the front
wheels inside the front wheel bracket till the sound of “click”.
indicating correct assembling way. Same installing method on
the other side. When disassembling, pressing the front wheels
button, meanwhile, pulling it outwards, same installing method
on the other side. 5
①
②
uppfällning och montering
1. Fälla upp chassit: Som bilden visar, tryck låsspärren (1) åt sidan och låt chassit vecklas ut,
Håll i handtaget med en hand och lyft uppåt (2) tills ett klickljud hörs. kontrollera chassits säker-
het genom att känna att chassit är i upplåst läge. tryck på knappen på handtaget för att justera
höjden.
2. montering av framhjulen: Som bilden visar, sätt in framhjulen inuti framhjulsfästet tills ett
”klick” hörs. Det indikerar korrekt monteringssätt. Samma installationsmetod på andra sidan.
Vid demontering, tryck på framhjulsknappen, samtidigt som du drar den utåt, samma procedur
på andra sidan.
3. Montering av bakhjulen. Som bilden visar, placera bakhjulen inuti bakhjulsfästet tills ljudet av
ett ”klick” hörs. Samma installationsmetod på andra sidan. Vid demontering, tryck på
låsknappen, samtidigt som du drar hjulet utåt, samma metod på andra sidan.
knapp för att
ta av framhjul
knapp för att
ta av bakhjul

3.Installing the rear wheels: As the picture shown, put the rear
wheels inside the rear wheel bracket till the sound of “click”.
indicating correct assembling way. Same installing method
on the other side. When disassembling, pressing the front
wheels button, meanwhile, pulling it outwards, same
installing method on the other side.
Canopy removal button
Unfolding and installing
4.Installing the front bar: As the pictures shown, Inserting the
bumper bar connecter inside the socket of the bar till the
sound of “click”. Indicating the correct installing way, pressing
the both sides of removal button together, then can remove the
front bar.
Seat unit
adjusting lever
6
uppfällning och montering
4. Montering av barnets handtag: Som bilderna visar, Sätt i handtagets fästpunkt i uttaget på
barnvagnen tills ljudet av ”klick” hörs. För att lossa, tryck på båda sidorna av
borttagningsknapparna tillsammans och sedan kan du lossa barnets handtagsbygel.
5. Installation av sittenheten: Sittenheten kan installeras i båda riktningar, framåt och bakåt.
Som bilden visar: se till att båda två sidornas fästpunkter är parallella med varandra när du
klickar fast sittdelen, höger och vänster sida samtidigt tills ljudet av ett ”klick” hörs. Detta indi-
kerar korrekt installationssätt. Om demontering är nödvändig, tryck samtidigt in låsknapparna på
vänster och höger sida. Sedan kan du lyfta sitsen uppåt.
knapp för att lossa barnets handtag
knapp för att lossa sitsen

5.Installing the seat unit: The seat unit can be installed by both
two directions, forward and backward. As the picture shown:
ensuring fixed plug of both two sides parallel before using it,
then inserting into the fixed socket of both two sides separately,
right and left .till the sound of “click”. Indicating the correct
installing way. If the disassembling is necessary , pulling the
removal level on the left and right sides at the same time. Then
can lift upwards the seat unit.
Instruction for using
1.Using method of the safety belt: As the picture shown,attaching
the magnet buckle below two Parts driving automatically stay
togecher till the sound of “click”,then mount the top part onto
the below parts till hearing the sound of “click”driving
automatically by magnet force . Pressing both side buttons
inside at the same time and then releasing the buckle.Pulling
the below parts upward open it. Shortening: lengthening the top
ring belt, then lengthening the tail belt and lock it. Length
adjustment: lengthening the top ring belt, then shortening the
tail belt and lock it. Shoulder belt third gear adjustment:
fastening the seat belt.The buckle passes through the front of
the seat pocket until it passes through the back plate of the seat
pocket, and then the safety buckle is flat against the back of the
seat pocket. The back of the board enables the shoulder strap to
be reliably fixed on the seat pocket.
3
2
1
Top belt
End belt
7
användarinstruktioner
1. Användningsmetod för säkerhetsbältet: Som bilden visar, fäster du magnetspännet under de
två övre selarna som automatiskt förenas ihop tills ljudet av ”klick” hörs, montera sedan den
övre delen på selarna nedan tills du hör ljudet av ett ”klick” igen.
Tryck på båda sidoknapparna samtidigt och släpp sedan spännet. Öppna det genom att dra
delarna under uppåt. Förkortning: förlängning av det övre ringbältet, förläng sedan bakremmen
och lås det. Längdjustering: förläng det övre ringbältet, förkorta sedan bakremmen och lås det.
Axelbälte justering av tredje växeln: fastsättning av säkerhetsbältet. Spännet passerar genom
framsidan av sätesckan tills det passerar genom bakplattan på sätesckan, och sedan ligger
säkerhetsspännet plant mot baksidan av sätesckan. Baksidan av bakplattan gör att axelrem-
men kan fästas på ett tillförlitligt sätt.
övre bälte
nedre bälte

Brake bar
2.Front wheels rotating: As the picture shown: pulling the rotary
button to the outside, and the wheel is in the state of free rotating.
Front wheel orientation: as the picture shown. pulling the rotary
button to the inside, and the wheel is in the orientation state.
3.Rear wheel brake: As the picture shown, steping on the brake bar
like“1”position, indicating braked now, steping on the brake bar
like“2”position. the stroller can work normally now.
Attention: when the stroller is not moving, the stroller must be in
the braking state.
Instruction for using
8
användarinstruktioner
2. Svängbara framhjul: Som bilden visar: dra knappen utåt och då kan hjulet rotera fritt. (a)
Framhjulets orientering: som bilden visar. dra vridknappen inåt och hjulet är i fast körläge. (b)
3. Bakhjulsbroms: Som bilden visar, trampa på bromsen till ”1”-läget, vilket indikerar bromsad.
Tryck bromsen uppåt till ”2”-läget. vagnen är nu i olåst läge.
Observera: när vagnen inte körs måste vagnen vara i bromsat tillstånd.
parkeringsbroms

Brake bar
2.Front wheels rotating: As the picture shown: pulling the rotary
button to the outside, and the wheel is in the state of free rotating.
Front wheel orientation: as the picture shown. pulling the rotary
button to the inside, and the wheel is in the orientation state.
3.Rear wheel brake: As the picture shown, steping on the brake bar
like“1”position, indicating braked now, steping on the brake bar
like“2”position. the stroller can work normally now.
Attention: when the stroller is not moving, the stroller must be in
the braking state.
Instruction for using
8
Seat unit adjusting lever
4.Backrest angel adjusting: As the picture shown, pulling
angel adjusting level, up and down, three different angel can
be adjusted .
Instruction for using
9
användarinstruktioner
4. Justering av ryggstödet: Som bilden visar, dra i justerings spaken, justera sedan sitsen upp
och ner, tre olika lägen nns.
sittlägesjustering

Instruction for using
5.Handle bar adjusting: As the picture shown, pinching in the
height adjusting button, then can adjust the handle bar height.
6.Footrest adjusting: As the picture shown, pressing the
adjusting button at the same time, then can adjust the footrest
up and down.
Handle bar adjusting button
Seat unit adjusting lever
10
användarinstruktioner
5. Justering av handtaget: Som bilden visar, tryck in höjdjusteringsknappen, sedan kan du
justera handtagets höjd.
6. Justering av fotstöd: Som bilden visar ska du trycka på justeringsknapparna på båda sidor
samtidigt för att justera fotstödet upp och ner.
Justera handtagshöjd
Justera fotstödet

Folding instruction
1.Forward folding: as the picture shown. when the seat unit is
used in the forward direction. Pulling the handle bar into the
lowest position. Together pushing the footrest upwards.
Unlocking the button to the left with your thumb, holding the
handle and lifting the stroller up at the same time. Then stroller
can be folded.
Handle bar adjusting button
Unlocked button
11
ihopfällning
1. Ihopfällning: som bilden visar. när sittenheten används i framåtriktning. Justera handtaget
till det lägsta läget. Skjut fotstödet uppåt. Lås upp knappen (säkerhetslåset) till vänster med
tummen, håll i handtaget och lyft handtaget uppåt. Nu kan vagnen fällas ihop.
Justera handtagshöjd
Säkerhetslås

Folding instruction
2.Reverse folding: as the picture shown. when the unit is used
in reverse direction. Pulling the handle bar into the lowest
position, and together adjusting the backrest level , folding the
backrest forward, unlocking the button to the left with your
thumb, and holding the handle bar while you open it. Lifting up
the stroller and now can put it away.
Unlocked button
Seat unit adjusting lever
Handle bar adjusting button
12
ihopfällning
2. Omvänd ihopfällning: som bilden visar. när barnvagnen med sits används i omvänd riktning.
Justera handtaget till det lägsta läget, och justera ryggstödsnivån framåt, lås upp knappen
(säkerhetslåset) till vänster med tummen och håll i handtaget medan du drar det uppåt.
Vagnen kan nu fällas ihop.
Justera handtagshöjd
Sittlägesjustering
Säkerhetslås

Installing carrycot with stroller
13
①②
montera liggdel

Uninstalling carrycot with stroller
14
①②
④
demontera liggdel

Installing carseat with stroller
15
①②
montera bilstol

Uninstalling carseat with stroller
16
①②
④
demontera bilstol

underhåll
Underhållsinstruktioner
• För att säkerställa att ditt barn är skyddat från oavsiktlig skada, kontrollera och underhåll
barnvagnen regelbundet.
• Använd en torr borstreför att rengöra sitsens tyg och använd vål eller neutralt
rengöringsmedel för att rengöra andra delar.
• Förvara inte barnvagnen i direkt solljus och regn.
• Kontrollera regelbundet om det nns en skruv eller del som lossnat eller sitter löst, byt ut
skadade delar vid behov.
• Använd barnvagnen enligt bruksanvisningen för att inte orsaka onödig skada.
Uppmärksamhet
• Kontrollera om komponenterna är monterade korrekt och låsta innan de används.
• Låt inte barnet klättra i barnvagnen eller stå på sätet.
• Använd inte barnvagnen på ojämn mark, nära eld eller andra farliga områden eller föremål.
• Undvik att använda eller förvara vagnen i våt, kall eller hög temperatur och håll barnvagnen
borta från eld eller stark värme.

ultra instructions
specications
Size folded: Chassiweight: 4.6kg
W50cm x L64cm x H22cm
Size unfolded:
W58cm x L79-96cm H88-105cm

• Never leave your child unattended.
• Ensure that all the locking devices are engaged before use.
• To avoid injury ensure that your child is kept away when unfolding and folding this product.
• Do not let your child play with this product.
• Always use the restraint system.
• Check that the pram body or seat unit attachment devices are correctly engaged before use.
• This product is not suitable for running or skating.
• Lock the stroller when place and remove the children.
• The max-loading weight for the basket is 10 kg.
• Any load attached to the handle and/or on the back of the backrest and/or on the sides of
the vehicle will affect the stability of the vehicle.
• Do not carry more than one child in this baby stroller.
• Any extra accessories aren’t allowed without the seller’s permission, only use replacement
parts supplied and approved by the manufacture.
• This vehicle does not replace a cot or a bed. Should your child need to sleep, then it should
be placed in a suitable pram body, cot or bed.
• Never use this product on a stand.
• Use only on a rm, horizontal level dry surface.
• Not add another mattress on top of the mattress provided or recommended by the
manufacturers.
• The vehicle is tested for up to 32 kg or 4 years whichever comes rst, where 22 kg is for
the seat and 10 kg is the basket.
• Before use, always ensure all wheels are securely attached, chassis is correctly unfolded
and brake is working
WARNING!
WARNING:
• Never leave your child unattended.
• Ensure that all the locking devices are engaged before use.
• To avoid injury ensure that your child is kept away when
unfolding and folding this product.
• Do not let your child play with this product.
• Always use the restraint system.
• Check that the pram body or seat unit attachment devices are
correctly engaged before use.
• This product is not suitable for running or skating.
• Lock the stroller when place and remove the children.
• The max-loading weight for the basket is 5kg.
• Any load attached to the handle and/or on the back of the
backrest and/or on the sides of the vehicle will affect the
stability of the vehicle.
• Do not carry more than one child in this baby stroller.
• Any extra accessories aren’t allowed without the seller’s
permission, only use replacement parts supplied and
approved by the manufacture.
• This vehicle does not replace a cot or a bed. Should your child
need to sleep, then it should be placed in a suitable pram body,
cot or bed.
• Never use this product on a stand.
• Use only on a firm, horizontal level dry surface.
• Not add another mattress on top of the mattress provided or
recommended by the manufacturers.
• The vehicle is suitable up to 22 kg or 4 years whichever comes first.
2
Seat measurements:
Total length 91cm, Backrest height 50cm, Seat width 33cm
Carrycot inner measurements:
Length 75cm, Width 35cm, Height 22cm

Brake bar
Handle bar
adjusting
button
Front bar
Basket
Seat unit
adjusting lever
4
Parts number
Fold hook
Parts number
Handle bar
Footrest
adjusting button
Rear wheels
Canopy removal
button
Canopy
Shoulder pad
Safety belt
Front wheels
3
ultra parts
Canopy
Handle bar
Front bar release button
Footrest adjustment
Rear wheels
Brake bar
Handle bar
adjustment
Front wheel
removal button
Shoulder Pad
Safety belt
Front wheels
Seat adjustment lever
Front bar
Basket
Folding hook
Table of contents
Other Crescent Stroller manuals
Crescent
Crescent Performance User manual
Crescent
Crescent DIVA User manual
Crescent
Crescent twist User manual
Crescent
Crescent classic User manual
Crescent
Crescent infinity S User manual
Crescent
Crescent Nordic XT User manual
Crescent
Crescent trike User manual

Crescent
Crescent compact User manual
Crescent
Crescent Comfort User manual
Crescent
Crescent duo lightway User manual
