Cromtech Brumby CTG3000i User manual
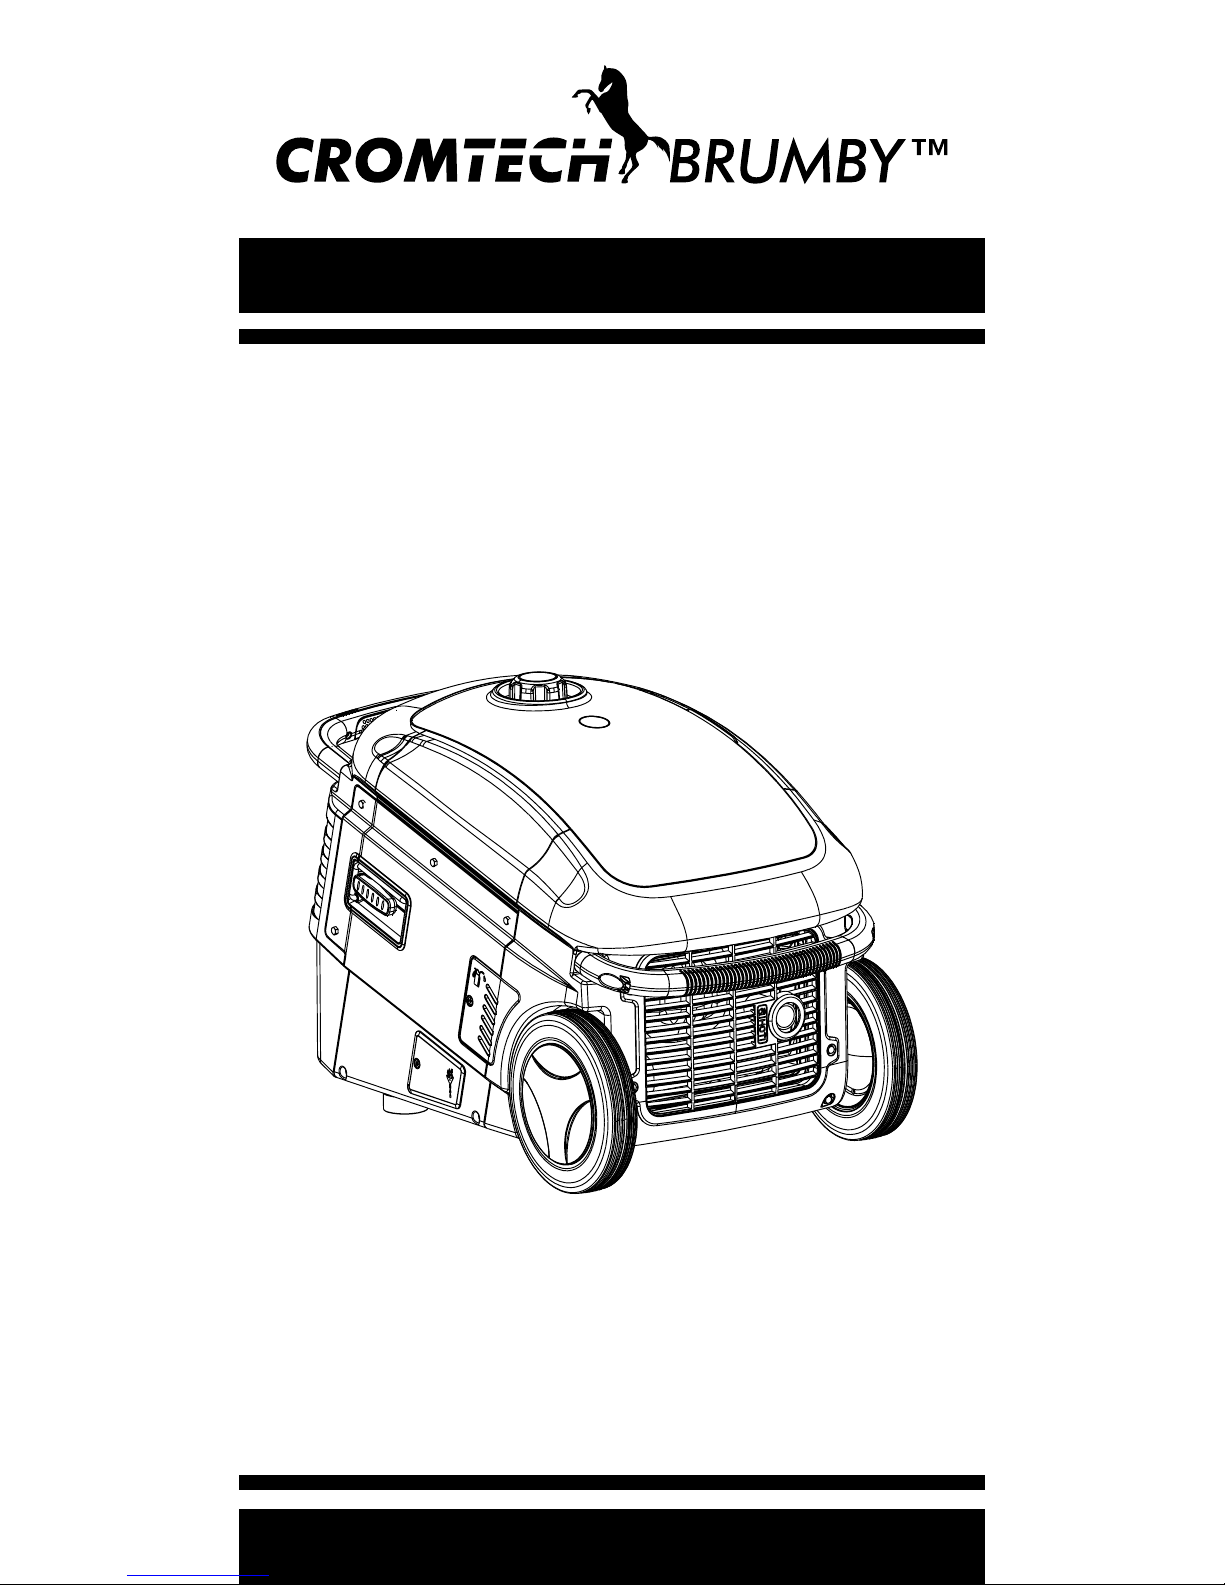
3.0kw Portable Petrol
Inverter Generator
MODEL CTG3000i
PLEASE READ THIS MANUAL
CAREFULLY BEFORE USING
OWNER’S MANUAL
Thank you for purchasing your Cromtech Brumby™
3.0kw portable petrol inverter generator.
This manual provides informaon of the operaon and
maintenance of this generator. Please read this manual
carefully before operang machine.
For any quesons regarding operaon or maintenance,
please consult your local service agent.
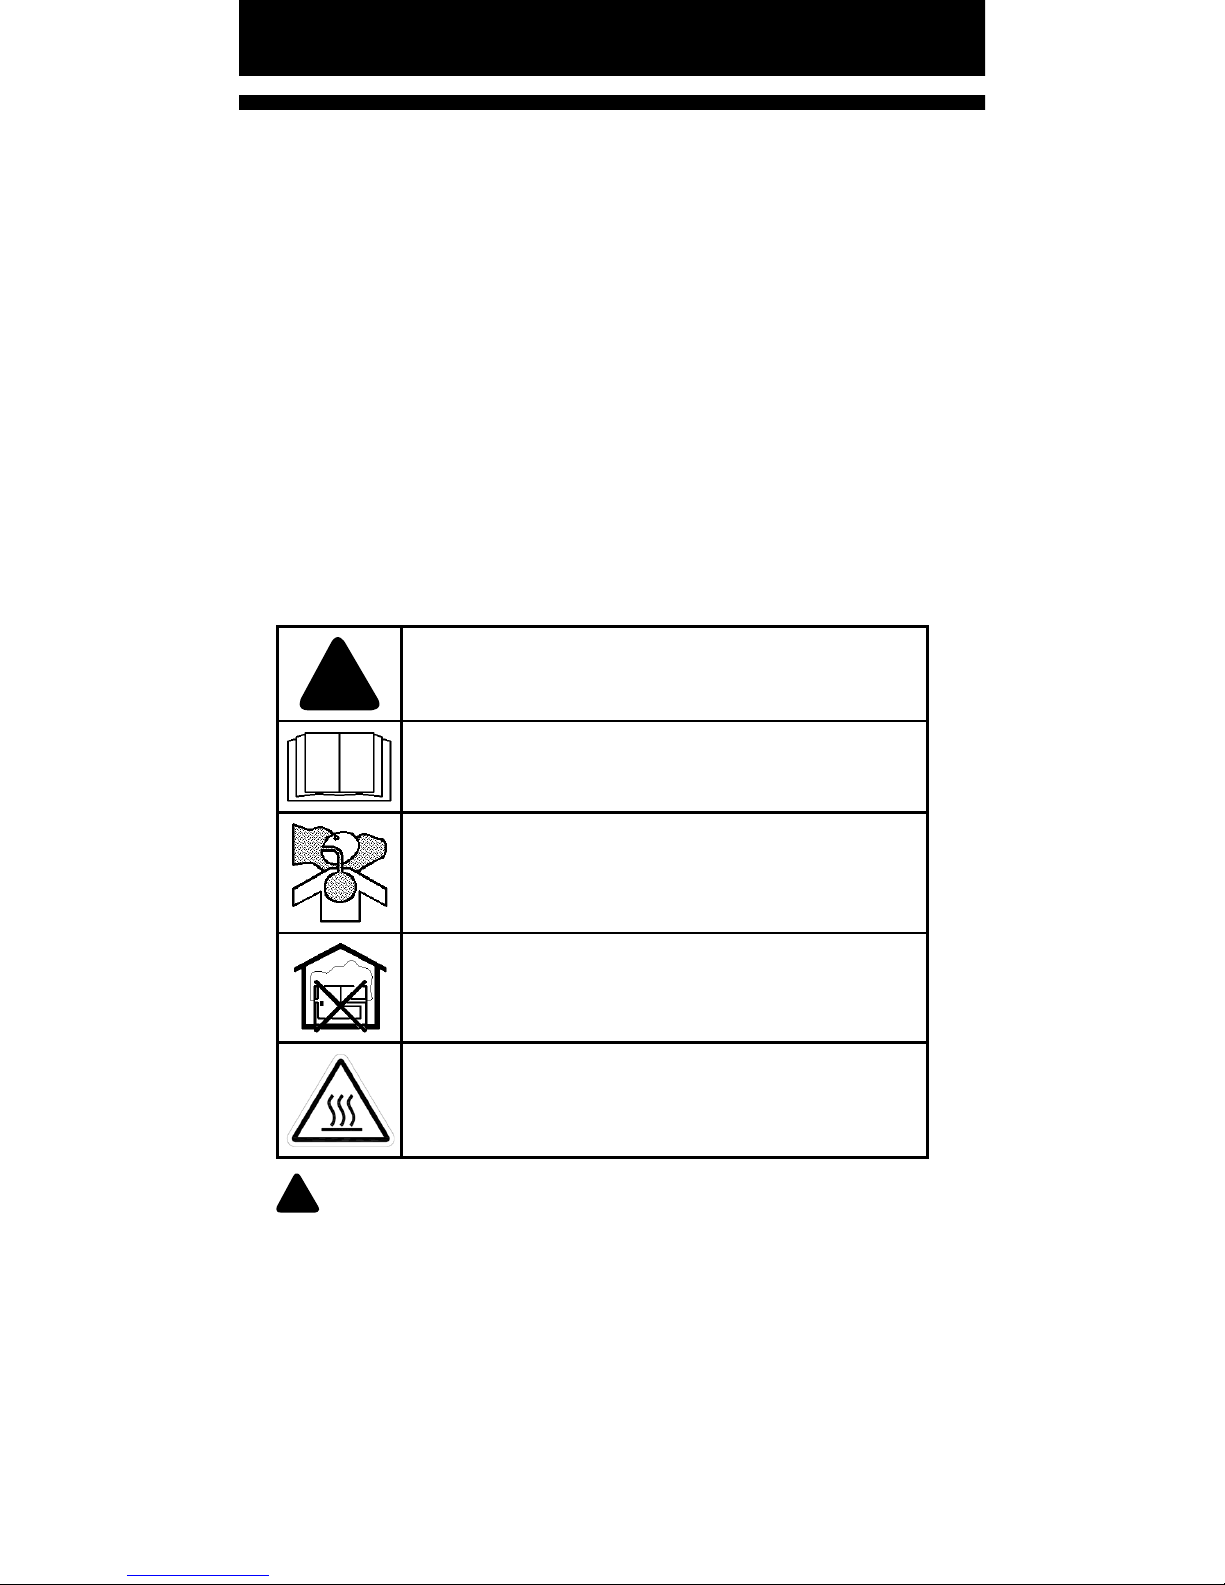
IMPORTANT ICONS
Important informaon is disnguished by the nocaons
below. The Safety Alarm Symbol ( !) alerts you to
potenal hazards. Please obey all safety informaon in the
symbol to avoid any possible injury or even death.
!WARNING: - The WARNING text indicates a
hazardous situaon, which will lead to severe injury or
death if not avoided.
!NOTICE: The ‘NOTICE’ text indicates special
precauons to avoid damage to this machine or other
property.
!NOTE: The ‘NOTE’ text provides important
informaon to simplify operaon.
!WARNING: PLEASE READ AND UNDERSTAND THIS
MANUAL BEFORE OPERATING THE GENERATOR.
!NOTE: The manufacturer of this generator
!
Pg. 2

INDEX:
Consumer Advice ........................................................ 5
Quick Start .................................................................... 6
Pre-Operaon ............................................................. 6
Operaon .................................................................... 7
Shutdown ................................................................... 7
Extend and Lock Handle .............................................. 8
Retract and Lock Handle ............................................. 8
DIagram handles ......................................................... 9
Ensure Safe Operaon ................................................. 10
Symbols Meanings ...................................................... 11
Baery Charging Safety Instrucons ........................... 12
Charging baery when located in vehicle ................... 12
Charging baery when out of vehicle ......................... 13
Safety Instrucon Labels ............................................. 14
Control Panel .............................................................. 17
Check the Engine Oil Level .......................................... 18
Engine Oil Capacity ..................................................... 18
Check the Fuel Level ................................................... 20
Fuel Tank Capacity ...................................................... 21
Start the Engine .......................................................... 22
High Altudes ............................................................. 23
Operang at Extreme Temperatures .......................... 23
Generator Usage ......................................................... 24
Digital Display ............................................................. 25
AC Applicaon ............................................................ 26
Generator Overload ................................................... 26
Overspeed Protecon ................................................ 27
DC Applicaon ............................................................ 28
Charging External Baeries ........................................ 28
Low Oil Alarm System ................................................ 29
Economy Switch ......................................................... 30
Stopping the Engine ................................................... 30
Pg. 3

Maintenance Schedule Table ....................................... 32
Changing Oil ................................................................. 33
Air Cleaner Check/Clean .............................................. 35
Spark Plug Service ........................................................ 36
Spark Arrestor Maintenance ........................................ 37
Transporng the Generator ......................................... 38
Short Term Storage ...................................................... 38
Long Term Storage ....................................................... 38
Generator Upkeep ....................................................... 39
Engine will not start ..................................................... 40
Appliance does not operator ....................................... 40
Generator has no output ............................................. 41
Standard Features ........................................................ 43
Applicaons ................................................................. 43
Industry ........................................................................ 43

WARRANTY
CROMTECH™, CROMTECH OUTBACK™ and CROMTECH BRUMBY™ are
registered trademarks of Crommelins Machinery. Crommelins Machinery
warrants their goods against defects in materials and workmanship under
normal use and service.
The Crommelins Machinery warranty does not cover fair wear
commensurate with the age of the product, any damage caused by
accident, abuse, misuse, neglect or failure to observe proper operang
instrucons or proper machinery maintenance as described in the
instrucon manual.
It is the owner’s responsibility to regularly maintain a product in
accordance with the owner’s manual and only use the equipment for its
designed purpose.
Our goods come with guarantees that cannot be excluded under the
Australian Consumer Law. You are entled to a replacement or refund for
a major failure and for compensaon for any other reasonably foreseeable
loss or damage. You are also entled to have goods repaired or replaced if
the goods fail to be of acceptable quality and the failure does not amount
to a major failure.
CONSUMER ADVICE
Any claim under these warranes must be made in the warranty period
from the date of purchase of the product.
To make a claim under the warranty, you must return the product (with
proof of purchase) to the place of purchase or the closest warranty agent.
There are over 185 naonal authorised service/repair agents available, visit
www.crommelins.com.au for their details and locaons.
Where a failure does not amount to a major failure, Crommelins Machinery
is entled to choose between providing you with a repair, replacement or
refund. To obtain compensaon, you would need to provide documentary
evidence of the loss or damage suered, and documentary evidence that
such loss or damage was a reasonably foreseeable consequence of a failure
by Crommelins Machinery to comply with a consumer guarantee under the
Australian Consumer Law.
Crommelins Operaons Pty Ltd trading as Crommelins Australia
and Crommelins Machinery
CROMMELINS MACHINERY:
Ph: (08) 9350 5588 Fax: (08) 9451 6381
[email protected]om.au
www.crommelins.com.au
PO Box 352, BENTLEY WA 6982
ABN 11 008 889 656

QUICK START GUIDE
!
• Generators produce carbon monoxide — a poisonous,
colorless, odorless gas that can cause death or serious
injury.
• Always operate on a level surface.
• Keep away from rain, snow or other wet condions
• Keep away from ammable materials when refueling.
• Do not run generator for extended periods with no
load or minimal load (eg. when charging baeries or
powering low waage equipment such as TVs and
Radios). This may cause premature spark plug failure,
excessive carbon build up or high oil consumpon. To
prevent this, run the generator periodically with an
increased load (More than 50% of generator capacity).
(Full instrucons pg. 18 - 20)
• ADDING OIL - Add oil by removing the oil ll access
door and inspecng the dipsck. Fill the oil reservoir
with 20.3 oz (600mL) of oil, or to the full mark on the
dipsck.
• Use an appropriate grade, premium quality, 4-stroke
engine oil (synthec or convenonal).
• Use SAE 10W-30 or 15W-30 viscosity oil unless
operang at ambient temperatures below 32° F (0° C).
• ADDING FUEL - Carefully add regular unleaded
automove gasoline. To avoid spilling fuel, use care
to not ll too quickly or over ll. Avoid geng dirt,
dust, or water in the fuel tank. Do not use a blend that
contains more than 10% ethanol. Do not use gasoline
containing methanol.
• Use unleaded fuel with an octane rang of 87 or higher.
!
increases.
On cooler days you won’t see much expansion, but on
warmer days the fuel in the tank will expand more. Make
sure that you leave extra room at the top of the tank when
you ll it, to provide for this expansion.
!CAUTION: Do not add 2-stroke oil to your fuel. Doing so
will void your warranty.
Pg. 6

Pg. 7
OPERATION (Full instrucons pg. 22 to 30)
!
!NOTE: Turn on the fuel valve.
1. Push the engine switch on the control panel to the
“ON” posion (Refer to page 17).
2. Pull the choke lever out to the “START” posion.
3. Pull the starter grip lightly unl resistance is felt, then
pull briskly out. Repeat unl the engine starts.
4. Push the choke lever back to the “RUN” posion.
5. The green “RUN” light will illuminate when the
generator is ready for use before connecng any
loads.
6. Make sure that all appliances to be connected have
been switched o and are in good working order.
Conrm that the combined electrical rang of the
appliances does not exceed that of the generator.
7. Connect the appliance to the appropriate receptacle
on the generator’s control panel.
8. To minimize fuel consumpon and noise, push the
economy switch to the “ON” posion. This seng
regulates the engine’s speed so that it matches
the needs of the connected loads. Do not use the
economy seng if you are connecng items with
electric motors that have a high amperage draw
during startup, or with appliances that cycle on and
o rapidly.
SHUTDOWN
!
1. Turn o all connected appliances.
2. Push the engine switch on the control panel to the
“OFF” posion.
3. Turn the fuel valve o.

USING THE HANDLES
!
This generator includes two (2) handles. A xed handle
is located on the rear of the generator, and a telescoping
handle is located on the front of the generator, above the
control panel.
The xed handle is used for liing the generator, if needed.
The telescoping handle is used to move the generator
wheelbarrow-style along smooth, even terrain. Always
operate on a level surface.
!
You should also unplug all cords connected to the generator
to prevent a tripping hazard and/or damage to the cords or
receptacles. Ensure that the telescoping handle is properly
stowed and locked when it is not being used to move the
generator.
EXTEND AND LOCK HANDLE
1. Press the unlocking buon in the middle of the handle.
2. While the buon is pressed, pull the bar outward from
the generator unl it is fully extended.
3. Release the buon, locking the handle in place.
RETRACT AND LOCK HANDLE
1. Press the unlocking buon in the middle of the handle.
2. While the buon is pressed, push the handle straight
into the body of the generator unl it booms out.
3.Release the buon, locking the handle in place.

V
Hz
Kw
V
Hz
Kw
V
Hz
Kw
V
Hz
Kw
V
Hz
Kw
V
Hz
Kw

SAFETY INFORMATION
!
• Read and understand this owner's manual before
operang the generator. Failure to do so could result in
personal injury or equipment damage.
• Exhaust gas contains poisonous carbon monoxide.
Never run the generator in an enclosed area
• Be sure to provide adequate venlaon
• The muer becomes very hot during operaon and
remains hot for several minutes aer stopping the
engine.
• Be careful not to touch the muer while it is hot.
• Let the engine cool before storing the generator
indoors.
ENSURE SAFE OPERATION
!
• Keep away from naked ames when refueling the
generator.
• Wipe up spilled gasoline at once.
• This generator is not intended, nor designed, for use
as a standby power supply, or to be connected to an
automac transfer switch (ATS); it should never be
used as such. Severe property damage and/or severe
personal injury or death may result. Such back feed
may electrocute ulity company workers or others who
contact the lines during a power outage. When ulity
power is restored the generator may explode, burn, or
cause res in the building’s electrical system.
• To avoid accidents or equipment damage, always make
a pre-operaon inspecon before you start the engine.
• Place the generator at least 3 (1 m) away from
buildings or other equipment during operaon.
• Operate the generator on a level surface. If the
generator is lted, fuel spillage may result.
• Know how to stop the generator quickly and
understand the operaon of all of the controls. Never
permit anyone to operate the generator without
proper instrucons.
• Keep children and pets away from the generator when
it is in operaon.
• Keep away from moving parts while the generator is
running.
• Generators are a potenal source of electrical shocks
when misused; do not operate with wet hands.
• Do not operate the generator in rain or snow and do
not let it get wet.
• Do not install this generator inside a compartment.
Doing so may lead to overheang and consequently,
re. It may also lead to CO poisoning and death by
asphyxiaon.
• Do not modify the enclosure of this generator.
SYMBOL MEANINGS
(Refer to SAFETY INFORMATION for more details. Page 7)
!Aenon! Become alert!
Your safety is important!
Read the manual before operaon.
Be careful of poisonous exhaust.
Never operate the machine in a closed area.
Avoid touching hot surfaces, such as engine
and muer.
!
interference.

BATTERY CHARGING SAFETY INSTRUCTIONS
1. Save these instrucons. This manual contains
important safety and operang instrucons.
2. Working in the vicinity of a lead-acid baery is
dangerous. Baeries generate explosive gases during
normal baery operaon. For this reason it is of the
utmost importance that each me before using your
charger, you read and follow the instrucons provided
exactly.
3. To reduce risk of baery explosion, follow these
instrucons and those marked on the baery.
4. Never smoke or allow an open spark or ame in the
vicinity of the baery or engine.
5. Use charger for charging a lead-acid baery only. It is
not intended to supply power to an extra-low-voltage
electrical system or to charge dry-cell baeries.
Charging dry-cell baeries may cause them to burst
and cause injury to persons and damage to property.
6. Never charge a frozen baery.
7. If it is necessary to remove baery from vehicle to
charge it, always remove grounded terminal from
baery rst. Make sure all accessories in the vehicle
are o in order to prevent an arc.
8. Study all baery manufacturer’s specic precauons
such as removing or not removing cell caps while
charging and recommended rates of charge.
9. For a charger having an output voltage selector switch,
refer to the car owner’s manual in order to determine
the voltage of the baery and to make sure the output
voltage is set at the correct voltage. If an output
voltage selector switch is not provided, do not use the
baery charger unless the baery voltage matches the
output voltage rang of the charger.
10. Never place the charger directly above or below
the baery being charged; gases or uids from the
baery will corrode and damage the charger. Locate
the charger as far away from the baery as DC cables
permit.
11. Do not operate charger in a closed-in area or restrict
venlaon in any way.
12. Connect and disconnect DC output clips only aer
seng any charger switches to the o posion and
removing ac cord from the electric outlet. Never allow
clips to touch each other.
CHARGING BATTERY WHEN LOCATED IN VEHICLE
1. Follow these steps when baery is installed in vehicle.
A spark near baery may cause a baery explosion. To
reduce risk of a spark near baery:
• Posion AC and DC cords to reduce risk of damage
by hood, door, or moving engine parts;
• Stay clear of fan blades, belts, pulleys, and other

parts that can cause injury to persons;
• Check polarity of baery posts. A posive (pos, p,
+) baery post usually has a larger diameter than a
negave (neg, n, –) post;
• Determine which post of baery is grounded
(connected) to the chassis. If negave post is
grounded to chassis (as in most vehicles), see item
(v). If posive post is grounded to the chassis, see
item (vi);
• For a negave-grounded vehicle, connect the
posive (red) clip from baery charger to posive
(pos, p, +) ungrounded post of baery. Connect the
negave (black) clip to vehicle chassis or engine
block away from baery. Do not connect clip to
carburetor, throle, fuel lines, or sheet-metal body
parts. Connect to a heavy gauge metal part of the
frame or engine block;
• Connect charger ac supply cord to electric outlet;
and
• When disconnecng charger, turn switches to
o, disconnect ac cord, remove clip from vehicle
chassis, and then remove clip from baery terminal.
CHARGING BATTERY OUT OF VEHICLE
1. Follow these steps when baery is outside vehicle. A
spark near the baery may cause a baery explosion.
To reduce risk of a spark near baery:
• Check polarity of baery posts. A posive (pos, p,
+) baery post usually has a larger diameter than a
negave (neg, n, –) post;
• Aach at least a 60 cm 6-gauge (awg) insulated
baery cable to a negave (neg, n, –) baery post;
• Connect the posive (red) charger clip to the
posive (pos, p, +) post of baery;
• Posion yourself and the free end of cable as far
away from baery as possible, then connect the
negave (black) charger clip to free end of the
insulated baery cable;
• Do not face baery when making nal connecon;
• Connect charger AC supply cord to electrical outlet;
and
• When disconnecng charger, always do so in
reverse sequence of connecng procedure and
break rst connecon while standing as far away
from baery as praccal.
2. The generator (stator winding) is isolated from the
frame and from the ac receptacle ground pin.
3. Electrical devices that require a grounded receptacle
pin connecon will not funcon if the receptacle
ground pin is not funconal.

LOCATION OF IMPORTANT LABELS
!
CTG3000i Series - Safety and instrucon labels
①
①
②
②
③
③
④
④
⑤
⑤
⑥
⑥

IDENTIFICATION
The machine idencaon series number is located on main
informaon label on the side on the Generator ①.
SERIAL NUMBER
___ ___ ___ ___ ___ ___ ___ ___ ___ ___ ___ ___ ___
(Write serial no.)

CTG3000i DIAGRAM
① Fuel cap
② Fuel gauge
③ Starter grip
④ Engine oil ll access door
⑤ Engine oil drain access door
⑥ Wheels
⑦ Telescoping handle
⑧ Control panel
⑨ Maintenance door
⑩ Stabalising rubber feet
V
Hz
Kw
①
⑦
②
⑧
③
⑨
④
⑩
⑤
⑥
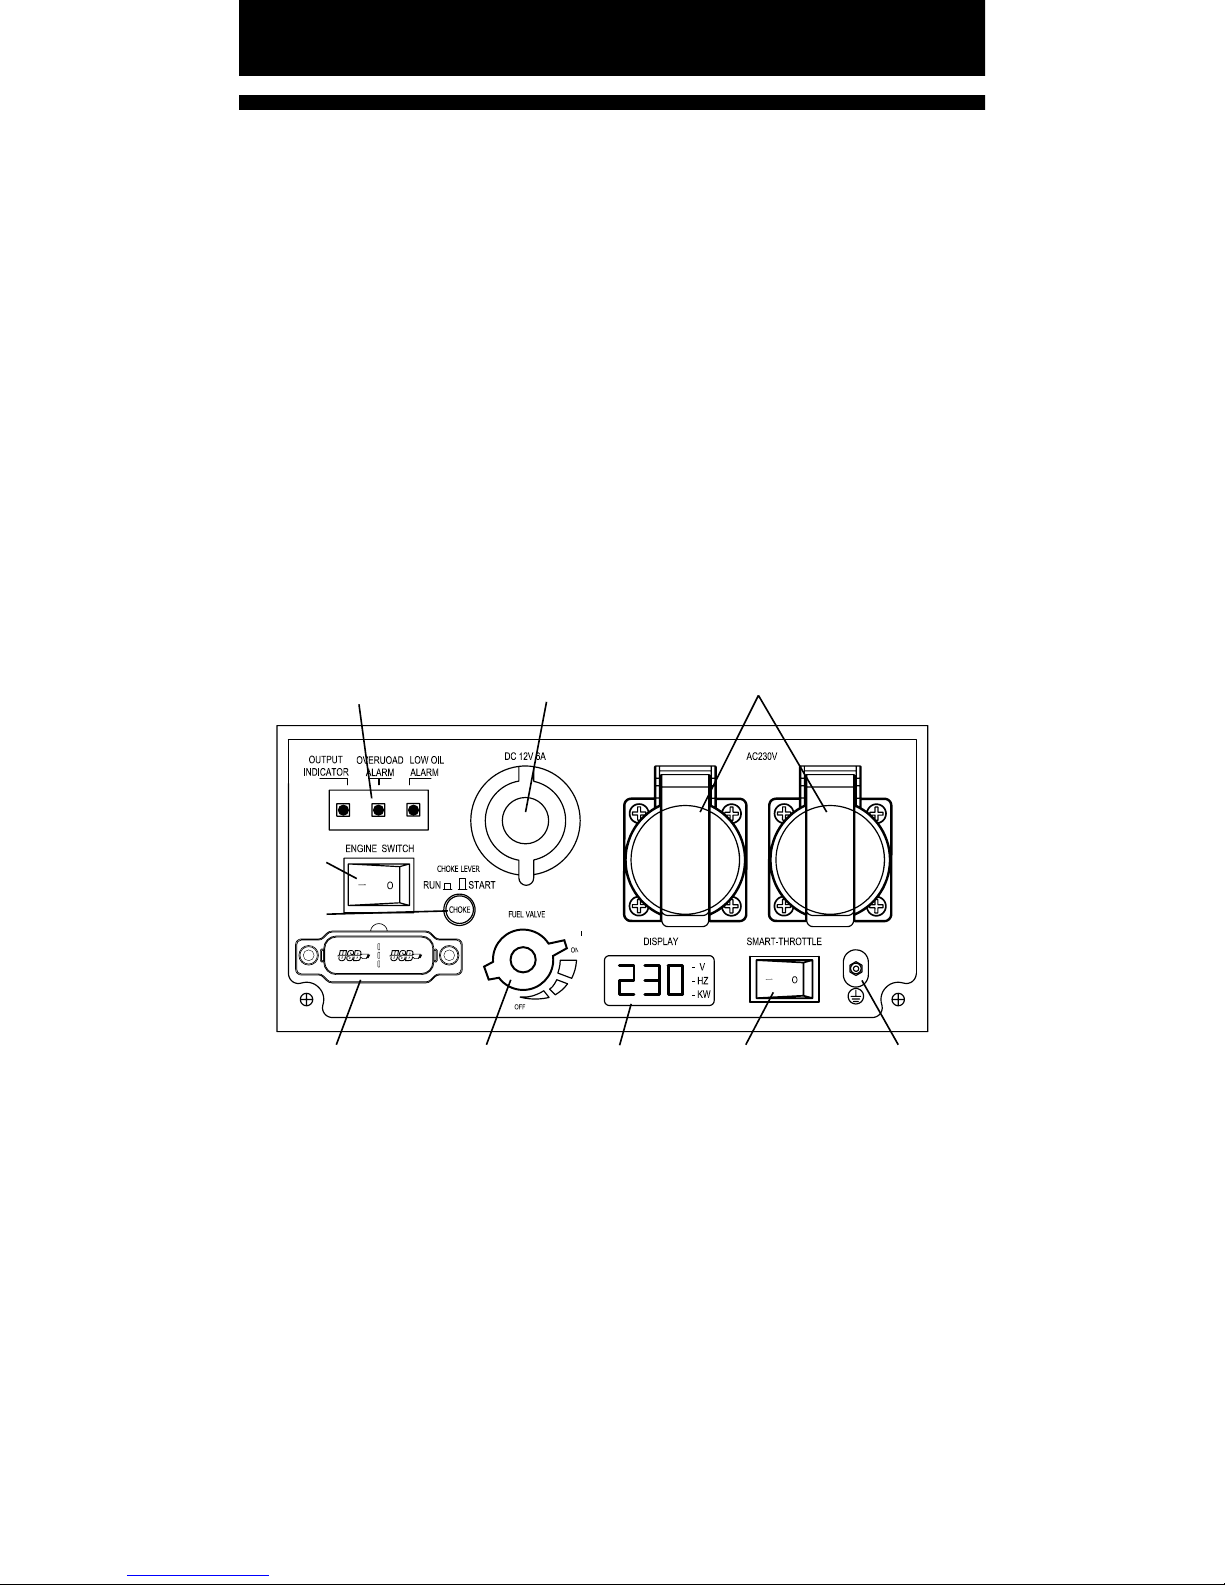
CONTROL PANEL
① LED Indicators
• Run light (Green)
• overload protecon (red)
• Low oil alarm (amber)
② DC 12V Baery charging outlet
③ Single Phase Outlets (2)
④ Ground terminal
⑤ Smart throle
⑥ Digital display
⑦ Fuel valve ON/OFF
⑧ USB Outlets
⑨ Choke lever
⑩ Engine switch ON/OFF
①
⑦
②
⑧
③
⑨
⑩
④⑤⑥
12V

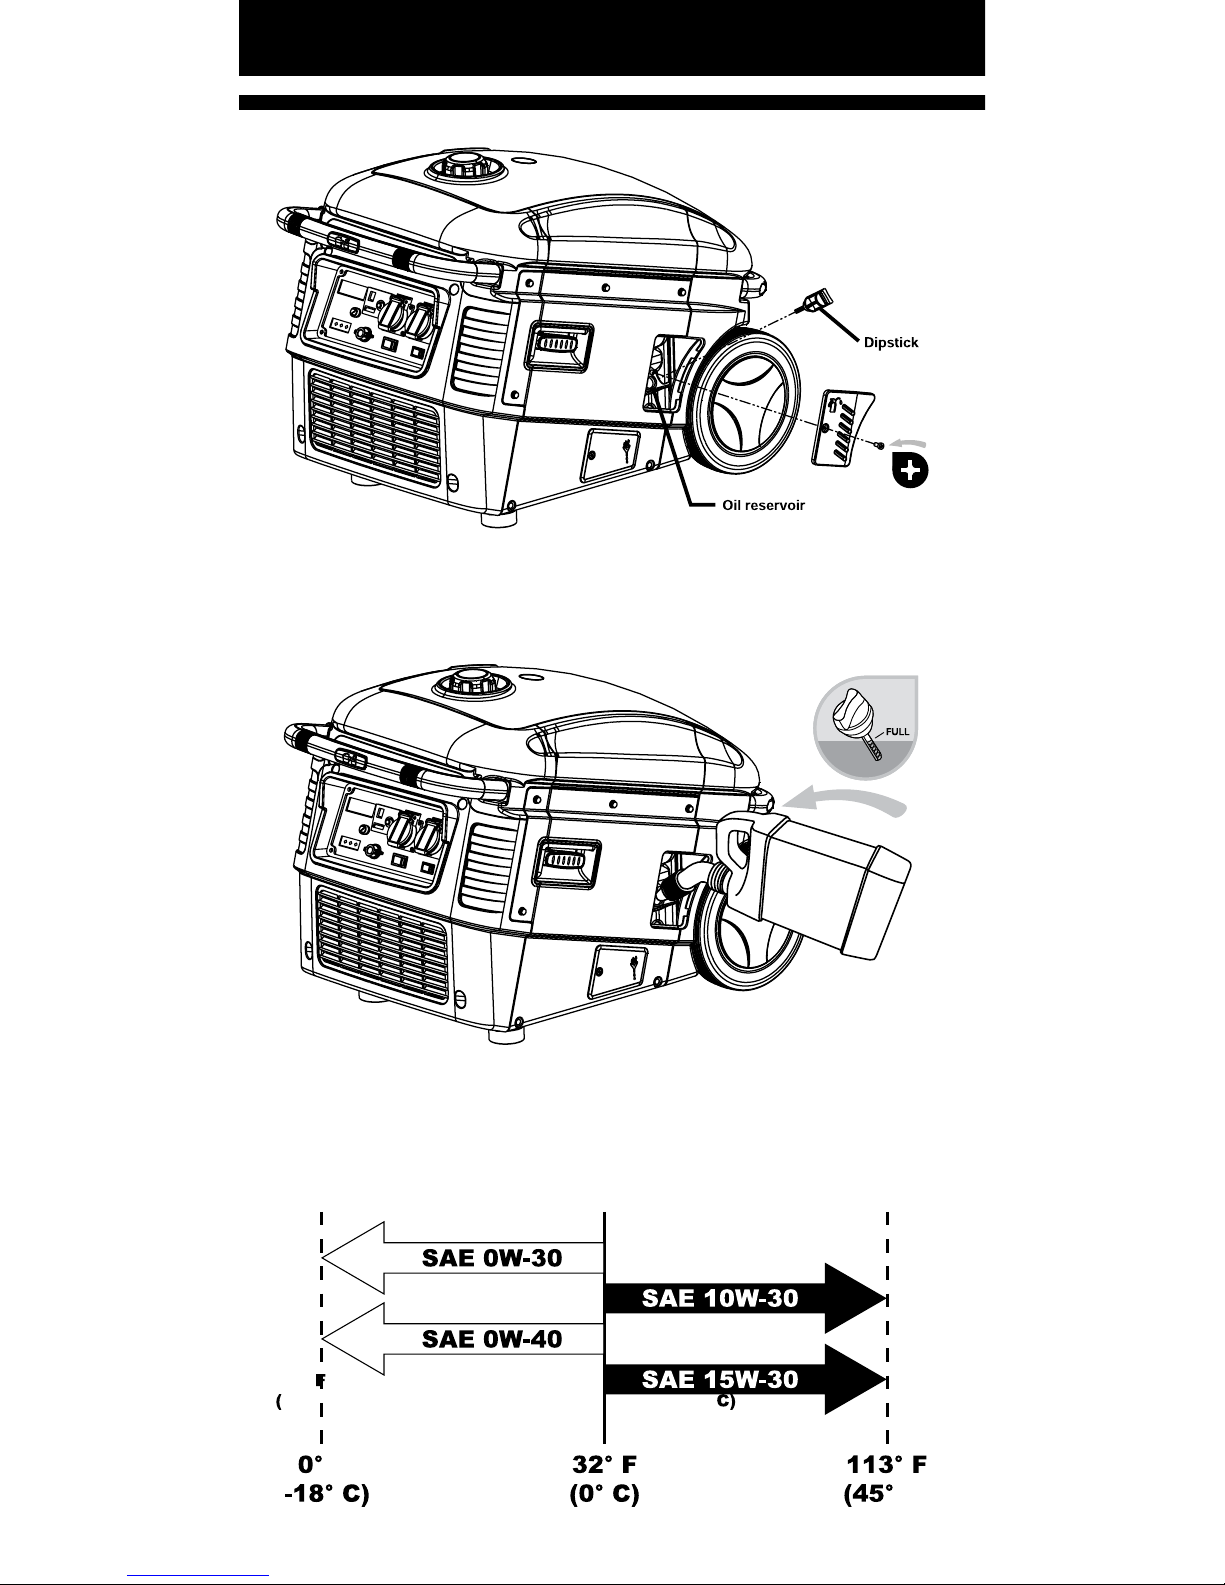
PRE-OPERATION CHECK
!WARNING: Be sure to check the generator is on a level
CHECK THE ENGINE OIL LEVEL
!NOTICE: Do not use non-detergent oil or 2-stroke
engine oil. It will void the warranty and will shorten the
engine's service life.
• Use a high-detergent, premium quality 4-stroke engine oil.
•
to clean manufacturing debris and
contaminaon during break-in.
• Use SAE 10W-30 or 15W-30 viscosity oil.
1. Loosen the oil ll access door screw and remove the
door.
2. Remove the dipsck, wipe it with a clean rag and reinsert
it into the ller neck, screwing it down completely.
3. Remove the dipsck again and check the oil level.
4. If the oil level is at or below the lower level on the
dipsck, rell with the recommended oil up to the top of
the upper level marking. Do not overll.
5. Reinsert the dipsck and be sure to screw it down unl it
is ght.
6. Reinstall the oil ll access door and ghten the screw
securely.
!
!
600ml
V
Hz
Kw

CHECK THE FUEL LEVEL
!
• Never use an oil/gasoline mixture or dirty fuel.
• Avoid geng dirt, dust or water in the fuel tank.
1. If the fuel level is low, rell the tank.
2. Aer refueling, ghten the fuel cap securely
!
of gasoline. Gasoline expands at a rate of 0.15939 cubic
inches per gallon for every degree (F) that the temperature
increases. On cooler days you won’t see much expansion,
but on warmer days the fuel in the tank will expand more.
Make sure that you leave extra room at the top of the tank
when you ll it, to provide for this expansion.
!
• Refuel in a well-venlated area with the engine
stopped. Keep away from ammable materials when
refueling
• Aer refueling, make sure the tank cap is closed
properly and securely.
• Be careful not to spill fuel when refueling. Spilled fuel
or fuel vapor may ignite. If any fuel is spilled, make sure
the area is dry before starng the engine.
• Avoid repeated or prolonged contact of fuel with skin
or breathing of fuel vapor
• KEEP OUT OF REACH OF CHILDREN.
GASOLINE CONTAINING ALTERNATE FUELS
Do not use a blend that contains more than 10% ethanol.
Do not use gasoline containing methanol. Octane rang of
87 or higher is recommended.
!
Pg. 20
Table of contents
Popular Portable Generator manuals by other brands


Tesla
Tesla TI4200 GPU-24-PFC user manual

Champion Power Equipment
Champion Power Equipment para link 500468-WL-EU Operator's manual

Eastern Tools & Equipment
Eastern Tools & Equipment TG3000 owner's manual

THORLABS
THORLABS VEG200 Series user manual

Toyama
Toyama TDMLG4004-T9C owner's manual

Gentherm
Gentherm 5220 operating manual


