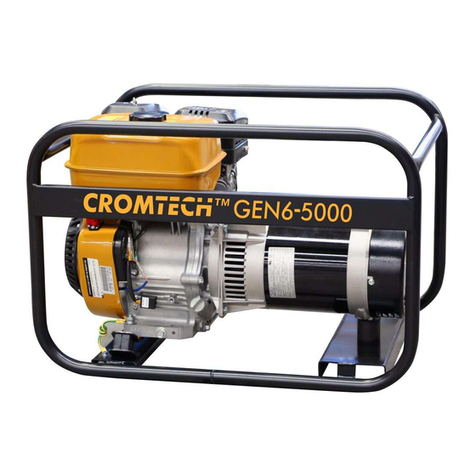
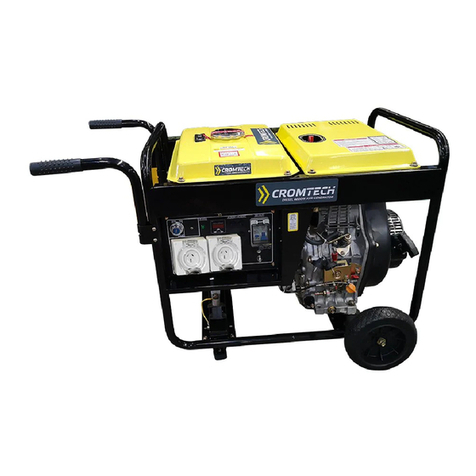
Cromtech TG6500VE User manual

CROMTECH AVR GENERATOR
OPERATION MANUAL
6500W AVR GENERATOR

Pg. 2
Thank you for purchasing a Cromtech Generator.
This manual provides understanding of the operaon
and maintenance of your generator. Please read this
manual carefully before operang.
For any quesons regarding operaon or maintenance,
please consult your local service agent. Find your local
service agent at www.crommelins.com.au.
IMPORTANT ICONS
Important informaon is disnguished by the nocaons
below. The Safety Alarm Symbol ( !) alerts you to
potenal hazards. Please obey all safety informaon in the
symbol to avoid any possible injury or even death.
!DANGER: - Indicates a hazardous situaon which, if
not strictly complied with, will result in substanal property
damage, serious injury or DEATH.
!WARNING: Indicates a hazardous situaon which, if
not strictly complied with, may result in property damage,
!CAUTION: Indicates a hazardous situaon which, if
not strictly complied with, could result in property damage
or injury.
!NOTE: Indicates important informaon to simplify
operaon and understanding.
!WARNING: PLEASE READ AND UNDERSTAND THIS
MANUAL BEFORE OPERATING THE PUMP.
!NOTE: We connually seek advancements in product
design and quality. Therefore, there may be minor
discrepancies in actual machine and the printed manual.

INDEX:
Warranty ..................................................................... 4
Safety Warnings .......................................................... 5
TG6500VE Features ....................................................... 8
Generator Specicaons .............................................. 9
Features ..................................................................... 9
Geng Started ............................................................ 10
Unpacking .................................................................. 10
Assembly .................................................................... 10
Baery and Parts ......................................................... 12
Operang Checklist ...................................................... 13
Operang area ........................................................... 13
Operang condion ................................................... 13
Check engine oil ........................................................... 14
Check fuel levels .......................................................... 15
Electrical Devices ......................................................... 16
Grounding ................................................................... 16
Starng the Generator ................................................. 17
Connecng electrical devices .................................... 19
Maximum capacity .................................................... 19
Waage reference guide ........................................... 20
Charging a baery ..................................................... 21
Stopping the generator ............................................. 22
General Maintenance .................................................. 23
Maintenance schedule .............................................. 24
Generator maintenance ............................................ 24
Engine oil ................................................................... 25
Air lter ..................................................................... 26
Spark plug .................................................................. 27
Spark arrestor ............................................................ 28
Engine speed ......................................................... 28
Adjustments .......................................................... 28
Troubleshoong ......................................................... 29
Storage and Transport ................................................ 29
Storage ..................................................................... 29
Long term storage .................................................... 29
Transport .................................................................. 30
Pg. 3

WARRANTY
CROMTECH™and CROMMELINS™ are a registered trademark of The
Crommelin Group. Crommelins warrants their goods against defects in
materials and workmanship under normal use and service.
The Crommelin Group warranty does not cover fair wear commensurate
with the age of the product, any damage caused by accident, abuse, misuse,
neglect or failure to observe proper operang instrucons or proper
machinery maintenance as described in the instrucon manual.
It is the owner’s responsibility to regularly maintain a product in accordance
with the owner’s manual and only use the equipment for its designed
purpose.
Our goods come with guarantees that cannot be excluded under the
Australian Consumer Law. You are entled to a replacement or refund for
a major failure and for compensaon for any other reasonably foreseeable
loss or damage. You are also entled to have goods repaired or replaced if
the goods fail to be of acceptable quality and the failure does not amount to
a major failure.
CONSUMER ADVICE
Any claim under these warranes must be made in the warranty period
from the date of purchase of the product.
There are over 185 naonal authorised service/repair agents available, visit
www.crommelins.com.au for their details and locaons.
To make a claim under the warranty, you must return the product (with
proof of purchase) to the closest warranty agent or to the place of purchase.
Where a failure does not amount to a major failure, Crommelins Machinery
is entled to choose between providing you with a repair, replacement or
refund. To obtain compensaon, you would need to provide documentary
evidence of the loss or damage suered, and documentary evidence that
such loss or damage was a reasonably foreseeable consequence of a failure
by The Crommelins Group to comply with a consumer guarantee under the
Australian Consumer Law.
Crommelins Operaons Pty Ltd trading as The Crommelin Group,
Crommelins Australia and Crommelins Machinery
THE CROMMELIN GROUP:
Ph: (08) 9350 5588 Fax: (08) 9451 6381
recepon@crommelins.com.au
www.crommelins.com.au
PO Box 352, BENTLEY WA 6982
ABN 11 008 889 656
Pg. 4

SAFETY WARNINGS
! WARNING: DO NOT Operate this generator unl
you have read ALL safety, operaon, and maintenance
instrucons listed in this manual.
• Failure to follow the instrucons may result in property
damage, INJURY or DEATH.
• The warnings and precauons discussed in this manual
cannot cover all possible condions and situaons that
may occur. It must be understood by the operator that
common sense and cauon are factors which cannot
be built into this product, but must be supplied by the
operator.
! WARNING: Modicaons to any part of the generator
is not allowed and may void your warranty.
! WARNING: This generator is intended for residenal
consumer use only. This generator is not designed for
permanent setup.
! WARNING: Before each use, check for loose or
damaged parts, signs of oil or fuel leaks, and any other
condion that may aect proper operaon. Repair or
replace all damaged or defecve parts immediately.
• Locate all operang controls and safety labels.
• Operate only on level surfaces.
• DO NOT expose generator to excessive moisture, dust,
or dirt.
• Keep all safety guards in place and in proper working
order at all mes.
• DO NOT allow any material to block the cooling slots.
• DO NOT allow children or untrained persons to operate
the generang set.
• DO NOT run the generang set unaended. Turn o the
generang set before leaving the area.
!DANGER: FIRE OR EXPLOSION - Gasoline is highly
ammable and extremely explosive.
• Fire or explosion can cause severe burns or death.
• Keep ammable items away while handling gasoline.
• Fill fuel tank outdoors and in a well-venlated area with
the generator stopped.
• Always wipe o spilled fuel and wait unl the fuel has
dried before starng the generator.
Pg. 5

• DO NOT operate the generator with known leaks in the
fuel system.
• Use proper fuel storage and handling procedures. DO
NOT store fuel or other ammable materials nearby.
• Empty the fuel tank before storing or transporng the
generator.
• Keep re exnguisher handy and be prepared if a re
starts.
!DANGER: TOXIC FUMES - The exhaust of the generator
engine contains carbon monoxide, an odorless, colorless,
poison gas. Using engine indoors CAN KILL YOU!
• NEVER use generator inside any building or any kind of
enclosure, EVEN IF doors and windows are open.
• Place the generator in a well-venlated area and
consider wind and air currents when posioning the
generator
!DANGER: MOVING PARTS - Moving parts can cause
severe injury. Keep hands and feet away.
• DO NOT operate generator with covers, shrouds, or
guards removed.
• DO NOT wear loose-ng clothing, dangling drawstrings
or items that could become caught. Tie up long hair and
remove jewelry.
• NEVER place ngers, hands, or body near the engine
when it is running.
!DANGER: KICKBACK - Rapid retracon of the starter
cord will pull hand and arm towards the engine faster than
you can let go.
• Unintenonal startup could result in an injury.
!WARNING: HOT SURFACE - The running generator
produces heat. Severe burns can occur on contact.
• DO NOT touch generator while operang or just aer
stopping. Avoid contact with hot exhaust gases.
• Maintain at least three feet of clearance on all sides to
ensure adequate cooling.
• Combusble material can catch re on contact. Maintain
at least one metre of clearance from combusble
materials.
!WARNING: ACID (For types equipped with baery) - Be
careful when using any baery.
• Keep away from open ame, heat or spark.
• Baery will exhaust hydrogen while charging. Only
Pg. 6

charge a baery in a well venlated place.
• Avoid spilled baery acid. If contact with skin is made,
wash immediately with clean water.
!WARNING: ELECTRICAL SHOCK - This generator
produces powerful voltage and the electricity CAN KILL
YOU.
• This generator must be properly connected to an
appropriate ground to help prevent electric shock.
Failure to properly ground generator can result in
electrocuon, especially if the generator is equipped
with a wheel kit. Consult an electrician for local
grounding requirements.
• To reduce the risk of electrical shock, DO NOT use
electrical cords that are worn, frayed, bare or otherwise
damaged.
• DO NOT touch bare wires or receptacles.
• DO NOT operate generator in wet weather. Keep the
generator dry.
• DO NOT handle generator or electrical cords while
standing in water, while barefoot, or while hands or feet
are wet.
• DO NOT allow unqualied persons or children to operate
or service the generator.
Pg. 7

TG6500VE FEATURES & CONTROLS
Pg. 8
❶ Fuel cap
❷ Fuel level indicator
❸ Fuel tank
❹ Frame
❺ Wheels
❻ Cylinder head
❼ Muer guard
❽ Push handle
❾ Air lter
❿ Recoil starter
⓫ Support bracket
⓬ Fuel switch
⓭ Baery
⓮ Control panel
⓯ Engine switch
⓰ DC Baery charging
⓱ DC Overload switch
⓲ RCD Circuit breaker
⓳ AC Overload reset buon
⓴ DC Overload reset buon

GENERATOR SPECIFICATIONS
Model TG6500VE
Max. Output (W) 6500w
Cont. Rated Output (W) 6000w
Rated Voltage 230V / 50Hz
Power Factor 1.0
Engine Cromtech
Engine Features OHV, air cooled
Displacement 420cc
Fuel Type Petrol
Fuel Tank 25L
Oil Capacity 1.1L
Decibels at 7m (db) 74db
Weight (kg) 87kg
Packaging (LxWxH) 715x545x605mm
FEATURES
• 2x Outlets (single phase - 15 Amp)
• Electric start and recoil start
• Fold-out handles
• Steel frame with large wheels
• 4-Stroke, air cooled, OHV engine
• Hours operaon, Hz, Voltage meter
• Baery charging (12V-8.3Amp)
• Low oil alarm, overload alarm, output indicator
• Large 25L fuel tank
• 1 Year Cromtech warranty
Pg. 9

GETTING STARTED
! NOTE: DO NOT Operate this generator unl you have
read ALL safety, operaon, and maintenance Instrucons
listed in this manual.
1. UNPACKING - Remove the generator from the shipping
carton
I. Place the shipping carton on a solid, at surface.
Ii. Carefully cut each corner of the carton box from top
to boom. Fold each side at on the ground.
Iii. Remove everything from the carton except the
generator.
2. ASSEMBLY - Your generator requires some assembly. If
you have any quesons regarding the assembly of your
generator, please have your model number and serial
number ready and consult your local dealer for help.
INSTALL WHEEL KIT - Put wheel stop pin through
wheel and mounng lug hole, then x it with the clip.
❶Clip
❷ Wheel
❸ Wheel stop pin
INSTALL SUPPORT BRACKET - Connect bracket nuts,
seats, support bracket and bolt to frame.
❶ Support bracket nut M8
❷ Damping seat nut M6
❸ Support bracket
❹ Damping seat
❺ Damping seat nut M6 x18
❻ Support bracket bolt M8 x16
Pg. 10

INSTALL THE HANDLE - Place the push handle in the
bracket. Push the pin through the bracket and handle
and x with the clip provided.
❶Clip
❷ Pin
❸ Push handle
ATTACH NEGATIVE BATTERY WIRE - The sealed baery
on the generator is fully charged and pre-installed
except for the negave (black) baery cable.
1. Cut o e wrap securing loose end of negave
(black) cable.
2. Connect the negave (black) baery cable to
the negave(-) terminal on the baery.
3. Verify if it is correct and secure the connecons
between the baery and generang set.
❶ Posive (+) terminal (red)
❷ Negave ( - ) terminal (black)
Pg. 11
SUPPORT
BRACKET

OPERATING CHECKLIST
1. OPERATING AREA - This generator is for outdoor use.
• Only use OUTSIDE and place the generator in a
well-venlated area.
• Only operate the generator on a at, level surface
and in a clean, dry operang environment.
• Allow one metre clearance on all side of the
generator while operang it outdoors.
• Generators used for construcon sites may be
subject to addional rules and regulaons.
! DANGER: TOXIC FUMES - The exhaust of the
generang set contains carbon monoxide, an odorless,
colourless, poison gas. Using engine indoors CAN KILL
YOU.
• NEVER use inside any building or any kind of
enclosure, EVEN IF doors and windows are open.
• Place the generator in a well-venlated area and
carefully consider wind and air currents when
posioning generator.
2. OPERATING CONDITION - Check for loose or damaged
parts, signs of oil or fuel leaks, and any other condion
that may aect proper operaon. Repair or replace all
damaged or defecve parts immediately.
• Remove any excessive dirt or debris, especially
around the muer and recoil starter.
• DO NOT move or p the generator during operaon.
Use generator only for intended uses. If you have
quesons about intended use, ask your local dealer.
! DANGER: Failing to correct problem(s) before
operaon could result in property damage, serious
injury or DEATH.
Pg. 12

CHECK ENGINE OIL
! WARNING: This engine is not lled with oil from the
factory. Any aempt to crank or start the engine before it
has been properly lled (with the recommended type and
amount of oil) may result in engine damage and void your
warranty.
1. ENGINE OIL - Place the generator on a level surface with
engine stopped.
• Remove the dipsck and wipe it clean.
• Reinstall dipsck into tube; rest on oil ll neck, DO
NOT thread cap into tube.
2. Remove the dipsck again and check oil level. Level
should be at top of indicator on dipsck.
3. If lower, ll to the upper limit (marked with “H”) of the
dipsck with the recommended oil. Reinsert and fully
ghten the dipsck.
! WARNING: Oil is a major factor aecng
performance and service life of an engine. Use 4-stroke
automove oil SAE30.
! CAUTION: LEVEL GROUND - Operate generator
only on leveled surface. The engine is equipped with
a low oil sensor (applicable types) that will automac
stop the engine when the oil level falls below the safe
limit. To avoid the inconvenient of an unexpected
shutdown, ll to the upper limit and check the oil level
regularly.
Pg. 13

CHECK FUEL LEVELS
! CAUTION: Pressure can build up in the fuel tank.
Allow the generator to cool for at least two minutes before
removing fuel cap. Loosen the fuel cap slowly to relieve any
pressure in the tank
• ENGINE FUEL - With the engine stopped, check the fuel
level gauge. Rell the fuel tank if necessary.
• Use clean, fresh, regular unleaded gasoline only.
• DO NOT mix oil with gasoline.
• Be sure not to ll above the upper limit mark, always ll
to the level indicator, or ll to 25mm le from fuel tank
(to allow room for fuel expansion).
! DANGER: FIRE OR EXPLOSION - Gasoline is highly
ammable and extremely explosive. A re or explosion
can cause severe burns or death.
• Keep ammable items away while handling
gasoline.
• Fill fuel tank outdoors and in a well-venlated area
with the engine stopped.
• Always wipe o spilled fuel and wait unl the fuel
has dried before starng the engine.
• DO NOT operate the engine with known leaks in
the fuel system.
• Use proper fuel storage and handling procedures.
DO NOT store fuel or other ammable materials
nearby.
• Empty the fuel tank before storing or transporng
this engine.
• Keep re exnguisher handy and be prepared if a
re starts.
! CAUTION: NEVER use engine or carburetor cleaner
products in the fuel tank or permanent damage may occur.
• It is important to prevent gum deposits from forming
in fuel system, such as the carburetor, fuel lter, fuel
hose or tank during storage. Also, any alcohol-blended
fuels (called gasohol, ethanol or methanol) can aract
moisture, which leads to separaon and formaon of
acids during storage.
• Acidic fuel can damage the fuel system of an engine
while in storage. Be sure to review the Storage
instrucons.
Pg. 14

• Gasoline/Alcohol Blends: up to 10% alcohol, 90%
unleaded gasoline by volume is approved as a fuel.
Other gasoline/alcohol blends are not approved.
Eects of old, stale or contaminated fuel may void your
warranty.
! CAUTION: To minimise gum deposits in your fuel
system and to insure easy starng, do not use gasoline le
over from the previous season.
ELECTRICAL DEVICES
! NOTE: Disconnect all electrical devices from the
generator and switch o the AC circuit breaker before start
the engine.
• The generang set may be hard to start with electrical
devices.
GROUNDING
! WARNING: ELECTRIC SHOCK - Failure to properly
ground the generator can result in electric shock.
• The generator must be properly connected to an
appropriate ground. It helps prevent electrical shock
if a ground fault condion exists in the generator or in
connected electrical devices, especially when the unit is
equipped with a wheel kit.
• Proper grounding also helps dissipate stac electricity,
which oen builds up in ungrounded devices.
• A ground terminal on control panel generator has been
provided. For remote grounding, connect of a length of
heavy gauge(4mm) copper wire between the generator
ground terminal and a copper rod driven into the
ground.
• Your local state electrical codes may require proper
grounding of the unit. We strongly recommend that
you consult with a qualied electrician for grounding
requirements in your area.
Pg. 15

STARTING THE GENERATOR
1. Perform the operang checklist (page 12).
2. Turn the fuel valve to the ‘ON’ posion
3. Put the choke valve switch to ‘CLOSE’ posion
! NOTE: Choke posion for starng may vary
depending upon temperature and other factors. If re-
starng a warm engine, the choke should be le in the
HALF or OFF posion.
4. ELECTRIC START - Push the rocker ignion switch to
‘I’ run posion. Then push fully and hold switch in ‘II’
posion unl the engine is started. Aer the engine is
started, release the buon (It will return to the ‘I’ run
posion).
5. MANUAL START - Turn the rocker ignion switch to the
‘I’ run posion. Then take hold of the recoil handle and
slow pull unl there is a sense of resistance, and then
quickly pull to start.
! CAUTION: Ensure that the recoil rope is not
damaged and repair if required.
Pg. 16

! WARNING: Rapid retracon of the starter cord will
pull hand and arm towards the engine faster than you
can let it go. Unintenonal startup could result in an
injury.
! CAUTION: ENGINE FAILURE - If the engine fails to
start aer 3 aempts or stops aer starng; inspect
and ensure that the generator is placed on horizontal
surface and check the engine oil levels.
• DURING STARTING - DO NOT hold the ignion
switch in the ‘II’ posion for more than 5 seconds. It
is possible that it may damage the motor. If the unit
fails to start within rst me. Wait 10 seconds and
restart the procedure.
• DURING OPERATION - The baery supplies power
for the solenoid valve of the carburetor. When the
unit is turned o, make sure that the starng switch
is in the ‘O’ o posion otherwise the baery
voltage will be drained.
• LOW OIL ALERT - If the engine is equipped with
an engine oil alert, it is possible to prevent engine
starng when the oil is lower than the minimum
level.
• DURING RUNNING-IN - Rounely inspect the engine
oil. See maintenance secon for recommended
maintenance period/s.
6. Once the generator is operang stably, set the
choke valve to ‘OPEN’ posion.
7. The generator is now ready to be used.
! CAUTION: When connecng the generator with
electrical equipment. DO NOT start or stop the engine while
electrical equipment is in their ‘ON’ status.
Pg. 17

CONNECT TO ELECTRICAL DEVICES
! WARNING: This generator is ed with an RCD Circuit
Breaker. ALWAYS test RCD switch before every use.
! CAUTION: Inspect power cords for damage before
using. There is a hazard of electrical shock from crushing,
cung or heat damage.
1. Allow the engine to stabilise and warm up for a few
minutes aer starng.
2. Make sure the electrical devices are in their ‘OFF’
posion and the load current is not higher than the
maximum withstanding current of single socket.
MAXIMUM CAPACITY
! WARNING: DO NOT overload the generator. Exceeding
the capacity of generator can damage the generator and/or
electrical devices connected to it.
• You must make sure your generator can supply enough
rated(running) and surge (starng) was for the
electrical devices you will power at the same me.
Follow these simple steps to calculate the running and
starng was necessary for your purposes.
1. Select the electrical devices you will be powering at the
same me.
2. Calculate that the total amount of power you need
to run all devices is less than the rated output of the
generator. You may need to check the items rated
(running) was in their manuals.
3. Idenfy how many surge (starng) was you may need.
Surge waage is the short burst of power needed to
start electric motor-driven tools or appliances such as a
circular saw or refrigerator.
Pg. 18

! CAUTION: If connected devices overheat. Immediately
turn them o and disconnect from the generator.
! NOTE: AC OVERLOAD RESET BUTTON/S - If the AC power
outlet is overloaded, the AC circuit breaker will cut out the
power to the device. If tripped remove device/load and reset
buon.
! NOTE: Not all motors start at the same me, total surge
was can be esmated by adding only the electrical device(s)
with the highest addional surge was to the total rated
was from step 2.
WATTAGE REFERENCE GUIDE
ELECTRICAL EQUIPMENT RATED POWER (W)
Tablet computer 27” 120W
Energy saving globes 5-50W
Electric Cooker 1000W
Personal Computer (standard) 100-250W
Refrigerator (standard) 50-200W
Washing Machine 700W - 2000w (heat), 500w (spin)
Electric Fan 50W
Kele 1800W
2.0hp Air Condioner 1800W
Electric Welding Machine 2500W
Electric Hammer 1000W
Water Pump 800W
Pg. 19

CHARGING A BATTERY (APPLICABLE TYPES)
! WARNING: Baeries give o explosive hydrogen gas
while recharging. An explosive mixture will remain around
the baery for a long me aer it has been charged.
The slightest spark can ignite the hydrogen and cause an
explosion, resulng in blindness or other serious injury.
• Charge the baery only with baery charging sockets
provided
• Charge the baery in dry environment.
! WARNING: DO NOT allow smoking, open ame,
sparks or any other source of heat around a baery. Wear
protecve goggles, rubber apron and rubber gloves when
working around a baery.
• Baery electrolyte uid is an extremely causc sulfuric
acid soluon that can cause severe burns. If spill occurs
ush area with clear water immediately.
1. CHARGING VOLT BATTERIES - Check uid level in all
baery cells. If necessary, add ONLY dislled water to
cover separators in baery cells. DO NOT use tap water.
• If the baery is equipped with vent caps, make sure
they are installed and are ght.
• If necessary, clean baery terminals.
• Connect baery charge cable clamp with red handle
to the posive(+) baery terminal.
• Connect baery charge cable clamp with black
handle to the negave(-) baery terminal.
• Start engine. Let the engine run while baery
recharges.
• When baery has charged, shut down engine.
! WARNING: Use an automove hydrometer to
test baery state of charge and condion. Follow the
hydrometer manufacturer’s instrucons carefully.
Generally, a baery is considered to be at 100% state of
charge when specic gravity of its uid (as measured by
hydrometer) is 1.260 or higher.
Pg. 20
Table of contents
Other Cromtech Portable Generator manuals
