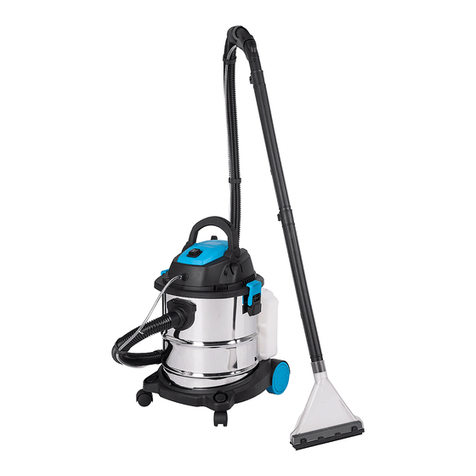
Crown CT42045 User manual


2
Content / Contenido / Содержание / Зміст / Мазмұны /
English
Explanatory drawings ������������������������������������������������������������������������������������������������������������ pages
General safety rules, instructions manual ����������������������������������������������������������������������������� pages
3 - 10
11 - 16
Español
Dibujos explicativos ������������������������������������������������������������������������������������������������������������ páginas
Recomendaciones generales de seguridad, manual de instrucciones ������������������������������ páginas
3 - 10
17 - 22
Русский
Пояснительные рисунки ������������������������������������������������������������������������������������������������ страницы
Общие указания по ТБ, инструкция по эксплуатации ������������������������������������������������� страницы
3 - 10
23 - 28
Украïнська
Пояснювальні малюнки ��������������������������������������������������������������������������������������������������� сторінки
Загальні вказівки по ТБ, iнструкція з експлуатації ��������������������������������������������������������� сторінки
3 - 10
29 - 34
Қазақ тілі
Түсіндіргіш әлеміштер �������������������������������������������������������������������������������������������������������� беттер
Жалпы қауіпсіздік жөніндегі ұсыныстар, пайдалану нұсқаулығы ���������������������������������������� беттер
3 - 10
35 - 40
����������������������������������������������������������������������������������������������������������������������������
����������������������������������������������������������������������������������������������������
3 - 10
41 - 45
�������������������������������������������������������������������������������������������������������������������������
��������������������������������������������������������������������������������������������
3 - 10
46 - 51
3

4

5

6

7

8

9

10

11
English
Noise information
Always wear ear protection if the sound
pressure exceed 85 dB(A).
Declaration of conformity
We declare under our sole responsibility that the prod-
uct described under "Power tool specications" is in
conformity with all relevant provisions of the direc-
tives 2014/30/EU, 2014/35/EU including their amend-
ments and complies with the following standards:
EN 55014-1:2017,
EN 55014-2:2015,
EN IEC 61000-3-2:2019,
EN 61000-3-3:2013+A1:2019,
EN 62233:2008,
EN 60335-1:2012+A11:2014+A13:2017+A1:2019+A2:
2019+A14:2019,
EN 60335-2-2:2010+A11:2012+A1:2003�
Certication Wu Cunzhen
manager
Merit Link International AG
Stabio, Switzerland, 28�01�2021
WARNING - To reduce the risk of injury,
user must read instruction manual!
General safety rules
WARNING! Read all safety warnings and
all instructions. Failure to follow the warn-
ings and instructions may result in electric
shock, re and / or serious injury.
Save all warnings and instructions for future refer-
ence.
The term "power tool" in the warniуngs refers to your
mains-operated (corded) power tool or battery-operat-
ed (cordless) power tool�
Work area safety
•Keep work area clean and well lit. Cluttered or
dark areas invite accidents�
•Do not operate power tools in explosive atmos-
pheres, such as in the presence of ammable liq-
uids, gases or dust. Power tools create sparks which
may ignite the dust or fumes�
•Keep children and bystanders away while oper-
ating a power tool. Distractions can cause you to lose
control�
Electrical safety
•Power tool plugs must match the outlet. Never
modify the plug in any way. Do not use any adapter
plugs with earthed (grounded) power tools. Un-
modied plugs and matching outlets will reduce risk
of electric shock�
•Avoid body contact with earthed or grounded
surfaces, such as pipes, radiators, ranges and
refrigerators. There is an increased risk of electric
shock if your body is earthed or grounded�
•Do not expose power tools to rain or wet condi-
tions. Water entering a power tool will increase the risk
of electric shock�
Power tool specications
All-purpose vacuum cleaner CT42045 CT42046
Power tool code [220-240 V ~50/60 Hz] 244978 244985
Rated power [W] 1000 1000
Amperage by voltage 220-240 V [A] 4�3 4�3
Vacuity [kPa] >16 >16
Air ow rate [m3/min] 1,7 1,7
Capacity [l] 15 20
Weight [kg]
[lb] 4,6
10�14
5,4
11�91
Safety class
Sound pressure [dB(A)] 78 78
Acoustic power [dB(A)] — —

12
English
•Do not abuse the cord. Never use the cord for
carrying, pulling or unplugging the power tool.
Keep cord away from heat, oil, sharp edges or
moving parts. Damaged or entangled cords increase
the risk of electric shock�
•When operating a power tool outdoors, use an
extension cord suitable for outdoor use. Use of a
cord suitable for outdoor use reduces the risk of elec-
tric shock�
•If operating a power tool in a damp location is
unavoidable, use a residual current device (RCD)
protected supply. Use of an RCD reduces the risk
of electric shock� NOTE! The term "residual current
device (RCD)" may be replaced by the term "ground
fault circuit interrupter (GFCI)" or "earth leakage circuit
breaker (ELCB)"�
•Warning! Never touch the exposed metal sur-
faces on gearbox, shield, and so on because touch-
ing metal surfaces will be interfered with the elec-
tromagnetic wave, thus causing potential injury or
accidents�
Personal safety
•Stay alert, watch what you are doing and use
common sense when operating a power tool. Do
not use a power tool while you are tired or under
the inuence of drugs, alcohol or medication. A
moment of inattention while operating power tools may
result in serious personal injury�
•Use personal protective equipment. Always
wear eye protection. Protective equipment such as
dust mask, non-skid safety shoes, hard hat, or hearing
protection used for appropriate conditions will reduce
personal injuries�
•Prevent unintentional starting. Ensure the
switch is in the off-position before connecting to
power source and / or battery pack, picking up or
carrying the tool. Carrying power tools with your n-
ger on the switch or energising power tools that have
the switch on invites accidents�
•Remove any adjusting key or wrench before
turning the power tool on. A wrench or a key left at-
tached to a rotating part of the power tool may result
in personal injury�
•Do not overreach. Keep proper footing and bal-
ance at all times. This enables better control of the
power tool in unexpected situations�
•Dress properly. Do not wear loose clothing or
jewellery. Keep your hair, clothing and gloves
away from moving parts. Loose clothes, jewellery or
long hair can be caught in moving parts�
•If devices are provided for the connection of
dust extraction and collection facilities, ensure
these are connected and properly used. Use of dust
collection can reduce dust-related hazards�
•Do not let familiarity gained from frequent use of
tools allow you to become complacent and ignore
tool safety principles� A careless action can cause
severe injury within a fraction of a second�
•Warning! Power tools can produces an elec-
tromagnetic field during operation� This field may
under some circumstances interfere with active or
passive medical implants� To reduce the risk of se-
rious or fatal injury, we recommend persons with
medical implants to consult their physician and the
medical implant manufacturer before operating this
power tool�
Power tool use and care
•The persons with lowered psychophysical or men-
tal aptitudes as well as children can not operate the
power tool, if they are not supervised or instructed
about use of the power tool by a person responsible
for their safety�
•Do not force the power tool. Use the correct
power tool for your application� The correct power
tool will do the job better and safer at the rate for which
it was designed�
•Do not use the power tool if the switch does
not turn it on and off. Any power tool that cannot be
controlled with the switch is dangerous and must be
repaired�
•Disconnect the plug from the power source
and / or the battery pack from the power tool be-
fore making any adjustments, changing accesso-
ries, or storing power tools� Such preventive safety
measures reduce the risk of starting the power tool ac-
cidentally�
•Store idle power tools out of the reach of chil-
dren and do not allow persons unfamiliar with the
power tool or these instructions to operate the
power tool. Power tools are dangerous in the hands
of untrained users�
•Maintain power tools. Check for misalignment or
binding of moving parts, breakage of parts and any
other condition that may affect the power tool’s op-
eration. If damaged, have the power tool repaired
before use. Many accidents are caused by poorly
maintained power tools�
•Keep cutting tools sharp and clean. Properly
maintained cutting tools with sharp cutting edges are
less likely to bind and are easier to control�
•Use the power tool, accessories and tool bits
etc. in accordance with these instructions, taking
into account the working conditions and the work
to be performed. Use of the power tool for operations
different from those intended could result in a hazard-
ous situation�
•Keep handles and grasping surfaces dry, clean
and free from oil and grease. Slippery handles and
grasping surfaces do not allow for safe handling and
control of the tool in unexpected situations�
•Note that when you operate a power tool, please
hold the auxiliary handle correctly, which is helpful
when controlling the power tool� Therefore, proper
holding can reduce the risk of accidents or injuries�
Service
•Have your power tool serviced by a qualied
repair person using only identical replacement
parts. This will ensure that the safety of the power tool
is maintained�
•Follow instruction for lubricating and changing ac-
cessories�
Safety guidelines during power tool
operation
•Carrying out operations with the ltering devices
removed is strictly prohibited- this will cause the power
tool breakdown and void the warranty repair�
•Carrying out the suction of the following is
prohibited:

13
English
•harmful substances (such as oak or beech wood
dust, crusher rock dust, spray asbestos, etc�);
•ammable and combustible liquids (such as
petrol, spirit, solvents, etc�);
•caustic chemicals and liquids (alkali, acids,
caustic soda, etc�);
•sharp objects (nails, splinters of glass, etc�);
•cinder and live coals (such as unextinguished or
hot coals from a replace or grill); the suction of waste
with temperature not exceeding 50°C is permitted�
•Do not use power tools as water pumps�
•The use of the power tool in an atmosphere
containing explosive gases and vapors emitted by
aggressive substances is prohibited�
•Do not close the power tool air vents and do not
close the suction tube orice tightly - this may cause
overheating�
•Do not put the end of the suction hose (when the
appliance is on) close to body, eyes or ears - this may
cause injuries�
•Do not use the air hose for the purposes other than
those for which it was intended� Never use the air hose
to carry the appliance or to drag it� Protect the air hose
from heating, sharp edges and moving parts of other
power tools or appliances�
•Picking up some substances may cause building
of static charge on the parts of the vacuum cleaner�
Take due care - static charge may cause sense of
discomfort, loss of balance and falling�
•When working in air blowing mode make sure that
the air hose is clean� Clean the hose if necessary�
•When working in air blowing mode small objects
may be thrown out at high speed with the airow.
These objects may injure the person operating the
appliance or surrounding persons� Use personal
protective equipment (safety glasses and mask) and
equip the workplace properly�
•Take special care while working on stairs�
Symbols used in the manual
Following symbols are used in the operation manual,
please remember their meanings� Correct interpreta-
tion of the symbols will allow correct and safe use of
the power tool�
Symbol Meaning
Serial number sticker:
CT ��� - model;
XX - date of manufacture;
XXXXXXX - serial number�
Read all safety regulations
and instructions�
Wear safety goggles�
Symbol Meaning
Wear ear protectors�
Wear a dust mask�
Disconnect the power tool
from the mains before instal-
lation or adjustment�
Movement direction�
Rotation direction�
Locked�
Unlocked�
Double insulation / safety
class�
Prohibited�
Attention� Important�
A sign certifying that the
product complies with es-
sential requirements of the
EU directives and harmo-
nized EU standards�
Useful information�
Do not dispose of the power
tool in a domestic waste
container�
Power tool designation
All-purpose vacuum cleaners provide the suction
of non-harmful dust, small particles and suction of
non-ammable liquids also. They are suitable for

14
English
connection to power tools that produce cuttings, swarf
and dust during operation�
Power tool components
1 Handle
2 On / off switch
3 Upper part of the vacuum cleaner (complete)
4 Hose connector (inlet, for suction)
5 Wheel holder
6 Wheel
7 Hose connector (outlet, for blowing)
8 Ventilation slots
9 Lock
10 Tank
11 Air hose *
12 Plastic tube *
13 Rectangular nozzle *
14 Crevice nozzle *
15 Filter *
16 Pleated lter *
17 Paper dust bag *
18 Telescopic tube *
19 Screw
20 Telescopic tube lock *
21 Float
22 Plastic frame
23 Dust bag connection pipe
* Optional extra
Not all of the accessories illustrated or described
are included as standard delivery.
Installation and regulation of power tool
elements
Before carrying out any works on the power tool it
must be disconnected from the mains.
Do not draw up the fastening ele-
ments too tight to avoid damaging the
thread.
Mounting / dismounting / setting-up of
some elements is the same for all power
tool models, in this case specic models
are not indicated in the illustration.
Mounting / dismounting wheels (see g. 1-2)
•Mount wheels 6 as shown in g. 1-2.
•Disassembly operations do in reverse sequence�
Mounting / dismounting of air hose and accesso-
ries (see g. 3-4)
•Connect air hose 11 to hose connector 4as shown
in g. 3-4. Note: connect air hose 11 to hose con-
nector 7 in the same way.
•Assemble components of the air line:
•for CT42045 - connect tube (tubes) 12 to the
air hose 11, connect nozzle 13 or 14 as shown in
g. 3;
•for CT42046 - connect telescopic tube 18 to the
air hose 11, connect nozzle 13 or 14 as shown in
g. 4.2. You can change legth of telescopic tube 18:
move and hold lock 20 as shown in g. 4.1, put for-
ward the thinner part of telescopic tube 18, release
lock 20�
•Disassembly operations do in reverse sequence�
Preparation for operation in dry waste suck in
mode (see g. 5-7, 10)
This mode is recommended to suck in dry waste.
Using of pleated lter (see g 5-6, 10)
•Unlock locks 9and remove upper part of the vacu-
um cleaner 3 (see g. 5).
•Install onto upper part of the vacuum cleaner 3: plac-
tic frame 22 with installed oat 21 and install pleated l-
ter 16 (see g. 6). Attention: install plastic frame 22
properly - the xing devices on plastic frame 22
must precisely match the slots in upper part of the
vacuum cleaner 3 and lock; do not allow misalign-
ment during installation.
•Mount upper part of the vacuum cleaner 3and se-
cure it with locks 9�
•Assemble the air line and connect air hose 11 to
hose connector 4 (see g. 10).
Using of paper dust bag (see g 5, 7, 10)
•Unlock locks 9and remove upper part of the vacu-
um cleaner 3 (see g. 5).
•If lter 15 is installed - remove it and install pleated
lter 16 (see g. 7.1).
•Connect paper dust bag 17 to connection pipe 23
(see g. 7.2). When connecting paper dust bag 17,
take care to connect it to connection pipe 23 evenly
without warp. Cardboard ange of paper dust bag 17
must touch the wall of tank 10� Carefully straighten pa-
per dust bag 17 after installation�
•Mount upper part of the vacuum cleaner 3and se-
cure it with locks 9�
•Assemble the air line and connect air hose 11 to
hose connector 4 (see g. 10).
•Attention: when removing paper dust bag 17 be
careful not to damage it. Do not empty paper dust
bag 17 for further reuse. Paper dust bag 17 is not
reusable, replace it if full.
Preparation for operation in liquid suck in mode
(see g. 5, 8, 10)
This mode is recommended to suck in liquids and
moist waste.
•Unlock locks 9and remove upper part of the vacu-
um cleaner 3 (see g. 5).
•Install onto upper part of the vacuum cleaner 3: plac-
tic frame 22 with installed oat 21 and install lter 15
(see g. 8). Attention: install oat 21 properly into
plastic frame 22 (see g. 8.2) - improper oat 21
installation may also cause the uid to enter the
power tool engine. Check if oat 21 is movable.
Float 21 must be able to move up and down free-
ly, otherwise the liquids sucked in may enter the
motor and bring it out of operation. Install plastic
frame 22 properly - the xing devices on plastic

15
English
frame 22 must precisely match the slots in upper
part of the vacuum cleaner 3 and lock; do not allow
misalignment during installation.
•Mount upper part of the vacuum cleaner 3and se-
cure it with locks 9�
•Assemble the air line and connect air hose 11 to
hose connector 4 (see g. 10).
Preparation for operation in blowing mode (see
g. 5, 7, 11)
•Unlock locks 9and remove upper part of the vacu-
um cleaner 3 (see g. 5).
•If lter 15 is installed - remove it and install pleated
lter 16 (see g. 7.1).
•Empty the tank 10, if a papers dust bag 17 is
installed - remove it, if necessary clean the air
hose 11� Otherwise, the power tool may blow out dust,
sawdust, etc�
•Mount upper part of the vacuum cleaner 3and se-
cure it with locks 9�
•Assemble the air line and connect air hose 11 to
hose connector 7 (see g. 11).
Initial operating of the power tool
Always use the correct supply voltage: the power sup-
ply voltage must match the information quoted on the
power tool identication plate.
Switching the power tool on / off
Switching on:
Set on / off switch 2into ON "I" position (see g. 9.1)�
Switching off:
Set on / off switch 2into OFF "0" position (see g. 9.2)�
Design features of the power tool
Air blowing mode (see g. 11)
This function allows for cleaning by blowing off waste
with airow in places where it is complicated or
impossible to suck in waste (air purging of complex
ofce machines, blowing leaves off gravel path, etc.).
Connect air hose 11 to hose connector 7 (see g. 11).
Overow protection system
Overow protection system automatically turns off the
vacuum cleaner if the tank 10 is completely lled with
liquid, this prevents enter the uids inside power tool
engine�
Recommendations on the power tool
operation
Carry out all above mentioned prepara-
tion and assembly steps depending on
the works to be done.
•Choose an appropriate nozzle depending on the
type of operation and work surface area�
•If you are going to use the vacuum cleaner for suc-
tion operations connect air hose 11 to the hose con-
nector 4 (see g. 10). Note: if you are going to use
the vacuum cleaner as a dust removing system
for another power tool, connect air hose 11 to the
power tool using the corresponding adapter.
•If you are going to use the vacuum cleaner for blow-
ing operations connect air hose 11 to the hose con-
nector 7 (see g. 11). Attention: empty the tank 10, if a
papers dust bag 17 is installed - remove it, if necessary
clean the air hose 11� Otherwise, the power tool may
blow out dust, sawdust, etc�
•Connect the power tool to the mains and switch it
on�
•Pick up dust or liquid, blow off dry waste or work
with another power tool connected to the vacuum
cleaner�
•In the event of the reduction in efciency during op-
eration, take the following actions:
•check the suction line - if you nd any clogs, re-
move them;
•check the pleated lter 16, clean it if durty;
•check the lling of paper dust bag 17, replace it
if full�
•After operation, switch off the power tool�
•If you have sucked in liquids, discharge the liquid
from tank 10, wash and dry tank 10 and lter 15�
Power tool maintenance / preventive
measures
Before carrying out any works on the power tool it
must be disconnected from the mains.
Pleated lter cleaning (see g. 12)
•Remove pleated lter 16, as described above�
•Clean pleated lter 16 using a soft brush, and then
blow it out with compressed air (see g. 12). Notice:
blowing must be done only on the inside of pleated
lter 16 (see g. 12).
•Install pleated lter 16, as described above�
•If pleated lter 16 is damaged or seriously clogged
(it is not possible to clean using the above listed
methods), replace it�
Filter cleaning
•Remove lter 15 as described above�
•Carefully wash lter 15 with warm soapy water and
dry it thoroughly�
•Install lter 15 as described above�
•If lter 15 is damaged or very contaminated (and
may not be cleaned), remove it�
Cleaning of the power tool
An indispensable condition for a safe long-term exploi-
tation of the power tool is to keep it clean� Regularly
ush the power tool with compressed air thought the
ventilation slots 8�
After-sales service and application service
Our after-sales service responds to your ques-
tions concerning maintenance and repair of your
product as well as spare parts� Information about
service centers, parts diagrams and informa-

16
English
tion about spare parts can also be found under:
www.crown-tools.com�
Transportation of the power tools
•Only move the power tool by handle 1or by picking
it up and supporting from the bottom� Do not move the
power tool by other parts (by pulling the air hose 11 or
power cable)�
•Categorically not to drop any mechanical impact on
the packaging during transport�
•When unloading / loading is not allowed to use any
kind of technology that works on the principle of clamp-
ing packaging�
Environmental protection
Recycle raw materials instead of
disposing as waste.
Power tool, accessories and packaging
should be sorted for environment - friendly
recycling�
The plastic components are labelled for categorized
recycling�
These instructions are printed on recycled paper man-
ufactured without chlorine�
The manufacturer reserves the possibility to introduce changes.

17
Español
Información sobre ruidos
Tome medidas adecuadas para proteger
sus oídos cuando la presión acústica ex-
ceda el valor de 85 dB(A).
Declaración de conformidad
Declaramos bajo nuestra exclusiva responsabili-
dad, que el producto descrito en los "Especicacio-
nes de la herramienta eléctrica" cumple con todas
las disposiciones correspondientes de las directi-
vas 2014/30/EU, 2014/35/EU inclusive sus modica-
ciones y esta en conformidad con las siguientes nor-
mas:
EN 55014-1:2017,
EN 55014-2:2015,
EN IEC 61000-3-2:2019,
EN 61000-3-3:2013+A1:2019,
EN 62233:2008,
EN 60335-1:2012+A11:2014+A13:2017+A1:2019+A2:
2019+A14:2019,
EN 60335-2-2:2010+A11:2012+A1:2003�
Gerente de Wu Cunzhen
certicación
Merit Link International AG
Stabio, Suiza, 28�01�2021
ADVERTENCIA - ¡Para reducir el riesgo
de lesiones, el usuario debe leer el ma-
nual de instrucciones!
Reglas de seguridad generales
¡ADVERTENCIA! Leer todas las instruc-
ciones y advertencias de seguridad. El
incumplimiento de las advertencias e ins-
trucciones puede provocar una descarga
eléctrica, incendio y / o lesiones graves�
Conserve todas las advertencias e instrucciones
para referencia en el futuro.
El término "herramienta eléctrica" en las advertencias
se reere a su herramienta eléctrica accionada por la
red eléctrica (con cable) o a una herramienta eléctrica
accionada por batería (inalámbrica)�
Seguridad en el área de trabajo
•Mantenga el área de trabajo limpia y bien ilumi-
nada. Las áreas desordenadas u oscuras dan lugar a
accidentes�
•No utilice herramientas eléctricas en atmósferas
explosivas, como en presencia de líquidos ina-
mables, gases o polvo. Las herramientas eléctricas
crean chispas que pueden encender el polvo o los va-
pores�
•Mantenga alejados a los niños y espectadores
mientras maneja una herramienta eléctrica. Las
distracciones pueden hacer que pierda el control�
Seguridad frente a la electricidad
•El enchufe macho de conexión, debe ser conec-
tado solamente a un enchufe hembra de las carac-
terísticas técnicas del enchufe macho en materia.
Nunca modique el enchufe de ninguna manera.
No utilice enchufes adaptadores con herramientas
eléctricas conectadas a tierra. Los enchufes no mo-
dicados y los tomacorrientes correspondientes redu-
cirán el riesgo de descarga eléctrica�
Especicaciones de la herramienta eléctrica
Aspiradora multipropósito CT42045 CT42046
Código de la herramienta eléctrica [220-240 V ~50 / 60 Hz] 244978 244985
Potencia absorbida [W] 1000 1000
Amperaje en el voltaje 220-240 V [A] 4�3 4�3
Vacuidad [kPa] >16 >16
Índice de ujo de aire [m3/min] 1,7 1,7
Capacidad [l] 15 20
Peso [kg]
[lb] 4,6
10�14
5,4
11�91
Clases de protección
Presión acústica [dB(A)] 78 78
Potencia acústica [dB(A)] — —

18
Español
•Evite el contacto del cuerpo con supercies co-
nectadas a tierra, tales como tuberías, radiadores,
estufas y refrigeradores. Existe un mayor riesgo de
descarga eléctrica si su cuerpo tiene descarga a tierra�
•No exponga las herramientas eléctricas a la llu-
via o a condiciones húmedas. Si entra agua a una
herramienta eléctrica aumentará el riesgo de descarga
eléctrica�
•No abuse del cable. Nunca use el cable para
transportar, tirar o desenchufar la herramienta
eléctrica. Mantenga el cable alejado de calor, acei-
te, bordes alados o partes móviles. Los cables da-
ñados o enredados aumentan el riesgo de descarga
eléctrica�
•Si el cable de alimentación está dañado, debe
ser sustituido por el fabricante, por su servicio
posventa o por personal cualicado similar con el
n de evitar un peligro.
•Cuando utilice una herramienta eléctrica al aire
libre, utilice un alargue adecuado para uso en ex-
teriores. El uso de un cable adecuado para uso en
exteriores reduce el riesgo de descarga eléctrica�
•Si el uso de una herramienta eléctrica en una
ubicación húmeda es inevitable, utilice un sumi-
nistro protegido de dispositivo de corriente resi-
dual (RCD). El uso de un RCD reduce el riesgo de
descarga eléctrica� ¡NOTA! El término "dispositivo de
corriente residual (RCD)" puede sustituirse por el tér-
mino "interruptor de circuito de falla a tierra (GFCI)" o
"disyuntor de fuga a tierra (ELCB)"�
•¡Advertencia! Nunca toque las supercies metáli-
cas expuestas en la caja de velocidades, el protector,
etc., porque si se tocan las supercies metálicas se
verán afectadas por la onda electromagnética y se
causarán lesiones o accidentes potenciales�
Seguridad personal
•Manténgase alerta, observe lo que está hacien-
do y use el sentido común cuando opere una he-
rramienta eléctrica. No use una herramienta eléc-
trica si está cansado o bajo la inuencia de drogas,
alcohol o medicamentos. Un momento de inatención
al operar herramientas eléctricas puede producir lesio-
nes personales graves�
•Use equipo de protección personal. Siempre lle-
ve protección ocular. Equipos de protección como
máscaras antipolvo, zapatos de seguridad antides-
lizantes, cascos o protección auditiva usados para
condiciones apropiadas reducirán las lesiones perso-
nales�
•Evite el arranque involuntario. Asegúrese de
que el interruptor esté en la posición de apagado
antes de conectar la fuente de alimentación y / o el
bloque de baterías, recoger o transportar la herra-
mienta. Llevar las herramientas eléctricas con el dedo
en el interruptor o conectar las herramientas eléctricas
con el interruptor en encendido da lugar a accidentes�
•Saque cualquier llave de ajuste o llave de tuerca
antes de encender la herramienta eléctrica. Si se
deja una llave de ajuste o llave de tuercas unida a una
parte giratoria de la herramienta eléctrica se pueden
producir lesiones personales�
•No adopte una postura forzada. Mantenga la
postura y el equilibrio en todo momento. Esto per-
mite un mejor control de la herramienta eléctrica en
situaciones inesperadas�
•Use ropa adecuada. No use prendas sueltas o
joyas. Mantenga el cabello, la ropa y los guantes
alejados de las partes móviles. La ropa suelta, las
joyas o el pelo largo pueden quedar atrapados en las
partes móviles.
•Si se proporcionan dispositivos para la co-
nexión de las instalaciones de extracción y reco-
lección de polvo, asegúrese de que se conecten y
utilicen correctamente. El uso del dispositivo para la
recolección de polvo puede reducir los peligros rela-
cionados con el polvo�
•No deje que la familiaridad obtenida con el uso
frecuente de herramientas le permita ser compla-
ciente e ignorar los principios de seguridad de las
herramientas. Una acción descuidada puede causar
lesiones graves en una fracción de segundo.
•¡Advertencia! Las herramientas eléctricas pueden
producir un campo electromagnético durante el fun-
cionamiento� Este campo puede interferir en algunas
circunstancias con los implantes médicos activos o
pasivos� Para reducir el riesgo de lesiones graves o
mortales, recomendamos a las personas con implan-
tes médicos consultar a su médico y al fabricante de
implantes médicos antes de operar esta herramienta
eléctrica�
Uso y cuidado de la herramienta eléctrica
•Las personas con aptitudes psicofísicas o mentales
disminuidas, así como los niños no pueden operar la
herramienta eléctrica, si no son supervisados o instrui-
dos sobre el uso de la herramienta eléctrica por una
persona responsable de su seguridad�
•No fuerce la herramienta eléctrica. Utilice la he-
rramienta eléctrica adecuada para su aplicación.
La herramienta eléctrica correcta hará el trabajo mejor
y más seguro a la velocidad para la que fue diseñada�
•No utilice la herramienta eléctrica si el interrup-
tor no la enciende y apaga. Cualquier herramienta
eléctrica que no pueda ser controlada con el interrup-
tor es peligrosa y debe ser reparada�
•Desconecte el enchufe de la fuente de alimen-
tación y / o la batería de la herramienta eléctrica
antes de realizar cualquier ajuste, cambiar acceso-
rios o guardarla. Estas medidas preventivas de se-
guridad reducen el riesgo de arrancar la herramienta
accidentalmente�
•Guarde las herramientas eléctricas inactivas
fuera del alcance de los niños y no permita que las
personas que no estén familiarizadas con la herra-
mienta eléctrica o estas instrucciones la utilicen.
Las herramientas eléctricas son peligrosas en manos
de usuarios inexpertos�
•Mantenimiento de las herramientas eléctricas
Compruebe si la herramienta está desalineada, si
las piezas móviles están atascadas, si hay piezas
rotas o cualquier otra condición que pueda afectar
el funcionamiento de la herramienta eléctrica. Si
está dañada, haga reparar la herramienta eléctrica
antes de usarla. Muchos accidentes son causados
por el mantenimiento deciente de las herramientas
eléctricas�
•Mantenga las herramientas de corte, aladas y
limpias. Las herramientas de corte adecuadamente
mantenidas con bordes alados son menos propensas
a empastarse y más fáciles de controlar�
•Utilice la herramienta eléctrica, los accesorios
y las brocas de las herramientas, etc. de acuerdo
con estas instrucciones, teniendo en cuenta las
condiciones de trabajo y el trabajo a realizar. El
uso de la herramienta eléctrica para operaciones di-

19
Español
ferentes de las previstas podría producir una situación
peligrosa�
•Mantenga las manijas y las supercies de agarre
secas, limpias y libres de aceite y grasa. Las mani-
jas y las supercies de agarre resbaladizas no permi-
ten un manejo y un control seguros de la herramienta
en situaciones inesperadas�
•Tenga en cuenta que cuando utilice una herramienta
eléctrica debe sostener la manija auxiliar correctamen-
te, esto es útil para controlar la herramienta eléctrica�
Por lo tanto, sostenerla de manera adecuada puede
reducir el riesgo de accidentes o lesiones�
Servicio
•Haga reparar su herramienta eléctrica por per-
sonal de reparación calicado que use solamente
piezas de repuesto idénticas. Esto asegurará que
se mantenga la seguridad de la herramienta eléctrica�
•Siga las instrucciones para lubricar y cambiar los
accesorios�
Guías de seguridad durante el funciona-
miento de la herramienta eléctrica
•Llevar a cabo operaciones con dispositivos de ltra-
do removidos está estrictamente prohibido; esto cau-
sará que se rompa la herramienta eléctrica y anulará
la reparación de garantía.
•Está prohibido llevar a cabo la succión de lo siguiente:
•sustancias dañinas (como polvo de madera de
haya o roble, polvo de roca machacada, asbestos
pulverizado, etc�);
•líquidos inamables y combustibles (como petró-
leo, alcohol, solventes, etc�);
•productos químicos cáusticos y líquidos (produc-
tos alcalinos, ácidos, soda cáustica, etc�);
•objetos losos (clavos, trozos de vidrio, etc.);
•escoria y carbones vivos (como carbones calien-
tes o no extintos de una chimenea o asador); la suc-
ción de desechos con temperatura que no supere
los 50°C está permitida�
•No use las herramientas eléctricas como bombas
de agua�
•Está prohibido el uso de herramienta eléctrica en
una atmósfera con gases y vapores explosivos emiti-
dos por sustancias agresivas�
•No cierre los ventiladores de aire de la herramienta
eléctrica y no cierre el oricio de tubo de succión total-
mente; esto puede causar sobrecalentamiento�
•No coloque el extremo de la manguera de succión
(cuando el artefacto está encendido) cerca del cuerpo,
los ojos o las orejas, esto puede causar lesiones�
•No use la manguera de aire para otros propósitos
que no sean los designados� Nunca use la manguera
de aire para transportar el artefacto o para arrastrarlo�
Proteja la manguera de aire del calor, de bordes lo-
sos y de partes móviles de otras herramientas eléctri-
cas o de otros artefactos�
•Recoger algunas sustancias puede provocar la acu-
mulación de carga estática en las piezas de la aspirado-
ra� Tenga cuidado: la carga estática puede causar una
sensación de molestia, pérdida de equilibrio y desmayos.
•Cuando esté trabajando en el modo de soplado de
aire, asegúrese de que la manguera de aire esté lim-
pia� Limpie la manguera, si fuera necesario�
•Cuando esté trabajando en el modo de soplado de
aire, es posible que los objetos pequeños salgan des-
pedidos a una alta velocidad con el ujo de aire. Estos
objetos pueden herir a la persona que esté operando el
artefacto o a las personas que estén cerca� Use equipo
de protección personal (gafas de seguridad y máscara)
y equipe el lugar de trabajo de manera adecuada�
•Tenga especial cuidado cuando trabaje en escale-
ras�
Símbolos usados en el manual
Los siguientes símbolos se utilizan en el manual de
instrucciones, recuerde sus signicados. La interpre-
tación correcta de los símbolos le permitirá el uso co-
rrecto y seguro de la herramienta eléctrica�
Símbolo Signicado
Etiqueta con número de
serie:
CT ��� - modelo;
XX - fecha de fabricación;
XXXXXXX - número de se-
rie�
Lea todas las reglas e ins-
trucciones de seguridad�
Use gafas de seguridad�
Use protectores para los oí-
dos�
Use una máscara antipolvo�
Desconecte la herramienta
eléctrica de la red antes de
instalarla o ajustarla�
Dirección del movimiento.
Dirección de la rotación.
Bloqueado�
Desbloqueado�
Doble aislamiento / clase de
protección.

20
Español
Símbolo Signicado
Prohibido�
Atención. Importante.
Un signo que certica que
el producto cumple con los
requisitos esenciales de las
directivas de la UE y las nor-
mas armonizadas de la UE�
Información útil.
No deseche la herramienta
eléctrica en un recipiente de
basura doméstica�
Designación de la herramienta eléctrica
Las aspiradoras multi propósito brindan la succión del
polvo no dañino, de pequeñas partículas y también de
líquidos no inamables. Son adecuadas para conectar
a las herramientas eléctricas que producen cortes, vi-
rutas y polvillo durante la operación.
Componentes de la herramienta eléctrica
1 Empuñadura
2 Interruptor de encendido / apagado
3 Parte superior de la aspiradora (completa)
4 Conector de manguera (entrada, para succión)
5 Soporte de rueda
6 Rueda
7 Conector de manguera (salida, para soplar)
8 Ranuras de ventilación
9 Bloqueo
10 Tanque
11 Manguera de aire *
12 Tubo de plástico *
13 Boquilla rectangular *
14 Boquilla para grietas *
15 Filtro *
16 Filtro plisado *
17 Bolsa de papel para el polvo *
18 Caño telescópico *
19 Tornillo
20 Bloqueo del caño telescópico *
21 Flotación
22 Marco de plástico
23 Caño de conexión para la bolsa para polvo
* Accesorios
No todos los accesorios fotograados o descritos
están incluidos en el envío estándar.
Instalación y regulación de los elemen-
tos de la herramienta eléctrica
Antes de llevar a cabo cualquier trabajo sobre la
herramienta eléctrica, debe desconectarse de la
fuente de energía.
No apriete demasiado los elementos de
ajuste para evitar dañar el hilo.
El montaje / desmontaje / congura-
ción de algunos de los elementos es
el mismo para todos los modelos de
la herramienta eléctrica, en este caso
los modelos especícos no están indicados en la
ilustración.
Montaje / desmontaje de las ruedas (ver g. 1-2)
•Monte las ruedas 6 como lo muestran la gura 1-2.
•Las operaciones de desarmado se hacen en se-
cuencia inversa�
Montaje / desmontaje de la manguera de aire y los
accesorios (ver g. 3-4)
•Conecte la manguera de aire 11 al conector de la
manguera 4 como se muestra en la g. 3-4. Nota:
conecte la manguera de aire 11 al conector de la
manguera 7 de la misma manera.
•Ensamble los componentes de la línea de aire:
•para el modelo CT42045 - conecte el tubo (tu-
bos) 12 a la manguera de aire 11, conecte la boqui-
lla 13 o 14 como se muestra en la g. 3;
•para el modelo CT42046 - conecte el tubo tele-
scópico 18 a la manguera de aire 11, conecte la bo-
quilla 13 o 14 como se muestra en la g. 4.2. Puede
cambiar la longitud del tubo telescópico 18: mueva
y mantenga el bloqueo 20 como se muestra en la
g. 4.1, coloque la parte más delgada del tubo tele-
scópico 18, suelte el bloqueo 20�
•Las operaciones de desarmado se hacen en se-
cuencia inversa�
Preparación para el funcionamiento en modo de
succión de desechos secos (ver g. 5-7, 10)
Se recomienda este modo para succionar dese-
chos secos.
Uso del ltro plisado (ver g. 5-6, 10)
•Destrabe los bloqueos 9y retire la parte superior de
la aspiradora 3 (ver g. 5).
•Instale en la parte superior de la aspiradora 3el
marco de plástico 22 con el otador 21 montado y
luego instale el ltro plisado 16 (ver g. 6). Atención:
instale el marco de plástico 22 correctamente - los
dispositivos de jación en el marco de plástico 22
deben coincidir con precisión con las ranuras en
la parte superior de la aspiradora 3 y bloquearse;
no permita la desalineación durante la instalación.
•Monte la parte superior de la aspiradora 3y asegú-
rela con los bloqueos 9�
•Monte la línea de aire y conecte la manguera de
aire 11 al conector de la manguera 4 (ver g. 10).
This manual suits for next models
3
Table of contents
Languages:
Other Crown Vacuum Cleaner manuals

Crown
Crown CT42033 User manual

Crown
Crown VCJ-2080 User manual

Crown
Crown CT42029 User manual

Crown
Crown VCJ-2090 User manual

Crown
Crown CT63006 User manual

Crown
Crown CT42055 User manual

Crown
Crown CT42027 User manual

Crown
Crown WVC-1220 User manual

Crown
Crown CMVC-414 User manual

Crown
Crown CT42032F User manual
Popular Vacuum Cleaner manuals by other brands

Dyson
Dyson DC37 operating manual

Onson
Onson J30 user manual

Dyson
Dyson Slim instructions

Sandia Plastics
Sandia Plastics Hipster Hip Vacuum Series Safety, operation and maintenance manual with parts list

Bissell
Bissell CLEANVIEW 1994 Series user guide

Black & Decker
Black & Decker DUSTBUSTER CWV1408 instruction manual