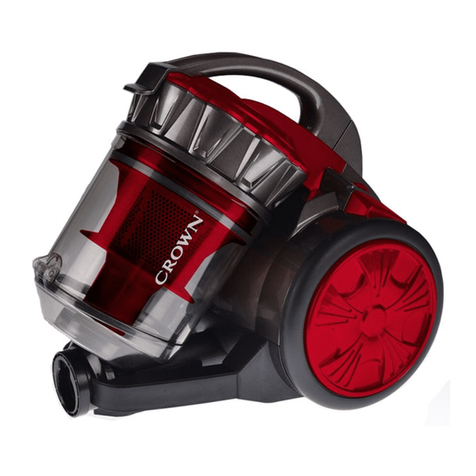
Crown CT42055 User manual


2
Content / Contenido / Содержание / Зміст / Мазмұны /
English
Explanatory drawings ������������������������������������������������������������������������������������������������������������ pages
General safety rules, instructions manual ����������������������������������������������������������������������������� pages
3 - 7
8 - 11
Español
Dibujos explicativos ������������������������������������������������������������������������������������������������������������ páginas
Recomendaciones generales de seguridad, manual de instrucciones ������������������������������ páginas
3 - 7
12 - 15
Русский
Пояснительные рисунки ������������������������������������������������������������������������������������������������ страницы
Общие указания по ТБ, инструкция по эксплуатации ������������������������������������������������� страницы
3 - 7
16 - 20
Украïнська
Пояснювальні малюнки ��������������������������������������������������������������������������������������������������� сторінки
Загальні вказівки по ТБ, iнструкція з експлуатації ��������������������������������������������������������� сторінки
3 - 7
21 - 25
Қазақ тілі
Түсіндіргіш әлеміштер �������������������������������������������������������������������������������������������������������� беттер
Жалпы қауіпсіздік жөніндегі ұсыныстар, пайдалану нұсқаулығы ���������������������������������������� беттер
3 - 7
26 - 30
����������������������������������������������������������������������������������������������������������������������������
����������������������������������������������������������������������������������������������������
3 - 7
31 - 34
�������������������������������������������������������������������������������������������������������������������������
��������������������������������������������������������������������������������������������
3 - 7
35 - 38

3

4

5

6

7

8
English
Noise information
Always wear ear protection if the sound
pressure exceed 85 dB(A).
WARNING - To reduce the risk of injury,
user must read instruction manual!
General safety rules
WARNING! Read all safety warnings and
all instructions. Failure to follow the warn-
ings and instructions may result in electric
shock, re and / or serious injury.
Save all warnings and instructions for future refer-
ence.
The term "power tool" in the warnings refers to your
mains-operated (corded) power tool or battery-operat-
ed (cordless) power tool�
Work area safety
Do not operate power tools in explosive atmos-
pheres, such as in the presence of ammable liq-
uids, gases or dust. Power tools create sparks which
may ignite the dust or fumes�
Electrical safety
•Do not expose power tools to rain or wet condi-
tions. Water entering a power tool will increase the risk
of electric shock�
•Do not abuse the cord. Never use the cord for
carrying, pulling or unplugging the power tool.
Keep cord away from heat, oil, sharp edges or
moving parts. Damaged or entangled cords increase
the risk of electric shock�
Personal safety
•Stay alert, watch what you are doing and use
common sense when operating a power tool. Do
not use a power tool while you are tired or under
the inuence of drugs, alcohol or medication. A
moment of inattention while operating power tools may
result in serious personal injury�
•Prevent unintentional starting. Ensure the
switch is in the off-position before connecting to
power source and / or battery pack, picking up or
carrying the tool. Carrying power tools with your n-
ger on the switch or energising power tools that have
the switch on invites accidents�
•Do not let familiarity gained from frequent use of
tools allow you to become complacent and ignore
tool safety principles� A careless action can cause
severe injury within a fraction of a second�
Power tool use and care
•The persons with lowered psychophysical or men-
tal aptitudes as well as children can not operate the
power tool, if they are not supervised or instructed
about use of the power tool by a person responsible
for their safety�
•Do not force the power tool. Use the correct
power tool for your application� The correct power
tool will do the job better and safer at the rate for which
it was designed�
•Do not use the power tool if the switch does not
turn it on and off. Any power tool that cannot be con-
trolled with the switch is dangerous and must be repaired�
•Store idle power tools out of the reach of chil-
dren and do not allow persons unfamiliar with the
Power tool specications
Vacuum cleaner CT42055
Power tool code [220-240 V ~50/60 Hz] 245463
Rated power [W] 1800
Amperage by voltage 220-240 V [A] 7�8
Vacuity [kPa] >21
Air ow rate [l/s] 1,75
Capacity [l] 3
Weight [kg]
[lb] 4,5
9�92
Safety class
Sound pressure [dB(A)] <80
Acoustic power [dB(A)] <91

9
English
power tool or these instructions to operate the
power tool. Power tools are dangerous in the hands
of untrained users�
•Use the power tool, accessories and tool bits etc.
in accordance with these instructions, taking into
account the working conditions and the work to be
performed. Use of the power tool for operations differ-
ent from those intended could result in a hazardous situ-
ation�
•Keep handles and grasping surfaces dry, clean
and free from oil and grease. Slippery handles and
grasping surfaces do not allow for safe handling and
control of the tool in unexpected situations�
Service
Have your power tool serviced by a qualied repair
person using only identical replacement parts.
This will ensure that the safety of the power tool is
maintained�
Safety guidelines during power tool op-
eration
Attention: this vacuum cleaner is de-
signed to suck dry debris and dust only.
Never suck liquids or damp debris, as
this will damage the power tool, in this
case you will void the warranty.
•Carrying out operations with the ltering devices
removed is strictly prohibited - this will cause the power
tool breakdown and void the warranty repair�
•Carrying out the suction of the following is
prohibited:
•harmful substances (such as oak or beech wood
dust, crusher rock dust, spray asbestos, etc�);
•caustic chemicals (caustic soda, etc�);
•sharp objects (nails, splinters of glass, etc�);
•hard and heavy objects (coins, nuts, stones etc�),
they can damage the walls of the reservoir;
•cinder and live coals (such as unextinguished
or hot coals from a replace or grill); the suction
of waste with temperature not exceeding 50°C is
permitted�
•Be careful when emptying the reservoir� Never pour
dust from the reservoir into an open re.
•The use of the power tool in an atmosphere
containing explosive gases and vapors emitted by
aggressive substances is prohibited�
•Do not close the power tool air vents and do not
close the suction tube orice tightly - this may cause
overheating�
•Do not put the end of the suction hose (when the
power tool is on) close to body, eyes or ears - this may
cause injuries�
•Do not use the air hose for the purposes other than
those for which it was intended� Never use the air hose
to carry the appliance or to drag it� Protect the air hose
from heating, sharp edges and moving parts of other
power tools or appliances�
•Picking up some substances may cause building
of static charge on the parts of the vacuum cleaner�
Take due care - static charge may cause sense of
discomfort, loss of balance and falling�
•Take special care while working on stairs�
Symbols used in the manual
Following symbols are used in the operation manual,
please remember their meanings� Correct interpreta-
tion of the symbols will allow correct and safe use of
the power tool�
Symbol Meaning
Serial number sticker:
CT ��� - model;
XX - date of manufacture;
XXXXXXX - serial number�
Read all safety regulations
and instructions�
Disconnect the power tool
from the mains before instal-
lation or adjustment�
Movement direction�
Rotation direction�
Locked�
Unlocked�
Double insulation / safety
class�
Attention� Important�
Useful information�
Do not dispose of the power
tool in a domestic waste
container�
Power tool designation
Vacuum cleaners are intended for domestic, non-
commercial use, e�g� in automobiles, homes, schools,

10
English
stores, ofces. Power tools allow you vacuuming up
non-harmful dry dust, ne debris.
Power tool components
1 Dust-collecting container (assembly)
2 Hose connector
3 Handle
4 Wheel
5 Ventilation slots
6 On / off switch
7 Power regulator
8 Power cable rewind button
9 Power cable
10 Air hose *
11 Telescopic tube *
12 Rectangular nozzle *
13 Crevice nozzle *
14 Telescopic tube lock *
15 Air ow regulator *
16 Locking button of the dust-collecting container
17 Locking button of the bottom cover
18 Reservoir
19 Bottom cover
20 Upper part of dust-collecting container (assembly)
21 Belt lter
22 Top cover
23 Lock of top cover
24 Housing of the foam lter
25 Foam lter
26 Cover of the HEPA lter
27 HEPA lter
* Optional extra
Not all of the accessories illustrated or described
are included as standard delivery.
Installation and regulation of power tool
elements
Before carrying out any works on the power tool it
must be disconnected from the mains.
Built-in brushes of the rectangular nozzle and
crevice nozzle (see g. 1)
Rectangular nozzle 12 and crevice nozzle 13 has built-
in brushes that allow suction of dust on hairy surfaces
(e�g� crumbs on furniture upholstery or carpet)�
•Press button of the rectangular nozzle 12 to extend
the built-in brush and rubber scraper (see g. 1.1).
•Rotate built-in brush of crevice nozzle 13 as shown
in g 1.2.
Mounting / dismounting of air hose and accesso-
ries (see g. 2)
•You can change legth of telescopic tube 11: move
and hold lock 14 as shown in g. 2.1, put forward the
thinner part of telescopic tube 11, release lock 14�
•Connect air hose 10 to hose connector 2as shown
in g. 2.2.
•Connect telescopic tube 11 to the air hose 10,
connect nozzle 12 or 13 as shown in g. 2.2.
•Disassembly operations do in reverse sequence�
Initial operating of the power tool
Always use the correct supply voltage: the power sup-
ply voltage must match the information quoted on the
power tool identication plate.
Switching the power tool on / off
Switching on:
Press and release on / off switch 6�
Switching off:
Press and release on / off switch 6�
Design features of the power tool
Power regulator (see g. 3.1)
You can adjust the power of vacuum cleaner by
moving power regulator 7 as shown on g. 3.1. This
function may be useful for the removal of waste from
light unxed objects (oorcloths, mats, etc.).
Air ow regulator (see g. 3.2)
You can adjust the air ow (and as a consequence,
the suction force) by moving regulator 15 on the tube
of air hose 10� By moving regulator 15 you can open
or close the tube orice (see g. 3.2). When the orice
is opened, the suction force is reduced� This function
may be useful for the removal of waste from light
unxed objects (oorcloths, mats, etc.).
Cable winder
Cable winder - winds the power cable 9on the reel
quickly and neatly�
Press and hold the button 8- the power cable 9will be
wrapped around the reel� It is recommended to guide the
power cable 9so that it does not get tangled or twisted�
Recommendations on the power tool op-
eration
Carry out all above mentioned prepara-
tion and assembly steps depending on
the works to be done.
•Choose an appropriate nozzle depending on the
type of operation and work surface area�
•Unwind the power cable 9 to sufcient length.
Power cable 9has 2 marks:
•yellow mark shows optimal cable length;
•red mark shows end point of cable�
Do not unwind the power cable 9beyond the red
mark�
•Connect the power tool to the mains and switch it
on. Adjust power and air ow as described above.
•Pick up dust or small dry debris�
•In the event of the reduction in efciency during op-
eration, take the following actions:
•check the suction line - if you nd any clogs, re-
move them;
•check the lters, clean it if durty.
•After operation, switch off the power tool and wind
up the power cable 9as described above�

11
English
Power tool maintenance / preventive
measures
Before carrying out any works on the power tool it
must be disconnected from the mains.
Emptying the reservoir (see g. 4-5)
Monitor the reservoir 18 lling, and emp-
ty it promptly according to safety precau-
tions described above.
•Turn off the power tool�
•Press the locking button 16 and remove the dust-
collecting container 1 (see g. 4.1).
•Press the locking button 17 to open bottom cover 19
and carefully empty the reservoir 18 (see g. 5).
•Close bottom cover 19 (button 17 should snap into
place)�
Belt lter and foam lter cleaning (see g. 4, 6-7)
•Remove dust-collecting container 1, as described
above (see g. 4).
•Unmount the upper part of dust-collecting contain-
er 20 as shown onto g. 6.1-6.2.
•Carefully empty the reservoir 18 (if necessary)�
•Remove the belt lter 21 by pulling on its ends, as
shown onto g. 6.3.
•Pull the lock and open the top cover 22 (see g. 7.1).
•Remove the housing 24 with installed foam lter 25
(see g. 7.2).
•Remove foam lter 25 from housing 24 (see g. 7.3).
•Clean all details using a soft brush or wash them
with warm soapy water�
•Carefully wash belt lter 21 and foam lter 25 with
warm soapy water�
•If belt lter 21 or foam lter 25 damaged or seriously
clogged (it is not possible to clean using the above
listed methods), replace them�
•Dry all parts thoroughly before assembly�
•Assembly operations do in reverse sequence�
HEPA lter cleaning (see g. 4, 8)
•Remove dust-collecting container 1, as described
above (see g. 4).
•Remove the cover 26 by pulling on its lock, as
shown in g. 8.1.
•Remove HEPA lter 27 (see g. 8.2).
•Clean HEPA lter 27 using a soft brush, and then
blow it out with compressed air.
•If HEPA lter 27 is damaged or seriously clogged
(it is not possible to clean using the above listed
methods), replace it�
•Install HEPA lter 27, as described above�
Cleaning of the power tool
An indispensable condition for a safe long-term exploi-
tation of the power tool is to keep it clean� Regularly
ush the power tool with compressed air thought the
ventilation slots 5�
After-sales service and application service
Our after-sales service responds to your ques-
tions concerning maintenance and repair of your
product as well as spare parts� Information about
service centers, parts diagrams and informa-
tion about spare parts can also be found under:
www.crown-tools.com�
Transportation of the power tools
•Only move the power tool by handle 3or by picking
it up and supporting from the bottom� Do not move the
power tool by other parts (by pulling the air hose 10 or
power cable)�
•Categorically not to drop any mechanical impact on
the packaging during transport�
• When unloading / loading is not allowed to use any
kind of technology that works on the principle of clamp-
ing packaging�
Environmental protection
Recycle raw materials instead of
disposing as waste.
Power tool, accessories and packaging
should be sorted for environment - friendly
recycling�
The plastic components are labelled for categorized
recycling�
These instructions are printed on recycled paper man-
ufactured without chlorine�
The manufacturer reserves the possibility to introduce changes.

12
Español
Información sobre ruidos
Tome medidas adecuadas para proteger
sus oídos cuando la presión acústica ex-
ceda el valor de 85 dB(A).
ADVERTENCIA - ¡Para reducir el riesgo
de lesiones, el usuario debe leer el ma-
nual de instrucciones!
Reglas de seguridad generales
¡ADVERTENCIA! Leer todas las instruc-
ciones y advertencias de seguridad. El
incumplimiento de las advertencias e ins-
trucciones puede provocar una descarga
eléctrica, incendio y / o lesiones graves.
Conserve todas las advertencias e instrucciones
para referencia en el futuro.
El término "herramienta eléctrica" en las advertencias
se reere a su herramienta eléctrica accionada por la
red eléctrica (con cable) o a una herramienta eléctrica
accionada por batería (inalámbrica)�
Seguridad en el área de trabajo
No utilice herramientas eléctricas en atmósferas
explosivas, como en presencia de líquidos inama-
bles, gases o polvo. Las herramientas eléctricas crean
chispas que pueden encender el polvo o los vapores�
Seguridad frente a la electricidad
•No exponga las herramientas eléctricas a la llu-
via o a condiciones húmedas. Si entra agua a una
herramienta eléctrica aumentará el riesgo de descarga
eléctrica�
•No abuse del cable. Nunca use el cable para trans-
portar, tirar o desenchufar la herramienta eléctrica.
Mantenga el cable alejado de calor, aceite, bordes
alados o partes móviles. Los cables dañados o enre-
dados aumentan el riesgo de descarga eléctrica�
Seguridad personal
•Manténgase alerta, observe lo que está hacien-
do y use el sentido común cuando opere una he-
rramienta eléctrica. No use una herramienta eléc-
trica si está cansado o bajo la inuencia de drogas,
alcohol o medicamentos. Un momento de inatención
al operar herramientas eléctricas puede producir lesio-
nes personales graves�
•Evite el arranque involuntario. Asegúrese de
que el interruptor esté en la posición de apagado
antes de conectar la fuente de alimentación y / o el
bloque de baterías, recoger o transportar la herra-
mienta. Llevar las herramientas eléctricas con el dedo
en el interruptor o conectar las herramientas eléctricas
con el interruptor en encendido da lugar a accidentes�
•No deje que la familiaridad obtenida con el uso
frecuente de herramientas le permita ser compla-
ciente e ignorar los principios de seguridad de las
herramientas. Una acción descuidada puede causar
lesiones graves en una fracción de segundo�
Uso y cuidado de la herramienta eléctrica
•Las personas con aptitudes psicofísicas o mentales
disminuidas, así como los niños no pueden operar la
herramienta eléctrica, si no son supervisados o instrui-
dos sobre el uso de la herramienta eléctrica por una
persona responsable de su seguridad�
•No fuerce la herramienta eléctrica. Utilice la he-
rramienta eléctrica adecuada para su aplicación.
La herramienta eléctrica correcta hará el trabajo mejor
y más seguro a la velocidad para la que fue diseñada�
Especicaciones de la herramienta eléctrica
Aspiradora CT42055
Código de la herramienta eléctrica [220-240 V ~50 / 60 Hz] 245463
Potencia absorbida [W] 1800
Amperaje en el voltaje 220-240 V [A] 7�8
Vacuidad [kPa] >21
Índice de ujo de aire [l/s] 1,75
Capacidad [l] 3
Peso [kg]
[lb] 4,5
9�92
Clases de protección
Presión acústica [dB(A)] <80
Potencia acústica [dB(A)] <91

13
Español
•No utilice la herramienta eléctrica si el interrup-
tor no la enciende y apaga. Cualquier herramienta
eléctrica que no pueda ser controlada con el interrup-
tor es peligrosa y debe ser reparada�
•Guarde las herramientas eléctricas inactivas
fuera del alcance de los niños y no permita que las
personas que no estén familiarizadas con la herra-
mienta eléctrica o estas instrucciones la utilicen.
Las herramientas eléctricas son peligrosas en manos
de usuarios inexpertos�
•Utilice la herramienta eléctrica, los accesorios y
las brocas de las herramientas, etc. de acuerdo con
estas instrucciones, teniendo en cuenta las condi-
ciones de trabajo y el trabajo a realizar. El uso de la
herramienta eléctrica para operaciones diferentes de
las previstas podría producir una situación peligrosa�
•Mantenga las manijas y las supercies de agarre
secas, limpias y libres de aceite y grasa. Las mani-
jas y las supercies de agarre resbaladizas no permi-
ten un manejo y un control seguros de la herramienta
en situaciones inesperadas�
Servicio
Haga reparar su herramienta eléctrica por perso-
nal de reparación calicado que use solamente
piezas de repuesto idénticas. Esto asegurará que
se mantenga la seguridad de la herramienta eléctrica�
Guías de seguridad durante el funciona-
miento de la herramienta eléctrica
Atención: esta aspiradora fue diseña-
da para aspirar residuos secos y polvo
únicamente. Nunca succione líquidos ni
residuos húmedos, ya que esto dañará la
herramienta eléctrica, y en este caso se anulará la
garantía.
•Llevar a cabo operaciones con dispositivos de ltra-
do removidos está estrictamente prohibido; esto cau-
sará que se rompa la herramienta eléctrica y anulará
la reparación de garantía�
•Está prohibido llevar a cabo la succión de lo siguiente:
•sustancias dañinas (como polvo de madera de
haya o roble, polvo de roca machacada, asbestos
pulverizado, etc�);
•productos químicos cáusticos (soda cáustica,
etc�);
•objetos losos (clavos, trozos de vidrio, etc.);
•objetos duros y pesados (monedas, nueces, pie-
dras, etc�), pueden dañar las paredes del depósito;
•escoria y carbones vivos (como carbones calien-
tes o no extintos de una chimenea o asador); la suc-
ción de desechos con temperatura que no supere
los 50°C está permitida�
•Tenga cuidado al vaciar el depósito� Nunca vierta el
polvo del depósito en fuego�
•Está prohibido el uso de herramienta eléctrica en
una atmósfera con gases y vapores explosivos emiti-
dos por sustancias agresivas�
•No cierre los ventiladores de aire de la herramienta
eléctrica y no cierre el oricio de tubo de succión total-
mente; esto puede causar sobrecalentamiento�
•No coloque el extremo de la manguera de succión
(cuando el artefacto está encendido) cerca del cuerpo,
los ojos o las orejas, esto puede causar lesiones�
•No use la manguera de aire para otros propósitos
que no sean los designados� Nunca use la manguera
de aire para transportar el artefacto o para arrastrarlo�
Proteja la manguera de aire del calor, de bordes lo-
sos y de partes móviles de otras herramientas eléctri-
cas o de otros artefactos�
•Recoger algunas sustancias puede provocar la acu-
mulación de carga estática en las piezas de la aspira-
dora� Tenga cuidado: la carga estática puede causar
una sensación de molestia, pérdida de equilibrio y
desmayos�
•Tenga especial cuidado cuando trabaje en escale-
ras�
Símbolos usados en el manual
Los siguientes símbolos se utilizan en el manual de
instrucciones, recuerde sus signicados. La interpre-
tación correcta de los símbolos le permitirá el uso co-
rrecto y seguro de la herramienta eléctrica�
Símbolo Signicado
Etiqueta con número de
serie:
CT ��� - modelo;
XX - fecha de fabricación;
XXXXXXX - número de se-
rie�
Lea todas las reglas e ins-
trucciones de seguridad�
Desconecte la herramienta
eléctrica de la red antes de
instalarla o ajustarla�
Dirección del movimiento�
Dirección de la rotación�
Bloqueado�
Desbloqueado�
Doble aislamiento / clase de
protección�
Atención� Importante�
Información útil�

14
Español
Símbolo Signicado
No deseche la herramienta
eléctrica en un recipiente de
basura doméstica�
Designación de la herramienta eléctrica
Las aspiradoras fueron diseñadas para uso doméstico,
no comercial, es decir, en automóviles, hogares, escue-
las, tiendas, ocinas. Las herramientas eléctricas le per-
miten aspirar polvo seco no dañino y escombros nos.
Componentes de la herramienta eléctrica
1 Recipiente recolector de polvo (montaje)
2 Conector de la manguera
3 Manija
4 Rueda
5 Ranuras de ventilación
6 Interruptor de encendido / apagado
7 Regulador de potencia
8 Botón de rebobinado del cable de alimentación
9 Cable de energía
10 Manguera de aire *
11 Caño telescópico *
12 Boquilla rectangular *
13 Boquilla para grietas *
14 Traba del tubo telescópico *
15 Regulador del ujo de aire *
16 Traba del recipiente colector de polvo
17 Traba de la tapa inferior
18 Depósito
19 Cubierta inferior
20 Parte superior del recipiente recolector de polvo
(montaje)
21 Filtro de cinta
22 Cubierta superior
23 Traba de la cubierta superior
24 Carcasa del ltro de espuma
25 Filtro de espuma
26 Cubierta del ltro HEPA
27 Filtro HEPA
* Accesorios
No todos los accesorios fotograados o descritos
están incluidos en el envío estándar.
Instalación y regulación de los elemen-
tos de la herramienta eléctrica
Antes de llevar a cabo cualquier trabajo sobre la
herramienta eléctrica, debe desconectarse de la
fuente de energía.
Cepillos incorporados de la boquilla rectangular y
boquilla para ranuras (ver g. 1)
La boquilla rectangular 12 y la boquilla para ranuras 13
tienen cepillos incorporados que permiten la succión
del polvo en supercies con vellos (por ejemplo, migas
en tapizados de muebles o alfombras)�
•Presione el botón de la boquilla rectangular 12 para
extender el cepillo incorporado y el raspador de goma
(ver g. 1.1).
•Gire el cepillo incorporado de la boquilla para ranu-
ras 13 como se muestra en la gura 1.2.
Montaje / desmontaje de la manguera de aire y los
accesorios (ver g. 2)
•Puede cambiar la longitud del tubo telescópico 11:
mueva y mantenga el bloqueo 14 como se muestra
en la g. 2.1, coloque la parte más delgada del tubo
telescópico 11, suelte el bloqueo 14�
•Conecte la manguera de aire 10 al conector de la
manguera 2 como se muestra en la g. 2.2.
•Conecte el tubo telescópico 11 a la manguera de
aire 10, conecte la boquilla 12 o 13 como se muestra
en la g. 2.2.
•Las operaciones de desarmado se hacen en se-
cuencia inversa�
Funcionamiento inicial de la herramien-
ta eléctrica
Utilice siempre la tensión adecuada de la red: la ten-
sión de la red debe coincidir con la información citada
en la placa de identicación de la herramienta eléctrica.
Encendido / apagado de la herramienta
eléctrica
Encender:
Presione y suelte el interruptor de encendido / apa-
gado 6�
Apagar:
Presione y suelte el interruptor de encendido / apa-
gado 6�
Características de diseño de la herra-
mienta eléctrica
Regulador de potencia (ver g. 3.1)
Puede ajustar la potencia de la aspiradora moviendo el
regulador de potencia 7 como se muestra en la g. 3.1.
Esta función puede resultar útil para eliminar los dese-
chos de objetos ligeros no jos (trapos, tapetes, etc.).
Regulador de ujo de aire (ver g. 3.2)
Puede ajustar el ujo de aire (y como consecuencia, la
fuerza de succión) moviendo el regulador 15 en el tubo
de la manguera de aire 10� Moviendo el regulador 15
puede abrir o cerrar el oricio del tubo (ver g. 3.2).
Cuando se abre el oricio, se reduce la fuerza de suc-
ción� Esta función puede resultar útil para eliminar los re-
siduos de objetos ligeros no jos (trapos, tapetes, etc.).
Enrollador de cable
Enrollador de cable: enrolla el cable de alimentación 9
en el carrete de forma rápida y ordenada�
Mantenga presionado el botón 8- el cable de alimen-
tación 9se enrollará alrededor del carrete� Se reco-
mienda guiar el cable de alimentación 9para que no
se enrede ni se retuerza�

15
Español
Recomendaciones sobre el funciona-
miento
Realice todas las operaciones antes
mencionadas y los pasos de armado de-
pendiendo del trabajo a realizar.
•Elija una boquilla apropiada dependiendo del tipo de
operación y del área de supercie de trabajo.
•Desenrolle el cable de alimentación 9hasta que ten-
ga una longitud suciente. El cable de alimentación 9
tiene 2 marcas:
•la marca amarilla muestra la longitud óptima del
cable;
•la marca roja muestra el punto nal del cable.
No desenrolle el cable de alimentación 9más allá de
la marca roja�
•Ajuste la potencia y el ujo de aire como se describe
arriba�
•Recoja polvo o escombros pequeños y secos�
•En caso de reducción de eciencia en la operación
siga estos pasos:
•verique la línea de succión, si encuentra obs-
trucciones, quítelas;
•revise los ltros, límpielos si están sucios.
•Después del uso, apague la herramienta eléctrica y en-
rolle el cable de alimentación 9como se describe arriba�
Mantenimiento de la herramienta eléctri-
ca / medidas preventivas
Antes de llevar a cabo cualquier trabajo sobre la
herramienta eléctrica, debe desconectarse de la
fuente de energía.
Limpieza del depósito (ver g. 4-5)
Controle el llenado del depósito 18 y
vacíelo rápidamente de acuerdo con las
precauciones de seguridad descritas an-
teriormente.
•Apague la herramienta eléctrica�
•Presione la traba 16 y retire el recipiente recolector
de polvo 1 (ver g. 4.1).
•Presione la traba 17 para abrir la tapa inferior 19 y
vacíe con cuidado el depósito 18 (ver g. 5).
•Cierre la cubierta inferior 19 (el botón 17 debe en-
cajar en su lugar)�
Limpieza del ltro de banda y del ltro de espuma
(ver g. 4, 6-7)
•Retire el recipiente recolector de polvo 1, como se
describe arriba (ver g. 4).
•Desmonte la parte superior del recipiente recolector
de polvo 20 como se muestra en la g. 6.1-6.2.
•Vacíe con cuidado el depósito 18 (si fuera necesario)�
•Retire el ltro de banda 21 tirando de sus extremos,
como se muestra en la g. 6.3.
•Tire de la traba y abra la tapa superior 22 (ver g. 7.1).
•Retire la carcasa 24 con el ltro de espuma 25 ins-
talado (ver g. 7.2).
•Retire el ltro de espuma 25 de la carcasa 24 (ver
g. 7.3).
•Limpie todos los detalles con un cepillo suave o lá-
velos con agua tibia y jabón�
•Lave cuidadosamente el ltro de banda 21 y el ltro
de espuma 25 con agua tibia y jabón�
•Si el ltro de banda 21 o el ltro de espuma 25 es-
tán dañados o gravemente obstruidos (no es posible
limpiar con los métodos enumerados anteriormente),
reemplácelos�
•Seque bien todas las piezas antes del montaje�
•Las operaciones de montaje se realizan en secuen-
cia inversa�
Limpieza del ltro HEPA (ver g. 4, 8)
•Retire el recipiente recolector de polvo 1, como se
describe arriba (ver g. 4).
•Retire la tapa 26 tirando de la traba, como se mues-
tra en la g. 8.1.
•Retire el ltro HEPA 27 (ver g. 8.2).
•Limpie el ltro HEPA 27 con un cepillo suave y luego
sople con aire comprimido�
•Si el ltro HEPA 27 está dañado u obstruido grave-
mente (no es posible limpiar con los métodos enume-
rados anteriormente), reemplácelo�
•Instale el ltro HEPA 27, como se describe arriba�
Limpieza de la herramienta eléctrica
Una condición indispensable para un uso seguro a
largo plazo de la herramienta eléctrica es mantenerla
limpia� Con frecuencia limpie la herramienta con aire
comprimido a través de las ranuras de ventilación 5�
Servicio de post-venta y servicio de aplicaciones
Nuestro serivicio de post-venta responde a sus pre-
guntas sobre el mantenimiento y la reparación de su
producto, así como también sobre los repuestos� La
información sobre los centros de servicio, los diagra-
mas de las piezas y sobre los repuestos también se
puede encontrar en: www.crown-tools.com�
Cómo transportar las herramientas eléc-
tricas
•Mueva la herramienta eléctrica únicamente por el
mango 3o levantándola y sujetándola por la parte
inferior� No mueva la herramienta eléctrica por otras
partes (tirando de la manguera de aire 10 o del cable
de alimentación)�
•Está terminantemente prohibido dejarlas caer para
que no se produzca ningún impacto mecánico en el
embalaje durante el transporte�
• Cuando se descarguen / carguen, no se permite
usar ningún tipo de tecnología que funcione bajo el
principio de sujeción de embalajes�
Protección del medio ambiente
Recicle las materias primas en lugar de
eliminarlas como basura.
Las herramientas, los accesorios y el emba-
laje deberían seleccionarse para un recicla-
do cuidadoso del medio ambiente�
Las piezas de material plástico están marcadas para
un reciclado selectivo�
Estas instrucciones están impresas sobre papel reci-
clado sin la utilización de cloro�
El fabricante se reserva la posibilidad de incluir cambios.

16
Русский
Информация о шуме
Носить приспособление для защиты
органов слуха при уровне звукового
давления свыше 85 дБ(A).
ПРЕДУПРЕЖДЕНИЕ - Чтобы снизить
риск получения травм, пользователь
должен ознакомиться с руководством
по эксплуатации!
Общие правила техники безопасности
ПРЕДУПРЕЖДЕНИЕ! Прочтите все
предупреждения о технике без-
опасности и инструкции. Несоблю-
дение предупреждений и инструкций
может привести к поражению электрическим током,
возгоранию и / или серьезной травме.
Сохраните все предупреждения и инструкции
для дальнейшего использования.
Термин "электроинструмент", используемый в тек-
сте предупреждений, относится к электроинстру-
менту с питанием от электросети (проводной) или
электроинструменту с питанием от аккумулятора
(беспроводной).
Безопасность рабочего места
Не используйте электроинструменты во взры-
воопасных средах, например, в присутствии
легковоспламеняющихся жидкостей, газов или
пыли. Электроинструменты создают искры, кото-
рые могут стать причиной воспламенения пыли
или паров.
Рекомендации по электробезопасности
•Не подвергайте электроинструмент воздей-
ствию дождя или влаги. Попадание воды внутрь
электроинструмента повышает риск поражения
электрическим током.
•Не используйте токоведущий кабель в целях,
для которых он не предназначен. Никогда не
используйте кабель для переноски электроин-
струмента, подтягивания электроинструмента к
себе, или для выключения электроинструмен-
та рывком за токоведущий кабель. Оберегайте
токоведущий кабель от нагревания, нефтепро-
дуктов, острых кромок или движущихся частей
электроинструмента. Поврежденный или спутан-
ный токоведущий кабель увеличивает опасность
поражения электрическим током.
Рекомендации по личной безопасности
•Будьте бдительными, следите за тем, что вы
делаете, и при работе с электроинструментом
руководствуйтесь здравым смыслом. Не ис-
пользуйте электроинструмент, если вы устали
или находитесь под воздействием наркотиче-
ских средств, алкоголя или лекарств. Ослабле-
ние внимания при работе с электроинструментом
может привести к серьезной травме.
•Не допускайте непреднамеренного запуска
электроинструмента. Перед подключением к ис-
точнику питания и / или аккумулятору, поднятием
или переносом электроинструмента убедитесь,
что включатель / выключатель находится в вы-
ключенном состоянии. Перемещение электроин-
струмента, когда палец находится на включателе /
выключателе, или включение питания электроин-
струментов с включенным включателем / выключа-
телем может стать причиной несчастного случая.
Технические характеристики электроинструмента
Пылесос CT42055
Код электроинструмента [220-240 В ~50 / 60 Гц] 245463
Номинальная мощность [Вт] 1800
Сила тока при напряжении 220-240 В [A] 7�8
Разрежение [кПа] >21
Воздушный поток [л/с] 1,75
Емкость [л] 3
Вес [кг]
[фунты] 4,5
9�92
Класс безопасности
Звуковое давление [дБ(A)] <80
Акустическая мощность [дБ(A)] <91

17
Русский
•Всегда будьте осторожны, не игнорируйте
принципы безопасной работы с электроин-
струментом из-за знаний и опыта, полученных
вследствие частого пользование электроин-
струментом. Неосторожное действие может неза-
медлительно привести к серьезным травмам.
Использование и обслуживание электроинстру-
мента
• Люди с недостаточными психофизическими
или умственными способностями и дети не могут
управлять электроинструментом, если человек, от-
ветственный за их безопасность, не контролирует
их или не инструктирует об использовании электро-
инструмента.
•Не перегружайте электроинструмент. Исполь-
зуйте электроинструмент, который соответству-
ет вашей цели применения. Соответствующий
электроинструмент будет работать лучше и без-
опаснее с той производительностью, для которой
он был спроектирован.
•Не работайте электроинструментом с неис-
правным включателем / выключателем. Элек-
троинструмент, включение / выключение которого,
не может контролироваться представляет опас-
ность и должен быть немедленно отремонтирован.
•Храните неиспользуемые электроинстру-
менты в недоступном для детей месте и не
разрешайте лицам, которые не ознакомились
с электроинструментом или этими инструкция-
ми, использовать электроинструмент. Электро-
инструменты опасны в руках неподготовленных
пользователей.
•Используйте электроинструмент, принадлеж-
ности, насадки и т.п. в соответствии с инструк-
циями, принимая во внимание условия работы
и выполняемые работы. Использование электро-
инструмента для операций, для которых он не
предназначен, может привести к опасной ситуации.
•Поддерживайте рукоятки и поверхности за-
хвата сухими, чистыми и свободными от мас-
ла и смазки. Скользкие рукоятки и поверхности
захвата препятствуют безопасному обращению с
электроинструментом и управлению им в неожи-
данных ситуациях.
Техническое обслуживание
Обслуживание Вашего электроинструмента
должно производиться квалифицированными
специалистами с использованием рекомендо-
ванных запасных частей. Это дает гарантию,
того что безопасность Вашего электроинструмента
будет сохранена.
Правила техники безопасности при
эксплуатации электроинструмента
Внимание: этот пылесос предназначен
только для всасывания сухого мусора и
пыли. Никогда не всасывайте жидкости
или влажный мусор, так как это может
повредить электроинструмент. В этом случае
гарантия вы лишитесь права на гарантийный
ремонт.
•Категорически запрещается проводить работы
со снятыми фильтрующими устройствами - это при-
ведет к поломке электроинструмента, и лишит вас
права на гарантийный ремонт.
•Запрещается производить всасывание:
•вредных для здоровья веществ (например,
древесной пыли дуба или бука, каменной пыли,
асбеста и др.);
•едкие химические вещества (каустическая
сода и др.);
•острых предметов (гвоздей, осколков стекла и
др.);
•твердые и тяжелые предметы (монеты, гайки,
камни и т. д.), они могут повредить стенки резер-
вуара;
•горячих или горящих углей (например, непо-
тушенных или неостывших углей из камина или
гриля), допускается всасывание мусора с темпе-
ратурой не выше 50°C.
•Будьте осторожны при опорожнении резервуара.
Никогда не высыпайте пыль из резервуара в откры-
тый огонь.
•Запрещается использовать электроинструмент в
атмосфере, содержащей взрывоопасные газы и ис-
парения агрессивных веществ.
•Не закрывайте вентиляционные отверстия элек-
троинструмента и не закрывайте плотно отверстие
всасывающего патрубка - это может привести к
перегреву.
•Не подносите конец всасывающего шланга (при
включенном электроинструменте) к телу, глазам
или ушам - это может привести к травмам.
• Не используйте воздушный шланг в целях, для
которых он не предназначен. Никогда не исполь-
зуйте воздушный шланг для переноски электроин-
струмента или подтягивания электроинструмента
к себе. Оберегайте воздушный шланг от нагрева-
ния, острых кромок или движущихся частей других
электроинструментов.
•При всасывании некоторых веществ возможно
накапливание статического заряда на деталях пы-
лесоса, соблюдайте осторожность - разряд стати-
ческого электричества может вызвать неприятные
ощущения, привести к потере равновесия и паде-
нию.
•Соблюдайте особую осторожность при проведе-
нии работ на ступеньках.
Символы, используемые в инструк-
ции
В руководстве по эксплуатации используются ни-
жеприведенные символы, запомните их значение.
Правильная интерпретация символов поможет ис-
пользовать электроинструмент правильно и без-
опасно.
Символ Значение
Наклейка с серийным но-
мером:
CT ... - модель;
XX - дата производства;
XXXXXXX - серийный но-
мер.

18
Русский
Символ Значение
Ознакомьтесь со всеми
указаниями по технике
безопасности и инструкци-
ями.
Отключайте электроин-
струмент от сети перед
проведением монтажных и
регулировочных работ.
Направление движения.
Направление вращения.
Заблокировано.
Разблокировано.
Двойная изоляция / класс
безопасности.
Внимание. Важная инфор-
мация.
Полезная информация.
Не выбрасывайте электро-
инструмент в бытовой му-
сор.
Назначение электроинструмента
Пылесосы предназначены для домашнего неком-
мерческого использования, например: в автомоби-
лях, домах, школах, магазинах, офисах. Электро-
инструменты позволяют убирать безвредную сухую
пыль и мелкий мусор.
Элементы устройства электроинстру-
мента
1 Пылесборный контейнер (в сборе)
2 Отверстие всасывания
3 Рукоятка
4 Колесо
5 Вентиляционные отверстия
6 Включатель / выключатель
7 Регулятор мощности
8 Кнопка наматывания кабеля питания
9 Токоведущий кабель
10 Воздушный шланг *
11 Телескопический патрубок *
12 Прямоугольная насадка *
13 Щелевая насадка *
14 Фиксатор телескопического патрубка *
15 Регулятор воздушного потока *
16 Кнопка блокировки пылесборного контейнера
17 Кнопка блокировки нижней крышки
18 Резервуар
19 Нижняя крышка
20 Верхняя часть пылесборного контейнера (в
сборе)
21 Ленточный фильтр
22 Верхняя крышка
23 Фиксатор верхней крышки
24 Корпус поролонового фильтра
25 Поролоновый фильтр
26 Крышка HEPA-фильтра
27 HEPA-фильтр
* Принадлежности
Перечисленные, а также изображенные принад-
лежности, частично не входят в комплект по-
ставки.
Монтаж и регулировка элементов
электроинструмента
Перед проведением всех процедур электроин-
струмент обязательно отключить от сети.
Встроенные щетки прямоугольной насадки и
щелевой насадки (см. рис. 1)
Прямоугольная насадка 12 и щелевая насадка 13
имеют встроенные щетки, которые позволяют вса-
сывать пыль с ворсистых поверхностей (например,
крошки с обивки мебели или ковра).
•Нажмите кнопку прямоугольной насадки 12, что-
бы выдвинуть встроенную щетку и резиновый скре-
бок (см. рис. 1.1).
•Поверните встроенную щетку щелевой насад-
ки 13, как показано на рис. 1.2.
Монтаж / демонтаж воздушного шланга и при-
надлежностей (см. рис. 2)
•Вы можете изменять длину телескопического
патрубка 11: переместите и удерживайте фикса-
тор 14, как показано на рис. 2.1, выдвиньте более
тонкую часть телескопического патрубка 11, отпу-
стите фиксатор 14�
•Подключите воздушный шланг 10 к отверстию 2,
как показано на рис. 2.2.
•Присоедините телескопический патрубок 11 к
воздушному шлангу 10, подключите насадки 12
или 13, как показано на рис. 2.2.
•Демонтаж производите в обратной последова-
тельности.
Ввод в эксплуатацию электроинстру-
мента
Убедитесь в том, что имеющееся напряжение в
сети соответствует данным, указанным на прибор-
ном щитке электроинструмента.

19
Русский
Включение / выключение электроин-
струмента
Включение:
Нажмите и отпустите включатель / выключа-
тель 6�
Выключение:
Нажмите и отпустите включатель / выключа-
тель 6�
Конструктивные особенности элек-
троинструмента
Регулятор мощности (см. рис. 3.1)
Вы можете регулировать мощность пылесоса, пе-
ремещая регулятор мощности 7, как показано на
рис. 3.1. Эта функция может быть полезна при уда-
лении загрязнений с легких незакрепленных пред-
метов (половиков, циновок и т.п.).
Регулятор расхода воздуха (см. рис. 3.2)
Вы можете регулировать поток воздуха (и, как след-
ствие, силу всасывания), перемещая регулятор 15
на патрубке воздушного шланга 10. Перемещая ре-
гулятор 15, вы можете открывать или закрывать от-
верстие в патрубке (см. рис. 3.2). Когда отверстие
открывается, сила всасывания уменьшается. Эта
функция может быть полезна при удалении загряз-
нений с легких незакрепленных предметов (полови-
ков, циновок и т.п.).
Устройство для наматывания кабеля
Устройство для наматывания кабеля - быстро и
аккуратно наматывает токоведущий кабель 9 на
катушку.
Нажмите и удерживайте кнопку 8 - токоведущий ка-
бель 9 будет намотан на катушку. Рекомендуется
направлять токоведущий кабель 9 так, чтобы он не
запутывался и не перекручивался.
Рекомендации при работе электроин-
струментом
Выполните подготовительные и сбо-
рочные операции описанные выше,
в зависимости от вида выполняемых
работ.
•Выберите насадку в зависимости от вида выпол-
няемых работ и от площади обрабатываемой по-
верхности.
•Размотайте токоведущий кабель 9 на доста-
точную длину. Токоведущий кабель 9 имеет 2
метки:
•желтая метка показывает оптимальную длину
кабеля;
•красная метка показывает конечную точку ка-
беля.
Не разматывайте токоведущий кабель 9 дальше
красной метки.
•Отрегулируйте мощность и воздушный поток, как
описано выше.
•Собирайте пыль или мелкий мусор.
•Если в процессе работы наблюдается снижение
производительности, попробуйте выполнить следу-
ющие действия:
•проверьте всасывающую магистраль, при об-
наружении засорений - устраните их;
•проверьте фильтры, очистите их, если они за-
сорены.
•По окончании работы выключите электроинстру-
мент и смотайте токоведущий кабель 9, как описа-
но выше.
Обслуживание / профилактика элек-
троинструмента
Перед проведением всех процедур электроин-
струмент обязательно отключить от сети.
Опорожнение резервуара (см. рис. 4-5)
Следите за наполнением резервуа-
ра 18 и регулярно опорожняйте его в
соответствии с описанными выше ме-
рами безопасности.
•Выключите электроинструмент.
•Нажмите кнопку блокировки 16 и снимите пылес-
борный контейнер 1 (см. рис. 4.1).
•Нажмите кнопку блокировки 17, чтобы открыть
нижнюю крышку 19 и осторожно опорожните резер-
вуар 18 (см. рис. 5).
•Закройте нижнюю крышку 19 (кнопка 17 должна
защелкнуться).
Очистка ленточного фильтра и поролонового
фильтра (см. рис. 4, 6-7)
•Снимите пылесборный контейнер 1, как описано
выше (см. рис. 4).
•Снимите верхнюю часть пылесборного контейне-
ра 20, как показано на рис. 6.1-6.2.
•Осторожно опорожните резервуар 18 (если это
необходимо).
•Снимите ленточный фильтр 21, потянув за его
концы, как показано на рис. 6.3.
•Потяните фиксатор и откройте верхнюю крыш-
ку 22 (см. рис. 7.1).
•Снимите корпус 24 с установленным поролоно-
вым фильтром 25 (см. рис. 7.2).
•Извлеките поролоновый фильтр 25 из корпуса 24
(см. рис. 7.3).
•Очистите все детали мягкой щеткой или вымойте
их в теплой мыльной воде.
•Тщательно промойте ленточный фильтр 21
и поролоновый фильтр 25 в теплой мыльной
воде.
•Если ленточный фильтр 21 или поролоновый
фильтр 25 повреждены или имеют серьезные за-
грязнения (и их невозможно очистить перечислен-
ными выше методами), замените их.
•Перед сборкой тщательно просушите все дета-
ли.
•Сборочные операции производите в обратной
последовательности.

20
Русский
Очистка HEPA-фильтра (см. рис. 4, 8)
•Снимите пылесборный контейнер 1, как описано
выше (см. рис. 4).
•Снимите крышку 26, потянув за фиксатор, как по-
казано на рис. 8.1.
•Снимите HEPA-фильтр 27 (см. рис. 8.2).
•Очистите HEPA-фильтр 27 мягкой щеткой, а за-
тем продуйте его сжатым воздухом.
•Если HEPA-фильтр 27 поврежден или имеет
серьезные загрязнения (и их невозможно очи-
стить перечисленными выше методами), заме-
ните его.
•Установите HEPA-фильтр 27, как описано
выше.
Чистка электроинструмента
Обязательным условием для долгосрочной и без-
опасной эксплуатации электроинструмента явля-
ется содержание его в чистоте. Регулярно проду-
вайте электроинструмент сжатым воздухом через
вентиляционные отверстия 5�
Послепродажное обслуживание
Ответы на вопросы по ремонту и обслуживанию
вашего продукта вы можете получить в сервисных
центрах. Информацию о сервисных центрах, схе-
мы запчастей и информацию по запчастям Вы мо-
жете найти по адресу: www.crown-tools.com�
Транспортировка электроинструмен-
тов
•Перемещайте электроинструмент только за ру-
коятку 3, либо переносите поддерживая его сни-
зу. Запрещается перемещать электроинструмент
за другие части (подтягивать его за воздушный
шланг 10 или токоведущий кабель и т.п.).
• Не допускайте падения упаковки, а также любые
механические воздействия на нее при транспорти-
ровке.
• При погрузке / разгрузке не используйте погру-
зочную технику, работающую по принципу зажима
упаковки.
Защита окружающей среды
Вторичное использование сырья вме-
сто устранения мусора.
Электроинструмент, дополнительные
принадлежности и упаковку следует эко-
логически чисто утилизировать.
В интересах чистосортной рециркуляции отходов
детали из синтетических материалов соответствен-
но обозначены.
Настоящее руководство по эксплуатации напечата-
но на бумаге‚ изготовленной из вторсырья без при-
менения хлора.
Оговаривается возможность внесения изменений.
This manual suits for next models
1
Table of contents
Languages:
Other Crown Vacuum Cleaner manuals

Crown
Crown VCJ-2080 User manual

Crown
Crown CT42032F User manual

Crown
Crown CT63006 User manual

Crown
Crown CMVC-414 User manual

Crown
Crown VCJ-2090 User manual

Crown
Crown CT42045 User manual

Crown
Crown CT42027 User manual

Crown
Crown WVC-1220 User manual

Crown
Crown CT42033 User manual

Crown
Crown CT42029 User manual