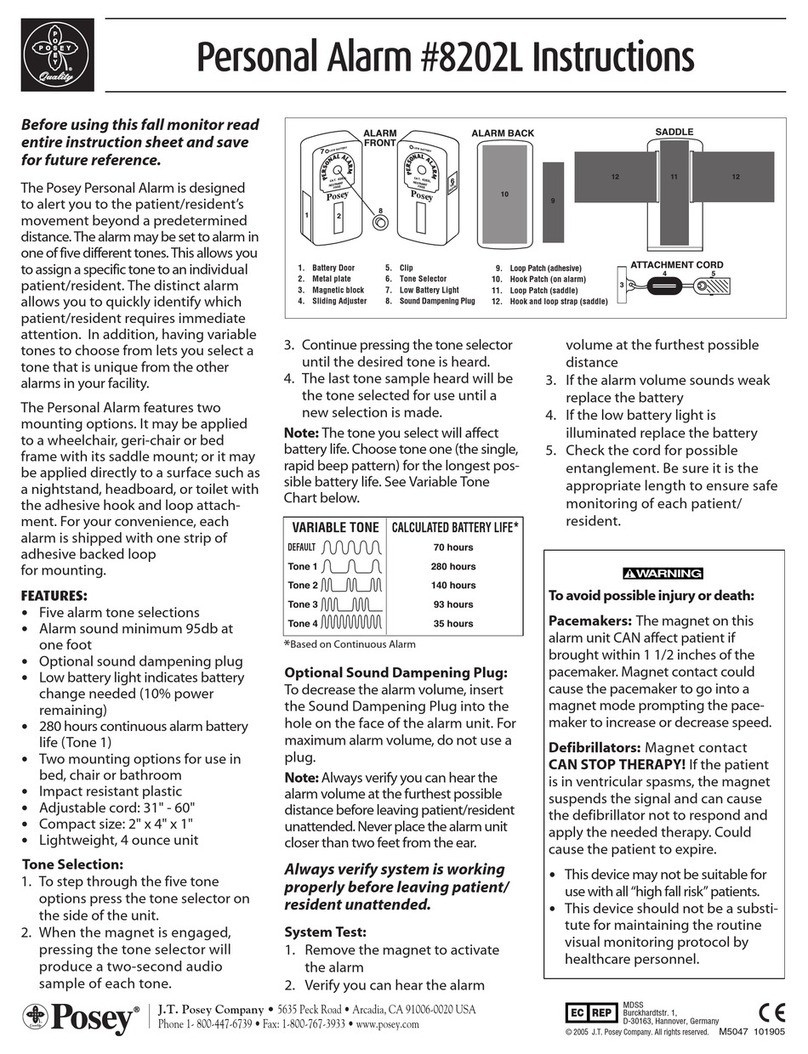
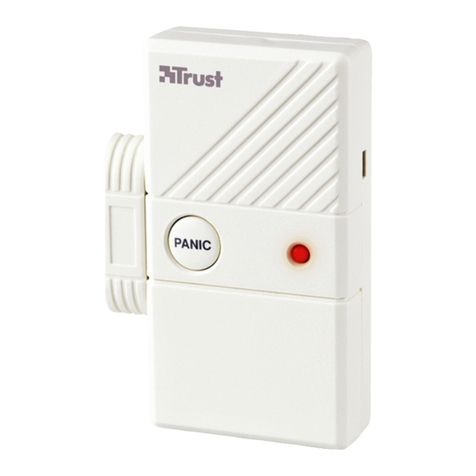
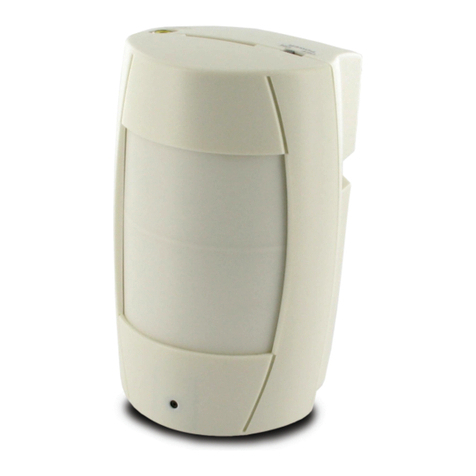
CruxCare C2 User manual

User Manual
Benutzerhandbuch
Manuel d'utilisation
Manuale utente
Manual del usuario
Gebruikershandleiding

1
18
35
52
69
86
CruxCare C2 Home Care Calling System
CruxCare C2 Hauspflege-Rufsystem
Système d'Appel pour les Soins CruxCare C2
Sistema di Chiamata per l'Assistenza Domiciliare CruxCare C2
Sistema de Llamada para la Atención Domiciliaria CruxCare C2
CruxCare C2 Oproepsysteem voor Thuisverpleging

CruxCare C2 Home
Care Calling System
ENGLISH
1

1. Disclaimer
2. CruxCare C2 system description
3. How to use this manual ‒ first use of your CruxCare product(s)
4. Instructions for use
5. Accessories
Overview: Optional accessories & compatible devices (sold separately)
5.1 CruxCare call buttons red and blue CCCB01R and CCCB02B
5.2 CruxCare call button Pro CCBS-01 (selected countries only)
5.3 CruxCare bathroom call button Pro CCBR-01 (selected countries only)
5.4 CruxCare bed mat Pro CCBP-01 (selected countries only)
5.5 Tiiwee Window & Door Sensor TWWS03
6. Connecting accessories
7. Indication of low batteries
8. How to replace the batteries
Customer Service
2

3
1. Disclaimer
2. CruxCare C2 system description
CruxCare C2 Home Care Calling System
Congratulations on your purchase of this CruxCare product. It is designed to
withstand many years of daily use. It is effortless to use, and we have gone to
great lengths to create a CruxCare product portfolio that will allow you to use this
product in many situations. Please read this manual carefully to ensure that you
will get the most out of the product.
The range of wireless devices may vary and be dependent on your specific
environmental conditions.
CruxCare products augment the caregiver. The use of a CruxCare C2 Home Alert
System is not a substitute for visual monitoring by a caregiver. Test the device
regularly. The CruxCare system relies on wireless radio technology, which is
subject to physical and environmental conditions. The product does not detect
when the Pager is out of range. Please make sure to test the product periodically.
The CruxCare C2 Home Alert System augments caregivers in their daily duties.
With a press of a button, a patient can actively ask for help very quickly. Also, with
accessories like door sensors and bed mats, patients can be monitored passively.
Connect the C2 Pager to up to 3 CruxCare accessories.
3. How to use this manual
first use of your CruxCare product(s)
If you purchased a kit containing the CruxCare C2 Pager and one or more
accessories, please refer to chapter 4 of this manual. These chapters describe
how to start using your kit.
However, if you connect a new accessory to your CruxCare C2 Pager, please
refer to chapter 6. Then, read chapter 4.

4
Unpacking
Switch on the C2 Pager by moving the button on the side from "OFF" to "ON". If
you purchased a CruxCare kit, all accessories have been connected to the C2
Pager at the factory. Your system is ready for use.
Setting notification sound
The C2 Pager offers a selection of 3 tones. Press the "VOLUME" button to toggle
between these options:
1. Low volume tone with vibration alert.
2. No tone (silent), but with vibration alert.
3. High volume tone with vibration alert.
Notification sounds
When a call button or sensor is activated, the C2 Pager will vibrate and produce
an alert tone (not in silent mode). The "DEVICE" indicator LEDs will indicate
which device caused the alert, and the respective status LED will blink red until
pressing "STOP" on the C2 Pager. Also, the C2 Pager will continue to vibrate as
long as the "STOP" button is not pressed.
In general
4. Instructions for use
CruxCare C2 Pager, product code CCPAG02
Status LED
ON / OFF switch
Belt clip
Device indicator LEDs.
Pair with (up to)
3 devices.
Volume, Connect and
Stop buttons

5
CruxCare C2 Pager features
Capacity for three sensors or calling devices with LED indicator
Convenient programming in seconds
Hi volume, low volume and silent mode
Vibration alert for people who are hard of hearing
Indication of low battery for pager and accessories (selected accessories only)
Stop a notification sound
Stop the sound by pressing the "STOP" button on the Pager. You will hear two
short beeps. Some accessories allow for the notification sound to be stopped
from the accessory itself.
IMPORTANT: Always press the "STOP" button for at least 1 second. Short
presses of this button will not have an effect.
*Note: availability of accessories may vary from country to country.
5. Accessories
CruxCare C2 Pager specifications
Range in open area: 100m
Power supply: 2 x AA batteries
Battery life: 4 - 6 months
Dimensions: 83 x 55 x 26mm
Housing material: ABS
Overview: Optional accessories & compatible devices (sold separately).
Accessory
CruxCare call button (red) CCCB01R
CCCB02B
CCBP-01
CCBS-01
CCBR-01
TWWS03
CruxCare call button (blue)
CruxCare bed mat Pro
CruxCare call button Pro
CruxCare bathroom call button Pro
Tiiwee door sensor
Product Code

6
Calling the carer
Press the red or blue call button. The button will light up as a sign that a signal
was sent.
Calling the carer
Short-press the red call button to call for assistance or help. The red light will
light up for the transmitted signal's whole duration (about 10 seconds).
Wireless patient handset with Call and Reset buttons for use at the bedside,
wheelchair or similar locations. When a call was made, the patient or caregiver
can decide to stop the notification sound on the C2 Pager by pressing the green
"C" button.
Stop the notification sound
Stop the sound at any time by pressing the "STOP" button on the CruxCare C2
Pager for about 1 second.
Installation
This device can be worn around the neck using a lanyard. Alternatively, mount
the call button to a fixed position by using double-sided adhesive pads.
Power supply: 1 x CR2450 battery
Dimensions: 5,5 x 5,5 x 2 cm
Housing material: ABS
Radio-frequency: 433 MHz
5.1 CruxCare call buttons red and blue CCCB01R and CCCB02B
5.2 CruxCare call button Pro CCBS-01 (selected countries only)

7
Installation
Attach the device by attaching it or looping it through a part of the bed or
chair using the hook. Wall mounting is possible as well by using the wall
mount bracket.
This device is intended to be used in bathrooms or toilets and features both call
and reset buttons (IP65 waterproof). It can be mounted in showers as well. When
Features:
Power supply: 2 x AAA alkaline batteries
Dimensions: 11,5 x 4,2 x 2,5 cm
Housing material: ABS
Radio-frequency: 433 MHz
FCCID: WNGNEC-05
Stop the notification sound
IMPORTANT: This device has a built-in safety feature. It will
transmit multiple signals to the C2 Pager during a timeframe of
about 10 seconds. These repeated signals assure that the C2 Pager
receives the call. You can stop the notification sound after 10
seconds have elapsed.
Stop the alert by short-pressing the green button or stop it by pressing
the "STOP" button on the C2 Pager for about 1 second (see above
important note).
5.3 CruxCare bathroom call button Pro CCBR-01 (selected countries only)
Large rubber buttons for easy use by elderly patients
Indicator light when the call is made
Red "CALL" button to call the carer
The green "STOP" button will stop the notification sound on the Pager
Clip to attach the device with clothes or bedside
Wall mount bracket for when the handset is not in use
Indication for low battery (in combination with CruxCare C2 Pager)

8
Calling the carer
Stop the notification sound directly from the
CCBR-01 device
Installation
Short-press the red call button or pull the red cord to call for
assistance (if the patient has fallen). The red light will light up
for 10 seconds.
IMPORTANT: This device has a built-in safety feature. It will
transmit multiple signals to the Pager during a timeframe of about 10 seconds.
These repeated signals assure that the call is received on the C2 Pager. During this
time, the alert cannot be stopped on the C2 Pager. It can only be stopped after 10
seconds.
Stop the call by short-pressing the green 'RESET" button on the
bathroom button, or stop the notification sound by pressing the
"STOP" button on the CruxCare C2 Pager for about 1 second (see
above important note).
a call has been made, the patient or caregiver can also decide to stop the call
from this device by pressing the green "C" button.
Mount the device at a suitable height using the supplied mounting material. Test
whether the call button can be easily reached. Adjust the red cord so that the red
hook ends 10 centimetres above the floor.
Power supply: 2 x CR2477 lithium ion battery
Battery life: 3 - 4 years
Dimensions: 8.5 x 8.5 x 6cm
Housing material: ABS
Radio-frequency: 433 MHz
FCCID: WNGWCP-11
Features:
Call & reset buttons
Pull the cord to activate the alert after falling

9
Stop the notification sound
Stop the call by pressing the "STOP" button on the CruxCare C2 Pager for about 1
second.
Installation
Position the bed mat in the bed, so the caregiver will
be alerted if the patient gets up or leaves the bed. To
receive an alert when the person raises himor herself,
place the bed mat under the upper back. For an alert
when the person exits the bed, put the bed mat under
their hips.
Power supply: 2 x CR2477 batteries
Dimensions: 78 x 25,5 cm
Radio-frequency: 433 MHz
FCCID: WNGTM-11
The bed mat will trigger an alert automatically when the patient exits the bed.
5.4 CruxCare bed mat Pro CCBP-01 (selected countries only)
Sends a signal to the C2 Pager when the patient leaves their bed
Wireless connection to the C2 Pager
Durable and long-lasting
The care instructions are printed on the bed mat
IP65 waterproof. This allows use in shower areas
Indication of low battery and automatic fault detection
Features:

10
This sensor can be mounted on doors and windows. When the
patient opens a door or window, a signal will be sent to the
CruxCare C2 Pager. This is helpful when guarding rooms or
areas.
Please find below mounting examples for the most
common situations in your home:
Power supply: 1 x AAA alkaline battery
Battery life: 10 - 12 months
Dimensions sensor: 78x24x18mm
Dimensions magnet: 75x10x12mm
Housing material: ABS
Radio-frequency: 433 MHz
5.5 Tiiwee Window & Door Sensor TWWS03
100% latex-free
Indication of low battery

11
6. Connecting accessories
Enter Connecting mode
Clear the CruxCare C2 Pager memory
IMPORTANT: if you have purchased a kit containing the CruxCare C2 Pager and
an accessory, the accessory is already connected in the factory. The connection
procedure is only needed for additional devices or if you want to connect an
accessory to a different "DEVICE" LED.
Clear the CruxCare C2 Pager memory If all memory slots are in use, it will be
necessary to clear the Pager's memory before connecting a new device into a
memory slot. To clear the Pager memory:
1. Hold down the 'CONNECT' and 'STOP' buttons simultaneously for ~ 10 seconds.
You will first hear two short beeps. Then, after 10 seconds, you will hear three
short beeps, and the status light will flash three times. Now, all devices have
been removed from the Pager.
Please note: This above procedure removes all previously connected devices
from the C2 Pager. At this stage, you can reconnect your accessories to the C2
Pager.
Step 1
Step 2
1. Ensure the Pager "ON / OFF" selector switch is in the "ON" position.
2. Press and hold the "CONNECT" button until the status LED lights green.
3. Release the "CONNECT" button.
IMPORTANT: the Pager will automatically exit connection mode after success-
fully pairing or after 30 seconds.

12
Step 3
IMPORTANT: not all products are available in all countries.
*IMPORTANT: For pairing the CruxCare bed mat, switch on the bedmat transmit-
ter while the C2 Pager is in connection mode.
**IMPORTANT: Before pairing this device, please open the battery compartment
and insert the included batteries.
Accessory
CruxCare call button Pro
(CCBS-01)**
CruxCare bathroom call
button Pro (CCBR-01)
CruxCare call buttons
red & blue
(CCCB01R and CCCB02B)
CruxCare bed mat Pro
(CCBP-01)*
What you do:
Connection Indication
Connect up to 3 devices
1. While the C2 Pager is in Connecting mode (Step 2), trigger the first device.
Depending on the type of accessory, you will receive a confirmation of successful
connection on the C2 Pager as outlined in the table below. The sound that
confirms a successful connection can be stopped by pressing "STOP" for about 1
second. When the device is connected, you can exit the connection mode for that
device, as outlined in the third column.
The respective "DEVICE"
LED will flash, and you will
hear notification sounds
The respective "DEVICE"
LED will flash, and you will
hear notifications sounds
The respective "DEVICE"
LED will flash once
The respective "DEVICE"
LED will flash, and you will
hear notification sounds
After 10 seconds, stop the
notification sound by pressing
the "STOP" button for 1 sec.
Tiiwee Window/Door
Sensor (TWWS03
The respective "DEVICE"
LED will flash, and you will
hear notification sounds
Stop the alert by press the
"STOP" button for 1 second
After 10 seconds, stop the alert
by pressing the "STOP" button
for 1 sec.
Stop the alert by pressing the
"STOP" button for 1 sec.
no action required. Once the
"DEVICE" LED has lit, the device
is successfully connected.

13
Step 4
2. To connect a second device, enter connection mode again (Step 2), then trigger
the second device. "DEVICE 2" LED will flash twice to acknowledge the successful
connection.
3. To connect a third device, enter connection mode again (Step 2), then trigger
the third device. "DEVICE 3" LED will flash twice to acknowledge the successful
connection.
IMPORTANT: Test the operating range within your building or work environment.
Have someone repeatedly trigger the device while you walk though the house.
Activate the connected device. The Pager will sound an alert and/or vibrate.
To stop the notification sound or vibration, press and hold the "STOP" button for
~1 second.
Test the C2 Pager before each use

14
C2 Pager
IMPORTANT: Do not use rechargeable batteries. Use a Phillips screwdriver to
open the battery compartment and insert two new AA alkaline batteries. Replace
the cover and tighten the screw.
CruxCare call buttons red and blue CCCB01R
en CCCB02B
Open the call button at the site where the little cut-out is
visible at the rim of the call button. You can use your
fingernail or another appropriate device. The call button
will open easily.Now, you will see the button battery.
Replace the battery with a new CR2450 (3V) battery. Please note the correct
polarity. Please test the call button before use.
*IMPORTANT: On these devices, a low battery indication is not shown on the C2
Pager. It is advised to replace batteries at least every six months.
7. Indication of low batteries
8. How to replace the batteries
Product
CruxCare C2 Pager (CCPAG02) Pager status LED flashes red
No low battery indication. Replace
batteries every six months
Pager status LED and respective
"DEVICE" LED flash red
Pager status LED and respective
"DEVICE" LED flash red
Pager status LED and respective
"DEVICE" LED flash red
LED light of the sensor is blinking
or is continuous lit
CruxCare call buttons red & blue
(CCCB01R CCCB02B)*
CruxCare bed mat Pro (CCBP-01)
CruxCare call button Pro (CCBS-01)
CruxCare bathroom call button Pro
(CCBR-01)
Tiiwee window & door sensor (TWWS03)*
Low battery indication

15
CruxCare call button Pro CCBS-01
CruxCare bathroom call button Pro CCBR-01
Remove the screw and open the battery compartment on the backside of the call
button. Replace the batteries with two fresh alkaline AAA batteries. Please watch
the correct polarity. Close the battery compartment again and test the call
button.
Remove the two round covers on the back of the device by turning them counter-
clockwise using a coin. Replace the batteries with 2 x CR2477 button batteries,
and clode the covers. Please make sure to close them fully. Test the call button.
Tiiwee window & door sensor TWWS03
Remove the screw at the bottom of the sensor. Now slide the sensor upwards and
remove it from the back panel. Take out the old battery and replace it with a new
AAA alkaline battery. Please note the correct polarity of the battery. Slide the
sensor on the back panel and secure it with the screw at the sensor's bottom.
Test the sensor.
For additional support, please visit www.tiiwee.com. Here you can find
supplementary support material as well as our support videos.
You can also contact us at [email protected]om. We respond within 24 hours to all
questions, but mostly still on the same day. A two years warranty applies to all
our products.
CruxCare bed mat Pro CCBP-01
Open the side of the bed mat and carefully take out the transmitter. Switch the
transmitter off. Unplug the transmitter from the bed mat. Open the transmitter by
removing the four screws. Slightly lift the electronic board (do not remove) and
remove the two CR2477 batteries. Insert two new CR2477 batteries with the plus
pole facing up. Close the transmitter again and plug it into the bed mat. Switch
the transmitter on also and carefully insert the transmitter back into the bed mat
pocket. Test the bed mat.
Customer Service

16
To recycle or dismantle this product and to minimize its impact on the
environment, handle this product according to European Directive 2012/19/EU
For further information, please contact your local or regional authorities.
In compliance with European laws. This product complies with the essential
requirements and other relevant provisions of Directive
2014/53/EU.
This product was designed and manufactured in compliance with Directive
2011/65/EU and its amendment directives 2015/863/EU of the European Parlia-
ment and of the Council on the restriction of the use of certain hazardous
substances in electrical and electronic equipment (RoHS Directive - RoHS) and is
deemed to comply with the maximum concentration values set by the European
Technical Adaptation Committee (TAC).
Any changes or modifications not expressly approved by the party responsible for
compliance could void your authority to operate the equipment.
Note: This equipment has been tested and found to comply with Class A digital
device limits, according to part 15 of the FCC Rules. These limits are designed to
provide reasonable protection against harmful interference when the equipment
is operated in a commercial environment. This equipment generates, uses, and
can radiate radio frequency energy and, if not installed and used per the instruc-
tion manual, may cause harmful interference to radio communications. Opera-
tion of this equipment in a residential area is likely to cause harmful interference,
in which case the user will be required to correct the interference at his own
expense.
This device complies with part 15 of the FCC Rules. Operation is subject to the

17
following two conditions: (1) This device may not cause harmful interference, and
(2) this device must accept any interference received, including interference that
may cause undesired operation.
RF exposure statements
1. This Transmitter must not be co‐located or operating in conjunction with any
other antenna or transmitter.
2. This equipment complies with FCC RF radiation exposure limits set forth for an
uncontrolled environment. This equipment should be installed and operated
with a minimum distance of 20 centimetres between the radiator and your body
or nearby persons.
CruxCare is a registered brand owned by Tiiwee B.V.
Manufactured in China.

18
CruxCare C2
Hauspflege-Rufsystem
DEUTSCH
This manual suits for next models
1
Table of contents
Languages:

