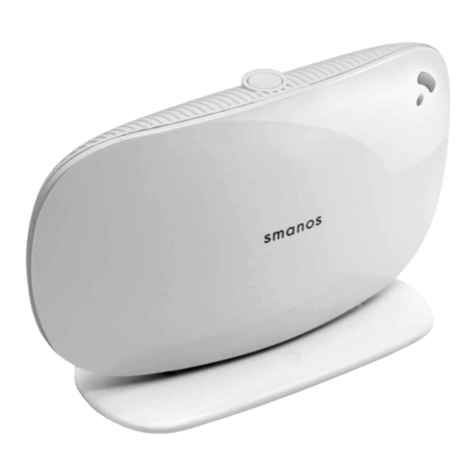
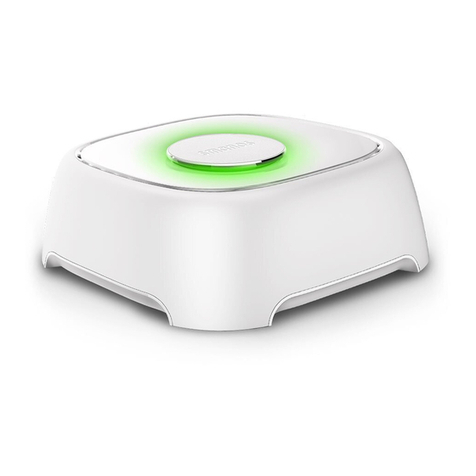
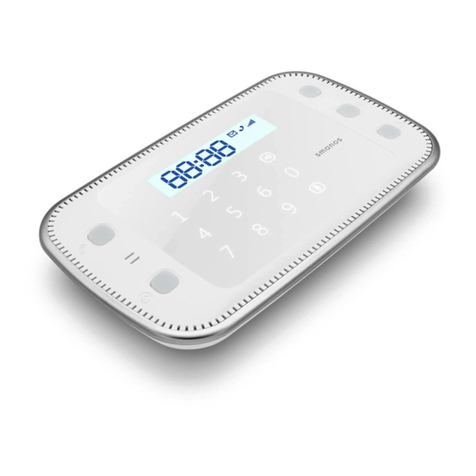
Smanos L020 User manual

Printed in China
PA: L020-UM-EN/FR/ES/PT-V1.0
© 2015 SMANOS HOLDING LTD. All Rights Reserved.
Security Alarm System
MULTILINGUAL USER MANUAL
EN ES PTFR
L020

Table of Contents
Please read this user manual carefully.
Be sure to keep this user manual handy for future reference.
VIDEO
Introduction ������������������������������������������������������������������������������������������������01
Features ��������������������������������������������������������������������������������������������������������01
In the Box���������������������������������������������������������������������������������������������02~03
How It Works����������������������������������������������������������������������������������������������04
Overview�������������������������������������������������������������������������������������������������������05
Power on and Network Setup��������������������������������������������������������������06
Accessories������������������������������������������������������������������������������������������07~10
Remote Control......................................................................................... 07
Zone modes............................................................................................... 08
Door/Window Contact ........................................................................... 09
APP Operation������������������������������������������������������������������������������������11~14
Apple and Android App...................................................................... 11
Managing Your Alarm System........................................................... 11
Pairing/Deleting Accessory�����������������������������������������������������������15~16
Pairing New Remote Control and Sensor....................................... 15
Pairing New Wireless Siren................................................................. 16
Deleting Sensors and Remote Controls.......................................... 16
Deleting Wireless Siren........................................................................ 16
Reload the Batteries of Accessories���������������������������������������������������17
Restoring to Factory Setting�����������������������������������������������������������������18
Trouble Shooting���������������������������������������������������������������������������������������19
Maintenance ���������������������������������������������������������������������������������������20~21
Specications��������������������������������������������������������������������������������������22~24
L020 Control Panel .............................................................................. 22
RE2300 Remote Control...................................................................... 23
DS2300 Door/Window Contact ........................................................ 23
Disclaimer�����������������������������������������������������������������������������������������������������24
Industry Canada Notice
This device complies with Industry Canada licence-exempt RSS standard(s).
Operation is subject to the following two conditions: (1) this device may
not cause interference, and (2) this device must accept any interference,
including interference that may cause undesired operation of the device.
Under Industry Canada regulations, this radio transmitter may only operate
using an antenna of a type and maximum (or lesser) gain approved for
the transmitter by Industry Canada. To reduce potential radio interference
to other users, the antenna type and its gain should be so chosen that
the equivalent isotropically radiated power (e.i.r.p.) is not more than that
necessary for successful communication.
ENEN

01 02
Introduction
Congratulations in buying the L020 alarm system. This product
is a totally D.I.Y. home security solution. It features automatic
connection to various accessories, putting your home under all-
round protection.
To experience this wonderful product, please follow the
instructions in the user manual. If there is any problem when using
the product, please contact us for help.
Features
1. Easy to operate
Connect network within 10 seconds
Interact by APP
Support entry and exit delay
Two groups of timing arm and disarm
2. High reliability
Built-in 1,000,000 RF codes combination
Built-in 105dB siren, deterring intruders
3. User-oriented
Standby over 10 hours
Support 10 remote controls, 30 wireless detectors
In the Box
Please check whether the package includes the following items. If
not, please contact the distributor/ retailer.
L020 Control Panel x 1 Battery of Control
Panel x 4
DS2300 Door/Window
Contact x 2 Network Cable x 1
ENEN

03 04
RE2300 Remote Control x 1 SA-A12 Adapter x 1
Warranty Card x 1 Reset Pin x 1
How It Works
Paired Door/Window Contact
Door or window is opened
Managed by remote
control / phone
Panel sounds / Sends a
push notication to users
Users
ENEN

05 06
Overview
Front
+
_
+
_
_
+
_
+
Status Indicator
Rear
+
_
+
_
_
+
_
+
Reset Button
Battery
Side
Network Cable Jack
+
_
+
_
_
+
_
+
App Pairing Button
Adapter Jack
Power on and Network Setup
②
①
Follow the illustrations above to connect the control panel with
power and router. Wait until the status indicator stops blinking
but keeps on, means it has connected with Internet.
Note: The control panel would not be able to control or push alarm
notication in case of power failure (even powered by batteries) or network
cable is cut, when alarm occurs, the control panel hoots on site.
Installation: The control panel is suggested to be installed in the
central of the system or open area for optimal performance and
avoid load-bearing wall or home electronics which may cause
signal attenuation.
ENEN
07 08
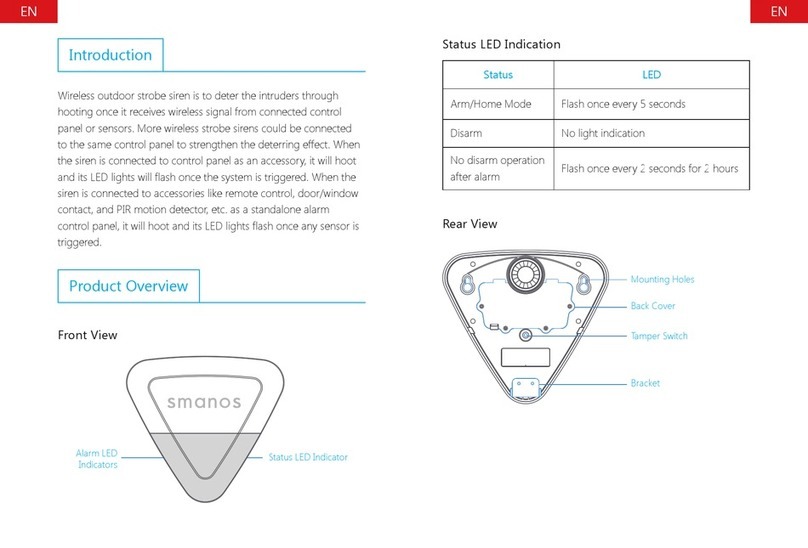
The control panel will hoot on-site with indicator ashing, users
will receive an emergency message from App.
Press the [stay ] button, the indicator on the remote control
blinks once, and then press [Arm ] button within 3 seconds
to mutely arm the system.
Press the [stay ] button, the indicator on the remote
control blinks once, and then press [Disarm ] button within
3 seconds to mutely disarm the system.
Zone modes
There are three zone modes available for the sensors.
Normal zone: In arm or home arm state, the detectors set to
normal zone work normally. Once intrusion is detected, the
detectors trigger an alarm.
Home mode zone: When system is in home arm state, the
detectors set to home mode zone are disarmed. The detectors set
to other zones are armed. That is, partial arm.
24-H zone: The detector set to 24-H zone trigger an alarm
immediately when detecting intrusion, no matter the system is
armed or disarmed.
Sensors in This Kit Zone Mode (Default Setting)
DS2300 Door/Window Contact Normal Zone (can be changed through
App)
Note: The zone mode of 24-hour zone sensor can not be changed.
Accessories
Remote Control
Overview
LED Indicator
Guide Point For The Blind
Arm
Disarm
Stay
SOS
Metal Ring
Note: If you press any button, the LED indicator is dusky and lights off after
ashing twice quickly, means the remote control battery is exhausted.
Button System Status
Press once to arm the system. The siren beeps once and the
red indicator will light on to conrm the system is armed.
Press once to disarm the system. The siren beeps twice and the
green indicator will light on to conrm the system is disarmed.
Note: System will alarm immediately if 24-hour zone detector
or tamper switch of sensor is triggered.
Press once to home arm the system, the siren beeps once after
3 seconds and the blue indicator will light on to conrm the
system is in home mode.
Note: System stops handling signal from home mode zone
detector, which enable users to move freely at home.
ENEN

09 10
Installation
Make sure the contacts work properly before installation.
Step 1: Choose a suitable installation location
It can be installed on doors,
windows or any other objects that
can be opened or closed. If it is
applied to metal doors, please
place spacer under the transmitter
and magnet.
Step 2: Secure the contacts with double-sided tapes
Make sure the triangle marks on
the side of transmitter and magnet
are closed to each other and within
the range of 1cm. As long as the
space between them is over 2cm,
the LED on the transmitter will blink
once.
>2cm
Door/Window Contact
The contact contains a transmitter and a magnet, which can be
mounted on a door, window or any objects that can be opened
or closed. When the transmitter and magnet are separated over
2 cm, the contact will send a signal to the control panel to trigger
an alarm.
Overview
LED Indicator
Transmitter
Front Side Back Side
Magnet
Tamper Switch
LED Indication
Blinks once: Door/window open detected.
Blinks once per 3 seconds after triggered: Low battery. Push
notication will be sent to App. Please change battery as soon as
possible.
Note: When tamper switch is pressed, system will alarm immediately.
ENEN

11 12
App pairing setup
Please follow the step descriptions on App to complete the App
pairing setup.
Please make sure your smartphone is connected with the Wi-Fi
which is same as the control panel’s.
Remote control your alarm system
Pull-down to Refresh
Network Reconnection
Disarm
Home Arm
Arm
APP Operation
Apple and Android App
Download App from App Store or Google Play by searching
keywords “L020 Alarm”.
L020 Alarm
Special Tips (For Iphone Only)
Tap “OK” to allow receiving notications
from “L020 Alarm”.Forbidden to receive
notications may result in an application
running failure, please re-install and
allow it to send notication to you in
case of alarm.
Managing Your Alarm System
The App can be bound with the alarm system through smart
phones. And this alarm system can be controlled by multiple
users.
Please make sure the control panel has been powered by
adapter. It will be disconnected with network when powered only
by batteries.
ENEN

13 14
System settings
① Edit Accessory
10 remote controls and 30 sensors could be extended and the
names of sensors are editable.
This function aims at guiding user to identify the invasion location
quickly by changing the sensor name. Their sequence in naming
follows pairing order, for example, the rst paired sensor is by
default assigned to zone 1, the second paired sensor is by default
assigned to zone 2, etc. In case of emergency, this control panel
will push notication with zone number (or new name) to user.
Meanwhile, you can change the working mode of accessory
(Except the 24-hour zone sensor) by tapping the [ ] or [ ],
please refer to the detail of “zone mode” on page 8.
② Wireless Siren
If wireless siren is purchased, you can setup on the app to turn on/
off the alarm function and arm/disarm tone, etc.
③ Exit Delay Time & Entry Delay Time
If you don’t want to carry along remote controls, you can set the
exit or entry delay.
Suppose entry delay is set at 30 seconds, the system will allow you
30 seconds to disarm the system before alarming. Suppose exit
delay is set at 35 seconds, the system will allow you 35 seconds to
leave before the system is armed. The “beep” is heard in every 2
seconds to remind you to leave. The pace of reminding sound will
speed up in the last 15 seconds. Thus leaves you enough time to
leave home without triggering the system.
④ User Deletion
Input the ID No. (on the back side of the control panel) to delete
all the users.
ENEN

15 16
Pairing/Deleting Accessory
The included accessories have been paired with the control panel
by default, if you want to pair new accessories, please follow these
instructions:
Pairing New Remote Control and Sensor
Ta p [+] on the accessory interface to send out pairing signal, and
then trigger the accessory by following the illustration.
Important: Please don't trigger the tamper switch of sensor when
pairing, otherwise the system will recognize the sensor as a 24-hour
zone sensor.
Press any button on the
remote control
Press the test button
more than twice(Purchase
separately)
Separate the transmitter
and the magnet
When a beep is heard from the control panel means the sensor
is paired successfully. If two beeps are heard, it means the sensor
has already been paired.
Note: To pair other sensors, please refer to the related user manuals.
Pairing New Wireless Siren
Wireless siren is sold separately.
1. Siren enters pairing state (please refer to its user manual).
2. Arm or disarm the control panel on App to send out pairing
signal to the siren.
When a beep is heard from the siren means the siren is paired
successfully. If two beeps are heard means the siren has already
been paired.
Deleting Sensors and Remote Controls
Use the supplied reset pin to press the reset button for about
3 seconds, the control panel will beep once to indicate all the
sensors and remote controls have been deleted.
Deleting Wireless Siren
Press and hold the pair button of the wireless siren, the deletion
is succeeded when one beep is heard from the wireless siren.
ENEN
17 18
Restoring to Factory Setting
Please read the steps below carefully before restoring to
factory setting�
Use the supplied reset pin to press the reset button ( refer to
page 5) for about 7 seconds, during the time, you will hear a beep
in the rst 3 seconds, do not loose it until another beep is heard.
After that, the control panel is restored to factory setting.
Note: The accessories will not be deleted after restoring to factory setting.
Reload the Batteries of Accessories
RE2300 Remote Control
Remove the rubber item Loose the screw
Open the case and change the battery
DS2300 Door/Window Contact
Open the case and change the batteries
ENEN

19 20
Maintenance
The alarm system features unique and brilliant design and
craftwork. Please use it with caution. The following suggestions
will help prolong the service life of the system.
1. Keep this product and accessories out of children’s reach.
2. Keep the product and accessories dry. Rainwater, moisture and
liquids are likely to contain minerals that will corrode electronic
circuits.
3. Do not use or store the alarm system in dusty or dirty places;
otherwise it may damage the electronic components.
4. Do not expose the alarm system to high temperature. High
temperatures can shorten the life of electronic components,
damage batteries, and cause melting and deformation of
plastic parts.
5. Do not store the alarm system in cold areas. Otherwise, when
the temperature of the alarm system rises to the normal level,
moisture appears inside, damaging PCB.
6. Test the alarm system regularly and perform troubleshooting in
time.
Trouble Shooting
If the alarm system cannot work properly, please rst check the
following sheet.
Problems Reason/Solution
The control panel does
not respond to App
operation
Check whether the local network is
working
Make sure the control panel is powered by
adapter
Remote control does not
work
Check if the remote control has been
paired to the control panel successfully
The distance between the control panel
and the remote control is too far away
Door/window contact is
triggered but the control
panel does not alarm
Check whether the system is in armed
state
Check if the door/window contact
has been paired to the control panel
successfully
Check if the door/window contact is far
away from the control panel
No sound when alarming Check if the volume of the control panel is
set to mute; Reset alarm ring volume on
App
ENEN

21 22
Specifications
L020 Control Panel
Power Supply DC 12V 500mA
Battery AA 1.5V LR 6 x 4pcs
Standby Current <140 uA
Alarm Current <270 mA
Internal Siren 105dB
Expandable Accessories 10 remote controls, 30 sensors
Radio Frequency 915MHz (±75 KHz)
Housing Material ABS plastic
Operating Condition Temperature 0°C~+55°C
Relative humidity <80%
(non-condensing)
Dismensions 117 x 118.5 x 40.5 mm (L x W x H)
7. Check the built-in batteries of accessories regularly. If the
batteries are low, replace with new ones.
8. The alarm system requires uninterrupted power supply for
working or standby. Therefore, you need to connect the AC
adapter to a reliable power outlet.
9. Avoid placing the control panel and sirens in bedrooms or
ofces, so as not to disturb your rest or work.
10. It is recommended to cut off the power if the system is not
used for long time.
11. If the alarm system is covered with dirt, wipe off the dirt with
soft cloth or tissue. For stains, apply diluted alkaline detergent
to soft cloth, wring the cloth out and wipe the product. Then,
dry the product with dry absorbent cloth.
Please carefully read and strictly follow the previous suggestions.
If the product remains faulty, you can send it to the place of
purchase or authorized maintenance center for maintenance. We
will provide help as soon as possible.
ENEN
23 24
Disclaimer
Dear users,
We have reviewed this manual thoroughly in order to ensure
it’s clear and easy for you to operate the system. All statements,
technical information, recommendations in this manual are
reliable, but the accuracy and completeness are not guaranteed
or warranted.
The specications and information regarding the products in this
document are subject to change without notice.
Photocopy, copy, reproduction, translation to any language,
modication, storage in a retrieval system or retransmission, in
any form or by any means, electronic, mechanical or otherwise, is
strictly prohibited without prior written permission.
In no event we are liable for any indirect, special, incidental, or
consequential damages, including, without limitation, lost prots
or loss or damage to data arising out of the use or inability to
use this document, even if the product has been advised of the
possibility of such damages.
RE2300 Remote Control
Power Supply DC 3V (CR2032 lithium cell battery x 1)
Transmitting Current <9.5 mA
Transmitting Distance <80 m (open area/no interference)
Radio Frequency 915MHz (±75 KHz)
Housing Material PC+ABS plastic
Operating Condition Temperature 0°C~+55°C
Relative humidity <80%
(non-condensing)
Dimensions 71 x 38 x 12 mm (L x W x H)
DS2300 Door/Window Contact
Power Supply DC 3V (CR2032 lithium cell battery x 2)
Static Current <1 uA
Alarm Current <10.5 mA
Transmitting Distance <80 m (open area/no interference)
Radio Frequency 915MHz (±75 KHz)
Housing Material ABS plastic
Operating Condition Temperature 0°C~+55°C
Relative humidity <80%
(non-condensing)
Transmitter Dimensions 72.5 x 28 x 10 mm (L x W x H)
Magnet Dimensions 58 x 14 x 9.5 mm (L x W x H)
ENEN

25 26
FCC STATEMENT
Warning: Changes or modications to this unit not expressly
approved by the party responsible for compliance could void the
user’s authority to operate the equipment.
NOTE: This equipment has been tested and found to comply
with the limits for a Class B digital device, pursuant to Part
15 of the FCC Rules. These limits are designed to provide
reasonable protection against harmful interference in a residential
installation. This equipment generates, uses and can radiate radio
frequency energy and, if not installed and used in accordance
with the instructions, may cause harmful interference to radio
communications.
However, there is no guarantee that interference will not occur
in a particular installation. If this equipment does cause harmful
interference to radio or television reception, which can be
determined by turning the equipment off and on, the user is
encouraged to try to correct the interference by one or more of
the following measures:
①Reorient or relocate the receiving antenna.
②Increase the separation between the equipment and receiver.
③Connect the equipment into an outlet on a circuit different
from that to which the receiver is connected.
④Consult the dealer or an experienced radio/TV technician for
help.
ENEN

Système d'alarme et de sécurité
MANUEL D’UTILISATION
L020
FR FR

Table des matières
Veuillez lire attentivement ce manuel de l’utilisateur.
Veuillez conserver ce manuel d’utilisation pour une consultation
future.
VIDEO
Introduction ������������������������������������������������������������������������������������������������01
Caractéristiques �����������������������������������������������������������������������������������������01
Dans la confection����������������������������������������������������������������������������02~03
Comment ça marche �������������������������������������������������������������������������������04
Vue d’ensemble������������������������������������������������������������������������������������������05
Alimenter et congurer le réseau�������������������������������������������������������06
Accessoires ������������������������������������������������������������������������������������������07~10
Télécommande ...................................................................................... 07
Mode des zones.................................................................................... 08
Contact de porte/fenêtre .................................................................. 09
Utilisation de l’application�������������������������������������������������������������11~14
Application sous système Apple et Android.................................. 11
Gestion de votre système d’alarme.................................................. 11
Apparier ou supprimer un accessoire���������������������������������������15~16
Apparier une nouvelle télécommande et un nouveau détecteur.... 15
Apparier une nouvelle sirène sans l............................................... 16
Supprimer des détecteurs et des télécommandes....................... 16
Supprimer une sirène sans l............................................................. 16
Restaurer les réglages d’usine��������������������������������������������������������������17
Remplacer les piles des accessoires���������������������������������������������������18
Dépannage��������������������������������������������������������������������������������������������������19
Maintenance ���������������������������������������������������������������������������������������20~21
Caractéristiques ���������������������������������������������������������������������������������22~23
Tableau de commande L020 ............................................................ 22
Télécommande RE2300....................................................................... 23
Contact de porte/fenêtre DS2300.................................................... 23
Avertissement���������������������������������������������������������������������������������������������24
Avis d’Industrie Canada
Conformément à la réglementation d’Industrie Canada, le présent
émetteur radio peut fonctionner avec une antenne d’un type et d’un gain
maximal (ou inf érieur) approuvé pour l’émetteur par Industrie Canada.
Dans le but de réduire les risques de brouillage radioélectrique à l’intention
des autres utilisateurs, il faut choisir le type d’antenne et son gain de sorte
que la puissance isotrope rayonn ée équivalente (p.i.r.e.) ne dépasse pas
l’intensité nécessaire à l’établissement d’une communication satisfaisante.
Le présent appareil est conforme aux CNR d’Industrie Canada applicables
aux appareils radio exempts de licence. L’exploitation est autoris é e aux
deux conditions suivantes : (1) l’appareil ne doit pas produire de brouillage,
et (2) l’utilisateur de l’appareil doit accepter tout brouillage radioélectrique
subi, même si le brouillage est susceptible d’en compromettre le
fonctionnement.
FRFR

01 02
Introduction
Félicitations pour l’achat de votre système d’alarme L020 Ce
produit est une solution de sécurité totalement prêt-à-monter. Une
connexion automatique vers les divers accessoires est prévue, ce
qui permet de garantir une protection globale de votre habitation.
Pour bénéficier de ce merveilleux produit, veuillez suivre les
instructions de ce manuel. Si vous rencontrez des problèmes lors
de l’utilisation du produit, veuillez nous contacter pour obtenir de
l’assistance.
Caractéristiques
1. Convivialité
Connexion au réseau dans les 10 secondes suivantes
Interaction via l’application
Prise en charge d’un délai de sortie et d’entrée
Deux groupes de synchronisation de l’armement et du
désarmement
2. Fiabilité supérieure
Combinaison de 1 000 000 de codes RF intégrés
Sirène intégrée de 105 dB pour dissuader les intrus
3. Orienté utilisateur
Autonomie en veille de 10 heures
Prise en charge de 10 télécommandes, 30 détecteurs sans l
Dans la confection
Veuillez vérier que l’emballage comprend les articles suivants. Le
cas échéant, veuillez contacter votre distributeur / revendeur.
1 tableau de commande
L020
4 piles pour le tableau
de commande
2 contacts de porte/fenêtre
DS2300
1 câble réseau
FRFR

03 04
1 télécommande RE2300 1 adaptateur SA-A12
1 carte de garantie 1 broche de réinitialisation
Comment ça marche
Contact de porte/fenêtre apparié
La porte ou la fenêtre est
ouverte
Géré par une
télécommande ou un
téléphone
Le tableau sonne ou
envoie une notication
directe aux utilisateurs
Utilisateurs
FRFR

05 06
Vue d’ensemble
Vue de face
+
_
+
_
_
+
_
+
Indicateur d’état
Vue de dos
+
_
+
_
_
+
_
+
Bouton de
réinitialisation
Pile
Vue latérale
+
_
+
_
_
+
_
+
Bouton d’appariement à
l’application
Prise de l’adaptateur
Prise du câble réseau
Alimenter et configurer le réseau
②
①
Suivez les illustrations ci-dessus pour connecter le tableau de
commande à l’alimentation et au routeur. Patientez jusqu’à ce
que l’indicateur d’état s’arrête de clignoter et reste allumé, ce qui
signie que la connexion à Internet est établie.
Remarque : Le tableau de commande ne sera pas en mesure d’être
contrôlé ou d’envoyer une notication d’alarme directe en cas de panne
électrique (même s’il est alimenté par piles) ou si le câble réseau est coupé.
En cas d’alarme, le tableau de commande sonne sur le site.
Installation : Il est conseillé d’installer le tableau de commande au
centre du système ou dans un espace dégagé pour obtenir des
performances optimales et éviter une atténuation du signal par
des murs porteurs ou des appareils électroniques domestiques.
FRFR
Other manuals for L020
3
Table of contents
Languages:
Other Smanos Security System manuals