Ctera C200 User manual

© 2013, CTERA Networks. All rights reserved.
Quick Walkthrough
CTERA C200
August 2013
Firmware Version 4.0

Safety Warning
Carefully read the Safety Instructions and Operating Procedures provided in this
guide before attempting to install or operate the appliance. Failure to follow
these instructions may result in damage to equipment and/or personal injuries,
and will void your warranty.
This product contains no user-serviceable parts. Repair, maintenance and servicing of this
appliance are to be carried out only by qualified CTERA personnel.
This product may only be used for the applications described in the user guide, and only
in connection with accessories which have been approved by CTERA.
This product can only function correctly and safely if it is transported, stored, set up, and
installed correctly, and operated and maintained as recommended.
Operate this product only from the type of power source indicated on the product’s
marking label.
You must use only the power supply that originally comes with your product.
Overloaded AC outlets, extension cords, frayed power cords, damaged or cracked wire
insulation, and broken plugs are dangerous. They may result in an electrical shock or fire
hazard.
Route power supply cords so that they are not likely to be walked on or pinched by items
placed upon or against them.
Slots and openings in the enclosure are provided for ventilation, to ensure reliable
operation of the product and to protect it from overheating. Do not block or cover these
openings.
Never place this product near or over a heat source. Do not place this product in a built-in
installation, such as a bookcase or equipment rack, unless you provide proper ventilation.
Shutting down the appliance does not disconnect it from the power system. To establish
a complete power separation, you must unplug the appliance from the wall outlet.
Never push objects of any kind into this product through openings, as they may touch
dangerous voltage or “short-out” parts, which could result in a fire or electric shock.
To provide added protection for this product during a lightning storm, or when it is left
unattended and unused for long periods of time, unplug it from the wall outlet.
Refer servicing to qualified service personnel in the following situations:
When the power supply cord or plug is damaged
If objects have fallen into the product
If the product has been exposed to rain or water
If the product has been dropped or the enclosure has been damaged

CTERA C200 Quick Walkthrough 3
Tip
For more detailed information, refer to the CTERA C Series User Guide, available at
http://www.ctera.com/support.

CTERA C200 Quick Walkthrough 4
Check the Package Contents
Verify that the package contains the following items:
C200
Ethernet Cable
Power Supply Cable
Check Required Items
Verify that you have the following required items (not included):
One or two hard drives (SATA, 3.5")
Ethernet Switch or Router with DHCP Enabled
1
Install the C200

Install the C200 1
CTERA C200 Quick Walkthrough 5
Connect the C200
1Open the C200's back cover, by pressing the two plastic tabs and then pulling backwards.
Two slots are revealed.
2Insert a SATA hard drive into the left-hand slot, pressing it firmly until it is all the way in.
The drive's metal cover should be facing left.
3If you have a second hard drive, insert it into the right-hand slot, pressing it firmly until it
is all the way in.

Install the C200 1
CTERA C200 Quick Walkthrough 6
The drive's metal cover should be facing right.
4Close the C200's back cover, by inserting first the bottom of the cover, pressing the tabs,
and then pushing forwards.
The cover should click into place.
5Connect one end of the Ethernet cable to the LAN port, and connect the other end to
your Ethernet LAN switch or router.

Install the C200 1
CTERA C200 Quick Walkthrough 7
6Connect the provided power supply cable to the power jack, and connect the power
supply to the wall outlet.
7Press the Power button at the back of the C200.
The C200 will start up, and the Ready/Status LED will flash rapidly in orange and then
green. When the LED turns steady green, the C200 is ready.
Tip
If a DHCP server is not available, then after one minute, the appliance will use the
IP address 192.168.192.5.
CTERA C200 Quick Walkthrough 8
Windows Vista/7/8
1On a computer connected to the same switch as the C200, view the network
neighborhood, by doing one of the following:
In Microsoft Windows 7®or Microsoft Windows 8®, click Start > Computer, then click
Network in the left pane.
The C200 is automatically detected using UPnP and appears in the list of network
places.
In Microsoft Windows Vista®, click Start > Network.
The C200 is automatically detected using UPnP and appears in the list of network
places.
2Double-click on the icon named CTERA C200.
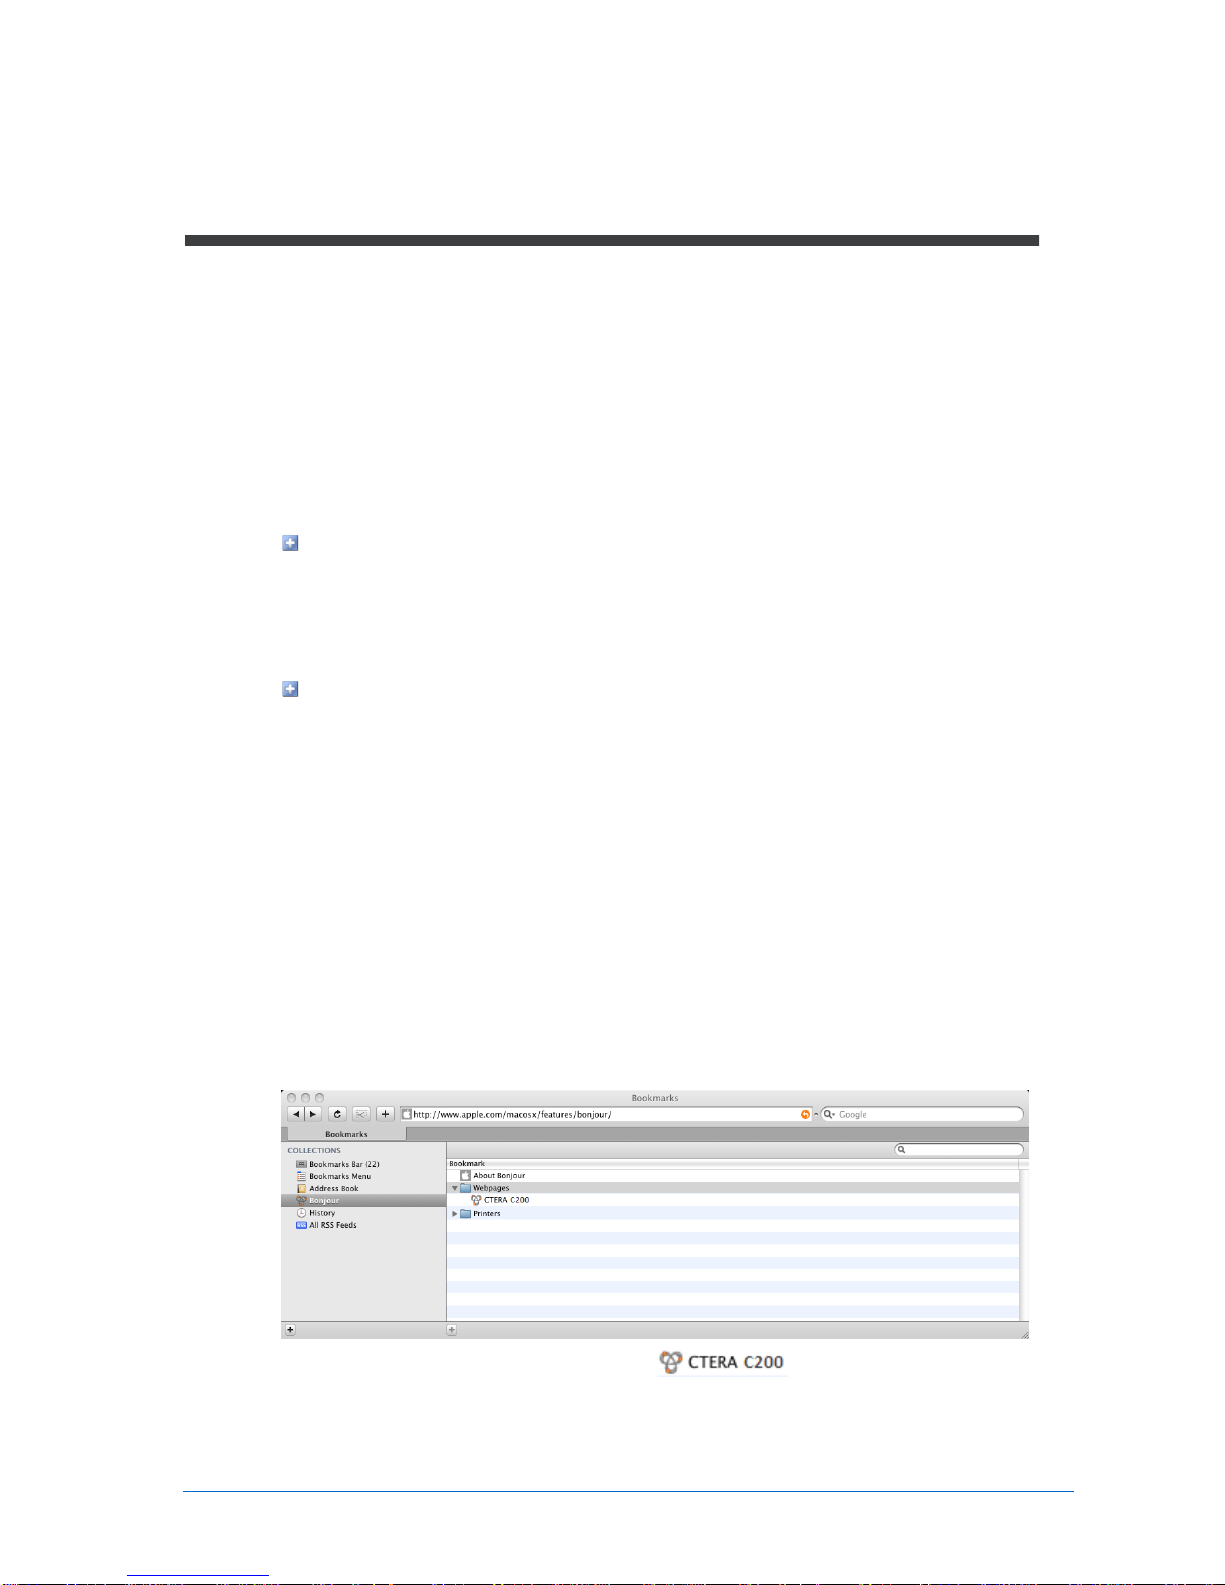
Mac OS
1On a computer connected to the same switch as the C200, run Safari.
2Open Bookmarks.
3In the Collections pane, select Bonjour.
4In the right pane, expand Webpages.
5Double-click on the name of your appliance .
2
Connect to the C200 Web Interface

Connect to the C200 Web Interface 2
CTERA C200 Quick Walkthrough 9
Tip
After connecting, you can add a bookmark in your Web browser, for easy access
to the C200 Web interface.

CTERA C200 Quick Walkthrough 10
After connecting to the C200 Web interface, your Web browser displays the Welcome to
CTERA page.
1Choose a user name and password for the administrator.
2Click Save.
The Setup Wizard opens, displaying the Easy Storage Setup dialog box.
3
Set Up the C200
Table of contents
Other Ctera Storage manuals


