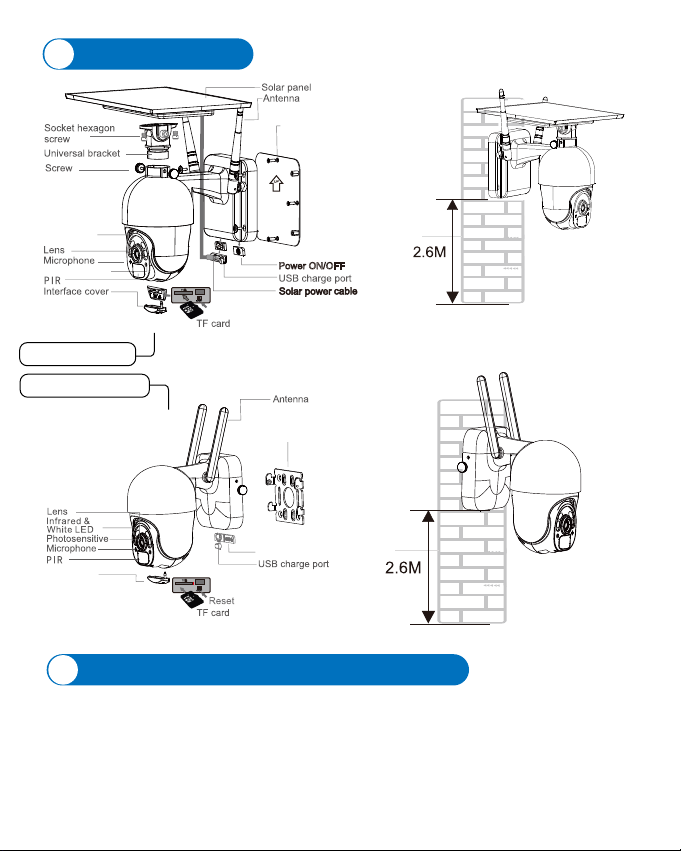
①The camera may have low battery power during long-term
transportation so, please use a 5V mobile phone charger or computer
USB port to charge the camera before use. The charging port lights
up red when charging, and lights up green when fully charged.
Please also insert an SD card into the camera for video recording.
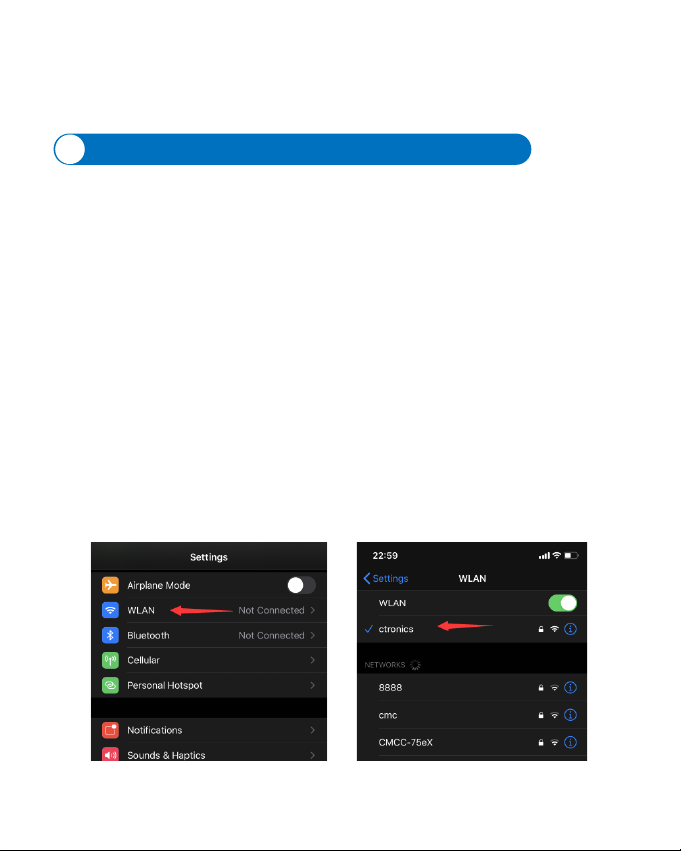
②Find your home Wi-Fi and connect to it. Please place your
mobile phone and camera next to the router for operation. Please
press the camera's power button, the light board indicator will flash
red light.The camera will constantly sound a chime when network
configuration, waiting for the camera to configure the network
(Picture 1 and Picture 2).
③Please note: the camera only works with 2.4G Wi-Fi. It does
not support 5G Wi-Fi.
-www.ctronics.com-
-04-
Picture 3 Picture 4 Picture 5
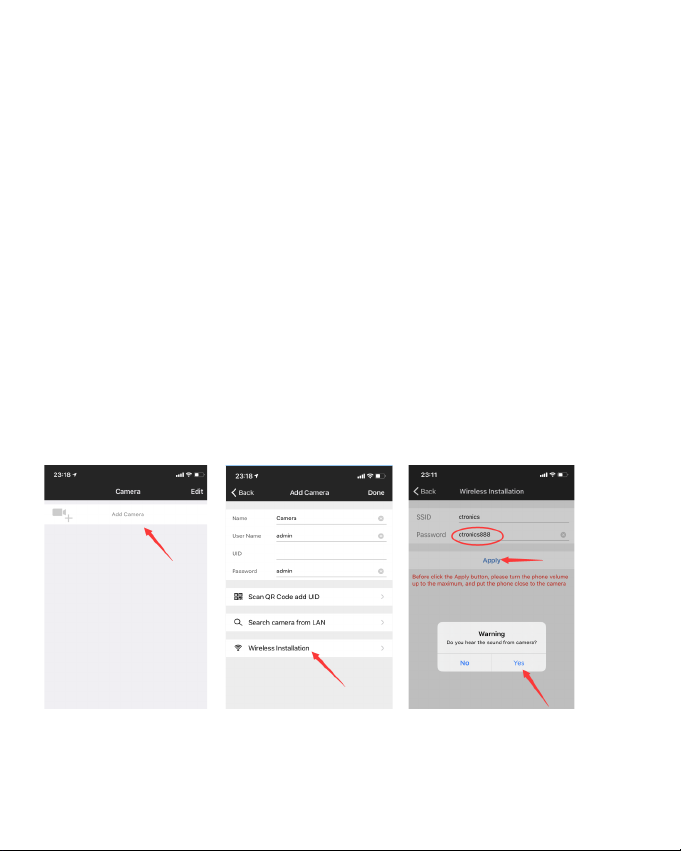
Note: As shown in picture 5, if the SSID shows "unknown ssid", please open the
location permission of the CTRONICS App in the phone settings.
When entering the Wi-Fi password, please ensure that it is case sensitive. After the
password is entered correctly, please click on the mobile phone application to enter
the network configuration. At the same time, the mobile phone will emit a sound
signal. Please adjust the phone volume to the maximum and also keep the distance
between the phone and the camera within 10 cm. Then, wait for the network
configuration to complete.
④Open the CTRONICS APP and add the camera according to
the following steps:
1.Click Add camera; (Picture 3)
2.Click Wireless Installation; (Picture 4)
3.Choose your home wireless network SSID, and input pass word(
ctronics888 is just for reference, please input your own password for
your home SSID),click Apply, and click Yes when you hear the
sound from camera;(Picture 5)
4.Waiting for connecting; (Picture 6)
5.Click Done when connection is finished; (Picture 7)
6. Camera shows online. (Picture 8)