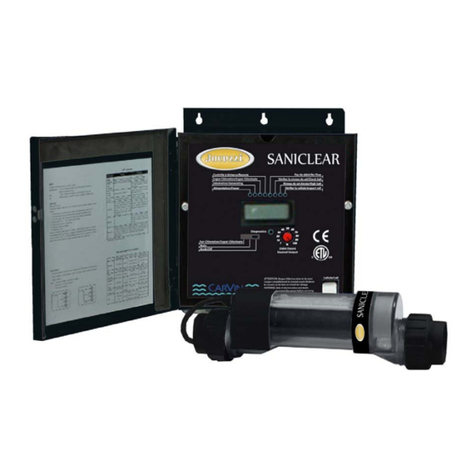
CTX PROFESSIONAL E Series User manual

E15 / 25 / E35
CHLORINATOR
INSTALLATION AND OPERATING INSTRUCTIONS

INST 428 CTX PROFESSIONAL E Series Salt Chlorinator V02.17
2
Contents
1.0 GENERAL OVERVIEW ............................................................................................................................ 4
2.0 CHLORINATOR CONTROL INSTALLATION.............................................................................................. 4
3.0 CELL INSTALLATION .............................................................................................................................. 4
4.0 POOL PREPARATION...............................................................................................................................5
5.0 PROGRAMMING ..................................................................................................................................... 6
6.0 CHLORINE OUTPUT...............................................................................................................................10
7.0 USER OPERATION .................................................................................................................................10
8.0 FAULT CODES........................................................................................................................................10
9.0 SETTING RIGHT CHLORINE OUTPUT AND FILTRATION TIME................................................................10
10.0 CHLORINATOR MAINTENANCE AND TROUBLESHOOTING................................................................... 11
11.0 MAINTENANCE OF YOUR CHRLORINATOR ........................................................................................... 11
12.0 TROUBLESHOOTING ............................................................................................................................12
13.0 WARRANTY........................................................................................................................................... 13
14.0 INSTRUCCIONES DE INSTALACIÓN Y UTILIZACIÓN...........................................................................14
15.0 DESCRIPCIÓN GENERAL .......................................................................................................................14
16.0 INSTALACIÓN DEL CUADRO DE CONTROL ...........................................................................................14
17.0 INSTALACIÓN DE LA CÉLULA................................................................................................................14
18.0 PREPARACIÓN DE LA PISCINA ..............................................................................................................15
19.0 PROGRAMACION ..................................................................................................................................16
20.0 PRODUCCIÓN DE CLORO......................................................................................................................20
21.0 OPERACIÓN POR EL USUARIO..............................................................................................................20
22.0 CÓDIGOS DE FALLOS............................................................................................................................20
23.0 AJUSTAR LA PRODUCCIÓN DE CLORO Y EL TIEMPO DE FILTRACIÓN CORRECTOS...............................20
24.0 ESTABILIZADOR....................................................................................................................................21
25.0 MANTENIMIENTO Y RESOLUCIÓN DE PROBLEMAS DEL CLORADOR ...................................................21
26.0 MANTENIMIENTO DEL CLORADOR.......................................................................................................22
27.0 SOLUCION DE PROBLEMAS..................................................................................................................22
28.0 GARANTÍA ............................................................................................................................................23
29.0 CONSIGNES D’INSTALLATION ET D’UTILISATION .............................................................................24
30.0 VUE GÉNÉRALE.....................................................................................................................................24
31.0 INSTALLATION DES COMMANDES DU CHLORATEUR...........................................................................24
32.0 INSTALLATION DE LA CELLULE ............................................................................................................24
33.0 PRÉPARATION DU BASSIN....................................................................................................................25
34.0 PROGRAMMATION ...............................................................................................................................26
35.0 DÉBIT DE CHLORE.................................................................................................................................30
36.0 COMMANDES DE L’UTILISATEUR..........................................................................................................30
37.0 CODES D’ERREUR .................................................................................................................................30
38.0 RÉGLAGE DU BON DÉBIT DE CHLORE ET DE LA BONNE DURÉE DE FILTRATION ..................................30
39.0 STABILISATEUR .................................................................................................................................... 31
40.0 ENTRETIEN ET DÉPANNAGE DU CHLORATEUR .................................................................................... 31
41.0 ENTRETIEN DE VOTRE CHLORATEUR....................................................................................................32

INST 428 CTX PROFESSIONAL E Series Salt Chlorinator V02.17
3
42.0 DÉPANNAGE......................................................................................................................................... 33
43.0 GARANTIE............................................................................................................................................. 33
44.0 ISTRUZIONI PER L’INSTALLAZIONE E L’UTILIZZO.............................................................................34
45.0 PANORAMICA GENERALE.....................................................................................................................34
46.0 INSTALLAZIONE DELLA SCATOLA DI COMANDO DEL CLORATORE......................................................34
47.0 INSTALLAZIONE DELLA CELLA .............................................................................................................35
48.0 PREPARAZIONE DELLA PISCINA...........................................................................................................36
49.0 PROGRAMMAZIONE .............................................................................................................................36
50.0 PRODUZIONE DI CLORO .......................................................................................................................40
51.0 FUNZIONAMENTO UTENTE ..................................................................................................................40
52.0 CODICI DI GUASTO ...............................................................................................................................40
53.0 STABILIZZATORE..................................................................................................................................41
54.0 MANUTENZIONE DEL CLORATORE E RISOLUZIONE DEI GUASTI..........................................................41
55.0 MANUTENZIONE DEL CLORINATORE ...................................................................................................42
56.0 RISOLUZIONE DEI PROBLEMI ...............................................................................................................43
57.0 GARANZIA ............................................................................................................................................43
58.0 INSTALLATIONS- UND BEDIENUNGSANLEITUNGEN ........................................................................44
59.0 GENERLLE ÜBERSICHT .........................................................................................................................44
60.0 INSTALLATION DES ELEKTROLYSEGERÄT-BEDIENELEMENTS .............................................................44
61.0 INSTALLATION DER ZELLE....................................................................................................................45
62.0 VORBEREITUNG DES POOLS ............................................................................................................... 46
63.0 PROGRAMMIERUNG ............................................................................................................................ 46
64.0 CHLORAUSGABE ..................................................................................................................................50
65.0 BEDIENUNG..........................................................................................................................................50
66.0 FEHLERCODES ......................................................................................................................................50
67.0 EINSTELLEN DER RICHTIGEN CHLORAUSGABE UND DER FILTRATIONSZEITEN...................................50
68.0 STABILISATOR ...................................................................................................................................... 51
69.0 WARTUNG UND STÖRUNGSBEHEBUNG ..............................................................................................51
70.0 WARTUNG IHRES ELEKTROLYSEGERÄTES ...............................................Error! Bookmark not defined.
71.0 STÖRUNGSBEHEBUNG.........................................................................................................................53
72.0 GARANTIE.............................................................................................................................................53
73.0 INSTRUÇÕES DE INSTALAÇÃO E FUNCIONAMENTO ...................................................................54
74.0 VISÃO GERAL........................................................................................................................................54
75.0 INSTALAÇÃO DO CONTROLO DO CLORADOR ......................................................................................54
76.0 INSTALAÇÃO DA CÉLULA......................................................................................................................55
77.0 PREPARAÇÃO DA PISCINA....................................................................................................................56
78.0 PROGRAMAR ........................................................................................................................................56
79.0 SAÍDA DE CLORO ................................................................................................................................. 60
80.0 FUNCIONAMENTO DO UTILIZADOR..................................................................................................... 60
81.0 CÓDIGOS DE AVARIA ........................................................................................................................... 60
82.0 DEFINIR A SAÍDA DE CLORO CORRETA E TEMPO DE FILTRAGEM ........................................................ 60
83.0 ESTABILIZADOR....................................................................................................................................61

INST 428 CTX PROFESSIONAL E Series Salt Chlorinator V02.17
4
84.0 MANUTENÇÃO DO CLORADOR E RESOLUÇÃO DE PROBLEMAS ..........................................................61
85.0 MANUTENÇÃO DO SEU CLORADOR .....................................................................................................62
86.0 RESOLUÇÃO DE PROBLEMAS...............................................................................................................62
87.0 GARANTIA ............................................................................................................................................63
1.0 GENERAL OVERVIEW
Congratulations! You have purchased an CTX PROFESSIONAL E-SERIES Salt Chlorinator. Please read the instructions
carefully and your purchase will provide you with years of trouble free use.
Your CTX PROFESSIONAL chlorinator works by converting some of the salt (sodium chloride) in your pool into chlorine
which starts to destroy algae and bacteria and sanitises your pool. As part of the process, the chlorine is converted back into
salt and hence salt is not consumed.
Your chlorinator control has many features which ensure simple operation of your chlorinator and Filtration system.
The CTX PROFESSIONAL E-SERIES chlorinator has an internal electronic time clock designed to operate the Filtration
pump up to 2 separate time periods each day. The control has a non-replaceable backup power source which is designed to
maintain timer setting memory in the event of an infrequent and short power interruption.
WARNING: This appliance is not intended for use by persons including young children or infirm persons with reduced
physical, sensory or mental capabilities, or lack of experience or knowledge, unless they have been given supervision or
instruction concerning use of the appliance by a person responsible for their safety.
Please ensure that young children are supervised to ensure that they do not play with the pump or chlorinator.
To avoid a safety hazard, the supply cord if damaged, must only be replaced by CTX PROFESSIONAL, or its service agent or
a suitably qualified person.
2.0 CHLORINATOR CONTROL INSTALLATION
The CTX PROFESSIONAL E-SERIES Chlorinator control has a Rating of IP23 enabling it to be installed outdoors.
Regulations require that the control is not allowed to be located within 3.5 metres (10 Feet)of the pool water.
The CTX PROFESSIONAL E-Series Chlorinator Control should be installed in a well ventilated position ideally away from
direct sunlight. Ensure that the unit is not located near pool chemicals(CTX-15,CTX-25 &CTX-35) as fumes may damage
the control.
When installing the control on a post, first attach a flat waterproof panel at least 300mm(12”) wide by 500mm long. Make
sure the control is located centrally on the panel and sits flat.
Note: The pump current rating must not exceed 8 amps.
3.0 CELL INSTALLATION
The Chlorinator Cell must be located last in the pipe work just prior to the return to the pool. If valves are installed
between the Chlorinator and the pool outlet, it is essential that they cannot deadhead the pump. If the pressure in the cell
exceeds 350kPa(50 PSI) and/or the water temperature exceeds 40º Celsius (104ºF), the cell may fail.
WARNING: Never install the cell before the pump or heater
The Cell MUST be installed with the barrel unions underneath (water connections pointing downwards) and the cell should
be horizontal. 50mm (2”) fittings have been provided. Use 50mm (2”) high pressure PVC pipe and glue into the 50mm (2”)
barrel union tails. Make sure that the ‘O-rings are correctly fitted and the unions are tightened firmly.
Direction of flow through the Cell is critical - unit must be plumbed with the water entering the cell at the end closest to
the terminal connections (as indicated by flow direction label mounted on cell)
WARNING:
It is essential that pipe work and equipment do not allow gases generated from the cell
to collect and build up.
Pipe Centres
108mm (4 ¼”)
From
Filter/Pump
Pool
Return

INST 428 CTX PROFESSIONAL E Series Salt Chlorinator V02.17
5
WARNING:
Cell must be installed horizontally with water connections pointing downwards - this
creates a safety gas trap. Installation in any other way may cause explosion, injury or
death.
WARNING:
Cell must be installed in the return pipework to the pool. Always install after filter, gas
heater, and solar heater or heat pump connections.
WARNING:
DO NOT install isolation valves on inlet or outlet of cell.
Once the Cell is located, connect the black multi-core cable to the cell. The blue wire must be
connected to the blue terminal. The cable is designed to come from below the cell. Make sure wing
nuts are correctly tightened to ensure good contact.
4.0 POOL PREPARATION
The recommended salt level for the CTX PROFESSIONAL E-SERIES Salt Chlorinator is 6,000ppm. The chlorinator requires
between 4000ppm and 6000 ppm of salt dissolved into the pool water. The level of salt will depend on water temperature,
but if a level of 6000 ppm dissolved salt is allowed for, your chlorinator will always be able to produce the maximum level of
chlorine. We recommend you add 6 kgs (13 Ibs) of salt for every 1000 liters ( 260 USG) of water (a typical pool of around
50,000 liters (13,000 USG) requires 300kg (660 Ibs) of salt).
Salt should always be added at the shallow end of the pool and allowed to dissolve. Running the pump will mix the water and
speed the dissolving process.
WARNING: Never add salt to the skimmer box!!
NOTE: Plug the pump directly into a power outlet (bypass the Chlorinator) and run for 8-10 hours to ensure the salt is
dissolved prior to running the chlorinator.
When the salt is dissolved, connect the pump to the chlorinator and run it on maximum chlorine output. Check that low
salt is not indicated on the screen. If it is, check again in 24 hours. If the low salt indicator still persists, have the salt level
checked by your local pool shops and ensure it is increased to 6000 ppm.

INST 428 CTX PROFESSIONAL E Series Salt Chlorinator V02.17
6
5.0 PROGRAMMING

INST 428 CTX PROFESSIONAL E Series Salt Chlorinator V02.17
7
SIMPLE PROGRAMMING: TIME CHANGE
Press MENU
Press ENTER
Press the MENU key 2 times
Then press the ENTER
key
Press
ing
the
key
Pressing UP or DOWN
Changes am or pm
Then press ENTER
Pressing UP or DOWN changes the minutes
Pressing UP or DOWN changes the hours
Then press ENTER

INST 428 CTX PROFESSIONAL E Series Salt Chlorinator V02.17
8

INST 428 CTX PROFESSIONAL E Series Salt Chlorinator V02.17
9
SIMPLE PROGRAMMING: PRODUCTION LEVEL
Setting Current Time/Day
Select Off
(a) Press the MENU button and screen should display CLK. Press ENTER
(b) Press ENTER and the hour digit will flash. Use up and down arrows to adjust.
(c) Press ENTER to change to minutes and set.
(d) Press ENTER and select AM or PM
(e) Press MENU to save
(f)
Press UP
Press UP
Press AUTO
Press AUTO
Press UP up to the desired value,
the maximum is 8
Press
AUT
Oto
leave
in
Auto
matic
,
Man
ual,
or
OFF

INST 428 CTX PROFESSIONAL E Series Salt Chlorinator V02.17
10
Setting Timers
Your Chlorinator has 2 timers enabling you to set different periods in which your chlorinator/pump will operate. Timers are
set by entering a start time and an off time. To set timers, do the following:
(a) Press the MENU button twice and screen should display TMR. Press ENTER
(b) Use up and down arrows to adjust start time for TIMER1. Press ENTER
(c) Use up and down arrows to adjust the off time for TIMER 1. Press ENTER.
(d) Repeat for TIMER 2
Programming Recommendations
CTX PROFESSIONAL recommend that you use two timers, one for the morning and one for the evening and typically for
periods of
2-5 hours for each. Your chlorinator is most effective if running in the early morning or evening when it is cooler (strong
sunlight consumes more chlorine). As a factory default, the control is set to come on at 08:00am and 04:00pm both for
periods of 4 hours.
6.0 CHLORINE OUTPUT
To adjust the chlorine output:
(a) Use Increase/Decrease arrows for setting the chlorine output level of the chlorinator. The Chlorinator output can
be set from levels 1 through to 8.
(b) Chlorine Output display shows the level set
7.0 USER OPERATION
The user mode buttons enable you to select Pool or Spa mode and to manually control the Chlorinator/Pump. Functions are
as follows:
(a) POOL MODE:
Auto - Running
The Chlorinator/Pump will run according to how you have set the timers
Manual -Running
The Chlorinator/Pump will run continuously.
Manual - Stopped
The Chlorinator/Pump will stay off continuously.
Maximum efficiency will be achieved from you chlorinator at the following levels:
Water temperature 15 Degrees - Salt level required is 6000 ppm
Water Temperature 25 Degrees - Salt level required is 4,100 ppm
8.0 FAULT CODES
The User Display can indicate the following fault codes;
NO F - No flow indication
LO S - Low salt indication
Refer to troubleshooting table at the end of this manual for actions to correct these errors.
9.0 SETTING RIGHT CHLORINE OUTPUT AND FILTRATION TIME
Your CTX PROFESSIONAL E-SERIESChlorinator must be run every day to ensure that your pool is correctly sanitized. As
the sun dissipates chlorine, running times are higher in the summer compared to the winter. CTX PROFESSIONAL
recommend that you initially run you chlorinator at maximum output.
Summer
You should set your Chlorinator to operate for 8 to 10 hours per day. Ideally, run it for 4-5 hours in the morning (say
8-12pm) and 4-5 hours in the evening (say 6.00-11pm).
In extremely hot weather it may be necessary to extend the running time if you find that the free chlorine level is too low.
To prevent consumption of chlorine by sunlight, try adding Cyanuric Acid (CTX-400 Clor Protect) as recommended by your
local pool professional. Additional benefit will be gained by operating your chlorinator and pump into the evening when the
strong sunlight has abated.
Chlorine is most effective when the pH of your pool water is 7.4. The electro-chemical process of the chlorinator, (change
salt into chlorine) will automatically raise the pH of your pool water, so it is very important to check your pH weekly and
adjust as necessary.
Winter
You should set your Chlorinator to operate for 6 to 8 hours per day. Again, running it in the morning and evening is
preferable.
Checking Chlorine Level
Ideally, check you Chlorine level after the morning operating period. The free chlorine residual level should be somewhere
between 1 and 3 parts per million. Increase or decrease the output of the Chlorinator to get the right residual chlorine level.
It may also be necessary to adjust the operating period if you are running at minimum or maximum output.

INST 428 CTX PROFESSIONAL E Series Salt Chlorinator V02.17
11
STABILISER
As previously mentioned, sunlight rapidly dissipates the amount of free chlorine in your pool. Chlorine stabilizer greatly
reduces this effect. Without stabilizer, you may need to run your Chlorinator and filtration system up to 16 hours per day
or longer!!!
Keep the Stabilizer reading between 30 and 60ppm.
pH Level
You should keep you pH level between 7.0 and 7.4 for fiberglass pools and 7.2 to 7.6 for other pools.
Total Alkalinity
The ideal range is between 80 and 120 ppm.
Salt Level
Although salt is not consumed by the Chlorinator, salt is lost during backwashing, and when your pool overflows due to rain
or splashing. The correct salt level is important to cell life and the effective operation of your chlorinator. Salt level should
be maintained around 6,000ppm but should never be allowed to fall below 4,000ppm.
A typical pool of around 50,000 litres (13,000 USG) requires 300kg (660 Ibs) of salt to initially set-up the pool to 6,000ppm.
A low salt level warning is indicated on your CTX PROFESSIONAL E-SERIESChlorinator if the salt level drops. If Low Salt is
indicated, check again in 24 hours and then if it is still indicated, add 50kg (110 Ibs) bags of salt to the shallow end of your
pool. Run the filtration system for approx. 6 hours to help mix the salt in the pool. It can take up to a day for the salt to fully
dissolve.
If the low salt light is still on, then you should get your pool water tested. If the Salinity is above 6000ppm then you may
need to have your Chlorinator checked.
Warning: Never add salt directly to the skimmer box. This practice should be avoided as it allows very high
concentrations of salt to be passed through your filtration and other pool equipment.
10.0 CHLORINATOR MAINTENANCE AND TROUBLESHOOTING
If the supply cord is damaged, it must be replaced by CTX PROFESSIONAL or its service agent or a similarly qualified
person in order to avoid a hazard.
Warning: Operating the Chlorinator with less than 3000 ppm of dissolved salt in the water may cause damage to the cell
and will void the warranty. Never start chlorinator, until the correct quantity of salt has been added and dissolved in your
pool water.
Cell Maintenance
Your CTX PROFESSIONAL E-SERIES Chlorinator has an automatic cleaning feature that under normal conditions, will keep
the cell plates clear of deposits of salt and calcium.
E-SERIES 15/25/35 cells have a negative charge sensor that monitors the flow and salt levels of the water. This sensor is
designed to be fail safe. As it is negative charge deposits of calcium or other debris may be deposited on it and cause it to
indicate a low salt or no flow condition. Should a low salt condition be indicated, have your salt level checked at your local
pool shop. If the low salt condition persists, or a no flow condition is indicated when the supply pump is operating, you may
need to manually clean your chlorinator Cell (CTX-35).
Cell Cleaning Instructions:
-Close applicable valves
-Disconnect the Chlorinator from the Mains by removing the 3 pin plug
-Disconnect the cell wires
-Undo the barrel nuts connecting the cell to your filtration system
-Turn the cell upside down (inlet and outlet on top) and fill the cell with a mix of 1 part Hydrochloric acid
(CTX-35) to 10 parts water and leave standing for a few minutes. As an alternative, you may use an approved
commercial Cell cleaning solution
-Repeat if necessary and then rinse well in clean water
-Re-install the cell ensuring o-rings are correctly located and barrel nuts are tightened to prevent leaks
-Re-connect cell wires with wing nuts supplied making sure the blue wire is connected to the blue terminal.
Incorrect connection may damage your chlorinator control. Tighten wing-nuts to ensure the electrical
connection is sound
-Return all valves to their normal positions, re connect power to the Chlorinator and turn on at power point.
WARNING: Follow safety instructions provided with the Hydrochloric acid or cleaning solution. When handling
Hydrochloric Acid (CTX-35) the use of eye protection, mask and gloves are highly recommended. Extreme caution should
be taken whenever handling Hydrochloric Acid or Cell Cleaning Solution.
11.0 MAINTENANCE OF YOUR CHRLORINATOR
Maintenance Schedule: Your new product incorporates moving parts and withstands high velocity water with chemicals in it.
Some of these parts will wear in the normal course of use and require regular checks and maintenance. Performing these
checks and maintenance will identify parts that have worn and require repair/replacement before further serious damage is
sustained. A small amount of regular care and attention to your pool equipment will help ensure long life and trouble free
performance.

INST 428 CTX PROFESSIONAL E Series Salt Chlorinator V02.17
12
To protect against extremes of temperature, your unit is vented to allow expensive electronics to cool. Ants and some
insects are often attracted to the warner, dry environment inside the enclosure. We recommend that, with power turned
off, you spray a surface insecticide on the surfaces surrounding the control to prevent ant and insect ingress. Repeat every
three months or as necessary
Timing
Maintenance Check
Service action (if required)
EVERY 2 WEEKS
Check cell for calcium build up
Check water chemistry
Check cable connections to cell
Soak electrode in mixture of 10 parts water to 1 part acid
(CTX-35). Use a soft brush only if required
Balance pH in pool and adjust output of unit to ensure
satisfactory production of chlorine
Ensure no water contact is occurring with pins
EVERY 3 MONTHS
Check cell connections for leaks
Check for Insects / ants
Isolate Pump, turn power off, clean and grease O rings or
replace if necessary
Spray a surface insecticide on the surfaces around the unit to
prevent ant and insect ingress,
EVERY 6 MONTHS
Check chlorine levels and pump
operating hours
Prevent insect ingress to controller
Adjust timer and output depending on demand for current
season.
Turn controller off, use an insect spray and spray onto
walls around controller. Do not spay directly into unit.
Important note: Regular maintenance is important to ensure long life and trouble free performance of your pool equipment.
If unable to perform the maintenance yourself, contact your local CTX PROFESSIONAL office who will arrange a trained
service technician to perform the maintenance for you.
Record your Equipment details here for quick reference:
Model No.:
Serial No.:
12.0 TROUBLESHOOTING
Your CTX PROFESSIONAL E-SERIES Chlorinator has diagnostic and safety features to make it easy to maintain your
system. The table below summarizes potential faults and their causes.
Fault Indication
Potential Cause
Remedy
No Flow
Pump turned off/disconnected or
valves closed
Blue wire disconnected from cell
Ensure valves/pump on
Connect Blue sense wire to cell
Low salt
Salt level in pool has dropped too low
Pool water temperature is low
Cell has calcified
Cell has failed
Take sample of water to pool shop and
check salt level - add salt as recommended.
Add salt and turn chlorinator output down
until the water is warmer
Clean cell
Call for Service
Display blank
No Power to Controller
Plug in controller and ensure mains power
available

INST 428 CTX PROFESSIONAL E Series Salt Chlorinator V02.17
13
Fuse blown
Have a service technician replace fuse (3
amp slow blow)
Low/No chlorine in pool
Cables not connected to cell
Timer period too short
Chlorine output level too low
Filter needs backwashing
Ph too high
Pool stabiliser (cyanuric acid) too low
Salt level too low
Connect cables
Increase timer period - particularly in
summer
Increase chlorine output
Backwash filter
Balance pH level to 7.4 - 7.6
Increase Stabiliser between 30 and 60 ppm
Increase salt to above 6000 ppm
Clock loses time when
mains power removed
Battery life expired
Call a technician
13.0 WARRANTY
1.1 General Aspects
1.1.1 In accordance with these provisions, the seller guarantees that the product corresponding to this Warranty
presents no lack of conformity at the time of delivery.
1.1.2 The Total Warranty period for the product is 2 YEARS, calculated as of delivery to the purchaser. The electrode is
covered by a 2- YEAR WARRANTY (or 4.000 hours), which is not extendable.
1.1.3 If there were any detect in the product and the purchaser informed the seller within the warranty period, the seller
must repair or replace the product at its own cost where it deems fitting, unless this were impossible or
disproportionate.
1.1.4 When the product cannot be repaired or replaced, the purchaser may request a proportional reduction in the
price, or, if the defect is substantial, the termination of the sales agreement.
1.1.5 Parts replaced or repaired pursuant to this warranty will not extend the term of the warranty of the original
Product, while will have its own warranty.
1.1.6 For this warranty to be effective, the purchaser must accredit the date of purchase and delivery of the Product.
1.1.7 When more than six months have elapsed between the delivery of the Product to the purchaser and the latter
alleges a defect, the purchaser must substantiate the source and the existence of the alleged defect.
1.1.8 This Warranty Certificate does not limit or prejudge the rights that correspond to the consumers by virtue of
obligatory national legislation.
1.2 Special Conditions
1.2.1 For this warranty to be effective, the purchaser must strictly follow the Manufacturer's indications included in the
documentation supplied with the Product, when applicable according to the range and model of the Product.
1.2.2 When a programme is specified for the replacement, maintenance or cleaning of certain parts or product
components, the warranty will only be valid when programme has been followed properly.
1.3 Limitations
1.3.1 This Warranty will only be applicable to sales made to consumers, with “consumer” taken to mean any person that
purchases the Product for a purpose outside the sphere of their own professional activity.
1.3.2 No warranty is given regarding normal wear through the use of the product, or with regard to parts, components
and and/or perishable materials or consumables (barring the electrode).
1.3.3 The Warranty does not cover cases in which the Product: (i)) has been unduly handled or used; (ii) has been
inspected, repaired, maintained or handled by an unauthorised person; (iii)) has been repaired or maintained with
non-original parts or (iv) has been installed or started up incorrectly.
1.3.4 When the Product defect is a consequence of an incorrect installation or start-up, this Warranty will only be
effective if the installation or start-up is included in the Product contract of sale and was performed by the seller or
under its responsibility.
1.3.5 Damages or faults of the product due to any of the following causes:
Operation at salinities below 3 g/l of sodium chloride and/or temperatures lower than 15°C (59°F) or higher than
40°C (104°F).
Operation at pH above 7.6.
Use of chemical products not explicitly authorised.
Exposure to corrosive environments and/or temperatures below 0°C (32°F) or above 50°C (125°F).

INST 428 CTX PROFESSIONAL E Series Salt Chlorinator V02.17
14
14.0 INSTRUCCIONES DE INSTALACIÓN Y UTILIZACIÓN
15.0 DESCRIPCIÓN GENERAL
¡Enhorabuena! Ha adquirido un clorador salino CTX PROFESSIONAL E-SERIES. Lea detenidamente las instrucciones y podrá
usar su producto durante años sin problemas.
El clorador CTX PROFESSIONAL E-SERIES convierte parte de la sal (cloruro de sodio) de su piscina en cloro que destruye
las algas y bacterias y desinfecta su piscina. Como parte del proceso, el cloro vuelve a convertirse en sal y por tanto esta
última no se consume.
El controlador del clorador tiene muchas funciones que garantizan un uso sencillo del clorador y del sistema de filtración.
El clorador CTX PROFESSIONAL E-SERIES está equipado con un reloj electrónico interno diseñado para hacer funcionar la
bomba de filtración hasta en 2 periodos de tiempo diferentes diariamente. El controlador tiene una fuente de alimentación
de reserva no reemplazable diseñada para conservar la memoria de los ajustes del temporizador en caso una interrupción de
la alimentación corta y poco frecuente.
ADVERTENCIA: El aparato no está diseñado para ser utilizado por personas, incluidos niños o personas enfermas con las
capacidades físicas, sensoriales o mentales reducidas, ni con falta de experiencia o conocimientos, a no ser que cuenten con
supervisión o se les hayan dado instrucciones sobre del uso del aparato por parte de una persona responsable de su
seguridad.
Asegúrese de que los niños estén vigilados para garantizar que no jueguen con la bomba ni el clorador.
Para evitar riesgos en la seguridad, si se daña el cable de alimentación, éste deberá ser sustituido únicamente por CTX
PROFESSIONAL, por su agente de servicio técnico o por una persona cualificada a tal efecto.
16.0 INSTALACIÓN DEL CUADRO DE CONTROL
El cuadro de control del clorador CTX PROFESSIONAL E-SERIES tiene un nivel de protección IP23, pudiendo ser
instaladon en exteriores. La normativa no permite que el controlador se instale a menos de 3,5 metros de la piscina.
El controlador del clorador debe ser instalado en un lugar con buena ventilación y preferiblemente lejos de la luz solar
directa. Asegúrese de que la unidad no esté cerca de productos químicos para piscinas (CTX-15, CTX25 & CTX-35) ya que
los vapores podrían dañar el controlador.
Si se instala el controlador en un poste, fije primero un panel impermeable plano de al menos 300 mm de ancho y 500 mm
de largo. Asegúrese de que el controlador esté centrado y plano en el panel.
Nota: La intensidad nominal de la bomba no debe ser superior a 8 amperios.
17.0 INSTALACIÓN DE LA CÉLULA
La célula del clorador debe ser instalada al final de la tubería, justo antes del tramo de retorno a la piscina. Si se instalan
válvulas entre el clorador y la salida de la piscina, es imprescindible que no puedan provocar que la bomba se cale. Si la
presión de la célula supera los 250 kPa y/o la temperatura del agua es superior a 40 grados Celsius, es posible que la célula
falle.
ADVERTENCIA: Nunca instale la célula antes de la bomba ni del calentador
La célula DEBE instalarse con las uniones de barril debajo (conexiones de agua hacia abajo) y la célula debe estar en
horizontal. Se incluyen juntas de 50 mm. Utilice una tubería de PVC de alta presión de 50 mm (2”) y péguela dentro de la
parte trasera de la unión de barril de 50 mm. Asegúrese de que las juntas tóricas estén fijadas correctamente y que las
uniones estén bien apretadas.
La dirección del caudal a través de la célula es clave. Se debe instalar la unidad con el agua entrando en la célula por el
extremo más cercano a las conexiones terminales (como se indica con la etiqueta de dirección del caudal que hay sobre la
célula).
Limpiafondos
Bolero ND
Centros de las
tuberías 108 mm
Desde el
filtro/bomba
Retorno hacia
la piscina

INST 428 CTX PROFESSIONAL E Series Salt Chlorinator V02.17
15
ADVERTENCIA:
Es fundamental que las tuberías y el equipo no permitan que se generen y acumulen
gases en la célula.
ADVERTENCIA:
La célula debe estar instalada en horizontal con las conexiones de agua hacia abajo.
Esto crea un sifón de seguridad de gases. Si se instala de otra forma podría provocar
explosión, lesiones o muerte.
ADVERTENCIA:
La célula debe estar instalada en las tuberías de retorno a la piscina. Siempre se debe
instalar después de las conexiones del filtro, calentador de gas y calentador solar o
bomba de calor.
ADVERTENCIA:
NO instale válvulas de aislamiento en la entrada o la salida de la célula.
Una vez colocada la célula, conecte el cable multipolar negro a la célula. El cable azul debe estar conectado al terminal azul.
El cable ha sido diseñado para salir por la parte de abajo de la célula. Asegúrese de que las tuercas de mariposa estén
apretadas correctamente para asegurar un buen contacto.
18.0 PREPARACIÓN DE LA PISCINA
El nivel de sal recomendado para el clorador salino CTX PROFESSIONAL E-SERIES es de 6.000 ppm. El clorador precisa
entre 4000 y 6000 ppm de sal disuelta en el agua de la piscina. El nivel de sal depende de la temperatura del agua, pero si se
alcanza un nivel de 6000ppm de sal disuelta, el clorador siempre podrá producir el nivel máximo de cloro . Se recomienda
añadir 6 kg de sal por cada 1000 litros de agua (una piscina típica con unos 50.000 litros requiere 300 kg de sal).
Añada siempre la sal en la parte poco profunda de la piscina y deje que se disuelva. Al poner la bomba en funcionamiento se
mezclará el agua y acelerará el proceso de disolución.
ADVERTENCIA: ¡¡Nunca añada sal a la espumadera!!
NOTA: Conecte directamente la bomba a la salida eléctrica (puentee el clorador) y hágala funcionar durante 8-10 horas para
asegurarse de que la sal se disuelva antes de activar el clorador.
Cuando la sal se disuelva, conecte la bomba al clorador y hágala funcionar con la producción máxima de cloro. Compruebe
que en la pantalla no se indique nivel de sal bajo. Si lo hay, vuelva a comprobarlo al cabo de 24 horas. Si persiste la indicación
de nivel de sal bajo , haga que un técnico de piscinas local compruebe el nivel de sal y asegúrese de que aumente a 6000
ppm.

INST 428 CTX PROFESSIONAL E Series Salt Chlorinator V02.17
16
19.0 PROGRAMACION

INST 428 CTX PROFESSIONAL E Series Salt Chlorinator V02.17
17

INST 428 CTX PROFESSIONAL E Series Salt Chlorinator V02.17
18

INST 428 CTX PROFESSIONAL E Series Salt Chlorinator V02.17
19
Ajuste del hora/día actual
Seleccione Apagado
(g) Pulse el botón MENÚ y en la pantalla aparecerá CLK. Pulse ENTRAR
(h) Pulse ENTRAR y el dígito de la hora parpadeará. Utilice las flechas arriba y abajo para ajustarla.
(i) Pulse ENTRAR para cambiar a los minutos y ajústelos.
(j) Pulse ENTRAR y seleccione AM o PM.
(k) Pulse MENÚ para guardar.

INST 428 CTX PROFESSIONAL E Series Salt Chlorinator V02.17
20
Configurar los temporizadores
El clorador tiene 2 temporizadores que le permite ajustar diferentes periodos en los que funcionará el clorador/la bomba.
Los temporizadores se ajustan introduciendo una hora de inicio y una hora de apagado. Para configurar los temporizadores,
haga lo siguiente:
(e) Pulse dos veces el botón MENÚ y en la pantalla aparecerá TMR. Pulse ENTRAR
(f) Utilice las flechas arriba y abajo para ajustar la hora de inicio del TEMPORIZADOR1. Pulse ENTRAR
(g) Utilice las flechas arriba y abajo para ajustar la hora de apagado del TEMPORIZADOR1. Pulse ENTRAR.
(h) Repita el procedimiento para el TEMPORIZADOR2.
Recomendaciones de programación
CTX PROFESSIONAL recomienda que utilice dos temporizadores, uno para la mañana y otro para la noche, y normalmente
con períodos de 2-5 horas cada uno. Su clorador es más eficaz si se hace funcionar a primera hora de la mañana o por la
noche, cuando hace más frío (la luz solar intensa consume más cloro). Como ajuste predeterminado de fábrica, el
controlador está programado para activarse a las 08:00 y a las 16:00 durante periodos de 4 horas.
20.0 PRODUCCIÓN DE CLORO
Para ajustar la producción de cloro:
(c) Utilice las flechas de aumento/reducción para ajustar el nivel de producción de cloro del clorador. La producción
del clorador se puede ajustar en niveles de 1 a 8.
(d) La pantalla de producción de cloro muestra el nivel establecido.
21.0 OPERACIÓN POR EL USUARIO
Los botones del modo de usuario permiten seleccionar el modo Piscina o Spa y controlar manualmente el clorador/la
bomba. Las funciones disponibles son:
(b) MODO PISCINA:
Funcionamiento automático
El clorador/la bomba funcionará según los temporizadores configurados.
Funcionamiento manual
El clorador/la bomba funcionará de forma continua.
Parada manual
El clorador/la bomba permanecerá apagado/a de forma continua.
Se puede conseguir una eficienca máxima del clorador en los siguientes niveles:
Temperatura del agua 15 grados - Nivel de sal necesario 6000 ppm
Temperatura del agua 25 grados - Nivel de sal necesario 4.100 ppm
22.0 CÓDIGOS DE FALLOS
La pantalla del usuario puede indicar los códigos de fallo siguientes:
NO F - Indicación de falta de caudal
LO S - Indicación de nivel de sal bajo
Consulte la tabla de resolución de problemas al final del manual para conocer las acciones correctivas para estos errores.
23.0 AJUSTAR LA PRODUCCIÓN DE CLORO Y EL TIEMPO DE
FILTRACIÓN CORRECTOS
El clorador CTX PROFESSIONAL E-SERIES debe funcionar diariamente para garantizar que la piscina se desinfecte
correctamente. Dado que el sol hace que el cloro se disipe, los tiempos de funcionamiento en verano son más largos que en
invierno. CTX PROFESSIONAL recomienda activar inicialmente el clorador a potencia máxima.
Verano
Debería configurar su clorador para que funcione durante 8 o 10 horas diarias. Lo ideal sería que funcione durante
4-5 horas por la mañana (digamos de 8:00a 12:00) y otras 4-5 horas por la tarde-noche (digamos de 18:00 a 23:00).
En climas extremadamente cálidos, puede ser necesario ampliar el tiempo de funcionamiento si ve que el nivel de cloro en el
agua es demasiado bajo.
Para prevenir que el cloro se consuma por la luz solar, pruebe a añadir ácido cianúrico (CTX-400 Clor Protect) según
recomienden los profesionales locales de piscinas. Puede conseguir más beneficios haciendo funcionar el clorador y la bomba
por la noche, cuando la luz solar intensa haya disminuido.
El cloro es más efectivo cuando el pH del agua de la piscina es de 7,4. El proceso electroquímico del clorador (convertir sal
en cloro) aumenta automáticamente el pH del agua de la piscina, por lo que es muy importante comprobar cada semana el
pH y ajustarlo según sea necesario.
Invierno
Debería configurar su clorador para que funcione durante 6 o 8 horas diarias. Nuevamente, lo preferible es que funcione por
la mañana y por la tarde.
This manual suits for next models
3
Table of contents
Languages:
Popular Swimming Pool Filter manuals by other brands

Lomart
Lomart Deluxe Thru-Wall Skimmer 1-4113-006 owner's guide

Majestic
Majestic UNO Instructions for use

RADLEY
RADLEY 5044-794 user guide

HARMSCO
HARMSCO Betterfilter BF144 BKM Installation and operation manual

Bayrol
Bayrol NATURALLY SALT Salt Relax POWER OPERATING AND INSTALLATION Manual

Clear Comfort
Clear Comfort CCW300 quick guide

Tigershark
Tigershark TigerShark owner's manual

Hayward
Hayward OmniPL HLXPROUPG installation manual

Waterway
Waterway Renegade Installation and operating instructions

Steinbach
Steinbach Speed Clean Classic 300 instruction manual

Zodiac
Zodiac DuoClear troubleshooting manual

Norsup
Norsup OceanClear LS Instructions for use