Cuchen PC061 US Series User manual

E-PC061-T-FT3-V1
PC061 US SERIES
You can access more information about Cuchen rice
cookers by using the QR code.
This User's Guide includes a product warranty. /
This guide was created for common use for multiple products and may contain images or contents that are different from the product purchased. /
This guide is subject to change according to the company's circumstances.
Prior to using your Cuchen Electric Pressure Rice Cooker,
please read this User's Guide to ensure proper use of this product.
After reading it, keep it in a place where users of the product can always see it.
CUCHEN
ELECTRIC IH PRESSURE
RICE COOKER

Product Specifications
Product Name Electric IH Pressure Rice Cooker CJH-PC061 Series
Rated Voltage & Frequency 120 V~, 60 Hz
Rated Power Consumption 1100 W
Maximum Cooking Capacity 1.08 L (6 servings)
Regulator Pressure/Safety Device Pressure 88.3 kPa / 166.7 kPa
Dimensions (Length x Width x Height) 270 X 383 X 260 mm
Weight 5.9 kg (6.9 kg when including packaging)
These specifications are subject to minor changes for the purpose of product performance improvement.
2
※ Donotusetheproducton
topofastainlesssteelplate,
pallet,cushion,electricpad,
ironplate,tinfoil,ironor
aluminumtray,etc.
Thereisariskofreorproduct
failure.
※ Donotusethecookeron
topofanotherelectronic
appliance(kimchi
refrigerator,dishwasher,
microwaveoven,
refrigerator/freezer,etc.).
Fireordeformationmayoccur.
※ Donotuseaninnerpot
thathasbeendeformed
orthatisnotadedicated
innerpotoftheproduct.
Anexplosion,re,or
malfunctionmayoccur.
Tray
Iron plate, tinfoil
ThankyouforpurchasingourCuchenIHElectricPressureRiceCooker.BesuretoreadtheUser'sGuide
forproperuseandmaintenanceoftheproduct.RefertothisUser'sGuidewhenatroubleoccurswhile
usingtheproduct.Pleasekeepthisguideinasafeplacebecauseitcontainstheproductwarranty.
Caution
Donotboilorcookfoods(beans,redbeans,tomatoes,our,etc.)otherthanthespeciedmenuitems.
Doingsomayclogtheautomaticsteamoutlet,whichposesariskofexplosionandburns.
Intheelectromagneticinductionheating(IH)methodoftheIR/IHelectricricecookers,astrongcurrentis
sentthroughcoppercoilstothebottomandsides,formingamagneticforcelinearoundthecoilstoheatthe
entireinnerpotandcookeverysinglegrainproperlytomakeshiny,delicious,andevenlycookedrice.
*Y
oumayheararesonantsoundfromIHoperationduringcookingorwarming.Thisisanormalphenomenon,andyoucanuseitwithrelief.
Heating Method

Table of Contents
3
Before Getting
Started
Operating
Instructions
Troubleshooting
Safety Precautions ………………………………… 4
Parts and Functions ………………………………… 9
Cleaning and Maintenance ……………………… 11
How to Cook Tasty Rice ………………………… 15
How to Set the Current Time …………………… 16
How to Cook Rice………………………………… 17
How to Control Rice Taste ……………………… 19
How to Fine-Tune Rice Taste …………………… 20
How to Use Preset Cooking …………………… 22
How to Cook in Steam and Slow Cook………… 24
Keeping Warm and Reheating ………………… 25
How to Keep the Rice Warm …………………… 26
Adjusting Warming Temperature and Heating
Intensity …………………………………………… 27
How to Set Language and Sound Volume …… 28
Auto Clean ………………………………………… 29
Food Recipes …………………………………… 30
Please read this before contacting the service
center ……………………………………………… 39

4
Safety PrecautionsSafety Precautions
IMPORTANT SAFEGUARDS
• Read all instructions.
• Do not touch hot surfaces. Use handles or knobs.
• To protect against electrical shock do not immerse cord, plugs, or (state specific part or
parts in question) in water or other liquid.
• Close supervision is necessary when any appliance is used by or near children.
• Unplug from outlet when not in use and before cleaning. Allow to cool before putting on or
taking off parts.
• Do not operate any appliance with a damaged cord or plug or after the appliance
malfunctions or has been damaged in any manner. Return appliance to the nearest
authorized service facility for examination, repair, or adjustment.
• The use of accessory attachments not recommended by the appliance manufacturer may
cause injuries.
• Do not use outdoors (this item may be omitted if the product is specifically intended for
outdoor use)
• Do not let cord hang over edge of table or counter, or touch hot surfaces.
• Do not place on or near a hot gas or electric burner, or in a heated oven.
• Extreme caution must be used when moving an appliance containing hot oil or other hot
liquids.
• Always attach plug to appliance first, then plug cord into the wall outlet. To disconnect, turn
any control to "off", then remove plug from wall outlet.
• Do not use appliance for other than intended use.
• Any repairs must be performed by an authorized service representative.
• This product is for household use only.
• Save these instructions

5
Before Getting Started
※
The purposes of these precautions are to protect your safety and prevent property damages.
※
Carefully read the cautions to use the product correctly.
DangerIftheinstructionsarenotfollowed,severeinjuryorevendeathmayoccur.
WarningIftheinstructionsarenotfollowed,seriousinjuryorpropertydamagemayoccur.
CautionIftheinstructionsarenotfollowed,minorinjuryorpropertydamagemayoccur.
Power Supply
Danger
This product is only for 120V.
Plug the product into an outlet of 120V with a
15A rating or above only.
Do not use the product with any other voltage
than AC 120V.
Using a voltage transformer can be the cause of
electric shock or fire.
Be sure to remove any water from your hands
before holding the power plug to plug or unplug
the product in/from the outlet.
If you use the product
connected to an outlet other
than one with the proper
rating specified above, there
is a danger of electric shock
or fire.
Use an extension cord of
15A or higher.
If you touch the power plug
or outlet with a wet hand,
there is a danger of electric
shock.
When removing the power plug, do not pull on
the cord, but instead grab the power plug to
remove it.
Do not make a connection or modication to
the power plug on you own.
Do not plug and unplug the power cord
repeatedly many times.
There is a danger of
electric shock or fire due to
impact.
There is a danger of
electric shock or fire.
There is a danger of
electric shock or fire.
Do not pull the power cord to move the
product.
Unplug the power plug if you are not using the
product for a long period of time.
Remove any foreign matters from the power
plug with a clean dry cloth.
Doing so may cause
electric shock or fire.
Doing so may cause
electric shock,
electric leak or fire.
If there is dust or foreign
matters on the plug,
connection may be
incomplete, which may
cause fire. Check the
condition of the power plug
often.
Do not bend, tie or pull the power cord
excessively.
Do not plug multiple electrical appliances into
one outlet at the same time. Use a dedicated
outlet.
Do not use the product where the power cord
or plug can be bitten by an animal or cut by
sharp metal objects such as nails.
Damage to the power cord or plug due to impact
may cause fire or electric shock.
There is a danger of fire or electric shock due to
short circuit.
There is a danger of
overheat, ignition, electric
shock,
or fire.
If the power cord or plug gets damaged or the power outlet becomes loose, stop using the product and contact Customer Service.
If the power cord shield is peeled off or cut, it may cause fire or electric shock. So check the condition of the power cord and plug often and make sure that
the power cord is not placed under the product or a heavy object.
If the power cord or plug is damaged, be sure to repair it at the designated Customer Center.

6
Safety Precautions
During Use
Danger
Remove the power plug before cleaning the
product, and do not sprinkle water on it or
wipe it with benzene, thinner, etc. Please
contact Customer Center if water entered
inside the product.
If any unusual sound, burning smell or smoke
comes out from the product, immediately
unplug it, remove the internal pressure by
pushing the pressure weight, and contact
Customer Center.
Do not place a stainless steel plate, pallet,
cushion, electric blanket, steel plate, tinfoil,
copper pipe, or platter made of iron or
aluminum under this product.
There is a danger of electric
shock, fire or discoloration.
There is a risk of fire. There is a danger of electric
shock, fire or discoloration.
Do not disassemble, repair or modify the
product on your own.
Do not place the product where a child can
use or touch it alone.
There is a danger of electric shock, burns or
bodily injury.
Do not use the product with a metal object such as
aluminum foil put on the outer surface of the inner pot.
There is a danger of electric shock,
fire or product damage.
No one other than the authorized
service persons may disassemble
or repair the product. Please
contact Customer Center for repair
consultation.
There is a danger of electric
shock, fire or discoloration.
When you close the lid, close it completely
until you can hear a click. Before starting to
cook rice or other food, put the lid handle in
the locked position.
Failure to do so may result in bodily injury or bad
performance.
Do not place the product on other equipment
such as a microwave oven or a kimchi
refrigerator or on a sink, and do not place a
pallet, cushion, electric blanket, steel plate,
or tinfoil under the product.
Do not insert any foreign matters into the
suction inlet or a gap on the product. If foreign
matters have entered the product, unplug the
product and contact Customer Center.
Fire or deformation may occur. There is a danger of electric shock, fire or bodily
injury.
Installation
Danger
Do not use the product near a heat source such as direct sunlight, gas
stove, lighter, heating appliance, and furnace.
Do not install or clean the product in a sink, bathroom or other places
where water can enter.
There is a danger of electric leak, electric shock, discoloration
or deformation.
Do not place the power cord near a heat source. If the cord
is damaged by a heat source, there is a danger of electric
shock or fire. Keep the product at least six feet away from
home appliances such as audio player, TV, etc.
Electric leak, electric shock or fire may occur.
If water enters the product, discontinue the use, unplug
the device, and contact Customer Center.
Do not use or store ammable
gas or materials near the product.
Do not install the product in a
dusty place or where there are
chemical substances.
Do not use the product on top of a rice container,
multi-purpose rack, etc.
There is a
risk of fire.
It may cause electric shock, fire or
performance deterioration of the
product.
If the power cord is pressed in a gap, it may cause fire
or electric shock.
There is a danger of device damage, fire or electric
shock caused by the rice container or multi-purpose
shelf during steam discharge.
Caution
Do not install the product on a
sloping surface and do not apply
excessive force or impact on the
product.
Be careful not to let your hands,
feet, or other objects tangled in
the power cord and cause the
product to fall.
Do not drop the product or inner
pot or cause impact on it.
Secure at least ve feet of space
above the product to install it.
There is a
danger of
bodily injury
or product
damage.
There is a
danger of
bodily injury
or product
damage.
There is a
danger of
bodily injury
or product
damage.
Failure to do
so may cause
malfunction
of the
product.
Close the lid with two hands!
1.5m or higher
Benzene,
thinner, sprayer,
etc.

7
Before Getting Started
During Use
Warning
Never use the product without the inner pot.
There is a danger of electric shock or fire.
Do not touch the inside of the inner pot,
pressure weight, clean cover, etc. during or after
cooking rice or other food since they are hot.
Do not use a deformed inner pot.
Only use a genuine, dedicated inner pot.
If you have added rice and
water into the product without
the inner pot, be sure to contact
Customer Center to check for
any abnormality before using the
product.
There is a danger of burn due
to the high temperature.
The pressure weight may be
pushed, and the discharged
steam may cause a burn.
There is a danger of fire,
malfunction or explosion.
If the inner pot has been
deformed by dropping, etc.,
please contact Customer Center.
Do not put a decorative cover, cloth, or other
objects on the lid while using the product.
Do not put the clean cover or a metal container,
metal stick or other metal objects in the product
without the inner pot and use the product.
Do not unplug the product or press any other
function button while cooking.
There is a danger of product
explosion due to fire, deformation
or pressure.
There is a danger of electric
shock or fire. (Especially, prevent
children from doing so.)
Doing so may cause malfunction.
Do not put your face or hand near the steam
outlet during or immediately after cooking.
Do not place the inner pot on a gas re or IH
range or use it for other purposes.
When cooking is in progress, do not turn the
lid handle to the opening direction or press
the lid open button.
There is a danger of burn injury
due to the
high-temperature steam.
Especially, prevent children from
coming near.
There is a danger of
discoloration or
deformation of
the inner pot and
product malfunction.
There is a risk of fire or bodily injury.
When cooking is in progress, the lid will not open
due to the pressure.
If you open it forcibly, there is a danger of explosion
or burns due to the pressure.
After cooking is completed, turn the lid handle only
after the steam is completely discharged.
If it is inevitable to open the lid while cooking, press
and hold the [Cancel] button for at least 1 second,
then open it after the internal pressure has been
completely removed.
Do not cook using a method other than the
provided cooking methods, such as by using
grain amounts in excess of the given ratio.
Doing so may cause product failure or injury to
your body.
Do not put the clean cover, metal objects, etc.
in the product without the inner pot and use
the product.
There is a danger of electric shock or fire.
Caution
If the inner pot coating is peeled
o, please contact Customer
Center.
If you use the product for a long
time, the coating on the inner pot
may peel off. If you clean the inner
pot with a coarse scrubber or
metallic scrubber, the impact may
peel off the coating, so be sure to
wash it with a mild detergent and a
sponge.
Do not ll the pot over the
maximum capacity and use the
product.
Doing so may cause malfunction
such as faulty cooking and overflow.
Keep a distance of at least one foot
from the product body during use.
The electronic product may emit
magnetic fields.
Do not place a magnetic object
on the lid or use the product
near a highly magnetic object.
Doing so may cause malfunction.
After cooking, be sure to wipe
collected water o the body.
Failure to do so may cause
discoloration, odor or performance
deterioration.
Wipe off water collected on the water
tray of the main body.
Be sure to close the lid fully
before cooking or warming.
Failure to do so may cause
discoloration, odor or performance
deterioration.
Clean the inner pot, pressure
packing, clean cover packing
and clean cover frequently. (See
How to Clean)
Failure to do so may cause odor or
performance deterioration.
In the event of a power outage
during cooking, the steam exhaust
unit may operate, and the product
may spew out the contents.
Be sure to cook with the steam
cover attached.
Do not use the product for purposes
other than cooking or warming rice
and cooking the provided menu
items, such as for boiling water
or making sikhye, seaweed soup,
curry, fried food, etc.
Doing so may cause malfunction or
odor.
OK!
Use only dedicated
inner pot
Do not use for
other purposes
Lock A power
outage

8
Safety Precautions
During Use
Caution
To wash the inner pot, soak it in water suciently before cleaning,
and do not use a coarse scrubber, metallic scrubber, brush or abrasive
as it may peel o the coating on the inside and outside of the pot.
Scrubbers for Cleaning Inner Pot
May Be Used May Not Be Used
Microfiber scrubber Iron scrubber
Sponge scrubber Green scrubber
Mesh scrubber Scrubber for burnt pots
In particular, do not use an abrasive, toothpaste, or other
polishing agents to wash the surface of the inner pot.
Discoloration may occur, or the coating may peel off.
Do not lift the product by
holding the inner pot handle. If
you lift the product by holding
the inner pot handle, the lid may
be opened.
Doing so may cause malfunction,
damage or injury.
When cleaning the exterior of
the product (especially metal
parts) or the clean cover, do not
use a coarse scrubber, metallic
scrubber or abrasive.
Doing so may cause damage or
deformation of the product.
Be sure to clean the product
after cooking a menu item
(Deluxe Steam, Porridge).
If you cook or warm rice without
washing after cooking a menu item,
the remaining smell may permeate the
rice. Use the product after thoroughly
cleaning the inner pot, clean cover,
pressure packing, etc.
If you use the product on top of a
rice container or multi-purpose
shelf, pull the cooker or shelf out
for cooking.
Failure to do so may cause damage
to the rice container or shelf when
the steam is discharged.
Do not spray or inject pesticides or chemicals into the product.
There is a danger of fire.
If a cockroach or another insect enters the product, please contact Customer
Center.
When inserting the inner pot into
the main body, align the inner
pot handle to the groove on the
main body.
Failure to do so may cause
malfunction.
Do not put the inner pot into the
main body with rice grains or
foreign matters on its outside
surface.
Doing so may cause malfunction.
Do not put the product into
water or other liquids to clean it.
Doing so may cause electric shock
or fire.
Turning the locking handle immediately after cooking may scratch
the inner pot due to the residual pressure. Wait 2-3 seconds until the
residual pressure is completely discharged then close the lid. This
prevents peeling of the coating at the location where the lid meets
the inner pot.
Wash rice in a separate container and move it to the inner pot, and do
not tap the inner pot to shake o the remaining rice in the container.
If the inner pot coating is scratched or peeled off due to the customer's fault,
the service will be charged even during the free service period.
If you are using an articial
cardiac pacemaker or another
electric medical assistant device,
please consult a physician before
using this product.
Always keep the area around the
product clean.
Repair after malfunction caused by
cockroaches or other insects may
be provided at a cost.
Operation of this product may affect
operation of the artificial cardiac
pacemaker or other electric medical
assistant devices.
Do not use the product outdoors.
There is a danger of electric shock
or fire.
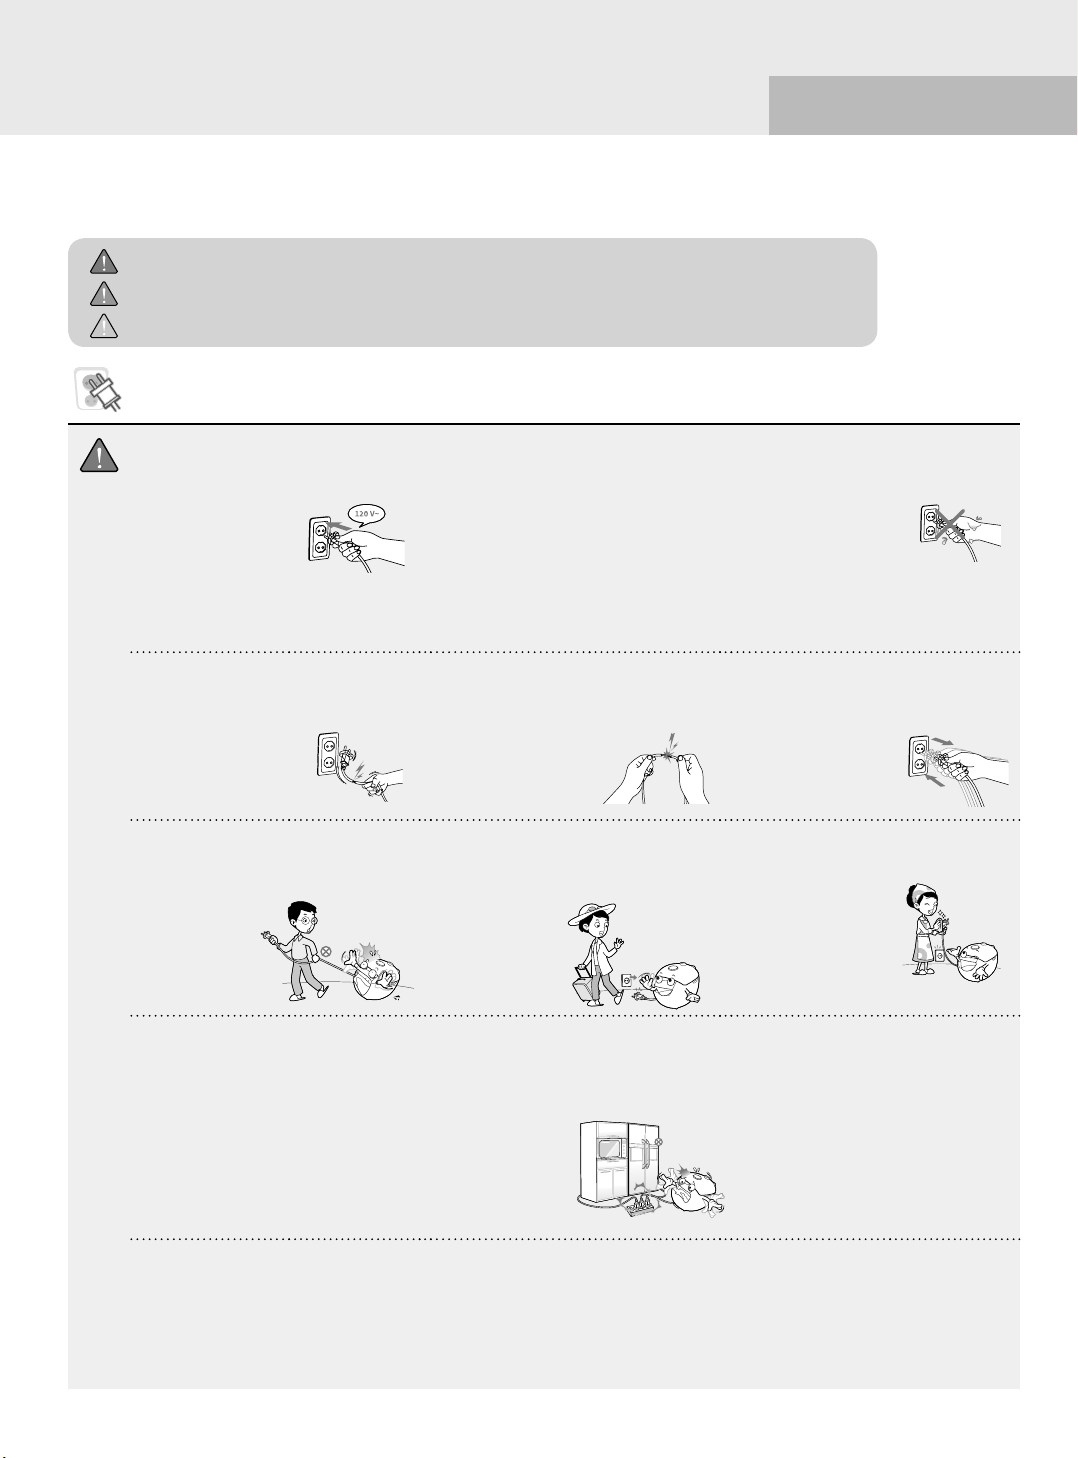
Keep the PE bag packaging
material out of reach of children
or discard it.
Actions like wearing the packaging
over the head may clog the nose or
the mouth, resulting in suffocation.
Always keep the infrared temperature sensor (IR sensor) /
temperature sensor clean, free of foreign substances (rice or other
food, etc.), and moisture.
The inner pot may overheat due to incorrect temperature sensing and cause
fire.
Before using the product, be sure to check whether there are any foreign
matters.
Be sure to install the clean cover
for cooking or warming rice or
cooking a menu item.
If the clean cover is not attached, the
cooking, reheating, and automatic
cleaning functions will not work.
Refrain from warming foods
other than white rice such
as those susceptible to food
spoilage (red bean rice, mixed
food, croquette, gratin, etc.).
Do not use the product where the plug or power cord can be bitten by
an animal or cut by sharp metal objects such as nails.
Such impact may cause a short circuit, electric shock, or fire.
Check the condition of the power plug and cord frequently.
Do not insert the inner pot
with the lid handle in the lock
position and close the lid.
Deformation or breakage of the locking
device or the inner pot may cause
steam leak and explosion.
Do not use a metallic rice scoop or spoon to scoop rice. Only use
plastic or wooden rice scoops.
Also, do not store metal kitchen tools such as knife and scissors in the
inner pot.
Doing so may cause damage to the inner pot coating or deformation of the pot.
If foreign matters or food
residues are stuck on the inner
pot and cannot be removed
easily, soak the pot in water
suciently and clean it.
When you are cooking food that has bones such as braised short ribs,
season it in a separate container before putting it in the pot.
Failure to do so may cause damage to the inner pot coating or deformation
of the pot.
Do not boil or cook foods (beans,
red beans, tomatoes, etc.) other
than the specied menu items.
<Steam plates are sold separately.>
Be careful that the product or
steam plate is not deformed by
incorrect use.
If the inner pot coating is scratched or peeled off due to the customer's fault,
the service will be charged even during the free service period.
Doing so may clog the automatic
steam outlet, which poses a risk of
explosion and burns.

9
PUSH
PUSH
PUSH
Exterior and Interior
User Manual Measuring Cup Rice Scoop
Accessories
Water Collector
Empty water from the collector after
each use and regularly detach it to wash.
Automatic Temperature Sensor
Monitors the temperature while
cooking or keeping rice warm.
To cook savory and tasty rice, keep the
automatic temperature sensor free from
moisture or foreign substances.
Inner Pot Handle
Power Plug
Control Panel
Includes buttons for controlling
all features of the product.
Steam Cap
Safety Sensor
Monitors the internal temperature.
Clean Cover Detachment Button
Press the button to detach the
clean cover.
Inner Packing
Tightly seals the clean cover to
keep steam from escaping from the
cooker.
Clean Stainless Steel
Automatic Pressure Regulator
(Steam Vent)
Automatically discharges pressure
from the inside of the cooker.
Inner Pot
Has a special coating layer that
does not peel off easily and
prevents food from sticking.
Clean Cover
You can detach it to wash.
Unless the clean cover is attached, the
product will not operate.
Pressure Packing
Forms a tight seal to prevent
steam from escaping. The
pressure packing should be
replaced at least once a year.
The pressure packing is a consumable.
It is available for purchase from the
service center or a large retail store.
Display Panel
Pressure Cap
Regulates the internal
pressure of the inner pot.
Lid Lock Handle
Cooking will not commence if the
handle is not in the “Lock (
●
)”
position.
Lid Release Button
Press the button to open the lid.
Parts and Functions

10
Control Panel
Caution
Do not clean the Control/Display panel with liquid containing volatile ingredients (e.g. alcohol and acetone).
Otherwise, the panel can be discolored or the text on the panel can be erased.
[WARM/REHEAT] Button
Used to warm or reheat rice.
Press the button once to operate
the warming function and press it
twice successively to operate the
reheat function.
[PRESET] Button
•Used to preset the
cooking time.
•Used to set Economy
Warm.
[CANCEL/POWER OFF] Button
•Used to cancel the selected function.
•Used to activate/deactivate the Power Off mode.
-Press and hold the [CANCEL/POWER OFF] button for 3 seconds or
more under the standby mode and it will enter the Power Off mode.
-Press the [CANCEL/POWER OFF] button in the Power Off mode and
it will deactivate the Power Off mode.
[SET] Button
•Used to set the current time or to enter the sound, warming
temperature, heating amount, and taste fine-tuning modes.
•Used to fine-tune rice taste. Rice taste tunable menu: PLAIN
STICKY, PLAIN MEDIUM, PLAIN REGULAR, MIXED, BROWN,
GAMA, BARLEY and NURUNGJI
Dial
•Used to select a menu option.
•Used to set the preset time, the current time, and the cooking time for
the STEAM and SLOW menu options.
-Turn the dial clockwise: Increase time.
-Turn the dial counterclockwise: Decrease time.
•Used to fine-tune rice taste.
[COOK/OK] Button
•Used to start cooking.
•Pressing the [COOK/OK] button twice successively will activate the Quick mode in which time
needed for cooking is reduced. The Quick mode is available for “Plain Rice”and “Mixed Rice”
menu options.
When using the Quick mode, adjust water to the water level of “PLAIN”or “MIXED” modes.
Soak rice in water before cooking, and cook the rice in the Quick mode for much tastier rice.
Power Off Mode
You can use the Power Off mode to minimize power consumption
without pulling out the power cord.
•You cannot enter the Power Off mode while cooking or keeping rice warm.
•In the Power Off mode, only the [CANCEL/POWER OFF] button is available.
Power Saving Mode
This mode minimizes the power consumption under the standby mode.
•If there is no button input for 1 minute under the standby mode, the
Power Saving mode is activated automatically.
•The cooker does not enter the Power Saving mode when in the cooking,
automatic cleaning, warming, preset cooking or economic cooking mode.
•When the cooker enters the Power Saving mode, the
ENERGY
SAVING
indicator in the display is turned on.
•Pressing a button or controlling the lid lock handle deactivates the Power
Saving mode.
Soft Touch Buttons
•The buttons are operated by the touch of a human finger (static
electricity). Softly touch a button to select a function.
•Touch the center of a button as if you are pressing it.
Button LED Function
Button LEDs let you know the buttons to press to activate a function or
indicate the product status.
Voice Navigation and Sound Volume Control
It uses a voice to notify users of the operating status of the product,
such as cooking start, cooking end, and steam discharge. It also informs
users of the next steps to be taken.
Parts and Functions

11
How to Clean the Clean Cover
After washing the clean cover, be sure to dry it completely before attaching it back.
•If the clean cover is not cleaned, it may cause odor while warming. (Pull out the power cord first and allow the cooker to cool before cleaning.)
•Clean the main body and the lid (in particular, the inner packing of the clean cover) using a dry kitchen towel. Do not use benzene or thinners to clean.
•A starch film may be formed on the clean cover, the lid and/or the inner pot while using. This, however, does not pose any health risk.
•While cooking, a small amount of steam may be discharged from a side of the lid due to vaporization within the cooker.
1
Turn the handle to align the “V” mark with the “▼” mark as shown in the figure. Then, hold the pressure packing
of the clean cover and pull the clean cover while pushing the PUSH button to detach it. Wash it. (Make sure the
main body is cooled down when you detach it.)
The clean cover will not be detached unless “V”and “▼”are aligned. Pressing it forcefully may damage the parts.
PUSH
PUSH
PUSH
Pressure Packing Clean Cover Detachment Button
2
Use a mild dishwashing detergent and sponge to
frequently clean the cover. Wipe off any excess
moisture with a dry kitchen towel. Use your fingers to
push in any protruding part of the pressure packing
while cleaning before using the cooker. If the pressure
packing is detached from the clean cover, fit in the
packing by using the packing bumps. (For information
on how to attach the pressure packing, refer to p.12.)
Packing Bump
Cover Bump
3
Align a bump of the clean cover to the lower prop and
press its upper part to attach the cover. If the clean
cover is set inside out, it may be damaged. So, be
careful. If the clean cover is not attached properly, the
product cannot recognize the lid lock and the cooking
and automatic cleaning functions won't work.
Letters
are
upright.
You should be able to read letters properly, and the bumps of
the pressure packing should be aligned with those of the clean
cover properly.
Letters are inverted.
[Front of the Clean Cover] [Rear of the Clean Cover]
Precautions When Attaching the Clean Cover
•Be sure to check the front and back of the clean cover.
•Do not insert screws or any other foreign substance into the hole of the clean cover.
Cleaning and Maintenance

12
How to Detach/Attach Pressure Packing
1
How to Detach Pressure Packing
Pull the packing gradually by grabbing its outer part or its outer and stainless parts. (Wash it
with a neutral detergent and a sponge.)
2
How to Attach Pressure Packing
Insert the packing into the groove of the clean cover. As shown in the figure to the right, turn the
clean cover while pressing the inner and outer parts of the packing with both of your thumbs.
-If the packing is attached loosely to the clean cover, steam may escape, and cooking and
warming may not be performed properly. (Before attaching the pressure packing, be sure to
align the bumps of the packing with those of the clean cover. Refer to p.11.)
3
Check Assembly Status of Pressure Packing
Lay the clean cover on a clean place and push inner and outer parts of the packing again with
your thumbs or index fingers while turning it.
(Check if the packing maintains a circular shape.)
Properly Assembled Improperly Assembled
The packing has a circular shape.
If the packing does not have a circular shape, it is assembled
incorrectly. (It is easier to assemble right after washing the packing.)
Caution: If the inner packing is not installed, steam may leak.
Caution: If the pressure packing is not installed, steam may leak.
How to Detach/Attach Inner Packing
Caution
•Do not remove the inner packing unless it is absolutely necessary to do so.
•It is recommended to clean it with clean cloths without removing it.
1
Hold the inner packing and pull it out to the direction
of the arrow to detach it for cleaning.
2
Clean the inner packing with a neutral detergent and a
sponge, and remove moisture from it. As shown in the figure
below, insert the packing into the groove. Then, press and turn
the inner and outer parts of the packing with index fingers.
PUSH
PUSH
PUSH
PUSH
PUSH
PUSH
Cleaning and Maintenance

13
Cleaning the Product
1
Inner Pot
Do not use rough or metallic scrubbers, brushes, or
abrasives. As the coating on inner and outer parts of the
inner pot may be peeled off, use a kitchen detergent with
soft cloths or a sponge to clean it.
Particularly do not use abrasives, tooth paste or other
brighteners to polish the surface of the inner pot.
Discoloration may occur or the coating may peel off.
2
Clean Stainless Steel and Inner Packing
Soak a kitchen towel in hot water and fully squeeze it, then
wipe off foreign substances from the surface. When you
keep the inner packing clean, you'll be able to maintain
product performance and odors won't be generated.
Do not remove the inner packing if possible, and clean
it with clean clothes.
3
Inside of the Main Body
Make sure to take out the inner pot and remove
foreign substances from the bottom of the main body
before using. If any foreign substance is present on the
automatic temperature sensor or at the bottom, the
sensor may be unable to detect temperature, which
prevents rice from being cooked or causes product
failure or fire. Wipe it off with a dry kitchen towel. Be
careful not to damage the automatic temperature sensor.
Do not touch or clean the inner parts of the main
body right after cooking or warming. You may get
burn injury.
4
Water Collector
Detach the water collector and clean it. Use a mild
dishwashing detergent and a sponge to clean it.
5
Accessories
Clean the accessories, dry them, and keep them in a safe place.
PUSH
PUSH
PUSH
Caution
•Always unplug the power cord before cleaning. Do not spray water directly on the product and do not use benzene or thinners to clean.
•If the product is not cleaned properly, rice may smell bad while being kept warm.
Before Getting Started

14
How to Clean Steam Cap
●
Use the Auto Clean mode to clean foreign substances in the steam vent. (Refer to p. 29.)
How to Clean Clogged Pressure Nozzle
Steam Vent
1
Detach the steam cap
as shown in the figure.
2
Press the front handle in
the direction of ①and
remove it in direction
of ②. Clean the part
frequently.
3
To reassemble the
steam cap, align it with
the groove ①and push
it down in the direction
of ②.
4
To reinstall the steam
cap on the cooker, seat
the steam cap on the
lid and press the area
indicated by the arrow
until it is securely seated
in place.
Pressure Cap/Pressure
Regulator Nozzle
If water is collected here,
wipe it with a dry kitchen
towel.
Steam Cap
If the pressure regulator nozzle’s
packing is out of place as shown
in the figure, steam may leak.
Make sure that the packing is
properly seated in place.
Caution: The product is hot immediately after cooking.
Do not touch it. It may cause burn injury.
Caution: The steam cap is hot immediately after cooking.
Do not touch it. It may cause burn injury.
Cleaning and Maintenance

15
●
Tasty rice starts with controlling the amount of water used! - 4 Servings of Plain White Rice -
To get soft-boiled rice
using old rice
To get hard-boiled rice
using fresh/soaked rice
Slightly above the level
Slightly below the level
Rice Type
Water Level
Using old rice Slightly above the level
Using fresh rice Slightly below the level
Using soaked rice Slightly below the level
To cook hard-boiled rice Slightly below the level
To cook a soft-boiled rice Slightly above the level
When cooking using washed rice,
use the standard water level based on serving size.
(Washed rice: rice pre-washed with water)
●
If the cooked rice smells bad when kept warm
-Clean the product frequently. In particular, germs can quickly spread and
cause a foul odor to develop if the lid and its parts are not kept in a clean state.
-Not cleaning the inner pot and other parts of the rice cooker can allow
germs to spread and cause cooked rice to smell. In this case, fill the
inner pot with a mixture of water and vinegar, perform Auto Clean and
wash it cleanly. (Ratio: One tablespoon of vinegar with water at the Auto
Clean water level)
-If you keep rice warm without cleaning the pot thoroughly after cooking
soups or steamed dishes in the pot, rice may take on the smell of the
previously cooked food.
Make sure that the clean cover is securely engaged.
If rice grains or other
foreign substances
are attached, wipe
them off with a dry
kitchen towel. Especially, clean
the steam vent
frequently.
●
Getting rid of the smell when cooking using old rice
Older rice tends to develop an unpleasant smell when cooked, which only
gets worse when kept warm. To solve the problem, take out the uncooked
rice in the previous evening, soak it for a while in water with a drop of
vinegar added to it, and then rinse the rice clean. In the next morning, rinse
the rice once more using lukewarm water just before cooking.
●
How to store rice (It determines the flavor of rice.)
Notes
•Once cooked, old or dried rice can develop poor texture, end up under-cooked, and even become smelly when kept warm.
•Even freshly polished rice can quickly become dry unless stored properly.
•To prevent bugs from infesting the rice, add cloves of garlic in the rice container.
Good Places Bad Places
Storage Area - Cool place with low temperature
- Dry place with good ventilation
- Hot place near boiler pipes
- Places exposed to direct sunlight
- Underneath a sink
Rice Purchase
Quantity and
Storage Period
It is advisable to buy rice in small quantities between 5 kg and 10 kg
and consume it within two weeks of breaking the packaging seal.
How to Cook Tasty Rice

16
Power Outage Compensation
The Cuchen electric pressure rice cooker features a power outage compensation function that automatically stores the status
information. When the power comes back, the cooker resumes cooking using the stored information.
Lithium Ion Battery
The Cuchen electric pressure rice cooker features a lithium ion battery to store the time settings and perform the power
outage compensation function. The battery’s lifespan can vary depending on the product’s specifications.
When you want to set the current time to 9:30 AM
1
Press the [SET] button once under the standby mode to enter the time setting mode.
2
Turn the dial to set the hour.
•Clockwise: Increase the hour unit .
•Counterclockwise: Decrease the hour unit .
Be sure to check if the time is AM or PM when you set the
‘hour’. Blinking
3
Press the [COOK/OK] button.
•It proceeds to set 'minute'.
4
Turn the dial to set the minute.
Blinking
5
Press the [COOK/OK] button to complete the setting.
•If you don't press the [COOK/OK] button for 15 seconds, the setting will be completed automatically. If you
press the [CANCEL/POWER OFF] button within 15 seconds, your setting will be cancelled and the previous
time will be restored.
How to Set Current Time

17
•Enabling this option cooks the rice without using any pressure, resulting in rice that is al dente.
•To reduce the cooking time, turn the dial to select the Plain Quick or Mixed Quick mode
•Pressing the [COOK/OK] button twice in the PLAIN mode or the MIXED mode will start cooking in
the Plain Quick mode or the Mixed Quick mode.
•It is recommended to cook in the Quick mode for servings of 4 or less. Also, note that rice cooked in
the QUICK mode may not taste as good as rice cooked in a normal mode.
•The Quick mode works only in the PLAIN and MIXED rice menu options.
PLAIN REGULAR
Menu Option
Using the
Quick Mode
Caution
Just before the steam is discharged, you will hear the voice message “Now, the steam will be
discharged. Watch out for your safety.” and then the steam will be automatically discharged. Don't be
startled and make sure that you don’t get burned by the steam.
Basic Cooking Instructions
1
Plug in the cooker and close the lid.
•Remove moisture or foreign substances from the automatic temperature sensor’s surface.
(Keep the automatic temperature sensor clean to always cook savory and tasty rice.)
•Make sure that the outer surface of the inner pot is completely dry and clean before placing it inside the cooker.
•Make sure that the pressure packing is seated properly.
Make sure that the clean cover is attached properly before closing the lid. If the clean cover is not attached properly, the
product does not recognize the lid lock and its cooking function does not start.
2
Turn the lid lock to the Lock (●) position.
•Always make sure that the pressure cap is leveled.
•If the lid lock is not in the Lock (●) position, the [COOK/
OK] button won't work.
3
Turn the dial to select the menu options.
•Whenever you turn the dial counterclockwise from the
standby mode, the menu circulates in the order of PLAIN
STICKY ↔PLAIN MEDIUM ↔PLAIN REGULAR ↔
PLAIN QUICK ↔MIXED QUICK ↔MIXED ↔SLOW ↔
STEAM ↔NURUNGJI ↔BARLEY ↔GAMA ↔BROWN
↔(AUTO CLEAN) ↔PLAIN STICKY.
If you turn the dial clockwise, the menu options will be
selected in the reverse order.
Blinking
Blinking
4
Press the [COOK/OK] button.
•Once cooking starts, the cooker will display the remaining cooking time.
The pressure cap may not move when cooking rice at its maximum serving capacity. This is a normal
phenomenon, not a product failure.
Once cooking is finished, the cooker automatically enters the WARM mode.
•Once the cooker finishes cooking rice, immediately and thoroughly mix the rice.
How to Cook Rice

18
Cooking Times by Menu Option
This function allows you to cook mixed grains within about 20 minutes.
•Press the [COOK/OK] button twice in the MIXED mode to enter the MIXED QUICK mode. This reduces the time needed for cooking.
•The MIXED QUICK option cooks 2 servings within about 20 minutes.
•It is recommended to cook in the MIXED QUICK mode is for servings of 4 or less. Also, note that rice cooked in the MIXED QUICK
mode may not taste as good as rice cooked in a normal mode.
•Cooking rice mixed with thoroughly soaked black or red beans in the MIXED mode can produce a mushy result. For this, you can
use the MIXED QUICK mode to make less mushy rice.
•The actual cooking time may vary depending on the ratio of grains, water temperature, amount of water used, and other factors.
MIXED QUICK
•The actual servings may vary depending on the type of dishes.
•When using the PLAIN QUICK, NURUNGJI and GAMA modes, use the plain rice level for the amount of water to be added.
•When using the MIXED QUICK mode, use the mixed rice level for the amount of water to be added.
•Adding more water than the standard limit can cause the water to spew out through the steam vent.
•The actual cooking time may change if the Taste Control option is in use.
•Using an excessive amount of water in the QUICK mode can prolong the overall cooking time.
•Cooking or warming rice after using the SLOW or STEAM mode can cause the rice to take on the previously cooked food's smell.
Servings Cooking Time Dishes
PLAIN
STICKY 2 to 6 servings Approx. 27 to
37 minutes
Rice, rice+potatoes and black sesame seeds, rice+vegetables and
mushrooms, sticky rice+sweet pumpkin, rice+bean sprouts, seafood rice
Others 2 to 5 servings Approx. 32 to
43 minutes
Rice, rice+octopus, rice+vegetables, rice+curry, rice+beef, rice+fried bean
curd, rice rolls, kimchi fried rice
QUICK 2 to 4 servings Approx. 15 to
26 minutes Rice
MIXED 2 to 4 servings Approx. 39 to
45 minutes Five-grain rice, rice with black beans, nutritious rice in hot pot, mixed
grains, mixed rice
MIXED QUICK 2 to 4 servings Approx. 29 to
35 minutes
BROWN 2 to 4 servings Approx. 47 to
56 minutes Brown rice
GAMA 2 to 4 servings Approx. 37 to
43 minutes Rice and iron pot rice
BARLEY 2 to 4 servings Approx. 47 to
52 minutes Barley
NURUNGJI 2 to 6 servings Approx. 33 to
40 minutes Rice, nurungji (scorched rice)
STEAM For detailed cooking instructions by
menu option, see Food Recipes.
Braised short rib, boiled pork, sweet potato, potato, boiled eggs, enriched
bread, potato boats, braised chicken, stuffed squid
SLOW Sujeonggwa (cinnamon/fruit punch), pumpkin porridge, vegetable soup
Category
Menu
How to Cook Rice

19
Taste Control Function of 3 Pressure Stages
Notes
To achieve certain characteristics of a menu option, there may be the melanoizing effect or a yellowish tinge.
(Melanoizing: It refers to the browning of the bottom rice in the process of cooking. It adds savory flavor as
well as aroma to the cooked rice.)
•The 3 stages of pressure taste control are enabled only in the PLAIN mode. Turn the dial to select the mode that fits the taste
you want.
•The rice cooker may release steam while operating in this mode. This is the result of the cooker regulating its internal pressure,
and is completely normal. (Control the rice texture setting according to your taste.)
•You cannot use the Taste Control function while cooking is in progress.
1 Sticky rice
Produces sticky and plump rice.
2 The right balance between sticky rice and perfectly
cooked rice
Maintains a balance between sticky rice and perfectly cooked rice.
3 Perfectly cooked
Produces Perfectly cooked rice, which is ideal for making rice rolls (kimbap) and sushi.
How to Control Rice Taste

20
Fine-Tuning the Taste
You can fine-tune the taste of the rice according to your taste by adjusting the soak time or heating temperature.
The fine tuning function is available only for PLAIN STICKY, PLAIN MEDIUM, PLAIN REGULAR, MIXED, BROWN, GAMA, BARLEY
AND NURUNGJI menu options.
Fine-Tuning the Taste
1
Press the [SET] button three times successively under the standby mode. 3 times
2
Turn the dial to select a menu option and press the [COOK/OK] button.
•Default soaking time and heating temperature are 0 minute and 0℃respectively.
Blinking
Blinking
3
Turn the dial to select the soaking time and press the [COOK/OK] button.
•Each time you turn the dial, 0 minutes ↔2 minutes ↔4 minutes ↔6 minutes ↔8 minutes ↔0 minutes will be selected in
sequence.
•The default soaking time is 0 minute. If you want to increase it, select one of 2, 4, 6 and 8 minutes.
Increasing the soaking time allows the rice to absorb more water and become softer.
The longer the soaking time is, the longer the cooking time is, and more browning effect appears than in regular cooking since
water-soluble starch from the rice will settle down to the bottom.
How to Fine-Tune Rice Taste
This manual suits for next models
1
Table of contents
Languages:
Other Cuchen Electric Pressure Cooker manuals
Popular Electric Pressure Cooker manuals by other brands

Heinner
Heinner HPCK-38BK instruction manual

Sharff & Mueller
Sharff & Mueller DUOPRO PLUS User manual book

Crown Food Service Equipment
Crown Food Service Equipment EC-2 Installation and operation manual

NUTRICHEF
NUTRICHEF PKPRC66 manual

WMF
WMF Fusiontec Perfect Premium/Excellence user manual

Presto
Presto Pressure Canner and Cooker Instructions and recipes