ANY ADJUSTMENTS YOU MAKE ARE ENTIRELY AT YOUR OWN RISK. DO NOT USE YOUR BIKE
FOR FREESTYLE AND STUNT RIDING, JUMPING OR COMPETITIVE EVENTS.YOU SHOULD
KNOW THAT OFF-ROAD USE OR ANY SIMILAR ACTIVITIES CAN BE DANGEROUS, AND YOU
ARE WARNED THAT YOU ASSUME THE RISK FOR PERSONAL INJURY, DAMAGES OR LOSSES
INCURRED FROM SUCH USE. DO NOT RIDE YOUR BIKE WHEN ANY PART IS DAMAGED OR
NOT WORKING PROPERLY. IF YOU ARE UNSURE HOW TO CARRY OUT REPAIRS OR
MAINTENANCE ON YOUR BIKE, IT IS VITAL THAT YOU CONSULT A LOCAL BIKE MECHANIC
FOR PROFESSIONAL ASSISTANCE AND SUPPORT.
READING AND FOLLOWING THE INFORMATION AND INSTRUCTIONS
IN THIS MANUAL ARE ESSENTIAL TO YOUR ABILITY TO RIDE SAFELY.
ATTENTION
ATTENTION
FOR YOUR SAFETY
THE RESPONSIBILITY OF THE OWNER
CYCLEKIDS LIFE MANUAL
It is the responsibility of the owner or in
the case of a younger rider the parents of
the rider to be certain all assembly
instructions have been followed, even if
the bike has been assembled by the seller
or a professional assembly company.
Rules for bicycle use (bicycle laws) vary
from location to location so be certain
the rider knows and understands the
rules that apply to bicycle usage in your
area. Wearing a helmet and using lights
and reflectors are two examples of rules
which may exist and which make sense as
rider safety precautions at all times.
There are many dierent types of
bicycles and often these types are
designed for dierent uses. Make sure
you know what type of unit you have and
do not exceed its service limitations. Be
sure you check and under the bicycle
classifications set forth, including size of
the unit that is proper for the ride to
ensure good control during use.
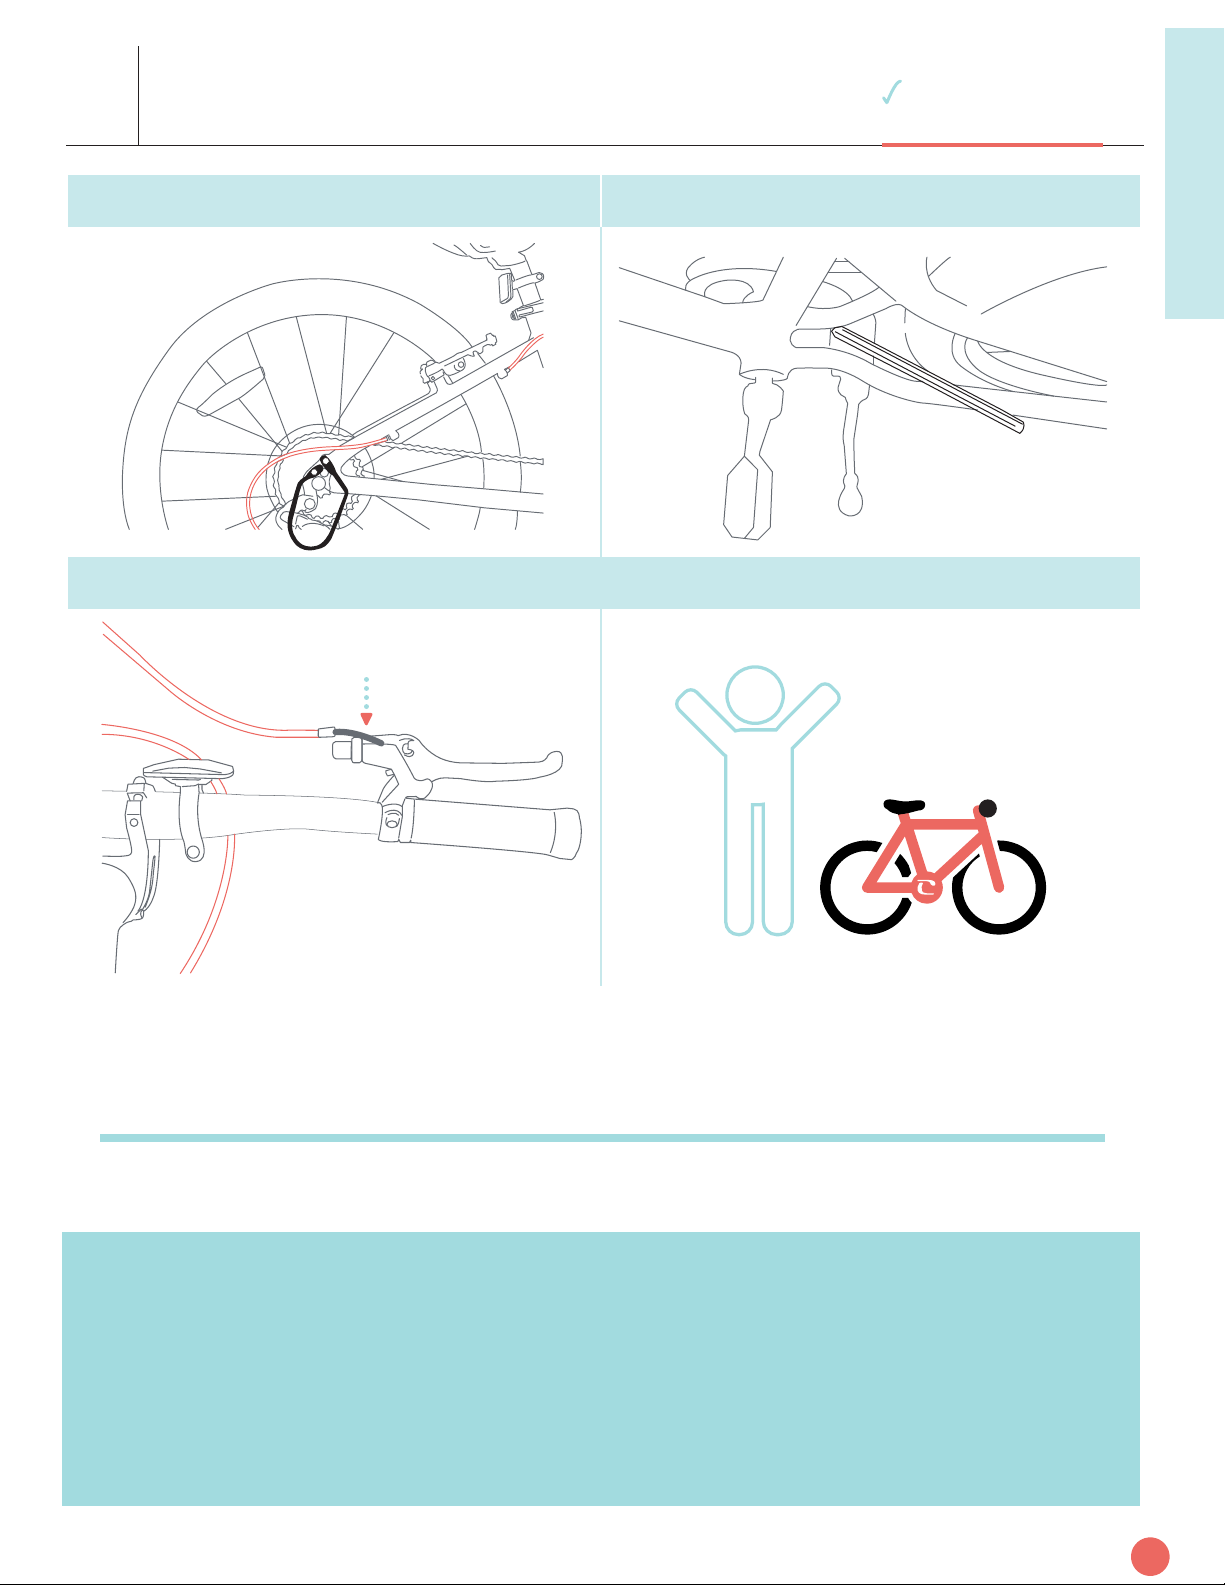
Brakes are essential to safety. Be sure
they are checked and working properly
before each use. Remember that any
mechanical system changes condition
during use and must be maintained and
checked before each use.
Know how to operate the bicycle and all
equipment on it before first use and be
certain anyone else allowed to use the
bike knows how to properly and safely
use the bike as well.
Riders who are too small may have
control problems. DO NOT OVERLOAD A
UNIT WITH A RIDER THAT IS TOO HEAVY OR
TOO LARGE, AND DO NOT ATTEMPT TO
CARRY EXTRA PASSENGERS, PACKAGES OR
LOADS ON THE BICYCLE. DO NOT ATTEMPT
TO USE STREET BIKES FOR OFF ROAD
RIDING.
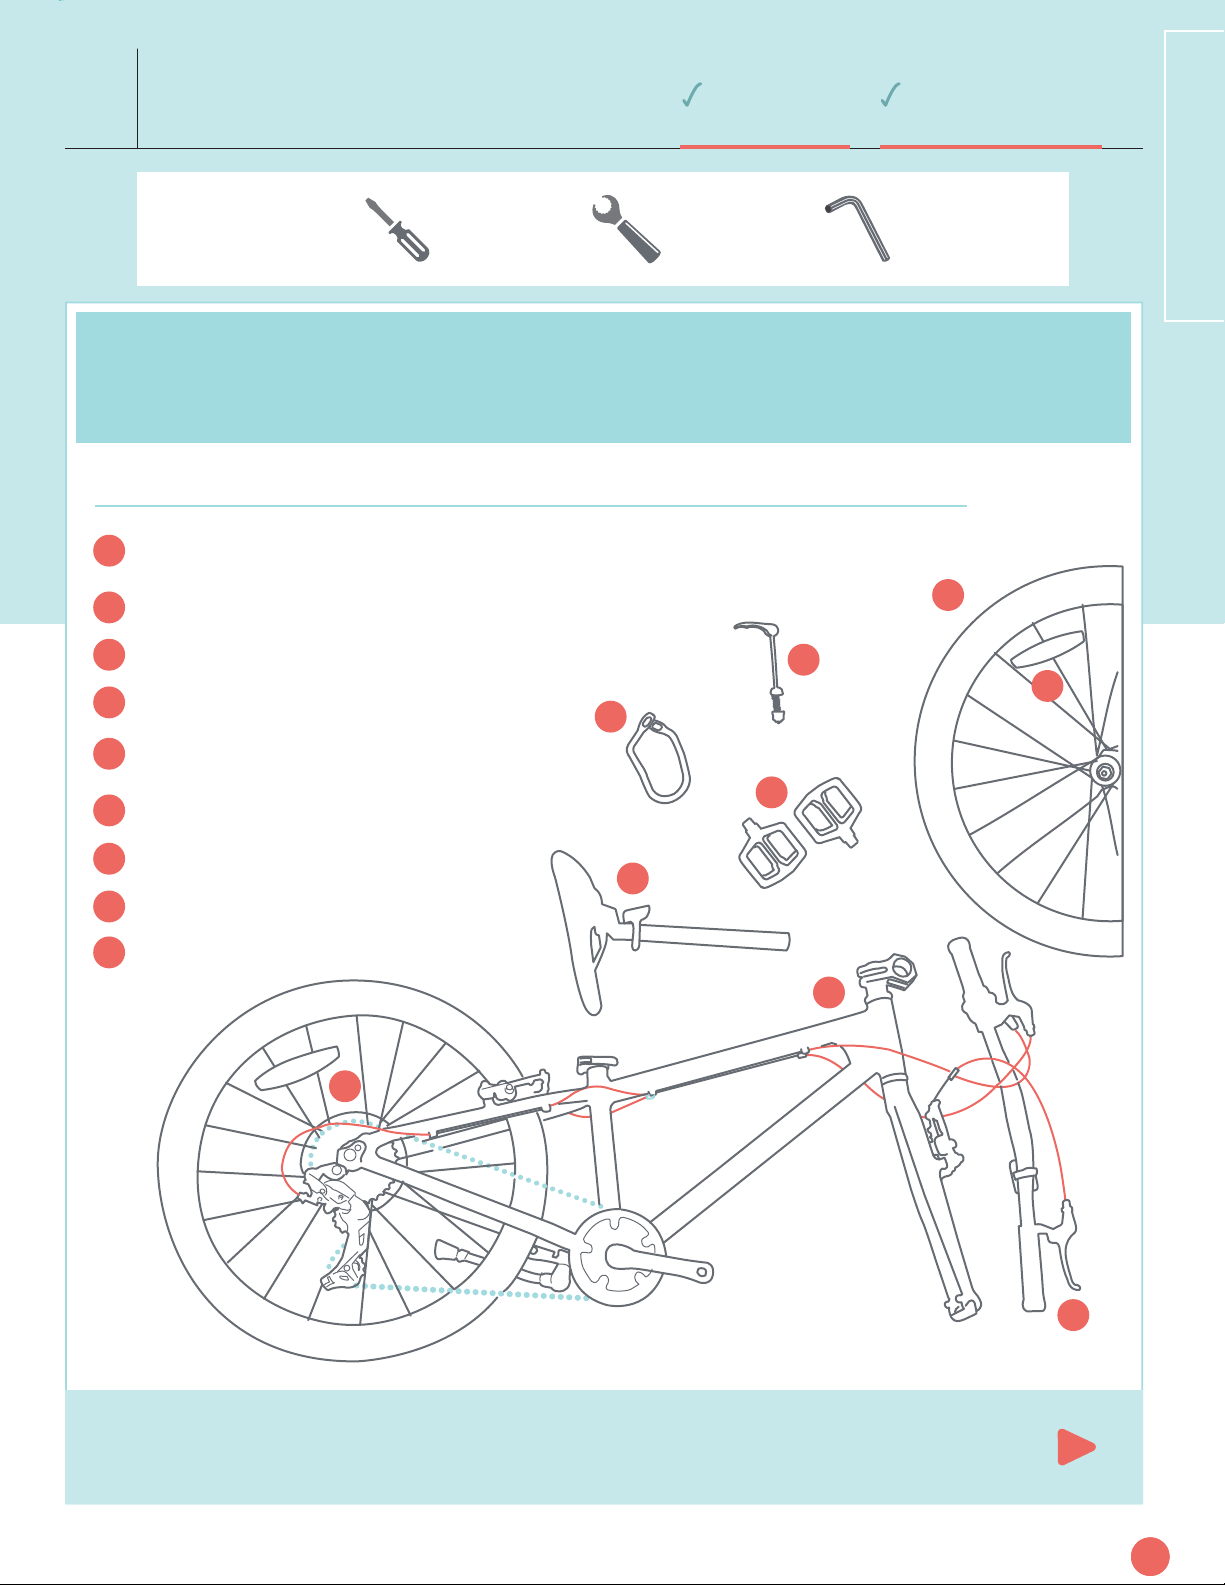
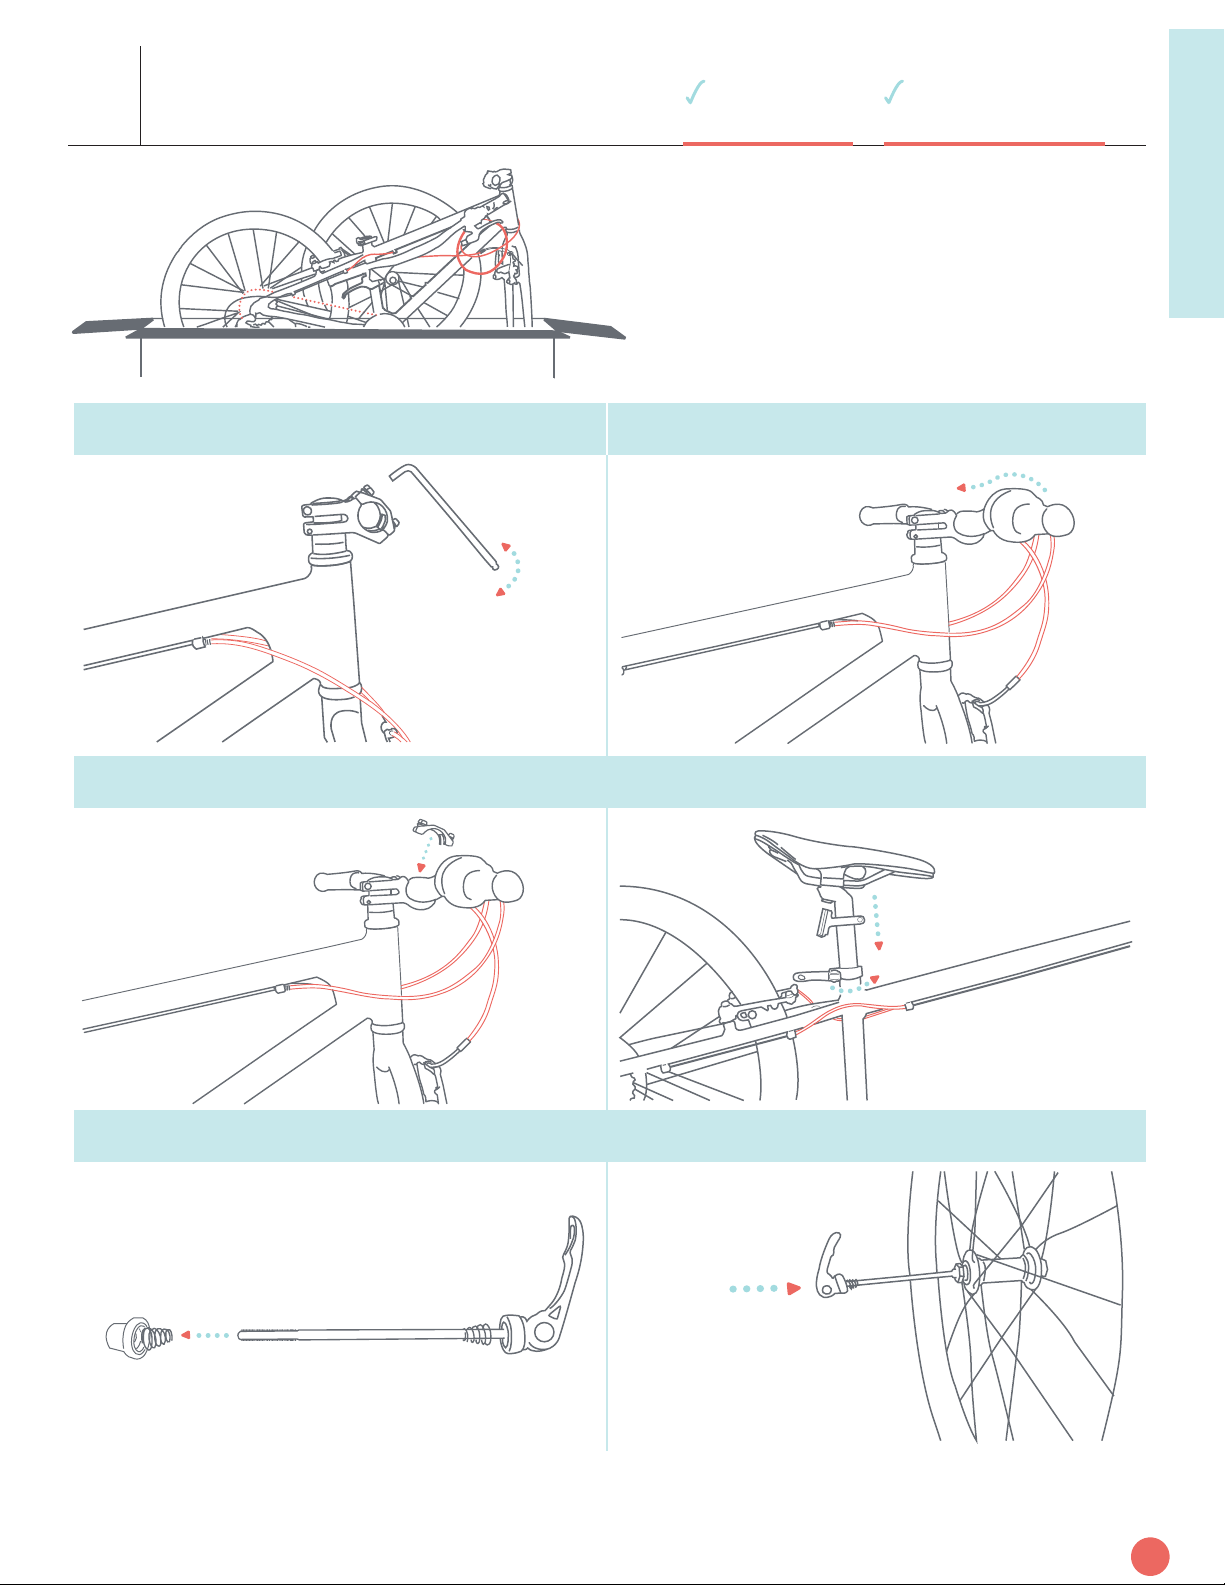
1 2
34
56
PAGE B
B