Read OWNER'S MANUAL and follow all Safety Messages and Instructions. Wear helmet
while riding the bike.
Do not use this bike for downhill competition or any aggressive off-road riding.
This e-bike is intended for use by persons 16 years or older that have the ability to control
the bike and follow the laws governing motorized bicycle use. Follow all Assembly and
Maintenance Instructions. Perform the Pre-Ride Checks before riding.
Failure to follow these WARNINGS and INSTRUCTIONS could lead to serious injury or
death.
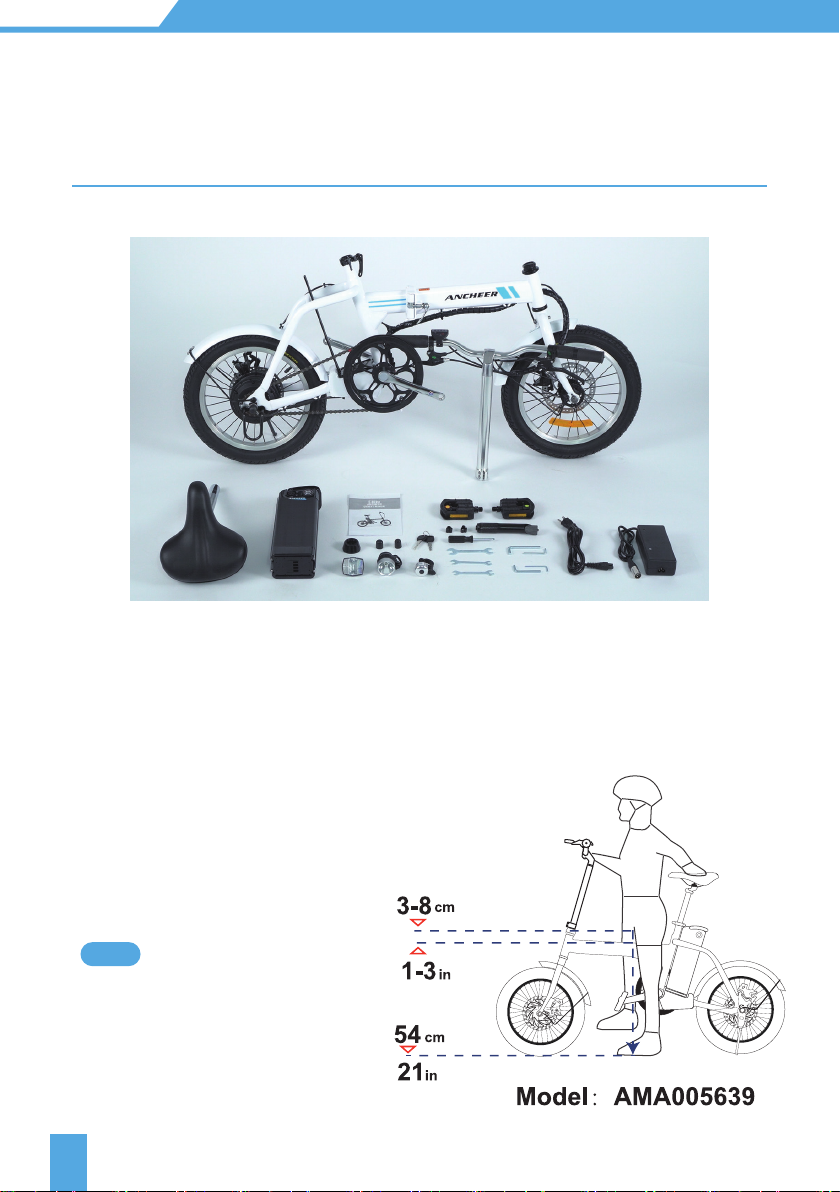
Thank you for purchasing the ANCHEER EBIKE. The EBIKE features the most recent
innovation in technology.
Keep the battery out of reach of children.
Charging at 0°C~40°C/ 32°F~104°F, and discharging at -5°C~40°C/ 23°F~104°F. Please
do not store the battery in temperatures above 35°C/ 95°F or below -5°C/ 23°F.
Keep the battery dry, do not put the battery in acidic or alkaline liquid, keep away from
rain, fire and high temperature environment.
Itisstrictlyforbiddentoconnectthepositiveandnegativepolesofthebatteryreversely,
and it is strictly forbidden to damage, disassemble or short-circuit the battery.
Used batteries are hazardous chemicals, and the used batteries should not be
disassembledwithoutauthorization,andrecycledbyrelevantprofessionaldepartments.
Use the original battery. Do not replace it with other brand’s or product’s battery.
●
●
●
●
●
●
WARNING