D-Link DCS-2132L User manual

QUICK
INSTALLATION
GUIDE
HD WIRELESS N CUBE NETWORK CAMERA
DCS -2132L
КРАТКОЕ РУКОВОДСТВО ПО УСТАНОВКЕ

2
ENGLISH
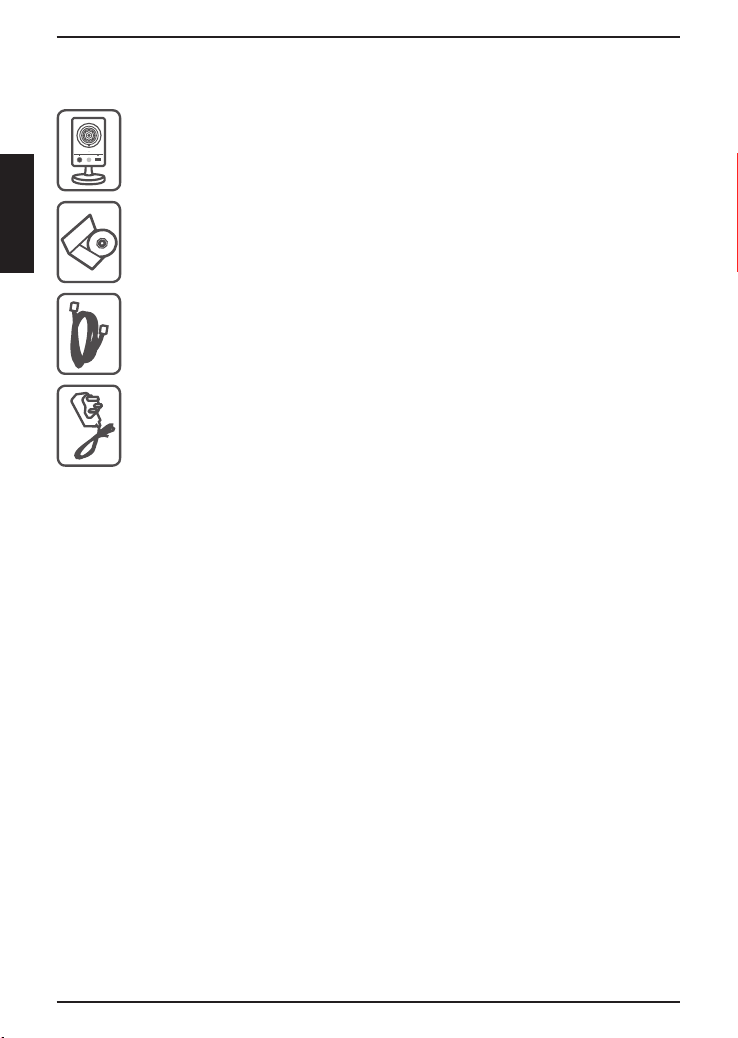
Package Contents
Minimum Requirements
Computer with:
• PC with 1.3 GHz or above and at least 128 MB RAM
• Windows® 8, Windows® 7, Vista® or XP (32-bit or 64-bit)
• Mac OS® X 10.6 or higher
Web Browser:
• Internet Explorer® 7, Firefox 12, Safari 4, or Chrome 20 and above
• Installed and enabled Java and ActiveX® controls
Network Device and Service:
• A router (A D-Link Cloud Router is recommended)
• An Internet connection
• An e-mail account (Required to register mydlink service)
CAT5 Ethernet Cable
DCS-2132L HD Wireless N Cube Network Camera
CD-ROM with User Manual and Software
If any of the above items are missing, please contact your reseller.
Power Adapter
3
ENGLISH
If you wish to connect your camera to your router with a wireless connection,
you can simply disconnect the Ethernet cable and move the camera to its
intended location.
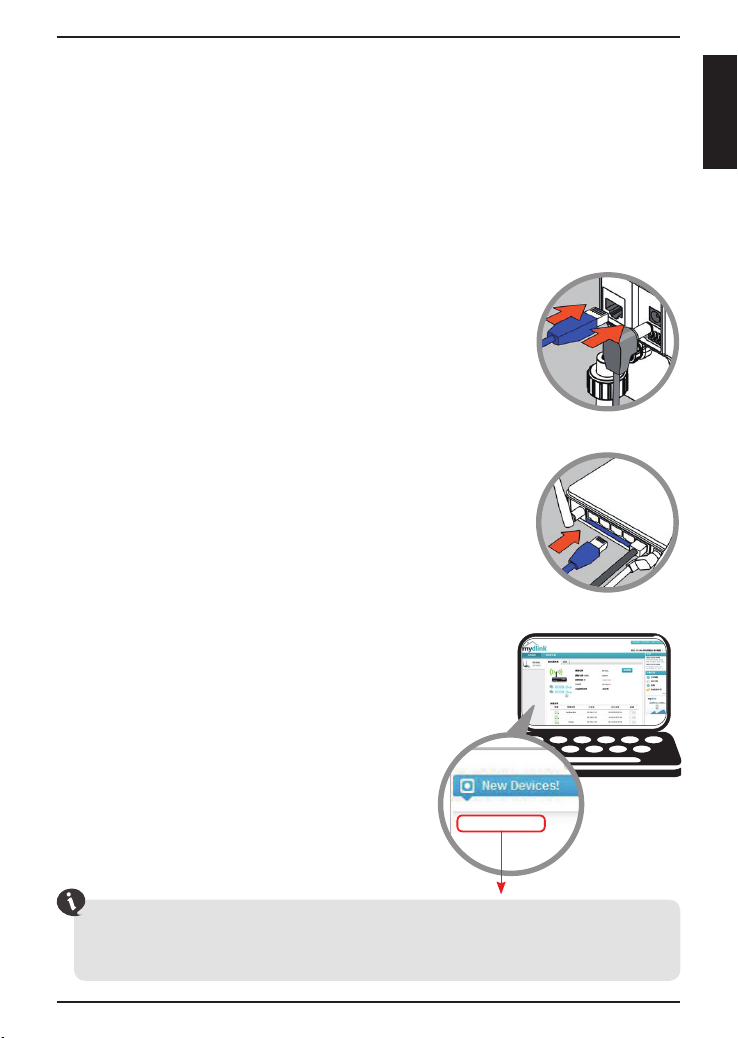
From any computer, open a web browser, go to
http://www.mydlink.com and log in to your account.
Click on the device name when the new device
notication appears to add the camera to
your account.
Connect the power cable and Ethernet cable to your
cloud camera.
Connect the other end of the Ethernet cable to
your D-Link Cloud Router and connect the camera’s
power adapter to a power outlet.
Setting up your Camera
Using a D-Link Cloud Router (Zero Conguration)
If you have a D-Link Cloud Router, you can take advantage of Zero
Conguration Setup. This feature automatically congures your camera’s
settings for you and adds it to your mydlink account automatically. If you
do not have a D-Link Cloud router, refer to the next page to install and
congure your camera.
DCS-2132L

4
ENGLISH
Using the Installation Wizard
If you do not have a D-Link Cloud Router, you can simply use any Windows
or Mac computer to go through the Installation Wizard from the CD, which
will guide you through the installation process from connecting your
hardware to conguring your camera.
• Windows Users – Insert the CD. Simply click Set up your Cloud
Camera to go through the Setup Wizard. If the Setup Wizard program
does not automatically start on your computer, go to Start > Run. In
the run box type D:\autorun.exe (where D: represents the drive letter
of your CD-ROM drive) and click OK.
• Mac Users – Insert the CD. On the desktop, open your CD drive,
double-click on the SetupWizard le, wait about 20-30 seconds, and
follow the instructions.
If you do not have a CD-ROM drive, or the CD is missing,
please download the Setup Wizard from
http://www.mydlink.com/support
5
ENGLISH
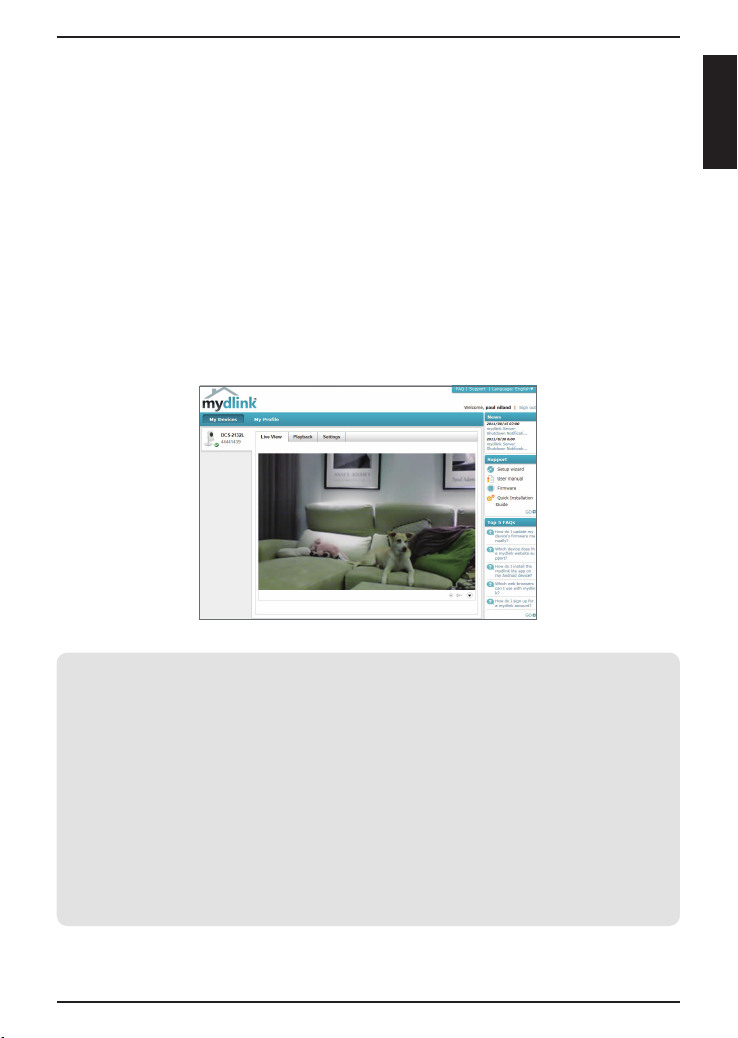
Getting Started with mydlink
mydlink is a web-based service which allows you to view and control your
mydlink-enabled devices through any computer connected to the Internet.
If you have cameras linked to your mydlink account, you will be able to see
their live views using the mydlink website. Follow the instructions below to
access your mydlink account.
• Open a web browser on any computer connected to the Internet.
• Type http://www.mydlink.com in the address bar and press Enter.
• Sign in using your mydlink account.
• From the home screen, you will be able to view all devices which have
been linked to your mydlink account.
• Ensure that your browser supports both Java and ActiveX, and that these
features have been installed and enabled.
• Windows does not have Java installed by default. You can download the latest
version from http://www.java.com.
• In Mac OS X 10.7.x, Java applets are disabled by default. To enable Java applets,
click the Finder > Applications > Utilities > Java Preferences and check the
Enable applet plug-in and Web Start applications option.
• The ActiveX® controls in IE will install automatically if needed. We suggest that
you make sure that you have enabled the related options in Tools > Internet
Options > Security > Custom Level.
6
ENGLISH
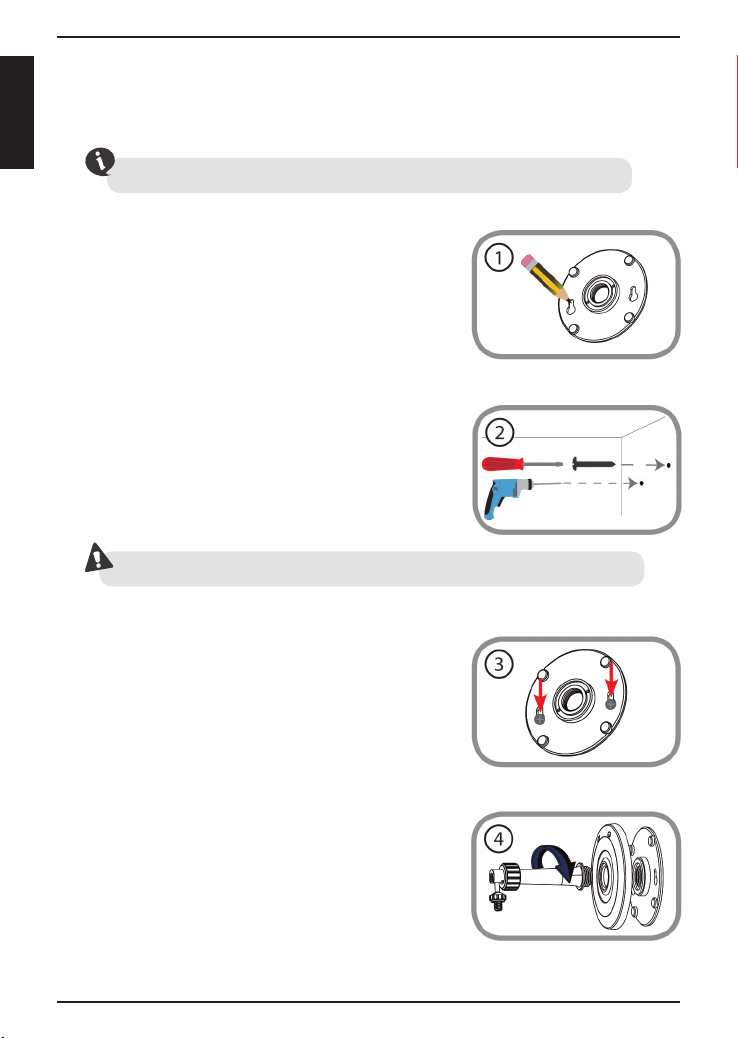
Mount the Camera
1. Place the mounting base where you want
to position the camera and use a pencil to
mark the holes.
4. Place the base cover on the base and
screw the camera stem clockwise into the
mounting base.
2. Depending on the material of the wall or
ceiling, use proper tools to drill two holes or
screws where you marked. If the wall is made
out of concrete, drill the holes rst, insert the
plastic anchors and then the screws.
3. Place the mounting base over the screw that
is mounted on the wall. Make sure to t the
screw-heads over the big holes and slide
it downward to lock rmly. Lightly pull the
base forward to make sure that it is locked.
Please refer to the steps below to assist you with mounting the camera.
The space between the camera and the screwheads should be 3mm.
We suggest that you congure the camera before mounting.
7
ENGLISH
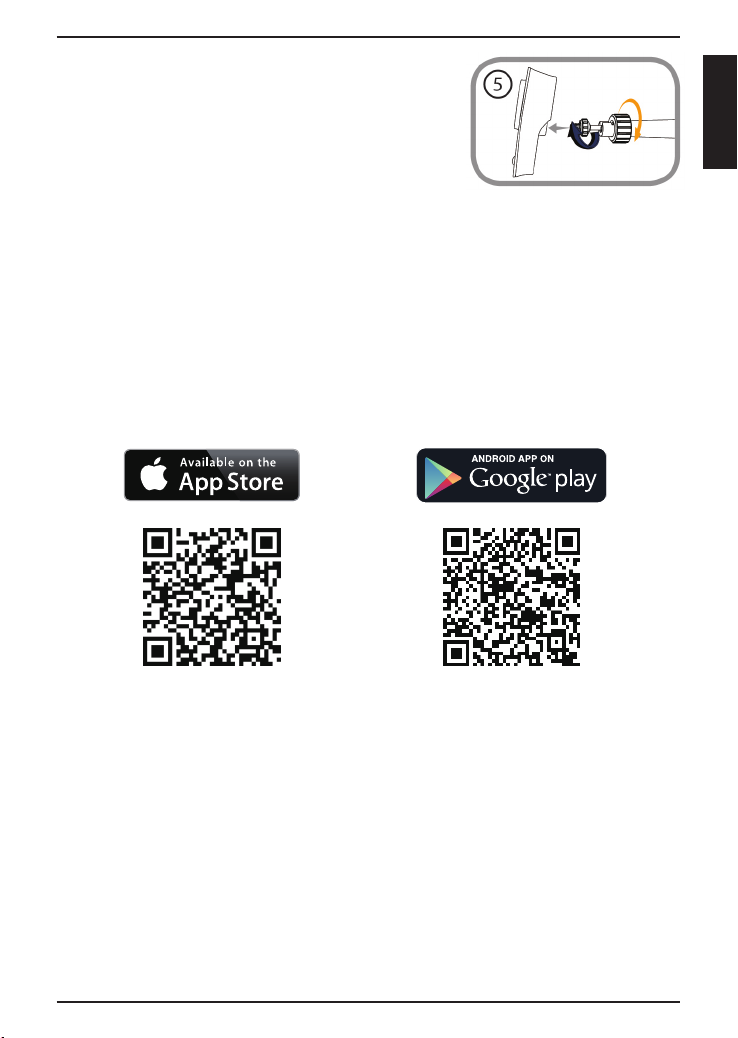
Using the mydlink Lite Mobile App
The mydlink Lite app lets you conveniently manage all your mydlink-enabled
devices right from your mobile device.
You can download the free mydlink Lite app from the App Store or Google
Play. If you have a QR code scanning app, you can scan the corresponding
code below to go straight to the mydlink Lite app page.
5. Adjust the angle of the camera as desired,
then tighten the collar on the camera stem
to lock it in place.

8
ENGLISH
TECHNICAL SUPPORT
You can nd software updates and user documentation on the D-Link website.
Tech Support for customers in
Australia:
Tel: 1300-766-868
24/7 Technical Support
Web: http://www.dlink.com.au
E-mail: [email protected]
India:
Tel: +91-832-2856000
Toll Free 1800-233-0000
Web: www.dlink.co.in
E-Mail: [email protected]
Singapore, Thailand, Indonesia,
Malaysia, Philippines, Vietnam:
Singapore - www.dlink.com.sg
Thailand - www.dlink.co.th
Indonesia - www.dlink.co.id
Malaysia - www.dlink.com.my
Philippines - www.dlink.com.ph
Vietnam - www.dlink.com.vn
Korea:
Tel : +82-2-2028-1810
Monday to Friday 9:00am to 6:00pm
Web : http://d-link.co.kr
E-mail : [email protected]
New Zealand:
Tel: 0800-900-900
24/7 Technical Support
Web: http://www.dlink.co.nz
E-mail: [email protected]
South Africa and Sub Sahara
Region:
Tel: +27 12 661 2025
08600 DLINK (for South Africa only)
Monday to Friday 8:30am to 9:00pm South
Africa Time
Web: http://www.d-link.co.za
E-mail: [email protected]
Saudi Arabia (KSA):
Tel: +966 01 217 0008
Fax: +966 01 217 0009
Saturday to Wednesday 9.30AM to 6.30PM
Thursdays 9.30AM to 2.00 PM
E-mail: [email protected]
D-Link Middle East - Dubai, U.A.E.
Plot No. S31102,
Jebel Ali Free Zone South,
P.O.Box 18224, Dubai, U.A.E.
Tel: +971-4-8809022
Fax: +971-4-8809066 / 8809069
Technical Support: +971-4-8809033
General Inquiries: [email protected]
Tech Support: [email protected]
Egypt
1, Makram Ebeid Street - City Lights Building
Nasrcity - Cairo, Egypt
Floor 6, ofce C2
Tel.: +2 02 26718375 - +2 02 26717280
Technical Support: +2 02 26738470
General Inquiries: [email protected]
Tech Support: [email protected]
Kingdom of Saudi Arabia
Ofce # 84 ,
Al Khaleej Building ( Mujamathu Al-Khaleej)
Opp. King Fahd Road, Olaya
Riyadh - Saudi Arabia
Tel: +966 1 217 0008
Technical Support:
+966 1121 70009
General Inquiries: [email protected]
Tech Support: [email protected]
Pakistan
Islamabad Ofce:
61-A, Jinnah Avenue, Blue Area,
Suite # 11, EBC, Saudi Pak Tower,
Islamabad - Pakistan
Tel.: +92-51-2800397, 2800398
Fax: +92-51-2800399
Karachi Ofce:
D-147/1, KDA Scheme # 1,
Opposite Mudassir Park, Karsaz Road,
Karachi – Pakistan
Phone: +92-21-34548158, 34326649
Fax: +92-21-4375727
Technical Support: +92-21-34548310, 34305069
General Inquiries: [email protected]
Tech Support: [email protected]
9
ENGLISH
TECHNICAL SUPPORT
Iran
Unit 5, 5th Floor, No. 20, 17th Alley , Bokharest
St. , Argentine Sq. ,
Tehran IRAN
Postal Code : 1513833817
Tel: +98-21-88880918,19
+98-21-88706653,54
General Inquiries: [email protected]
Tech Support: [email protected]
Morocco
M.I.T.C
Route de Nouaceur angle RS et CT 1029
Bureau N° 312 ET 337
Casablanca , Maroc
Phone : +212 663 72 73 24
Email: [email protected]
Lebanon RMA center
Dbayeh/Lebanon
PO Box:901589
Tel: +961 4 54 49 71 Ext:14
Fax: +961 4 54 49 71 Ext:12
Email: [email protected]
Bahrain
Technical Support: +973 1 3332904
Kuwait:
Technical Support: + 965 22453939 / +965
22453949
Türkiye Merkez İrtibat Ofisi
Ayazağa Maslak yolu
Erdebil Cevahir İş Merkezi No: 5/A Ayazağa /
Maslak İstanbul
Tel: +90 212 2895659
Ücretsiz Müşteri Destek Hattı: 0 800 211 00 65
W e b : w w w. d l i n k . c o m . t r
Teknik Destek: [email protected]
073-796-2797
10
PУCCКИЙ
Комплект поставки
Минимальные требования
Компьютер:
• ПК с частотой процессора 1.3 ГГц или выше, 128 МБ оперативной
памяти и более
• Windows® 8, Windows® 7, Vista® или XP (32- или 64-битная)
• Mac OS® X 10.6 или выше
Web-браузер:
•Internet Explorer® 7, Firefox 12 и выше
• Установленные и включенные элементы управления ActiveX® и
Java
Сетевое оборудование и сервисы:
• Маршрутизатор (рекомендуется маршрутизатор Cloud компании D-Link)
• Подключение к Интернет
• Учетная запись e-mail (требуется для регистрации на портале mydlink)
Ethernet-кабель 5 категории
DCS-2132L Беспроводная 802.11n HD-камера “Cube”
CD-диск с руководством пользователя и программным
обеспечением
Если что-либо из перечисленного отсутствует, пожалуйста, обратитесь
к поставщику.
Адаптер питания
Other manuals for DCS-2132L
1
Table of contents
Languages:
Other D-Link Network Camera manuals


