manuals.online logo
Brands
  1. Home
  2. •
  3. Brands
  4. •
  5. D-Link
  6. •
  7. Network Router
  8. •
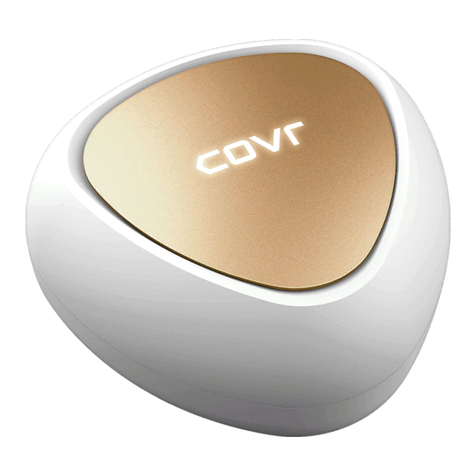
  9. D-Link Cobra DSL-5300 User manual

D-Link Cobra DSL-5300 User manual

Other manuals for Cobra DSL-5300

1

Other D-Link Network Router manuals

D-Link DSL-2730U User manual

D-Link

D-Link DSL-2730U User manual

D-Link DES-1210-52/ME Instruction Manual

D-Link

D-Link DES-1210-52/ME Instruction Manual

D-Link DVA-2800 User manual

D-Link

D-Link DVA-2800 User manual

D-Link DWR-932 User manual

D-Link

D-Link DWR-932 User manual

D-Link DIR-619L Instruction Manual

D-Link

D-Link DIR-619L Instruction Manual

D-Link DES-1004 User manual

D-Link

D-Link DES-1004 User manual

D-Link DIR-120 Specification sheet

D-Link

D-Link DIR-120 Specification sheet

D-Link DIR-880L User manual

D-Link

D-Link DIR-880L User manual

D-Link DFL-300 - Security Appliance User manual

D-Link

D-Link DFL-300 - Security Appliance User manual

D-Link xtreme n duo dap-1522 User manual

D-Link

D-Link xtreme n duo dap-1522 User manual

D-Link DGS-1016D - Switch User manual

D-Link

D-Link DGS-1016D - Switch User manual

D-Link SharePort DIR-825 User manual

D-Link

D-Link SharePort DIR-825 User manual

D-Link AirPremier DWL-1800 User manual

D-Link

D-Link AirPremier DWL-1800 User manual

D-Link xStack DGS-3200-10 User manual

D-Link

D-Link xStack DGS-3200-10 User manual

D-Link DIR-850L User manual

D-Link

D-Link DIR-850L User manual

D-Link Airspot DSA-3100 User manual

D-Link

D-Link Airspot DSA-3100 User manual

D-Link AirPlus XtremeG Ethernet-to-Wireless Bridge... User manual

D-Link

D-Link AirPlus XtremeG Ethernet-to-Wireless Bridge... User manual

D-Link AirPlus DWL-810+ User manual

D-Link

D-Link AirPlus DWL-810+ User manual

D-Link DHP-601AV User manual

D-Link

D-Link DHP-601AV User manual

D-Link DSL-2740B User manual

D-Link

D-Link DSL-2740B User manual

D-Link SharePort DIR-825 User manual

D-Link

D-Link SharePort DIR-825 User manual

D-Link DWC-2000 User manual

D-Link

D-Link DWC-2000 User manual

D-Link DSR-250V2 User manual

D-Link

D-Link DSR-250V2 User manual

D-Link DIR-505L User manual

D-Link

D-Link DIR-505L User manual

Popular Network Router manuals by other brands

TRENDnet TEW-435BRM - 54MBPS 802.11G Adsl Firewall M Quick installation guide

TRENDnet

TRENDnet TEW-435BRM - 54MBPS 802.11G Adsl Firewall M Quick installation guide

Siemens SIMOTICS CONNECT 400 manual

Siemens

Siemens SIMOTICS CONNECT 400 manual

Alfa Network ADS-R02 Specifications

Alfa Network

Alfa Network ADS-R02 Specifications

Barracuda Networks Link Balancer quick start guide

Barracuda Networks

Barracuda Networks Link Balancer quick start guide

ZyXEL Communications ES-2024PWR Support notes

ZyXEL Communications

ZyXEL Communications ES-2024PWR Support notes

HPE FlexNetwork 5510 HI Series Openflow configuration guide

HPE

HPE FlexNetwork 5510 HI Series Openflow configuration guide

Allied Telesis AT-AR236E quick start guide

Allied Telesis

Allied Telesis AT-AR236E quick start guide

ADTRAN NetVanta 3458-PoE quick start

ADTRAN

ADTRAN NetVanta 3458-PoE quick start

C&H Technologies EM405-8 manual

C&H Technologies

C&H Technologies EM405-8 manual

Huawei WiFi Mesh 3 Product description

Huawei

Huawei WiFi Mesh 3 Product description

Addonics Technologies ISC8P2G-S Quick install guide

Addonics Technologies

Addonics Technologies ISC8P2G-S Quick install guide

Atel W02 Arch+ Faqs

Atel

Atel W02 Arch+ Faqs

Allnet ALL0333AU user guide

Allnet

Allnet ALL0333AU user guide

Sercomm Genesis OC3505D Quick installation guide

Sercomm

Sercomm Genesis OC3505D Quick installation guide

Billion BIPAC 5102 Series user manual

Billion

Billion BIPAC 5102 Series user manual

TP-Link TD-8817 QIG

TP-Link

TP-Link TD-8817 QIG

Motorola MR1900 user guide

Motorola

Motorola MR1900 user guide

Cisco SOHO Series Regulatory compliance and safety information

Cisco

Cisco SOHO Series Regulatory compliance and safety information

manuals.online logo
manuals.online logoBrands
  • About & Mission
  • Contact us
  • Privacy Policy
  • Terms and Conditions

Copyright 2025 Manuals.Online. All Rights Reserved.

ENGLISH
DSL-5300
If any of the above items are missing, please contact your reseller/retailer.
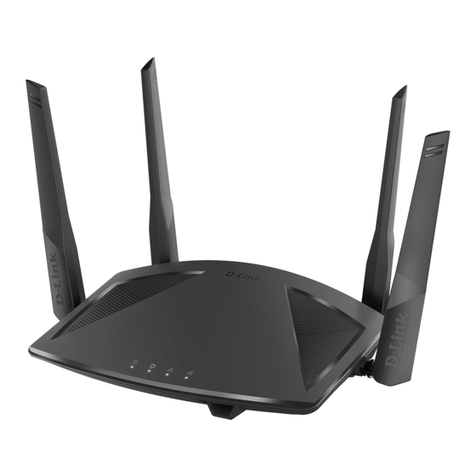
COBRA AC5300 Wave 2 Wi-Fi Modem Router (DSL-5300)
Power Adapter
1 x Ethernet Cable
1 x Phone Cable
xDSL Microlter/Splitter
Quick Install Guide & Wi-Fi Conguration Card
1Power LED A solid green light indicates a proper connection to the power
supply.
2Internet LED A solid green light indicates a connection to your broadband service.
3Wi-Fi LED A solid green light indicates that Wi-Fi is operational
4USB 2.0 LED A solid green light indicates a USB device is attached
5USB 3.0 LED A solid orange light indicates a USB device is attached
6DSL LED A solid green light indicates ADSL/VDSL sync
7DSL Port Connect to a DSL enabled telephone line and supplied lter/splitter
8USB Ports Connect USB storage devices (Blue - USB 3.0,White - USB 2.0)
9Reset Button Press and hold to reset to factory default settings
10 WPS Button Push to enable WPS connect with wireless clients
11 Ethernet
WAN Port
Connect an active Cable/NBN/UFB modem to use the DSL-5300 as a
“Residential Gateway”
12 LAN (1~4)
Ports
Connect Ethernet devices such as computers, switches, and game
consoles.
13 Power Button Press to turn on or o the device.
14 Power Port Connect the supplied power adapter.
1
11
8
9
1Connect the supplied Microlter to your telephone outlet, with the cable
labelled WALL SOCKET.
2Connect the supplied Phone cable from the MODEM port on the Microlter
to the DSL port of the modem router.
3Connect the Ethernet cable from the LAN port of the modem router to the
Ethernet port on your computer.
4Plug the power adapter into your modem router and connect to an available
power outlet.
5
6
After the modem router has powered up, verify that the Power and ADSL
LEDs are both lit.
Continue with the Conguration section on the other side of this document.
Microlter
Telephone Outlet
Package Contents
QUICK INSTALLATION GUIDE Hardware Overview Minimum Requirements Connect your Modem Router
•Internet Provider Account Details - If you are using an Australian or New
Zealand ADSL/VDSL connection, you will need your username and password. If
you do not have this information, contact your Internet provider.
Do not proceed until you have this information.
Before you Start
Internet Requirements:
• An activated ADSL/VDSL telephone line and account with an Internet
provider or;
• An activated existing Internet connection (e.g. NBN FTTP, NBN HFC) that
requires an Ethernet WAN interface
Web-based Conguration Requirements:
Device with the following:
• An installed Ethernet adapter or wireless adapter
Supported Browsers:
• Internet Explorer 7 or higher
• Safari 4 or higher
• Chrome
• Firefox
• Microsoft Edge
WALL
SOCKET
MODEM
3
13
5
7
2
12
14
4
6
Power Adapter
Computer
Phone Cable
Microlter
Ethernet Cable Computer
Microlter
10
ENGLISH
Version 1.1 | August 17, 2017
Conguration
Web Browser Setup
Open a web browser (e.g., Internet Explorer, Chrome, Firefox, or Safari)
and enter ‘192.168.1.1’ into the address bar. The Setup Wizard should
commence straight away without requring you to log in.
1
Note: If you want to congure your modem
router from a wireless computer or mobile device,
connect to the router wirelessly by going to
your wireless utility on your device. The default
Wi-Fi Network and the default Wi-Fi password is
detailed on the Wi-Fi Conguration Card inside
the box.
When the Welcome screen appears, click Next to start the wizard.
2
Select your Internet Access Type - Ethernet WAN, ADSL or VDSL. Also
Enable TaggedVL AN if your Internet connection requires it
3
7
Copyright ©2017 D-Link Corporation/D-Link Australia Pty Ltd. All rights reserved. D-Link and the D-Link logo are registered trademarks
of D-Link Corporation or its subsidiaries in Australia and other countries. Other trademarks are the property of their respective owners.
Maximum wireless signal rate derivedfrom IEEE Standard 802.11g, 802.11n and 802.11ac specications. Actual data throughput will vary.
Network conditions and environmental factors, including volume of network trac, building materials and construction, and network
overhead, lower actual data throughput rate. Environmental factors will adversely aect wireless signal range. Product specications,
size and shape are subject to change without notice, and actual product appearance may dier from that depicted on the packaging.
Visit www.dlink.com.au for more details.
Having trouble installing your new product? D-Link’s website contains the latest
user documentation and software updates for D-Link products. Australian and New
Zealand customers can contact D-Link Technical Support through our website.
Australia
http://support.dlink.com.au
New Zealand
http://support.dlink.co.nz
How do I connect my wireless devices to the DSL-5300 modem router?
1. Open your wireless network utility that displays available wireless networks.
2. Select the Wi-Fi Network name you assigned in the wizard and connect.
Note: If you did not run the setup wizard or you reset the router to its default
settings, refer to the label on the router for the default Wi-Fi Network Name and
Wi-Fi Password.
You can also connect using WPS:
1. Press the WPS button on the DSL-5300 for three seconds.
2. Within one minute press the WPS button on your wireless device.
3. Allow up to two minutes to connect.
Note: Some devices may require you to log in to a utility to start the WPS process.
Refer to the user manual of the device you want to connect to the router if you do
not know how to start the WPS process.
How do I change the wireless settings on the DSL-5300 modem router?
1. Open a web browser (e.g. Internet Explorer, Chrome, Firefox, or Safari) and
enter the IP address of the router (http://192.168.1.1).
2. At the login screen, type in admin for the user name and enter the router
password you created in the wizard.
3. Go to Settings > Wireless to create a new Wi-Fi network name (SSID) and
Wi-Fi password.
Documentation available at http://www.dlink.com.au/DSL-5300
Troubleshooting
Technical Support
NOTE: This step is only for setting up an ADSL connection: Select your
country to use the pre-congured ADSL settings
Select your Internet Connection Type. There is a helpful explanation against
each option. If unsure, consult your ISP
4
5
Congratulations!You have completed the Modem Router installation.
6
9
8
Enter your Internet Username and Password when prompted.
NOTE: This step is only relevant to some Connection Types from the previous
step, such as PPPoE.
Review your settings and then click Finish to complete the Setup Wizard
Enter a new Wi-Fi Network Name (SSID) as well as a Wi-Fi Password.
NOTE: As Smart Connect is on by default, all of your Wi-Fi networks
will be displayed under one Wi-Fi Network Name and have only one
Wi-Fi Password.
Enter a new Password to secure your modem router, click Next to continue.