D-Link AirPlus DP-G310 User manual
1
©2004 D-Link Systems, Inc. All rights reserved. Trademarks or registered trademarks are the property of their respective holders. Software and
specifications subject to change without notice. DP-G310 .03092004
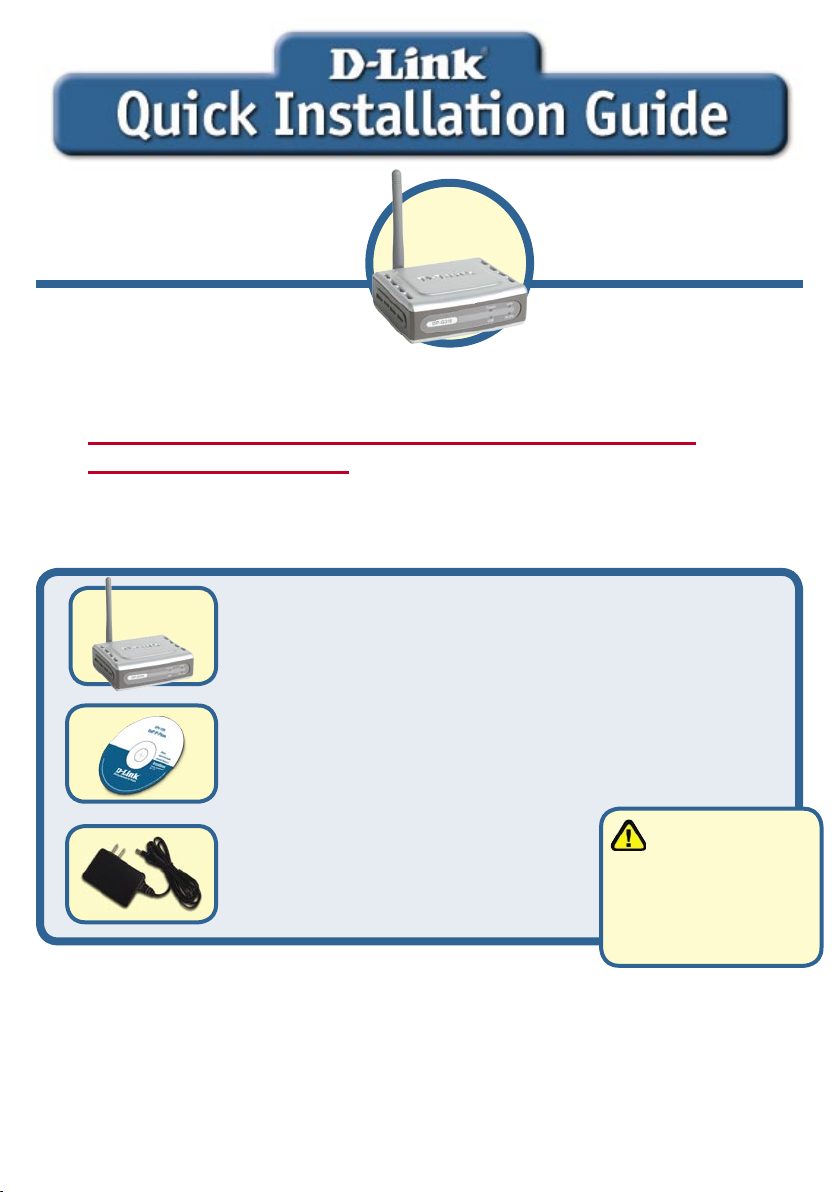
If any of the above items are missing, please contact your reseller.
CD-ROM (Software, Manual and Warranty)
Before You Begin
DP-G310 AirPlusTM G Wireless USB Print Server
Check Your Package Contents
DP-G310
AirPlusTM G 2.4GHz
Wireless Print
Server
5V DC 2.5A Power Adapter
Using a power
supply with a
different voltage rating
will damage this
product and void its
warranty.
This product can be setup
using any current web
browser, i.e., Internet Explorer
6 or Netscape Navigator 7.0
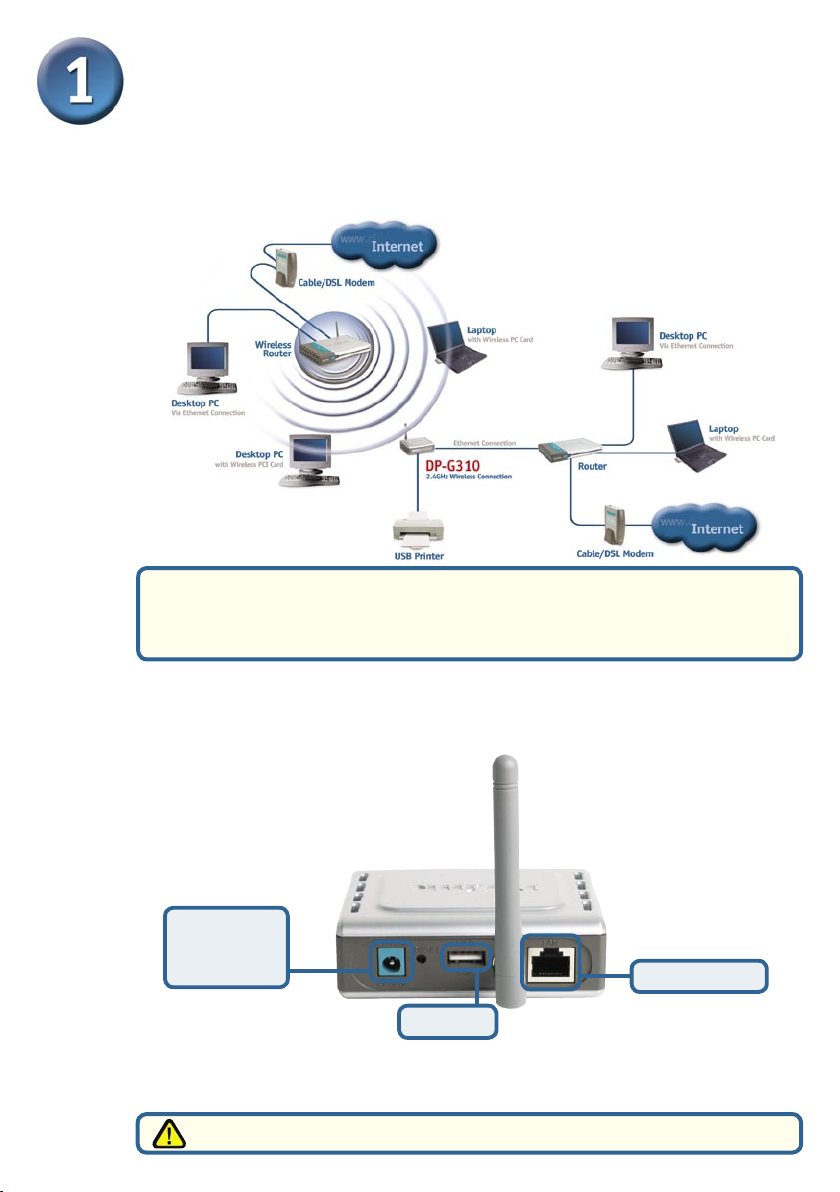
You will need an Ethernet-enabled device, such as a laptop or desktop
computer and a USB printer that will connect to the DP-G310.
Important: TURN OFF the power to the printer before
installing the DP-G310.
2
Next, make sure that the Printer is turned OFF.
Using the USB cable, connect one end of the cable to the USB port of the
DP-G310 (shown below) and the other end to the USB port of the printer.
Turn ON the printer.
Then, plug one end of the power adapter into the DP-G310 and the other
end into your electric outlet. The DP-G310 will turn on and begin a self-test.
Connecting The DP-G310 To Your
Network
For Mac OS printing, please refer to manual (.pdf) located on the CD-ROM.
USB Port
Receptor for
AC Power
Adapter Network Port
First, insert one end of a straight-through CAT5 Ethernet RJ-45 cable into
the “Network Port” (shown below.) Connect the other end of the cable to the
LAN port of the gateway or switch. Note: Do not connect the power cord to
the DP-G310 until you are advised to do so.
Warning!
Only a USB printer may be connected to the USB port of the DP-G310. Do not
connect any other USB device to the USB port; doing so may damage the unit,
voiding the warranty for this product.
3
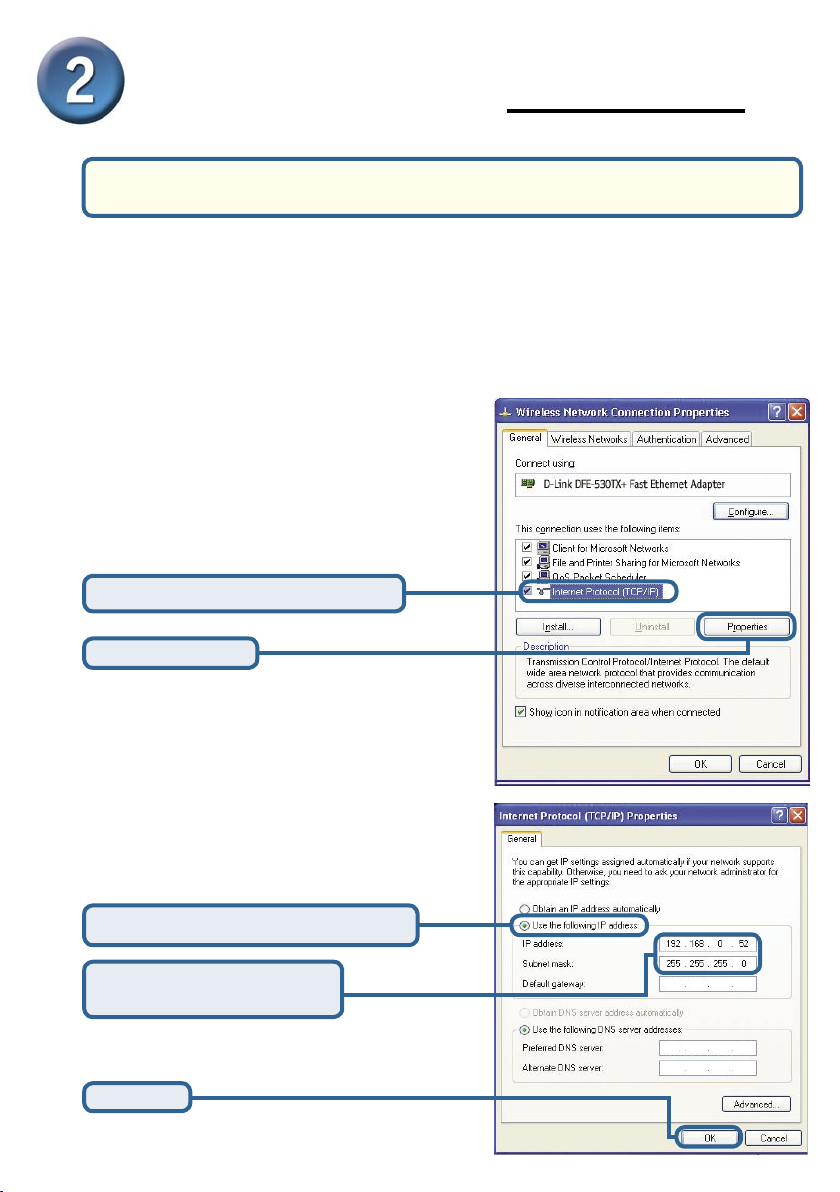
Setting up your DP-G310 for
network printing in Windows XP
The factory default IP address of the DP-G310 is 192.168.0.10. In order to net-
work to the printer through the DP-G310, the DP-G310 must have the same IP
network settings as your network. IP address can be assigned manually or auto-
matically by DHCP, BOOTP or RARP. To access the print server’s web configura-
tion, manually assign an IP address on one of the wired PC’s on your network to
the same subnet as the print server.
For additional Windows operating system setup or information on the web-management
interface, refer to the manual located on the CD-ROM.
Go to Start > right click on
My Network Places >
select Properties > Double-click on
the Network Connection associated
with your Network Adapter.
Input a static IP address in the
same range as the print server.
Click OK
Click Internet Protocol (TCP/IP)
Click Properties
Select Use the following IP address
IP address: 192.168.0.52
Subnet mask: 255.255.255.0
4
Setting up your DP-G310 for
network printing in Windows XP
(continued)
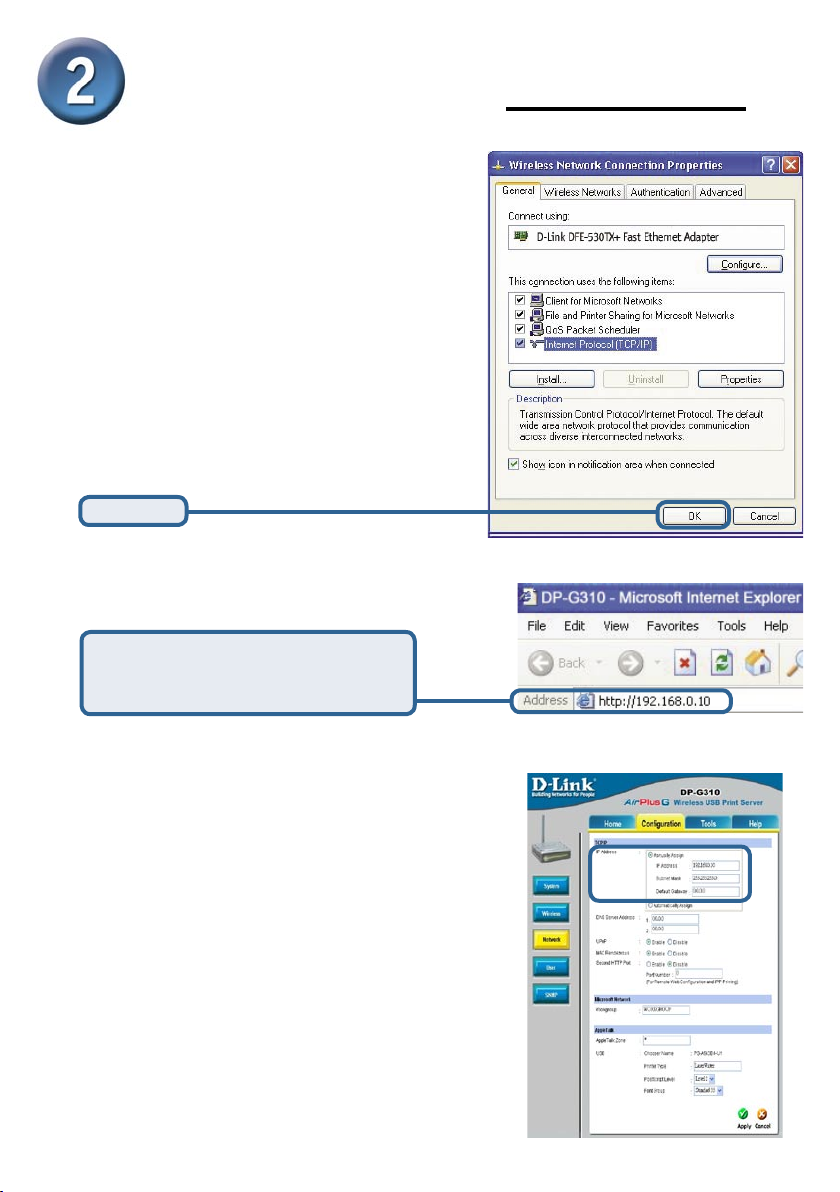
Using your web browser enter the IP
address of the DP-G310. By default
the IP address is set to 192.168.0.10
The IP address of the DP-G310 can be
modified on the Network tab of the web
configuration menu.
The following instructions use the print
server’s default IP address as an example.
Make the appropriate changes if you
modify the DP-G310’s IP address.
Click OK to apply IP address settings.
*Note:Please notice that if you connect
your printer server in a LAN where a
DHCP server is present. The IP address
will differ from the one in the example
192.168.0.10.
Click OK
5
Setting up your DP-G310 for
network printing in Windows XP
(continued)
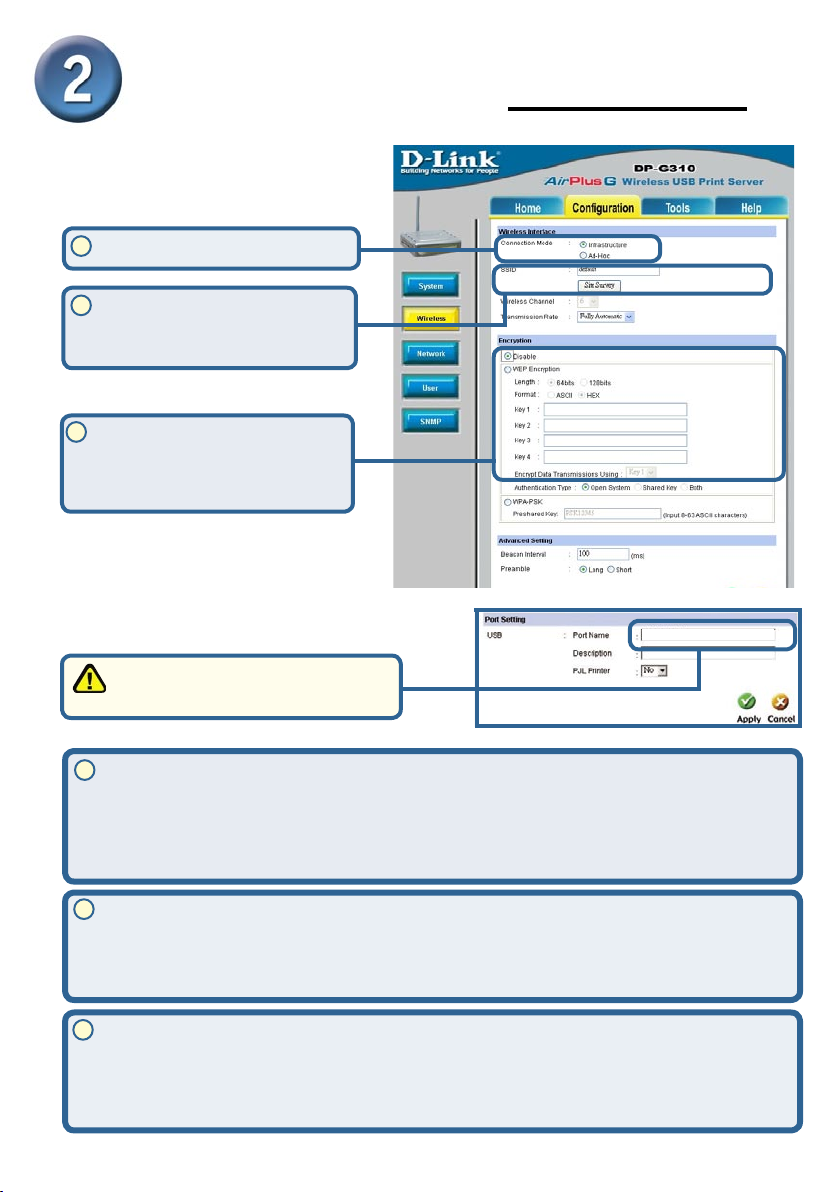
What is Infrastructure and Ad-Hoc Mode?
Ad-Hoc: Refers to two or more 802.11b wireless devices that communicate directly
with one another without using an access point or any connection to a wired network.
Infrastructure: Refers to an 802.11 network in which wireless devices communicate
with each other by first going through an Access Point (AP) or wireless router.
Enter the SSID of the remote
access point or wireless rout-
er you wish to connect to.
If you would like to set
WEP Encryption, select the
encryption level and the key
here.
Click on the Configuration tab to view
the current Wireless Settings.
64 bit WEP encryption uses a 10 hexidecimal character key. 128 bit WEP uses a 26
hexidecimal character key. The WEP encryption key must match the WEP settings on
your AP or wireless router to connect properly.
A workgroup name of your Wireless Network. All wireless devices must all have the
same SSID to communicate on the Wireless Network. All D-Link Wireless devices have
the default SSID of default, all lower case.
What is an SSID?
How does WEP Work?
2
3
1
2
3
Click on the System tab to view
the current Port Settings.
PS-121B28-U1
Write down on a piece of paper the
Port name that you wish to use.
Select your Connection Mode
1

6
Select “Local Printer.”
Click Next
Setting up your DP-G310 for
network printing in Windows XP
(continued)
Click Next
For Windows XP:
Go to Start>Printers and Faxes>Add a
Printer or Go to Start>Control Panel>
Printers and Faxes
Double-click on the
“Add Printer” icon
Please make sure to
deselect Automatically
detect and install my Plug
an Play printer.
7
Setting up your DP-G310 for
network printing in Windows XP
(continued)
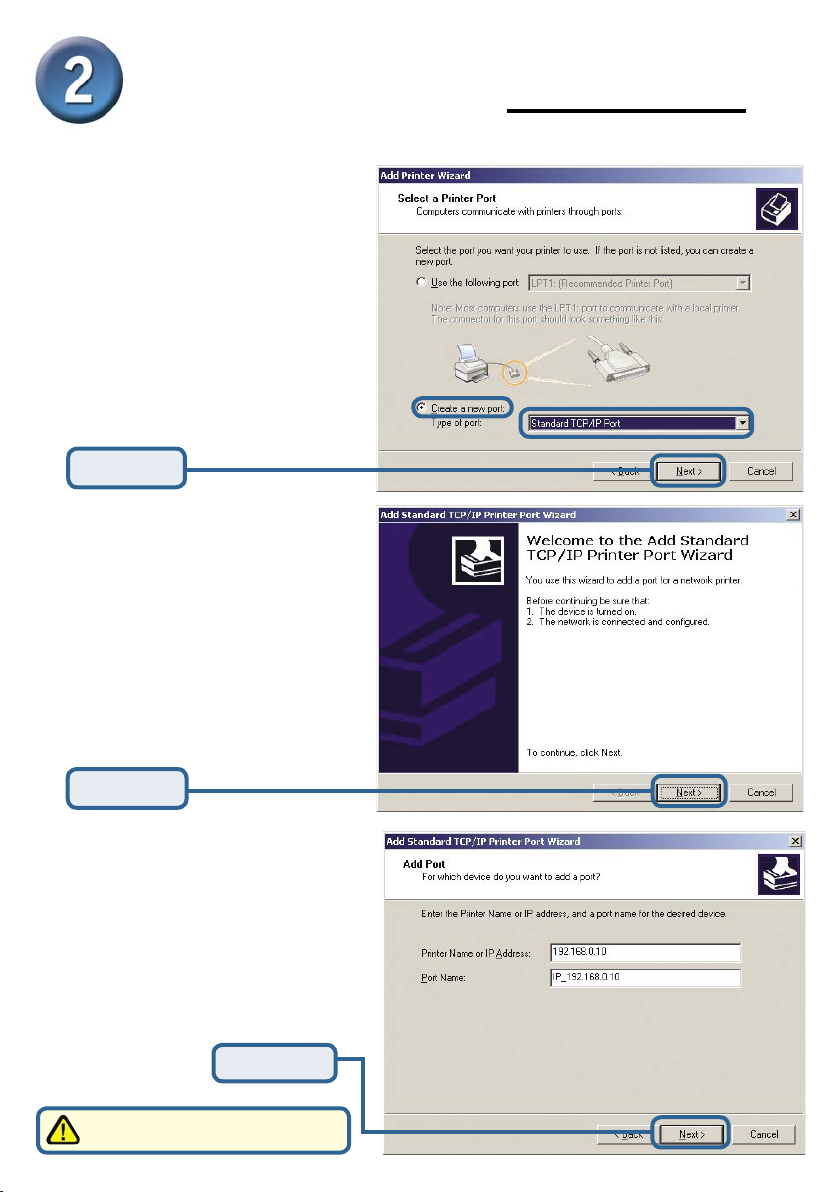
Select “Create a new port.”
At the pull-down menu, highlight
“Standard TCP/IP Port.”
Click Next
Click Next
Type in the IP address of the
print server. (i.e. 192.168.0.10)
The port name will automatically
be filled in.
Click Next
This may take a few seconds
8
Click Next
Setting up your DP-G310 for
network printing in Windows XP
(continued)
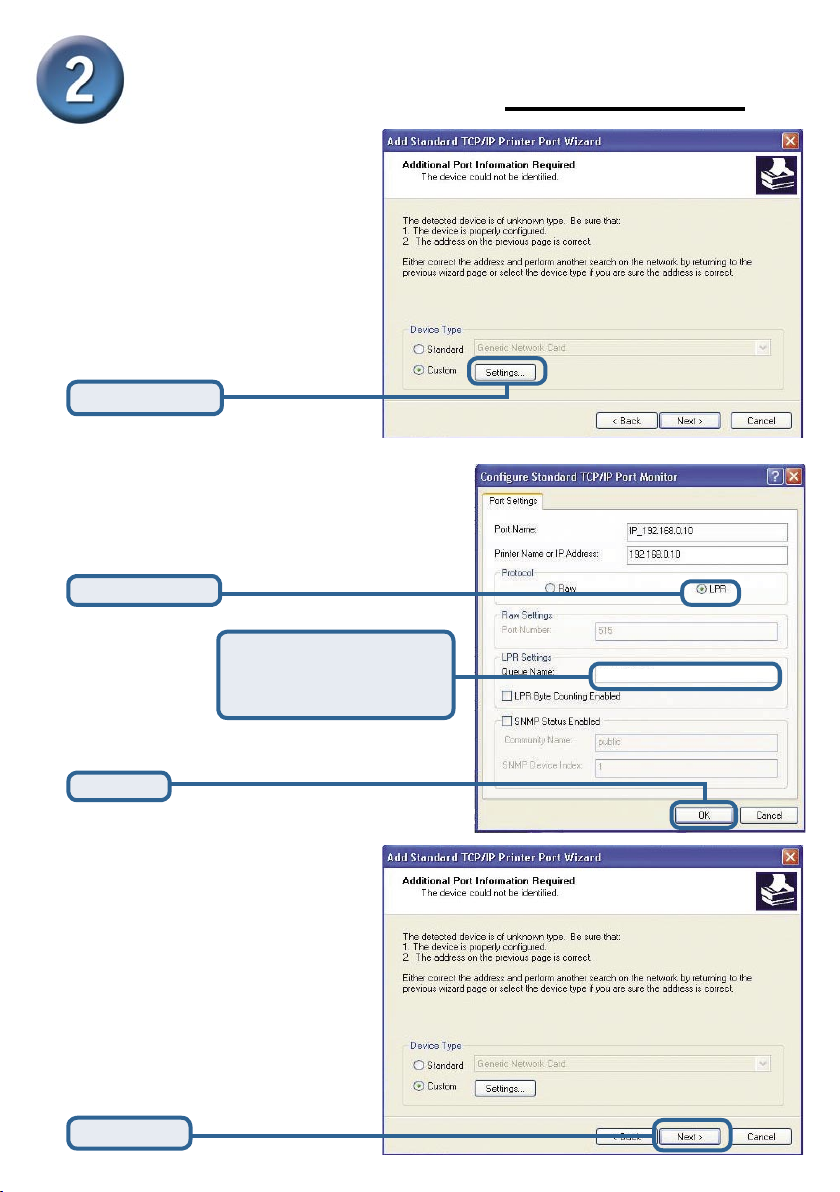
Click OK
Input the port name of the
port being used by the
printer
Select “Custom”
Then click on Settings.
Click Settings
Select “LPR”
PS-121B28-U1
9
Setting up your DP-G310 for
network printing in Windows XP
(continued)
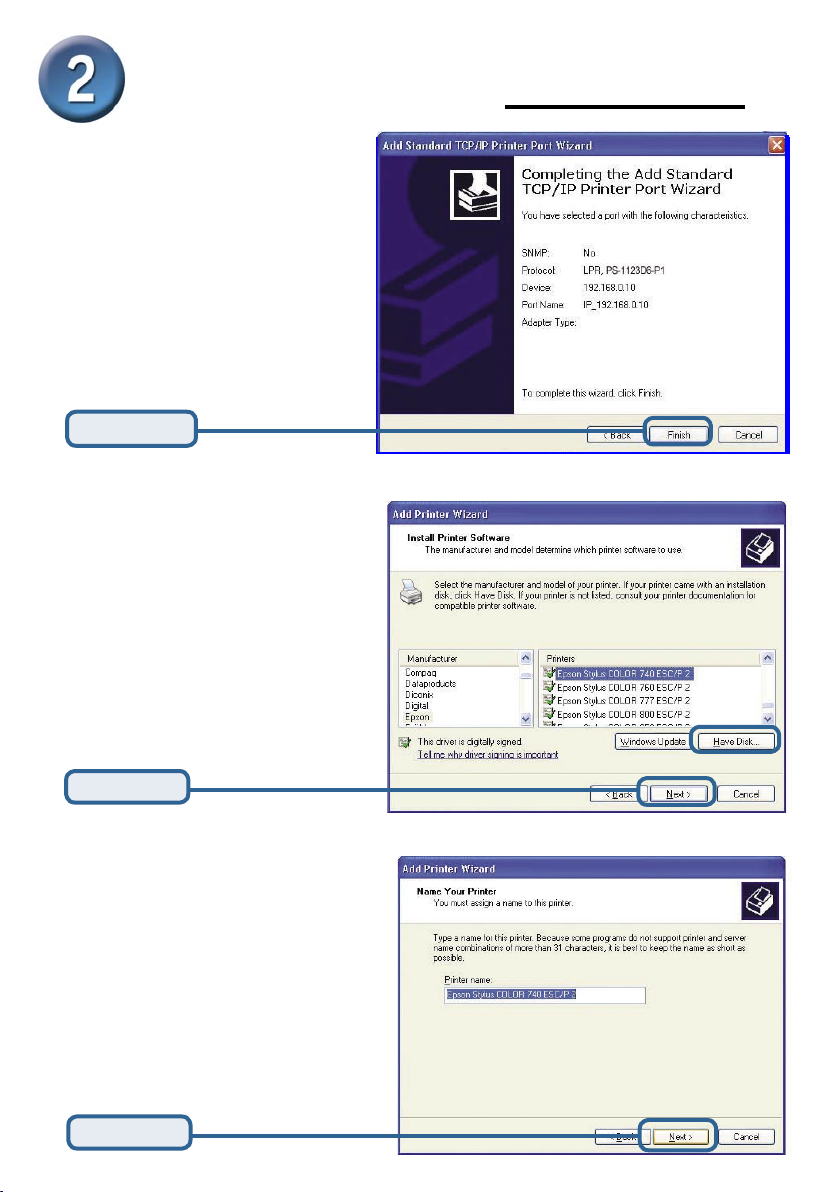
In this window, scroll down to find
your printer. (If it is not listed,
insert the driver CD or diskette that
came with your printer.)
Click on “Have Disk...”
Then, scroll down and highlight the
printer.
Click Next
Click Finish
At this screen, you can input a name
for this printer.
Click Next
10
Your Setup is Complete!
The printer is now ready for
printing with Windows XP, on
your network.
Click Finish
Setting up your DP-G310 for
network printing in Windows XP
(continued)
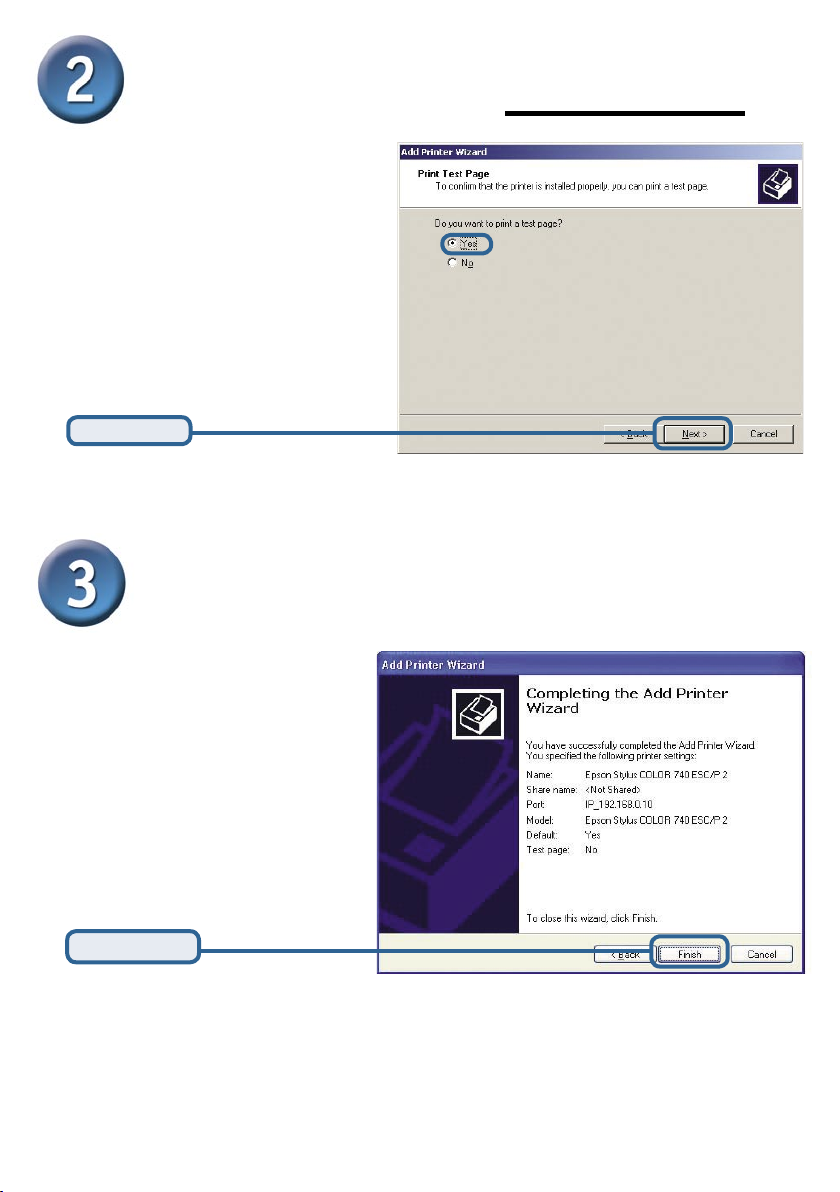
Select “Yes” to print a test page
Click Next
Other manuals for AirPlus DP-G310
7
Other D-Link Server manuals


