3
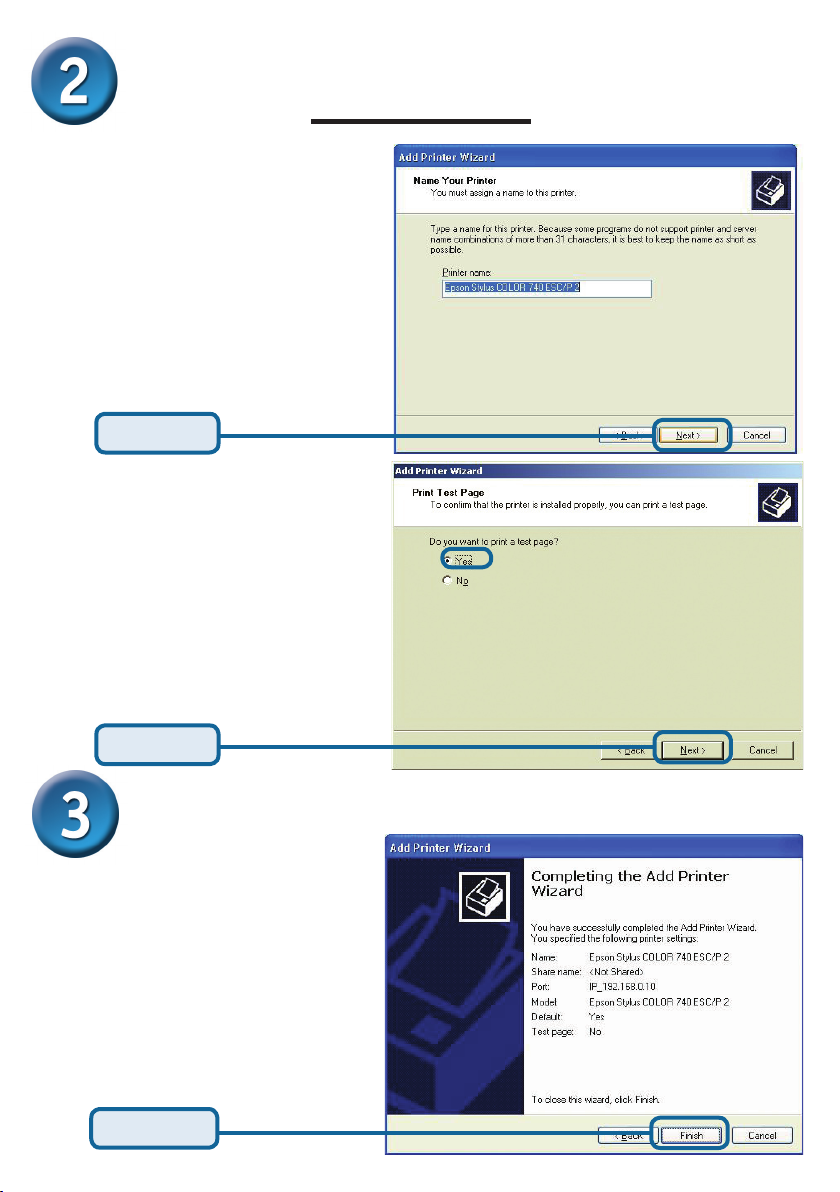
Setting up your DP-301P+ for network
printing in Windows XP
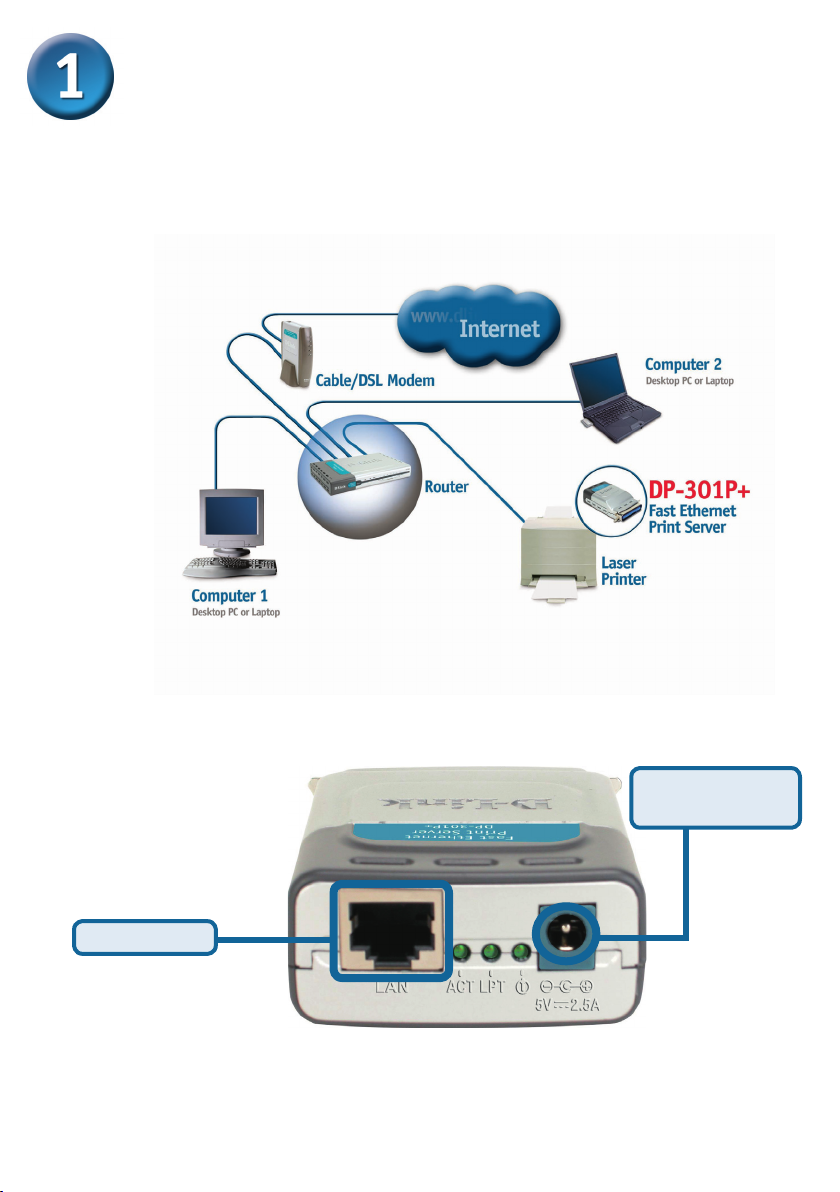
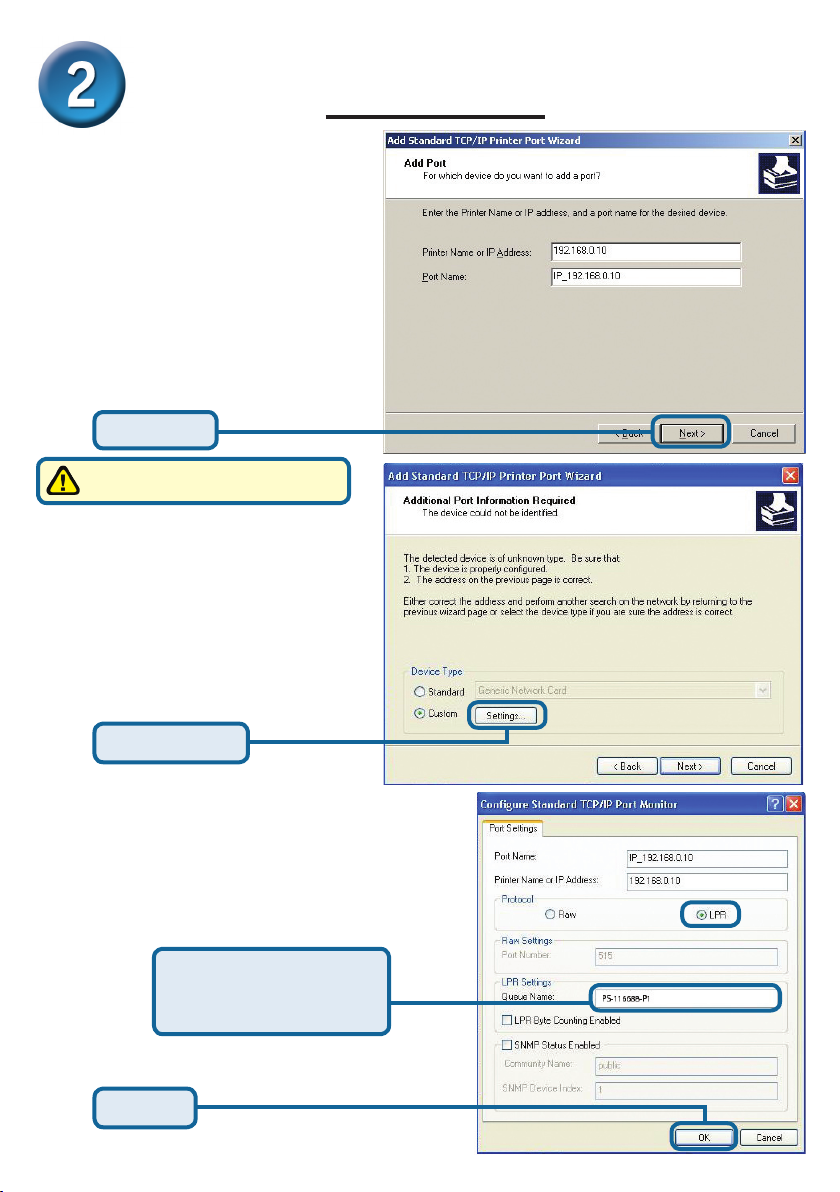
The factory default IP address of the DP-301P+ is 192.168.0.10. In order to
connect to the printer through the DP-301P+, the DP-301P+ must have the
same IP network settings as your network. IP address can be assigned manually
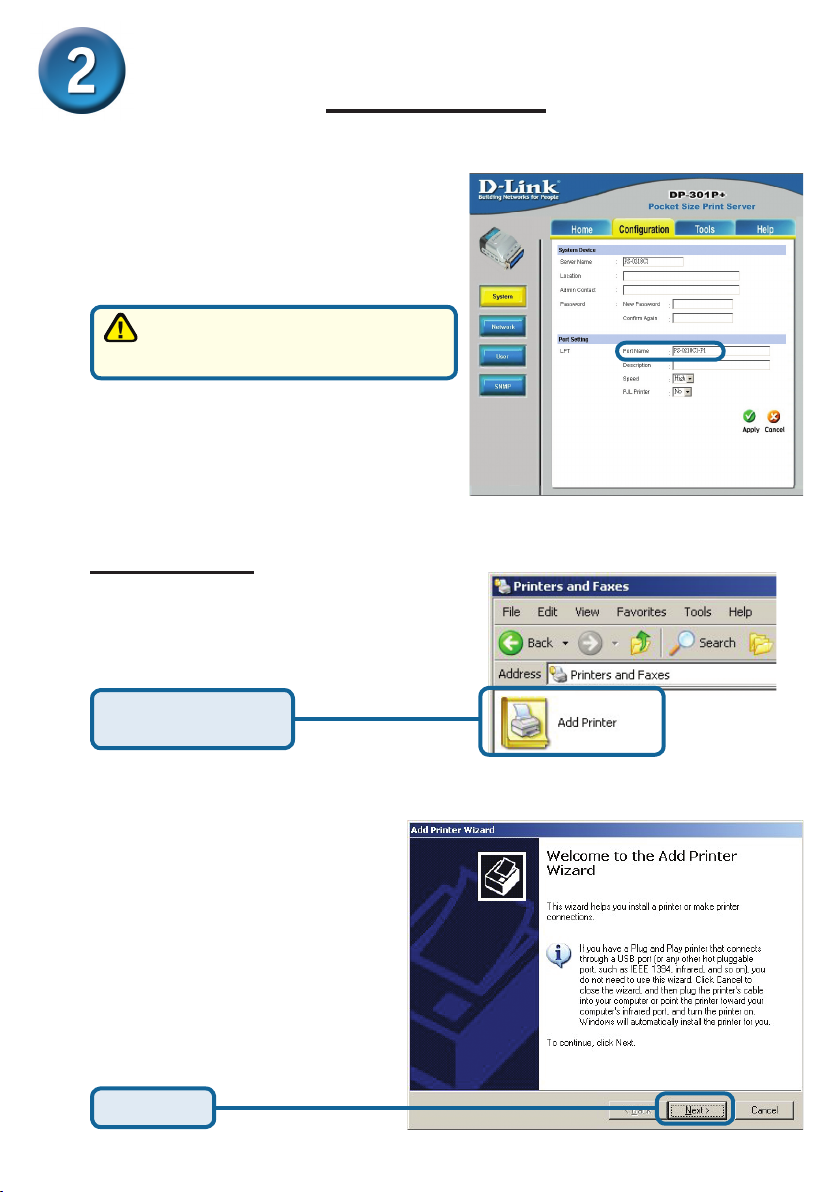
or automatically by DHCP, BOOTP or RARP. To access the print server’s web
conguration, manually assign an IP address on one of the PC’s on your network
to the same subnet as the print server.
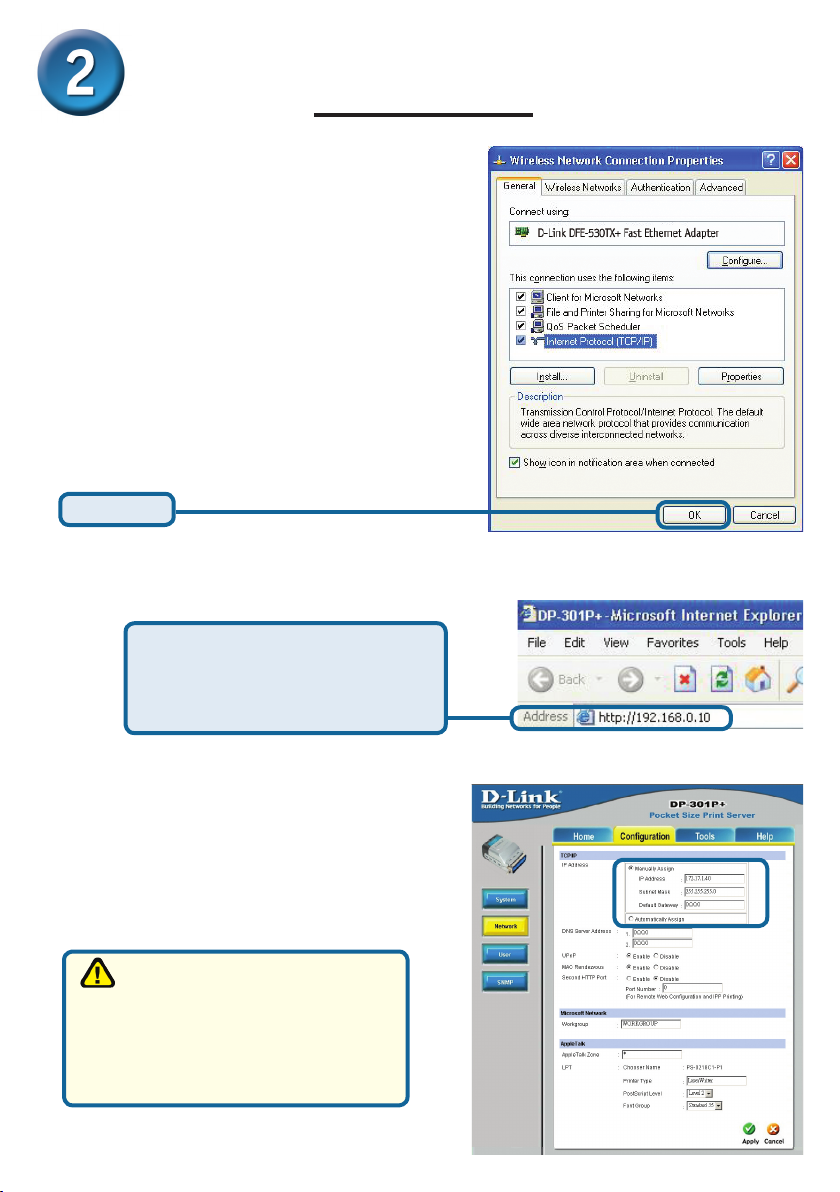
For additional Windows operating system setup or information
on the web-management interface, refer to the manual located
on the CD-ROM. For Mac OS printing, please refer to the
manual located on the CD-ROM.
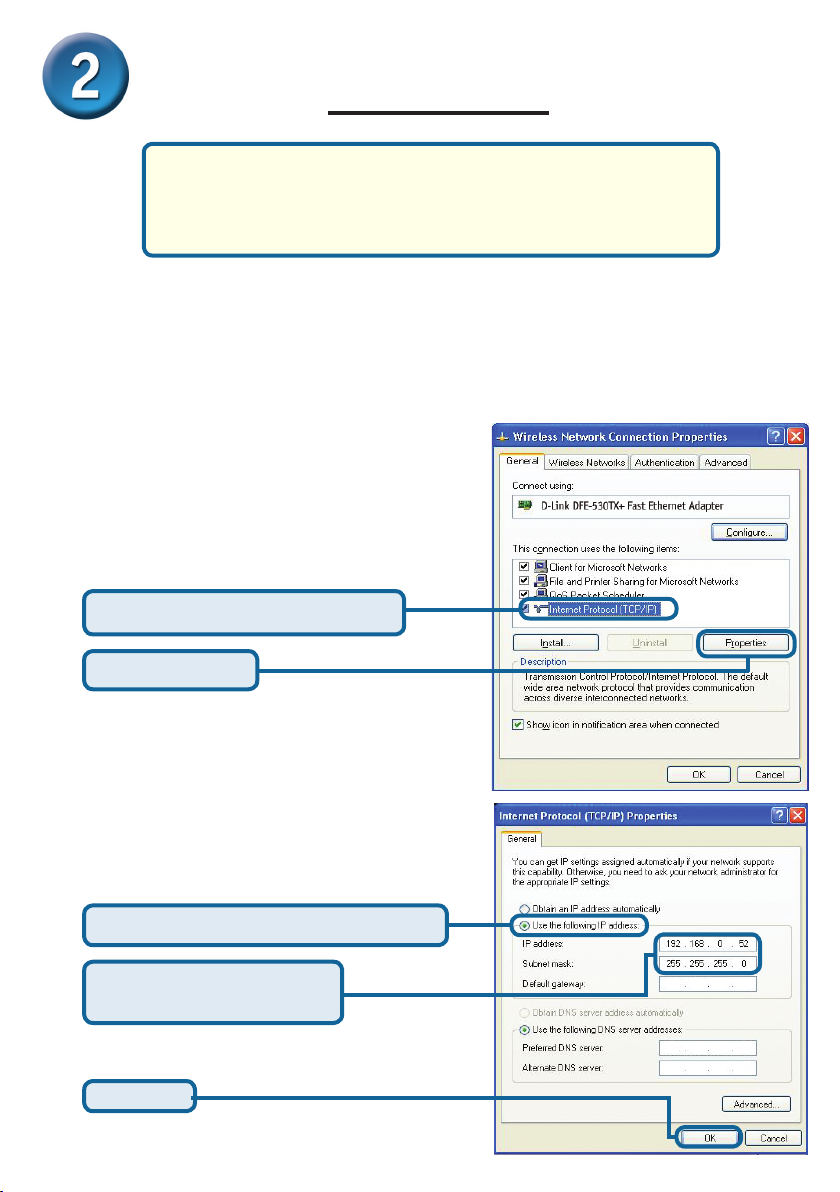
Go to Start > right click on
My Network Places >
select Properties > Double-click on
the Network Connection associated
with your Network Adapter.
Input a static IP address in the
same range as the print server.
Click OK
Click Internet Protocol (TCP/IP)
Click Properties
Select Use the following IP address
IP address: 192.168.0.52
Subnet mask: 255.255.255.0