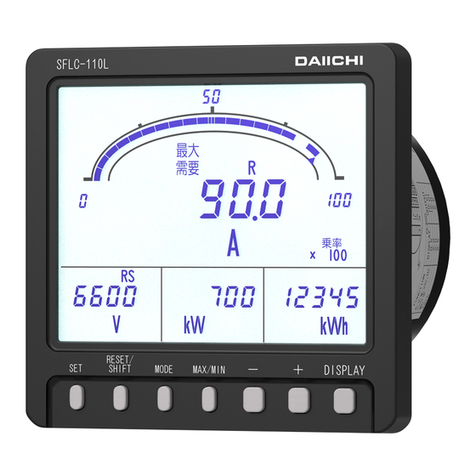
Daiichi Electronics SVLC-110L User manual

SVLC-212-175
INSTRUCTION MANUAL
POWER LINE MULTI-METER
(VOLTMETER)
SVLC-110L
[ 1φ2W / 1φ3W / 3φ3W ANALOG OUTPUT ]
HARDWARE MODEL C
[
Green backlight
]
HARDWARE MODEL F
[
White backlight
]

SVLC-212-175
1
Introduction
Thank you for your purchase of our product.
Read this instruction manual carefully before installation, wiring, and using this product.
Keep this instruction manual handy for reference at any time.
Have a contact with us or sales agent in case that this instruction manual is lost or damaged.
<Caution>
Have a contact with us when you have any questions or are aware of missing article.
Safety precaution
Important contents are mentioned in this instruction manual to prevent any damage / use this product appropriately.
Keep the following safety precaution in mind after understanding each sign.
Improper use may lead to death or severe injury.
Improper use may possibly lead to death or severe injury.
Improper use may lead to medium injury.
We are not responsible for the damage caused by following condition (earthquake / fire which is not caused
by us, action by third party, other accident, damage caused by our customer, misuse, product usage under
abnormal condition).
We are not responsible for secondary damage caused by product use / product malfunction(loss of profit,
halt of business operation). We are also not responsible for damage caused by false operation in combination
with connecting equipment which is beyond our control.
Do not disassemble, remodel and repair this product.
Have a contact with us or sales agent when product failure happens to prevent fire / electric shock / injury.
Do not get this product wet to prevent heat generation / ignition / product failure. When this product gets
wet, stop using it.
Do not connect metal excepting wiring to terminal in order to prevent heat generation/ignition.
Do not get this product near the inflammables / combustible chemicals / gas to prevent fire.
Connect specified power supply.
Connecting power supply beyond specification causes fire / product failure.
When dust is on the terminal, wipe it off after power is OFF to prevent fire.
Follow the below-mentioned procedure when abnormality (fuming / bad odor) happens.
(1) Stop a power supply and input, and stop using.
(2) Contact our company or a distributing agent.
Do not use this product in a environment of high temperature / high humidity to prevent any damage.
Do not touch the terminal during operation to prevent electric shock.
Do not pull/bend connecting cable with force. Cable damage causes heat generation / burn and contact failure
leads to equipment damage.
Do not connect/inspect with wet hands to prevent electric shock.

SVLC-212-175
2
Other precaution
Don't mount or store this unit in the following environment.
Places where corrosive gas (SO
2
/ H
2
S / etc.)(1) is generated.
Places where dust is generated.
Places with much vibration and shock.
Places with influence of external magnetic field (2).
Note (1) Corrosive gas = Sulfur dioxide SO
2
/ Hydrogen sulfide H
2
S / etc.
Note (2) Large current bus / saturable reactor / etc.
Wipe off dirt on the surface with dry cloth softly. Keep in mind that strong rubbing of nameplate leads to
character disappearance. Organic solvent and chemicals and cleaner is not appropriate for cleaning.
Mercury component, Nickel-cadmium battery are not used in this product.
Please dispose of this product as industrial waste (noncombustible).
The precautions at the case of using by outdoor board.
① This product is not dust-proof structure and not waterproof structure. In using by the outdoor panel,
please avoid the place, which dust causes.
And, please install in the place that requires neither rain
nor waterdrop.
② Please do not install in the place of sunlight. A display of this product may become hard to see.
And, deformation of a case may take place by the surface temperature rise.
The warranty period and warranty scope.
Warranty period.
The warranty period of this product is for one year after supplying the appointed place.
Warranty scope.
In the state of the normal use of product-specification within the range according to this instruction manual,
the trouble within the warranty period performs exchange or repair gratuitously.
However, the shipping expenses and the packing cost in the case of shipping obtain as payment on a customer.
And, if it corresponds to the next, it does not warrant.
(1) If it breaks down when converted or repaired except our company.
(2) If it breaks down by use out of specification range.
(3) If the cause of trouble is based on cause other than this product.
(4) Transportation, movement, damage by falling, and trouble.
(5) A natural disaster, disaster, etc., if it is the trouble which is irresponsible for a payment side
(our company or distributing agent).
This warranty is a warranty of a product simplex. It cannot warrant the damage induced by trouble of this product.
Change of instruction manual written contents.
This instruction manual changes written contents without a notice by product improvement etc.

SVLC-212-175
3
The precaution for use.
1. Environment of usage and storage.
Don’t mount or store this product in the following environments. If the unit becomes defective due to the use
in an environment other than specified, it may be repaired for pay even during its warranty period (one year
after the date of delivery).
① Don’t mount or store the unit at a place where the ambient temperature is other than a range of -10~+55℃
or the relative humidity is higher than 85
%
RH.
② Don’t mount or store the unit at a place where a corrosive gas such as SO
2
, H
2
S, etc. is generated.
Corrosive gas = Sulfur dioxide SO
2
/ Hydrogen sulfide H
2
S / etc.
Large current bus / saturable reactor / etc.
③ Don’t mount or store the unit at a dusty place.
④ Don’t mount or store the unit at a place subjected to noticeable vibrations or shocks.
⑤ Don’t mount or store the unit at a place subjected to noticeable external noises.
⑥ If this unit directly measures an inverter output of cycle control, SCR phase angle control or PWM control,
an error may increase due to its operation principle.
2. Cautions on use in an outdoor panel
Be careful with the following items when using this unit in an outdoor panel.
① Don’t mount the unit at a place where it is directly exposed to rain or water drops, otherwise this unit may
become defective because of no water-proof or drip-proof structure.
② Don’t mount the unit at a dusty place.
③ Don’t mount the unit at a place exposed to direct sunlight. Avoid exposing the unit to direct sunlight even
through a glass window.
If the meter is directly exposed to sunlight, the surface temperature of the meter rises and the case may be
deformed if the temperature exceeds 80℃.
④ If the average temperature around the meter exceeds 40℃, the life of the unit may shorten.
3. About dew condensation
If the temperature and humidity of an installation change rapidly when a product is a non-energization, the
waterdrop by dew condensation may adhere to a display inner side. (The display filter and the LCD surface
stick and the pattern of the shape of a circle or an ellipse occur.) This phenomenon improves by doing the
power distribution of the auxiliary power and leaving it for about 2 hours.
4. Mounting and wiring
Mount and connect the unit by a technician while referring to the instruction manual and observing the following
cautions.
Connect the unit after confirming the connection diagram. An improper connection may cause troubles
such as the generation of a high voltage on the secondary side of its current transformer or burning
of the unit or the occurrence of a fire.
Don’t perform any connection in a hot line without turning off the power supply in advance, otherwise
an electric shock accident, troubles or burning of the unit, a fire, gas explosion, or other very
dangerous accidents may occur.
The terminal cover is mounted for preventing an electric shock accident. Mount the terminal cover
without fail after the end of work.

SVLC-212-175
4
5. Setting
This unit requires setting and confirmation of the measuring range, etc. before use. Wrong setting, if any, causes
malfunction of the unit. If setting should be wrong, neither measurement nor output becomes correct.
Carefully read the instruction manual before setting the unit.
■ Default setting
The default settings are as specified below at the delivery time. Set them according to the working conditions.
The input circuit of this product is the common use of 3-phase 3-wire (3φ3W), single-phase 2-wire (1φ2W), and
single-phase 3-wire (1φ3W). In case an input circuit is designated at the case of an order, it is shipped by
the default value of the designated input circuit. And, in case it does not do designation of the input circuit
(with no designation), it is shipped by the default value of 3-phase 3-wire (110V).
The unit will be delivered with your specified setting values, if so specified.
№ Setting item (5)(6) 3-phase 3-wire Single-phase 3-wire Single-phase
110V input 220V input (U-W-N) 110V input 220V input
1 Display
pattern
Pattern Pattern 1 Pattern 1 Pattern 1
Main monitor V(UV) V(UN) V
Sub monitor (Left) V(VW) V(WN) Nothing
Sub monitor (Center) Nothing Nothing Nothing
Sub monitor (Right) V(WU) V(UW) Nothing
Bar graph V(UV) V(UN) V
2 Alarm output
(3)
Factor Voltage (OR of each
line voltage)
Voltage (OR of each
line voltage) Voltage
Reset method AUTO AUTO AUTO
Contact delay time 0 second 0 second 0 second
3
Instant
measurement
detection
Voltage upper limit OFF OFF OFF
Voltage lower limit OFF OFF OFF
4 Backlight Action AUTO AUTO AUTO
Brightness (4) 3(Middle) 3(Middle) 3(Middle)
5 Measurement
range
Voltage range 6600V 220.0V 110.0V 3300V 220.0V
Digit number of voltage
range 4 digits 4 digits 4 digits
Frequency range 45.0~65.0Hz 45.0~65.0Hz 45.0~65.0Hz
Digit number of frequency
range 3 digits 3 digits 3 digits
6 Analog output
(3)
Output factor 1 V(UV) V(UN) V
Output factor 2 V(VW) V(WN) OFF
Output factor 3 V(WU) V(UW) OFF
Low input cut OFF OFF OFF
7 External operation input (3) Alarm reset Alarm reset Alarm reset
8 Measurement
display ON/OFF
Voltage ON ON ON
Frequency ON ON ON
9 Input circuit Phase wire change(5) 3φ3W 1φ3W (U-W-N) 1φ2W
Input voltage (6) 110V 220V 300V 110V 220V
10
Analog output
adjustment
(3)
Output 1 Bias adjustment 0.0% 0.0% 0.0%
Span adjustment 100.0% 100.0% 100.0%
Output 2 Bias adjustment 0.0% 0.0% 0.0%
Span adjustment 100.0% 100.0% 100.0%
Output 3 Bias adjustment 0.0% 0.0% 0.0%
Span adjustment 100.0% 100.0% 100.0%
Note(3) A setting item is not displayed in case there is no corresponding option.
Note(4) In the case of green backlight, it does not indicate the setting item of brightness.
Note(5) If input circuit phase wire change setting is changed, the value (No. 1 to 8) of setting 1 and setting
2 will return to the default setting of the switched phase wire.
Note(6) When phase wire change setting of an input circuit is set as 3φ3W (or 1φ2W) and the input voltage
setting is changed, the voltage range returns to the default value of the phase wire.
(For example:In case of 3φ3W, 6600V at the case of 110V setting, 220V at the case of 220V setting.)
SVLC-212-175
5
6. Operation
Be careful with the following cautions during use.
Use the input within the rated range. Be careful since negligence of this caution may cause troubles of
the unit.
There is a function to hold the maximum value and the minimum value with a measurement factor in this product.
A blackout is guaranteed and this value isn't also cleared by a power supply reset. However, the minimum value
may be updated in case input is not applied to a power up. For this reason, in order to make the past minimum
value hold by powering on, please apply input within 1 second after switching on a power supply.
The maximum value, a minimum value measurement factor
Measurement factor Maximum value measurement Minimum value measurement
Voltage ,Frequency ○ ○
Be careful not to touch any terminal when power is applied to the unit.
Don’t disassemble or modify this unit without any previous permission of our company, otherwise
the warranty does not apply to the unit any more. Also, modifications may cause troubles, a
fire, or other accidents. For specifications change, etc., please contact us.
7. Maintenance and check
① Wipe off the surface of the unit with a dry soft cloth. The liquid crystal display (LCD) may light during
cleaning on the LCD face. However, this phenomenon is caused by the static electricity that may be produced
in the filter, and it does not show any trouble. Leave the unit as it is for a while, and the display goes
out due to natural discharge. Please keep in mind that it will break if a LCD is pushed strongly.
And, if a filter is pushed, a LCD face will touch a filter. Therefore, the pattern of the shape of a
circle or an ellipse may occur. Please do not push a filter strongly.
② Check the following items.
◎ Check the unit for damage in appearance.
◎ Check if indications conform to the inputs.
◎ Check if the unit is mounted normally without any loose connections of the terminal board after turning
off the power supply.
If a question has arisen or if the unit seems to be defective, please contact us.

SVLC-212-175
6
Content
1. Product outline ・・・・・・・・・・・・・・・・・・・・・・・・・・・・・・・・・・・・・・・・・・・・・・・・・・・・・・・・・・・ 7
1.1 Usage of product ・・・・・・・・・・・・・・・・・・・・・・・・・・・・・・・・・・・・・・・・・・・・・・・・・・・・・・・ 7
1.2 Features of product ・・・・・・・・・・・・・・・・・・・・・・・・・・・・・・・・・・・・・・・・・・・・・・・・・・・・ 7
1.3 Composition of type ・・・・・・・・・・・・・・・・・・・・・・・・・・・・・・・・・・・・・・・・・・・・・・・・・・・・ 7
2. The name and function of each part ・・・・・・・・・・・・・・・・・・・・・・・・・・・・・・・・・・・・・・・・ 8
3. Preparation
3.1 Installation ・・・・・・・・・・・・・・・・・・・・・・・・・・・・・・・・・・・・・・・・・・・・・・・・・・・・・・・・・・・ 9
3.2 Connections ・・・・・・・・・・・・・・・・・・・・・・・・・・・・・・・・・・・・・・・・・・・・・・・・・・・・・・・・・・・・ 10
4. Operation ・・・・・・・・・・・・・・・・・・・・・・・・・・・・・・・・・・・・・・・・・・・・・・・・・・・・・・・・・・・・・・・・・ 11
4.1 The screen change and function by switch operation ・・・・・・・・・・・・・・・・・・・・・ 12
4.2 The kind of display ・・・・・・・・・・・・・・・・・・・・・・・・・・・・・・・・・・・・・・・・・・・・・・・・・・・・ 13
4.2.1 Measurement display ・・・・・・・・・・・・・・・・・・・・・・・・・・・・・・・・・・・・・・・・・・・・・・・・・ 13
4.2.2 Alarm detection display ・・・・・・・・・・・・・・・・・・・・・・・・・・・・・・・・・・・・・・・・・・・・・ 14
4.2.3 Setting display ・・・・・・・・・・・・・・・・・・・・・・・・・・・・・・・・・・・・・・・・・・・・・・・・・・・・・ 15
4.3 Operation ・・・・・・・・・・・・・・・・・・・・・・・・・・・・・・・・・・・・・・・・・・・・・・・・・・・・・・・・・・・・・・ 16
4.3.1 The main monitor display factor change ・・・・・・・・・・・・・・・・・・・・・・・・・・・・・・ 16
4.3.2 Line (phase) display change ・・・・・・・・・・・・・・・・・・・・・・・・・・・・・・・・・・・・・・・・・ 16
4.3.3 Setting value check ・・・・・・・・・・・・・・・・・・・・・・・・・・・・・・・・・・・・・・・・・・・・・・・・・ 17
4.3.4 Setting mode ・・・・・・・・・・・・・・・・・・・・・・・・・・・・・・・・・・・・・・・・・・・・・・・・・・・・・・・・ 18
4.3.5 Reset ・・・・・・・・・・・・・・・・・・・・・・・・・・・・・・・・・・・・・・・・・・・・・・・・・・・・・・・・・・・・・・・ 19
5. Setting
5.1 Function table ・・・・・・・・・・・・・・・・・・・・・・・・・・・・・・・・・・・・・・・・・・・・・・・・・・・・・・・・・ 21
5.2 Setting table ・・・・・・・・・・・・・・・・・・・・・・・・・・・・・・・・・・・・・・・・・・・・・・・・・・・・・・・・・・ 23
5.3 Setting in detail explanation ・・・・・・・・・・・・・・・・・・・・・・・・・・・・・・・・・・・・・・・・・・ 27
5.3.1 Setting mode 1 ・・・・・・・・・・・・・・・・・・・・・・・・・・・・・・・・・・・・・・・・・・・・・・・・・・・・・・ 27
5.3.2 Setting mode 2 ・・・・・・・・・・・・・・・・・・・・・・・・・・・・・・・・・・・・・・・・・・・・・・・・・・・・・・ 32
5.3.3 Setting mode 3 ・・・・・・・・・・・・・・・・・・・・・・・・・・・・・・・・・・・・・・・・・・・・・・・・・・・・・・ 36
6. Specification
6.1 Specification and intrinsic error ・・・・・・・・・・・・・・・・・・・・・・・・・・・・・・・・・・・・・・ 38
6.2 Performance ・・・・・・・・・・・・・・・・・・・・・・・・・・・・・・・・・・・・・・・・・・・・・・・・・・・・・・・・・・・・ 39
6.3 Option ・・・・・・・・・・・・・・・・・・・・・・・・・・・・・・・・・・・・・・・・・・・・・・・・・・・・・・・・・・・・・・・・・ 41
7. Maintenance and check
7.1 Trouble shooting ・・・・・・・・・・・・・・・・・・・・・・・・・・・・・・・・・・・・・・・・・・・・・・・・・・・・・・・ 42
7.2 Check ・・・・・・・・・・・・・・・・・・・・・・・・・・・・・・・・・・・・・・・・・・・・・・・・・・・・・・・・・・・・・・・・・・ 42
7.3 Test ・・・・・・・・・・・・・・・・・・・・・・・・・・・・・・・・・・・・・・・・・・・・・・・・・・・・・・・・・・・・・・・・・・・ 43
7.4 Maintenance ・・・・・・・・・・・・・・・・・・・・・・・・・・・・・・・・・・・・・・・・・・・・・・・・・・・・・・・・・・・・ 44
7.5 Storage ・・・・・・・・・・・・・・・・・・・・・・・・・・・・・・・・・・・・・・・・・・・・・・・・・・・・・・・・・・・・・・・・ 44
7.6 Countermeasures against troubles ・・・・・・・・・・・・・・・・・・・・・・・・・・・・・・・・・・・・・・・ 44

SVLC-212-175
7
1. Product outline
1.1 Usage of product
This single unit can measure and monitor voltage ×3, frequency.
It is optimum for voltage measurement of a power receiving, a bus, and a low voltage system.
The intensive monitor doubled with the system by option (analog output, alarm output, external operation input)
addendum is possible.
1.2 Features of product
It is common type product of 3-phase 3-wire, single-phase 2-wire, single-phase 3-wire.
It's possible to share stock.
Bar graph 1 measurement and digital 4 measurement are displayed simultaneously.
Analog output 3 circuit and contact-output can be taken out. (Option)
And, an output factor can be selected by setting.
External operation inputs are possible of reset. (Option) Choice of an alarm output, the maximum/minimum
value, and an alarm output, and the maximum/minimum value is possible at setting.
Power supply is AC85~264V,DC80~143V (for both AC and DC uses).
The mounting method of this unit is compatible with the mounting method of conventional 110 square
mechanical meter. This unit is mounted at 2 diagonal points.
A backlight function is equipped. Selection of backlight-on, backlight-off, and auto backlight-off and
setting of brightness (only white backlight) are possible. Automatic turning off the lights at the time
of non-operation can be established. LED:Green or White (appoints by order).
LCD can be chosen from 2 kinds, the type to see from the top and the type to see from the bottom.
(Please designate it at an order.)
1.3 Composition of type
TYPE Specification code
SVLC-110L-
□□□□□
-
□□□
Installation position
1:For an upper installation.
2:For an lower installation.
Option
Specificat
ion code
External
operation input Analog output Contact output
0-00 Nothing Nothing Nothing
1-11 One circuit DC4~20mA×3 Alarm×1
Auxiliary power supply
1:AC85~264V, DC80~143V for both AC and DC uses
Input range
D:Common use for 150V, 300V.
Input circuit
F:Common use for 1φ2W, 1φ3W, 3φ3W.
Hardware model
A:R-S-T,Green backlight D:R-S-T,White backlight
B:R-Y-B,Green backlight E:R-Y-B,White backlight
C:U-V-W,Green backlight F:U-V-W,White backlight

SVLC-212-175
8
2. The name and function of each part
Bar graph display
The measurement value of the main
monitor is indicated by the analog.
(Setting which does bar graph display
of the measurement value of sub monitor
is also possible.)
Scale markings
It sets automatically by
measurement-range setting.
In setting mode, it is used
as a switch that changes a
setting item.
If this switch is pushed 1 second
or more continuously, it will
reset an alarm, the maximum value,
and the minimum value (factor
which it is displaying on the
main monitor).
In setting mode, it uses it as
a switch to which it moves a
setting item (move up).
It uses it as a switch which it
changes to setting mode.
If it continues pushing 3 seconds
or more, it will change to setting
mode.
In setting mode, it is used as a
switch that determines a set point.
Lower limit setting index
An lower limit set point is displayed.
Upper limit setting index
An upper limit set point is displayed.
Unit display
It sets automatically by
measurement-range setting.
The switch to which
measurement displays element
of main monitor is changed.
If it is not operated for 10 minutes
after a display change, it returns to the
original measurement display factor.
In set mode, it is used as a switch that
changes a setting value.
It is the switch that changes a line
(phase) display of voltage.
If it is not operated for 10 minutes
after a display change, it returns to the
original phase display.
In setting mode, it is used as a switch
that terminates setting mode.
The switch to which general
measurement display (usually)
and the maximum minimum measurement
display are changed.
In setting mode, it uses it as a
switch to which it moves a setting
item (move down).
Digital display
Measurement monitor can watch 4 elements at the same time.
Sub monitor Sub monitor Main monitor Sub monitor
(Left) (Center) (Right)
General
measurement
display
Maximum and minimum
measurement
display
MAX/MIN
MAX/MIN

SVLC-212-175
9
3. Preparation
3.1 Installation
Mount the unit by the attached M5 nuts to a panel of thinner than 10mm, referring to the following external
dimensions drawing and panel cutout. Fasten these nuts with tightening torque 2.0~2.5N・m.
● Dimension diagram
● Caution on handling
Mount the LCD to obtain an optimum angle, since the contrast changes according to the monitoring angle.
(1) For upper case installation (2) For lower case installation
● Installation
(1) A product is put in a cut hole of a panel from a front.
A body is inserted until it exceeds retaining stopper
of the lower base.
(2) Please fix a product certainly with attached M5
flange nut for installation. Please give a
tightening torque as 2.0~2.5N・m.

SVLC-212-175
10
3.2 Connections
Please perform connection after referring to the following wiring diagram.
● Connection drawing (8)
(1) 1φ2W,Analog output. (2) 1φ3W,Analog output.
AUX. SUPPLY
Analog output 3
Analog output 1
Analog output 2
Alarm output
External operation input
Analog output 1
Analog output 2
Analog output 3
Alarm output
External operation input
AUX. SUPPLY
(3) 3φ3W,Analog output.
Analog output 1
Analog output 2
Analog output 3
Alarm output
External operation input
AUX. SUPPLY
● Caution on connection
(1) Mount the terminal cover without fail for safety after the end of connections.
(2) Separate the input wiring and output wiring from each other without fail, and take a preventive measure
against malfunction due to external noises.
(3) Connect the grounding terminal E (No. 7 terminal) to the ground without fail for enhancing the shield effect.
Keep the grounding resistance between the grounding terminal and the ground to be lower than 100Ω.
(4) Keep a distance of more than 30cm between this unit and the circuit breaker as well as between this unit
and the relay contact signal line.
(5) No protection is necessary for this unit even if the transmission line may be affected by an induced lightning
surge or the like when transmitting an analog output to the receiver. Mount an about 500V SPD (arrester)
or the like between the line surge protector and the ground as well as between the transmission line and
the ground on the receiver side for the purpose of protecting the devices on the receiver side.
(6) It is recommended to mount a surge killer outside when connecting an inductive load to the alarm output.
If no surge killer is mounted, the contact life may shorten.
Note(7) Analog output, alarm output, external
operation input is an option.
Note(8) In case of low-voltage circuit,
secondary side earthing of VT is
unnecessary.
And, VT is unnecessary in case it used
110V or direct 220V.

SVLC-212-175
11
4. Operation
● The function of switch
Switch Function
SET
If it continues pushing 3 seconds or more, it will change to setting mode.
In setting mode, it is used for the determination of a set point.
RESET/SHIFT
Various kinds of alarms are reset. The maximum value and the minimum value are reset in the maximum
minimum measurement display. In setting mode, it uses it as a switch to which it moves (move up)
a setting item.
MODE
In setting mode, it is used for the change of a setting item.
MAX/MIN
The usual measurement display and maximum value or minimum value display are changed.
In setting mode, it uses it as a switch to which it moves (move down) a setting item.
+
,
-
The measurement display factor of the main monitor is changed.
In setting mode, it is used for change of a set point.
DISPLAY
A line (phase) display of voltage is changed. It is used in case it terminates setting mode.
And, it is used in case it returns the display combination of a measurement factor.
● Convenient functions
(1) In case a measurement change or a line (phase) change is performed and the original screen composition
is not clear anymore,
DISPLAY
is pushed for more than 3 seconds or it's no-operation for 10 minutes and returns
to original screen structure.
(2) If a measurement change is performed and the original main monitor display is not clear anymore.
It continues pushing a + or - more than 3 seconds, or returns to the original measurement display
factor by no operation for 10 minutes.
(3) Even if it stops operation with setting mode, it returns to the display mode in 10 minutes.
● 7 segment displays
This product shows the guidance in various setting using 7 segment displays besides a display of a measurement
value. A digital readout and 7 segment displays corresponding to each alphabet are shown in the following.
A B(b) C D(d) E F G H I J K L M
Non-dis
play
Non-dis
play
N(n) O(o) P Q(q) R(r) S T(t) U(u) V W X Y(y) Z
Non-dis
play
0 1 2 3 4 5 6 7 8 9

SVLC-212-175
12
4.1 The screen change and function by switch operation.
This product changes various screens by switch operation. Here, the change step of the screen by switch
operation is explained.
Alarm reset
(Output and display)
Conditions:
At manual reset setting
Maximum / Minimum
reset
(Main monitor
display factor)
Conditions:
Displaying the factor
applicable to the
main monitor.
Instant measurement display
(General display)
Maximum / Minimum
measurement display
MAX/MIN
Changes a screen
with the main
monitor factor
of instant
measurement.
It displays the
factor of the
maximum and the
minimum
measurement on
display on the
main monitor.
MAX/MIN
Push
1 seconds
RESET/SHIFT
Maximum / Minimum
reset
(All factor)
Push 1 seconds
+
RESET/SHIFT
+
Phase (line) display
change
+Main monitor
display factor
change
-
Setting point check
,
Or No operation, 10 minute.
SET
Setting mode 1
Push 3 seconds
Or No operation, 10 minute.
Setting mode 2
Push 3 seconds
Or No operation, 10 minute.
+
Setting mode 3
Push 3 seconds
Or No operation, 10 minute.
+
Push 3 seconds or
No operation, 10 minute.
Push 3 seconds or
No operation, 10 minute.
TEST mode
Push 3 seconds
+
-+
V factor in display.
At 1φ2W, With no function.
DISPLAY
DISPLAY
DISPLAY
DISPLAY
DISPLAY
DISPLAY
DISPLAY
DISPLAY
DISPLAY
RESET/SHIFT
RESET/SHIFT
SET
SET
SET
MODE

SVLC-212-175
13
4.2 The kind of display
4.2.1 Measurement display
The change of the measurement display factor of the main monitor by switch operation and the change of
the line / phase display of voltage is possible (temporarily).
In a general measurement display, if switch operation is not performed for 10 minutes after changing a
display factor, it returns to the original measurement display factor automatically.
Voltage, frequency, etc. indicate the
measurement value of four factors by the
maximum.
Setting which always displays a measurement
factor is possible. And, it is possible to
change to a display of the maximum value and the
minimum value, about the measurement factor
which performs holding of the maximum value and
the minimum value by switch operation.
These maximum values and the minimum value are
reset by switch operation (it updates to the
instantaneous value at the time).
In addition, as for the maximum value and the
minimum value, power-supply reset is not
cleared either. And, this display is held by
even after 10 minutes of switch non-operation.
・The example of a measurement display of each measurement factor (Main monitor)
Measurement factor Example of display
Voltage
V
Frequency
Hz
General measurement display
V(UV) display
V(VW) display
General measurement
maximum and minimum display
Instant display
Range of minimum to maximum
is displayed in bar graph.
Minimum display
V(WU) display
Hz display
Maximum display

SVLC-212-175
14
4.2.2 Alarm detection display
It is a display when voltage measurement becomes more than a upper limit setting value or less than a lower
limit setting value.
If the voltage is being indicated by measurement under the main monitor or the sub-monitor, a measurement value
display is flicker. And, if the line (phase) set as the alarm output factor detects,
H
, or
L
V
flicker-indicates.
If the return method is manual reset setting, even if it returns from upper limit (lower limit) detection,
an alarm detection display is held. The return in this case needs alarm reset operation.
Please refer to "4.3.5 Reset" for alarm reset.
Alarm factor Example of a display
Voltage
Upper limit
Lower limit alarm setting value Upper limit alarm setting value
Lower limit
Lower limit alarm setting value Upper limit alarm setting value
Upper limit
detection
V(UV)
Hz
V(WU)
V(VW)
Alarm detection display
(Flicker)
Return
(Auto return)
Measurement display Detection display
Flicker
Alarm reset
operation
Return
(Manual return)
Alarm detection
display
(Indicate)
Indicate
Detection display
(At alarm factor setting)
Detection display
(At alarm factor setting)

SVLC-212-175
15
4.2.3 Setting display
It is the display at the case of various setting. There are three types of setting modes according to the
contents of a setting.
Operation and the contents of setting (detail) in setting mode, please refer to "5 Setting".
① Setting mode 1
Setting of a measurement display factor, an
alarm output, and an alarm value, and
backlight is performed.
And, an alarm output can be tested in this
setting mode.
Setting mode 1
(No.111 Display pattern)
② Setting mode 2
Setting of measurement range, analog output,
external operation input, and measurement
display ON/OFF is performed.
And, it can initialize settings in this
setting mode.
Setting mode 2
(No.211 Voltage range)
③ Setting mode 3
Setting of an input circuit is performed.
And, analog output can be adjusted in this
setting mode.
Setting mode 3
(No.311 Input circuit phase wire change)
New setting
Now setting
Setting No.
Setting factor
New setting
Now setting
Setting No.
New setting
Now setting
Setting No.

SVLC-212-175
16
4.3 Operation
4.3.1 The main monitor display factor change
The measurement display factor of the main monitor is changed. A change is performed by + -.
A measurement display and maximum display,minimum display can also perform this operation.
After changing a measurement display factor, if a switch is not operated for 10 minutes, it will return
to the original measurement display factor automatically.
In a maximum display and minimum display, even if a switch is not operated for 10 minutes, it does not
return to the original display.
Main monitor V(WU) Main monitor V(UV) Main monitor V(VW)
(Default display)
4.3.2 Line (phase) display change (3-phase 3-wire, Single-phase 3-wire)
Line and phase display of voltage is changed. (Everything which is being indicated.)
A change is performed by
DISPLAY
.
A measurement display and maximum display,minimum display can also perform this operation.
In addition, after changing a line and phase display, if a switch is not operated for 10 minutes, it will return
to the original phase display automatically.
In a maximum display and minimum display, even if a switch is not operated for 10 minutes, it does not
return to the original display.
V(UV) display
V(VW) display V(WU) display Hz display
No operation 10 minute
-
+
-
+
-
+
-
+
DISPLAY
DISPLAY
DISPLAY
V(UV) display
V(VW) display Hz display
V(WU) display
No operation 10 minute

SVLC-212-175
17
4.3.3 Setting value check
A voltage range (primary voltage), and an alarm-output set point are checked.
Check is
RESET/SHIFT
and
-
are pushed simultaneously and performed.
The change of a set point is carries out by
+
and
-
.
DISPLAY
is pushed in case it returns to the
original measurement display. And, if a switch is not operated for 10 seconds after a set point check,
it will return to the original measurement display automatically.
Note(9) It is not displayed if there is no option.
DISPLAY
or
No operation
10 seconds
RESET/SHIFT
+
-
+
-
-
+
V(UV) display
V(VW) display Hz display
V(WU) dis
p
la
y
Primary voltage
Factor
display
Alarm factor return method
Contact delay time
(9)
-
+
Upper limit (lower limit) value
Setting value check
Voltage range (primary voltage),
Rated voltage
Measurement display
Upper limit setting value
Alarm factor
Return
method
Contact delay time
Input rated voltage
display
(At 3φ3W, 1φ2W)
Lower limit
setting value

SVLC-212-175
18
4.3.4 Setting mode
Various kinds of setting are performed. Setting mode is three types, and operations are different.
DISPLAY
is pushed in case it returns to the original measurement display. And, if a switch is not operated
for 10 minute after a set point check, it will return to the original measurement display automatically.
Operation and the contents of setting (detail) in setting mode, please refer to "5 Setting".
・Setting mode 1:Press
SET
for longer than 3 seconds.
・Setting mode 2:Press
SET
and
RESET/SHIFT
together for longer than 3 seconds.
・Setting mode 3:Press
SET
and
DISPLAY
together for longer than 3 seconds.
<Reference> It can operate by measurement display and maximum (minimum) display.
【Setting mode 2】
New setting
Setting factor Now setting
SET
3 seconds
SET
+
RESET/SHIFT
3 seconds
SET
+
DISPLAY
3 seconds
V(UV) display
【Setting mode 1】
New setting
Setting No. Now setting
【Setting mode 3】
New setting
Setting No. Now setting
V(VW) display Hz display
V(WU) display
Measurement display
DISPLAY
or
no operation
10 seconds.
Return to
measurement
display. Setting No.

SVLC-212-175
19
4.3.5 Reset
Various kinds of reset are performed. The kind of reset is as follows and operations are different,
respectively. Reset of maximum value and minimum value (it updates to the instantaneous value at the time),
Alarm-output reset (OFF of an alarm output (at the case of manual reset setting)).
And, the operation from each measurement display constitutes conditions at each reset.
(1) Alarm reset
In case an alarm return method is set to “HOLD (manual return)”, an alarm output is reset (output OFF).
(With an alarm-output option) However, an output is not turned off by this operation, in case an alarm
continues and it has caused. And, this operation is unnecessary if an alarm return method is set as "AUTO
(automatic return)". (An output is also OFF to an alarm return.)
In addition, setting can perform same operation in external operation input.
Please refer to "5.3.2 Setting mode 2 (3) external operation input setting" for the setting method.
Please refer to "6.3 Option" for the external operation input.
① It continues pushing
RESET/SHIFT
1 second or more by a measurement display, the maximum measurement
display, and the minimum measurement display.
<Caution> If a
RESET/SHIFT switch performs alarm reset, the maximum value of the measurement factor
currently displayed on the main monitor and the minimum value are also reset.
Alarm detection (Hold)
RESET/SHIFT
1 second
V(UV) display
V(VW) display
V(WU) display
Hz display
Measurement display Reset completion
Table of contents
Other Daiichi Electronics Multimeter manuals

Daiichi Electronics
Daiichi Electronics SQLC-110L User manual

Daiichi Electronics
Daiichi Electronics SQLC-110L User manual

Daiichi Electronics
Daiichi Electronics SMLC-110L User manual

Daiichi Electronics
Daiichi Electronics SFLC-110L User manual

Daiichi Electronics
Daiichi Electronics SALC-110L User manual