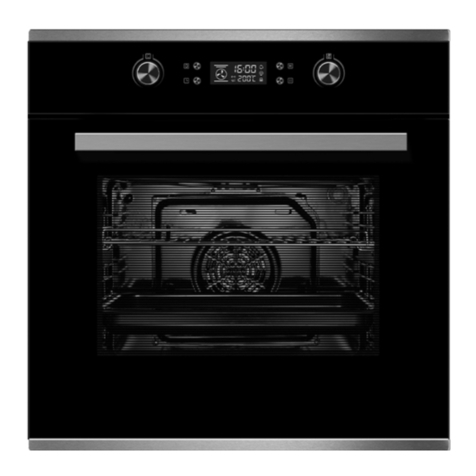
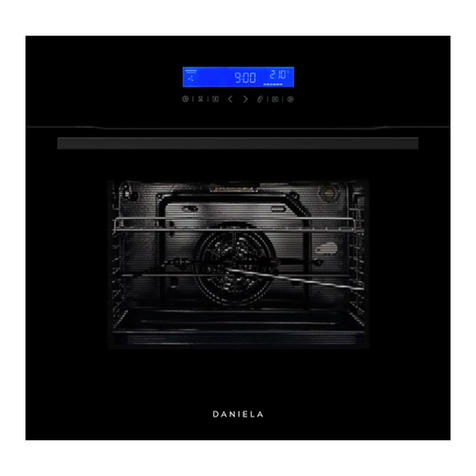
Daniela DAN90ABO User manual

Pg 1
DANIELA
APPLIANCES
DAN90ABO
USER MANUAL

Pg 3
DANIELA
APPLIANCES
C
O
O
K
I
N
G
W
I
T
H
S
T
Y
L
E
p
l
i
a
n
c
e
s
.
c
o
m
.
a
u
APPLIANCES
www.danielaappliances.com.au
Italian Designed. Australian at Heart
Over 20 years of passionate design for cooking appliances,
Daniela is committed to providing exceptional products and
customer service while always keeping the Australian family at
heart, so you can Cook With Style!
Using only key European made components, we carefully and
meticulously design our products with durability, functionality and
aesthetics in mind, allowing you to keep cooking longer with style.
We stand by our products with 24 months in home warranty
backed by our local call centre and also our very own technicians.
DAN90ABO
90cm Built-in 10 function oven with rotisserie
This manual contains instructions for your brand new oven
below, these instructions include maintenance and care for
your oven as well detailed descriptions of the many features
available to you.
If you have any questions about your new oven, please feel free
to email us your inquiry and one of our support team will gladly
assist you.
We hope you love your new oven!
From everyone at Daniela Appliances

DANIELA
DAN90ABO
USER MANUAL
DANIELA
DAN90ABO
USER MANUAL
Pg 4 Pg 5
Using This Manual
This Owner’s Manual includes instructions to help you use and maintain your
appliance as well as crucial safety information. Please keep your manual in
a safe place
Safety Instructions
Only a licenced electrician is permitted to instal this oven. In accordance
with the relevant safety guidelines and local Australian codes, it is the
installer’s responsibility to connect the appliance to the mains power supply.
Electrical safety
If the oven has been damaged in transport. DO NOT connect it.
• This appliance must be connected to the mains power supply only by an
approved licensed electrician.
• In the event of a fault or damage to the appliance, do not attempt to
operate it.
• Repairs should be performed by a licensed technician only. Improper repair
may result in considerable danger to you and others. If your oven needs
repair, you may contact our support to arrange a service of your oven.
• If the supply cord is damaged, it must be replaced by the manufacturer or
an authorised service agent or similarly qualifies person in order to avoid
a hazard.
• Electrical leads and cables should not be allowed to touch the oven,
• The oven should be connected to the mains power supply by means of
an approved circuit breaker or fuse. Never use multiple plug adapters or
extension leads.
• The rating label is located either on the right side of the door or affixed to
the bottom of side of the cavity front fame.
• The power supply of the appliance should be turned off when it is being
repaired or cleaned.
• Take care when connecting electrical appliances to sockets near the oven,
WARNINGS
• The appliance should be turned off at the circuit breaker or board before
replacing lamps to avoid the possibility of electric shock.
• During oven operation, the interior surfaces become very hot.
Safety during operation
CAUTION, HOT SURFACE
• This oven has been designed only for non-commercial household
use. It must not be altered in any way.
• During use, the oven interior surfaces become hot enough to cause
burns. Do not touch heating elements or interior surfaces of the oven
until they have had time to cool.
• Never store flammable materials in or near the oven.
• The oven surfaces become hot when the appliance is operated at a
high temperature for an extended period of time.
• When cooking, take care when opening the oven door as hot air and
steam can escape rapidly.

DANIELA
DAN90ABO
USER MANUAL
DANIELA
DAN90ABO
USER MANUAL
Pg 6 Pg 7
Safety during operation (Continued)
• When cooking dishes that contain alcohol, the alcohol may evaporated
due to the high temperatures and vapour can catch fire if it comes into
contact with a hot part of the oven.
• Use of high-pressure water cleaners or steam jet cleaners is not permitted
for cleaning.
• Frozen foods such as pizzas should be cooked on the wire grill. If the
baking tray is used, it may become deformed due to the great variation in
temperatures.
• DO NOT pour water into the oven bottom when it is hot. This could cause
damage to the enamel surface.
• The oven door must be closed during cooking.
• DO NOT line the oven bottom with aluminium foil and do not place any
baking trays or tins on it. The aluminium foil blocks the heat, whic may
result in damage to the enamel surfaces and cause poor cooking results.
• Fruit juices will leave stains, which can become indelible on the enamel
suraces of the oven. When cooking very moist cakes, use the deep pan.
• Does not rest bake ware on the open oven door.
• This appliance is not intended for use by persons (including children) with
reduced physical , sensory or mental capabilities, or lack of experience
and knowledge, unless they have been given supervision or instruction
concerning the use of the appliance by a person responsbible for their
safety.
• Only use the temperature probe recommended for this oven.
• If a cooking time is not entered, the oven will shut itself off after the lengths
of time indicated below.
• Always place oven racks in desired location while oven is cool. If a rack
must be moved while oven is hot, do not let potholder contact the heating
elements. Always use fry potholders. Moist or damp potholders on hot
surfaces may result in burns from steam. Do not let potholder touch hot
heating elements. Do not use a towel or other bulky cloth.
Children safety
• Warning: During use, accessible parts can get hot. Children should not be
present. Pets and children shouldn’t be left unsupervised or alone in the
vicinity of the appliance. Whether or not the item is in use, they shouldn’t
be permitted to lay close by the oven.
Children safety (Continued)
• Secure all loose garments, etc. before beginning. Tie long hair so that it
does not hang loose, and do not wear loose fitting clothing or hanging
garments, usch as ties, scaves, jewelry, or dangling sleeves.
• When children become old enough to use the appliance, it is the legal
responsibility of the parents or legal guardians to ensure that they are
instructed in safe operation of the appliance by qualified persons.
• Do not allow anyone to climb, stand, lean, sit, or hang on any part of an
appliance, especially on the door, warming drawer or storage drawer. This
can damage the appliance, and the unit may tip over, potentially causing
severe injury.
CAUTION:
Children’s items should not be kept inside appliances, cabinets above appli-
ances, or on the splashback. Children could sustain catastrophic injuries if
they climb on an appliance to reach something.

DANIELA
DAN90ABO
USER MANUAL
DANIELA
DAN90ABO
USER MANUAL
Pg 8 Pg 9
Cleaning safety
WARNING
Before cleaning the oven, make sure to turn off the oven and wait till it is cool.
Children should not perform clean-up or user maintenance. While the appliance
is still hot, avoid cleaning it. Some cleaning agents release foul smells when
they are applied to a hot surface. Burns from steam can be caused by wet
towels or sponges. DON’T clean the oven using a steam cleaner.
Oven exterior
• For cleaning both the interior and exterior of the oven, use a micro fibre
cloth and a mild cleaning agent or warm soapy water.
• Use a micro fibre cloth to dry.
• Do not use scourers, caustic cleaners or abrasive products.
Stainless steel oven fronts
• Do not use steel wool, scouring pads or abrasives. They may damage the
finish.
• For tough stains we recommend using Magic Stainless Steel Cleaner &
protector, follow the instructions on product for more information.
• To remove fingerprints and water stain we recommend using Magic
Stainless steel wipes
Oven interior
• Do not use coarse scouring pads or cleaning sponges.
• To avoid damaging the enamel oven surface, DO NOT use abbrasive
products such as Mr Muscle or window cleaners. ONLY use Magic Oven
and rangehood cleaner to safely clean your oven.
• Only use Non-Caustic oven cleaners.
Oven door glass
The oven door is equipped with three layers of glass placed against each
other. The inner & middle sheets can be removed for cleaning. If removed they
need to be placed back in the correct order as they use a reflective coating
has to face inward towards the oven cavity.
WARNING
• Whenever the door is separated from the oven, the clips should be flipped
open.
• Do not use harsh abrasive cleaners or sharp metal scrapers to clean the
oven door glas since they can scratch the surface, which may resulting in
shattering of the glass.
• When the door is mounted, removing some of the parts (the door glass or
some other part) from the door may result in injury.
Attention
Apply care when cleaning your inner glass door. The glass may break if you
use excessive force especially at the edges of the front sheet.
Accessories
Wash all bakeware and accessories after each use and dry with a kitchen tow-
el. To clean easily, soak in warm saopy water for about 30 minutes.
Disposal
Disposal Instructions
Disposing of the packaging material
• The material used to package this appliance is recyclable.
• Dispose of the packaging materials in the appropriate container at your
local waste disposal facility.
Disposing of old appliances
WARNING: Before disposing of old appliances, make them inoperable so that
they cannot be a source of danger. Removal of doors is also advised.
To do this, disconnect the appliance from the mains supply and remove the
mains lead.
To protect the environment, it is important that old appliances are disposed of
the correct manner.
• The appliance must not be disposed of with household rubbish.
• You can obtain information about collection dates and public refuse dis-
posal sites from your local refuse department or council.

DANIELA
DAN90ABO
USER MANUAL
DANIELA
DAN90ABO
USER MANUAL
Pg 10 Pg 11
Oven and accessories
A. Control Panel
G. Oven Rack
H. Guides for sliding the racks or baking pan out
F. Baking Pan / Drip Tray
L. Light bulb
Understanding your oven How to use your oven
The benefits of both traditional conventional ovens and more contemporary
fan assisted types are combined in one appliance with this multi-function oven.
It is a very versatile appliance that enables you to switch between several
cooking modesquickly and safely.
Note: Before using your appliance for the first time, we advise you to set the
thermostat to the highest setting and keep the oven on for roughly 30 minutes
with the door closed. Then allowfresh air into the ovenby opening the oven
door. The ingredients used to protect the oven during storage and up until it
is installed have evaporated, which is why the smell that is frequently noticed
during this initial use exists.
Notice: When using the oven, DO NOT place the included drip tray for gathering
oil or spills on the bottom area of the oven cavity. If you’re grilling meals or
using a rotisserie, use the bottom rack position for this (only available on
certain models). Avoid using aluminium foil to catch spills as well. Due to the
strong heat produced by the bottom heating element, damage may result if
either are put on the enamel base of the oven. Cookware should always be
placed on the grid that comes with the device when it is inserted, especially
when using the oven guidelines.

DANIELA
DAN90ABO
USER MANUAL
DANIELA
DAN90ABO
USER MANUAL
Pg 12 Pg 13
Positioning the oven trays & shelves
The Baking Pan or Oven Shelf can be located in any of the four height positions
in the oven.
Refer to the ‘Cooking Guide Table‘ for the recommended shelf position. When
fitting the trays or shelves, ensure they are fitted between the two wires that
are closet together as shown below.
Oven Shelves have a stop so that they are not fully withdraw by accident. To
fully remove the Oven Shelves, lift the front of the shelf slightly and withdraw
fully from the oven. Note that the Drip Tray / Baking pan does not have a
stop position and can be fully withdrawn interruption, so be careful not to
accidentally fully withdraw the tray.
Fit Trays and
Shelves
between bars
as shown
right
Locking Pin
To remove the Oven Shelf Sup-
port, push down on the wire
below the locking pin, Pull
away from the oven wall until
you can release the top of the
support from the holes in the
oven wall. Replace in reverse
procedure.
Oven Shelf fitted to chrome wire
Shelf Support
Before using for the first time
Setting and changing the current time
The oven only operates when the time has been set.
When the appliance is connected to the electrical supply or when there has
been a power cut, the symbol for the Time flashes automatically.
1. Use the or buttons, set the current time.
After about 5 seconds, the flashing stops and the clock displays the time of
the day set.
The appliance is now ready for use.
2. To change a time that has already been set, press the Clock functions
button repeatedly until the symbol time flashes. Use or buttons,
set the current time.
Operating the touch control panel

DANIELA
DAN90ABO
USER MANUAL
DANIELA
DAN90ABO
USER MANUAL
Pg 14 Pg 15
General Instructions
• When the selected function is lit, the oven begins to heat up or the time set be-
gins to count down.
• The oven light is switched on as long as an oven function has started.
• The oven light will turn off automatically when the oven is switched off.
• The oven light is switched on or off by pressing the light button
• Press the Pause/Off button once and the oven will pause cooking.
• Switch appliance off by pressing the Pause/Off button a second time.
Selecting the oven function
1. Switch on the oven with the Menu button.
2. Press the or buttons to select the desired oven function which will appear
in the display.
- A suggested temperature appears on the temperature display.
- Press the Start button, he oven begins to heat up.
Changing the oven temperature
1. Press the button first.
2. Press the or buttons to raise or lower the temperature.
The setting changes in steps of 5°C.
Thermometer symbol
• The slowly rising thermometer symbol indicates the oven is heating up.
• The three segments of the thermometer symbol lit up indicate the oven has
reached the set temperature.
Switching off the oven
Switch the appliance off by pressing the Pause/Off button twice.
Speed Cook
After an oven function is selected, with the use of the additional function Speed
cook , the empty oven can be pre-heated in a relatively short time.
Important: Do not put the food to be cooked into the oven, until Speed
cook is completed and the oven is operating using the desired function.
1. set the desired function. If necessary, change the suggested temperature.
The thermometer symbol lights up:
The bars flashing one after another show that Speed cook is operating. When
the set temperature is reached, the bars of the symbol all light up. An au-
dible signal sounds. The oven now continues heating according to the pre-set
oven function and temperature. You can now place the food in the oven.
Clock Functions
Countdown
To set a countdown. A signal sounds after the time has elapsed.
This function does not affect the operation of the oven.
Clock time
To set how long the oven is to be in use.
End time
To set when the oven is to switch off.
Timer
To set, change or check the time (See also section “Before Using for the First
Time“)
General instructions
After a clock function has been selected, the corresponding symbol flashes
for aprox. 5 seconds. During this time, the desired times can be set or modified
using the or buttons.
When the desired time has been set, the symbol continues to flash for approx.
5 seconds. After this the symbol lights up. The set Countdown begins to
count down.
The time set for Cook time and End time begins to count down after the
selected function starts.
Countdown
1. The countdown timer is only available with the oven in standby mode.
Press the clock Function button . The bell symbol flashes.
2. Set the desired Countdown time using the or buttons (max. 59
minutes).
After approx. 5 seconds the display shows the time remaining.
The symbol for Countdown lights up.
When the set time has elapsed, the alarm will sound 30 times.
Press any button to stop the alarm.

DANIELA
DAN90ABO
USER MANUAL
DANIELA
DAN90ABO
USER MANUAL
Pg 16 Pg 17
Cook time
1. Select an oven function and using the or buttons, select the temperature.
2. Press the Clock Functions button repeatedly until the symbol for Cook
time flashes.
3. Using the or buttons, set the desired cooking time.
The oven switches itself on. The symbol for Cook time lights up.
By repeatedly pressing the Clock Functions button, the current time can
be called up.
When the time has elapsed, an audible signal sounds 3 times.
The oven switches itself odd.
“0.00“ is displayed and the symbol for Cook time flashes.
To turn off the audible signal:
Press any button.
End time
1. Select an oven function and using or buttons, select the temperature.
2. Press the Clock Functions button repeatedly until the symbol for End
time flashes.
3. Using the or buttons, setthe desired switch-off (End) time.
The symbols for End time and Cook time light up.
The oven will automatically switch itself on.
By repeatedly pressing the Clock Functions button, the current time can
be called up.
When the time has elapsed, an audible signal sounds 3 times.
The oven switches itself off.
“0.00“ is displayed and the symbols for End time and Cook time flash.
To turn off the audible signal:
Press any button.
Cook time and End time combined
Cook time and End time can be used simultaneously, if the oven is to be
switched on and off automatically at a later time
1. Select an oven function and temperature.
2. Using the Cook time function, set the time that the dish needs to cook for,
e.g, 1 hour.
3. Using the End time function, set the time at which the dish is to be ready,
e.g. 14:05.
The symbols for Cook time and End time light up.
The oven switches on automatically at the time calculated, e.g. 13:05.
When the set cooking time has elapsed, an audible signal sounds 3 times.
The oven switches itself off, e.g. 14:05.
Child safety device
As soon as the child safety device is engaged, the appliance can no longer
be switched on.
Activating the child safety device
Press and hold the button until appears in the display.
The child safety device is now activated.
Deactivating the child safety device
Press and hold the button until disappears from the display.
The child safety device is now deactivated and the appliance is again ready
for use.
Activate or deactivate button sound (beep)
Switching off the button beep
1. Switch off the appliance using the Pause / Off button twice.
2. Press and hold and buttons at the same time until a signal sounds
(approx.2 seconds).
The button beep is now switched off.
Switching on the button beep
Press and hold and buttons at the same time until a signal sounds
(approx.2 seconds).
The button beep is now switched on again.

DANIELA
DAN90ABO
USER MANUAL
DANIELA
DAN90ABO
USER MANUAL
Pg 18 Pg 19
Oven Functions
Conventional mode
Conventional mode is when the top and bottom element turn on, also This is
a traditional, classic oven that has been refined for excellent heat distribution
and low energy usage. This is the traditional method of baking. It is best to
bake on only one shelf at a time in this function. Ideal for large cakes and
dishes that bake for several hours. This mode is best for baking cakes, fruit,
and foods in covered casserole dishes in the oven. Only use one dripping pan
or frying rack at a time while using convection cooking; otherwise, the heat will
be distributed unevenly. You may balance the amount of heat in the oven by
using the various rack heights that are available. Depending on whether the
dish requires more or less heat from the top, choose from among the several
rack heights.
Fan bake
The top, bottom, and fan will all turn on at the same time, ensuring consistent,
uniform heat throughout the oven allowing for faster pre-heating tim. Ideal for
dishes like lasagne that need to brown on top and also single trays of small
cakes or biscuits that bake in less than an hour or ready made frozen meals
that require no preheating time.
Multi-Cooking Mode
This mode allows for multiple heating elements to alternate throughout the
cooking process, fan force, top heating element, and bottom heating element
will all turn on and off alternately allowing for the air to cook and brown
food uniformly throughout its whole surface since the heat is steady and
homogeneous throughout the oven. As long as the cooking temperatures for
each dish remain the same, you can cook many dishes simultaneously in this
mode.
Pizza Bake
The pizza bake functions allows for the fan-force as well as bottom heating
elements to turn on. This mode allows for the oven to heat up quickly, with the
majority of the heat coming from the bottom. Pizza bake is best for cooking
pizzas or large roasts and other items that require high temperatures. Use
just one rack or tray at a time in the oven. But if more than one is utilised,
these must be changed in the middle of the cooking procedure.
Oven Functions continued
Pastry bake
Both the fan and the bottom heating element turn on. Excellent for sweet and
savoury pastry foods including cakes, muffins and cookies. Excellent outcomes
may also be had when cooking food that requiresheat from the bottom.
We reccomend placing the pan on the lowest shelf for optimum results.
Grill
For “finishing off” many meals, such as browning the top of potato gratin and
frittata, the grill is the best option. Use the grill to grill your favourite chicken,
fish, and steak as well as to toast bread.
Fan grill
The fan and top central heating elements turn on. By forcing air to circulate
throughout the oven, this set of features improves the efficiency of the heating
elements’ unidirectional thermal radiation. Perfect for roasting sensitive meat
and poultry parts. Larger things, such a whole chicken, should be placed on
the lower shelf places.
Fan force
The fan force mode is excellent for cooking on multiple shelves. The constant
temperature guarantees that baked goods rise properly. Cookies made with
fan forced have a crisp exterior and a mushy within. The fan and back heating
element turn on to ensure that the oven receives gentle heat that is distributed
evenly. This mode is perfect for baking and cooking delicate items, notably
cakes that require to rise, as well as for simultaneously preparing some
tartlets on three shelves. Here are a few illustrations: Cream puffs, savoury
puffs, and sweet and savoury biscuits
Defrost mode
Defrost mode is when the bottom of the oven’s andfan creates a circulation of
room temperature air around the frozenfood. All kinds of frozenfood canbe
defrosted using this method, particularly delicate foods that don’t require
heat, such ice cream cakes, cream or custard desserts, and fruit cakes, are
especially advised. The defrosting time is roughly cut in half when utilising a
fan. By employing the “Baking” mode with a temperature setting of 80 to 100,
the cooking procedure for meat, fish, and bread can be accelerated.
DANIELA
DAN90ABO
USER MANUAL
DANIELA
DAN90ABO
USER MANUAL
Pg 20 Pg 21
Oven Functions continued - Rotisserie
To start the turnspit, proceed as follows:
Insert the rotisserie rod “A” into the drive unit and groove “B” into bend “C”;
Turn the plastic handle “D” anti clockwise and slide the rack into the oven
runners ensuring that the rod “E” slots into the hole “F”;
The rotisserie rack must always be fitted in the middle of the oven (second
position from bottom); Choose appropriate function suitable with rotisserie.
Cooling ventilation
All Daniela ovens come withacooling fan that activates automatically when
the oven is heated in order to cool the appliance’s exterior. A typical airflow
may be heard leaving between the oven door and the control panel when
the fan is on.
Note: After cooking is complete, the fan continues to run until the oven has
completely cooled.
Automatic cut off
After lengthy use, the oven will automatically turn off the elements as a safety
measure. When the oven has been left on and forgotten about, this feature
offers protection. While the oven’s light and display remain on, the heating
process stops.
Temperature range: 1-105 degrees 16-hour running time
Temperature range: 105 to 200 degrees Duration: 8 hours
Temperature range:200–250 degrees Duration: 4 hours
Cooking advice
The oven provides a variety of options that let you cook any kind of food
in the best way possible. The following instructions are merely a general
outline that can be modified based on your individual experience as you gain
more experience using this multipurpose cooking appliance.
Pre-heating
The “Multi-Cooking” mode and the “Fast cooking” option can be used to
get the oven to the correct temperature as quickly as possible in order to
conserve energy if the oven needs to be preheated, which is typically the
case when cooking leavened dishes. The best cooking mode can then be
chosen after the food has been put in the oven.
Cooking on more than one rack
Use either the “Fan force” mode or the “Multi-Cooking” mode if you need to
cook food on many racks; these are the only modes that support this. Use the
“Fan force” option, which enables you to cook on three racks simultaneously,
when preparing delicate food on more than one rack (the 1st 3rd and 5th from
the bottom). The “Practical Cooking Advice” table contains a few examples.
Use the “Multi-Cooking” mode while cooking additional meals on different
racks, keeping the following advice in mind: Five racks are installed in the
oven. Use two of the three middle racks when using fan assisted cooking; the
lowest and highest racks receive hot air directly, which increases the risk of
delicate items being burned on these racks. Use the second and fourth racks
from the bottom as a general rule, placing the meals that require more heat
on the second rack from the bottom. Place the more delicate item on the
fourth rack from the bottom when cooking meat roasts, for instance, and the
roast on the second rack from the bottom when cooking other foods.

DANIELA
DAN90ABO
USER MANUAL
DANIELA
DAN90ABO
USER MANUAL
Pg 22 Pg 23
When cooking meals that require different cooking periods and temperatures,
establish an oven temperature that falls between the two requirements,
position the more delicate food on the fourth rack from the bottom, and
remove the food that needs to cook for a shorter amount of time first. Use the
grid on the top rack and the dripping pan on the lower rack.
Pizza bake
Use the “Pizza bake” mode to prepare pizza for the best results:
Use a light aluminium pizza pan and place it on the oven’s supplied grid to
start the oven’s preheating process.
Do not open the oven door frequently while the pizza is cooking.
If the pizza has a lot of toppings (three or four), we recommend adding
the mozzarella cheese on top halfway through the cooking process. If the
dripping pan is used, this will extend the cooking time and make it difficult to
get a crispy crust. Pizza cooked on two racks should be placed in the oven
after the oven has been prepared for at least 10 minutes, using the second
and fourth racks at a temperature of 220 degrees.
Cooking for fish and meat
Use a temperature setting between 180 and 200 when preparing white meat,
poultry, and fish. It is a good idea to start with a high temperature setting
(200–220) for a little period of time, then turn the oven down later for red
meat that should be well done on the outside while supple and juicy in the
interior.
Generally, the temperature setting should be lowered the larger the roast.
To catch the fat, lay the dripping pan beneath the meat in the centre of the
grid. Ensure that the oven’s centre is where the grid is placed when inserting
it. Use low rack heights for savoury roasts if you want to enhance the amount
of heat coming from below (especially duck and wild game).
Cleaning and maintenance
Disconnect the power source before cleaning or doing maintenance on your
oven. In order to prolong the life of your oven,theenamelled or stainless
steel parts should be washed with lukewarm waterwithout using any abrasive
powders or corrosive substances that could destroy them.
Stainless steel could become discoloured if not treated correctly or maintained
enough. Products that claim to be “oven cleaners” can be abrasive to enamel
if not used correctly. We reccomend using Magic oven cleaner to clean your
oven interior, this can be found on their website here.
https://rubbedin.com.au/product/magic-oven-and-rangehood-cleaner/
Never line the oven bottom of your oven with aluminum foil, as the consequent
accumulation of heat could compromise the cooking and even damage the
enamel. We reccomend using a micro fibre cloth to clean the glass door using
non-abrasive chemicals or sponges and dry it with a soft cloth.
Use only non caustic oven cleaners purchased from hardware stores or
supermarkets.
Avoid using abrasive detergents (for example cleaning powders, etc) and
abrasive sponges for dishes or acids (such as limescale remover, etc…) as
these could damage the enamel.
DO NOT USE ANY CHEMICAL AGENTS WHILE OVEN IS HOT
DO NOT USE A STEAM CLEANER TO CLEAN YOUR OVEN.

DANIELA
DAN90ABO
USER MANUAL
DANIELA
DAN90ABO
USER MANUAL
Pg 24 Pg 25
How to remove oven door
You can remove your oven door follow the steps below:
- Open the door so that it is fully open
- Lift up and turn the small levers situation ontop of the hinges on both side
- Grip the door on the two external sides, shut it slowly but not
completely and pull the door towards you, pulling it out of its seat.
Follow the steps backwards to place door back on oven.
Replace oven lamp
WARNING: Ensure that the appliance is switched off before replacing the
lamp to avoid the possibility of electric shock
· Disconnect the oven from the power supply by means of the omnipolar
switch used to connect the appliance to the electrical mains ;or unplug the
appliance if the plug is accessible ;
· Remove the glass cover of the lamp - holder;
· Remove the lamp and replace with a lamp resistant to high temperatures
(300Ԩ) with the following characteristics:
Voltage: 220-240V
Wattage: 2X25W
Type: E 14
Replace the glass cover and reconnect the oven to the mains power supply.
Installation
Installation of the appliance must be done by a qualified applianceinstallerwho
follows the directions given. Appliances are completely assembled as they
would be under normal use, with no parts removed. Daniela Appliances
declines all liability for faulty installation, which could cause harm to people,
pets, and other property. Important: - Before doing any modifications or
maintenance on the device, the power supply must be turned off.
DANIELA APPLIANCES PTY LTD DOES NOT ACCEPT RESPONSIBILITY FOR
ANY DEFECTS OCCURING DURING INSTALLATION.
The cabinet housing the built-in appliance needs to be suitable for it in order
for it to operate effectively. The cut out measurementsfor installation under
the counter are shown in the figure below.
The back panel of the cabinet unit must be taken off to ensure appropriate
ventilation. A 20mm space must be left between the oven and the backpanel.
The bench top or cook top must have a 50mm clearance from the oven. To
avoid condensation, the oven needs to be entirely sealed off from nearby
cupboards. The adjacent cabinets’ panels must be constructed from a heat-
resistant material. Cabinets with a veneer exterior, in particular, must be put
together using glues resistant to temperatures of up to 100 degrees.
Oven and Cabinet Dimensions

DANIELA
DAN90ABO
USER MANUAL
DANIELA
DAN90ABO
USER MANUAL
Pg 26 Pg 27
Installation
The appliance is usually supplied fitted with a power cord and 3 pinplug.
Install the cooker so that the plug is easily accessible.Plug the 3-pin plug
into a properly earthed, 15A general purpose power outlet. The supply cable
should be positioned so that it does not reach a temperature of more than 75
degrees along its entire length.
If the appliance is not supplied with a plug or if connecting the cable directly to
the mains, connection to the electricity supply must be made by an authorised
person in accordance with the Wiring Rules AS/NZS3000. The installation
must include a suitable isolating switch with a minimum contact opening of
3mm between the appliance and the mains. The isolating switch should be
sized according to the load on the data label and should comply with current
regulations (the earth wire should not be interrupted by the circuit breaker).
Before making the connection check that:
·The switch, wiring and electrical system can support the appliance load (see
data plate);
·The power supply system has an efficient earthing connection which complies
with the provisions of current regulations.
·The power outlet or omnipoar circuit-breaker must be easily accessible once
the cooker has been installed.
Replacing the power supply cable
If the supply cord or plug is damaged, it must be replaced by the manufacturer
or its service agent or a similarly qualified person in order to avoid hazard.
Technical Data
Service Information
It is a warranty requirement that proof of purchase must be provided when booking
a service call. Please be advised that without this proof of purchase, your warranty
may not be honoured.
All warranty will be voided, if not installed by a licensed technician or tradesman.
Please fill out the form below for future reference
Technician/Tradesman who installed
Company Name: _________________________________________________
Licence Number: _________________________________________________
Date of installation: _______________________________________________
NOTE: Model number and details are to be recorded below for future reference.
Please have the following information ready before calling our customer care
team.
Your order/appliance details:
Full name: _____________________________________________________
Order/Invoice Number: ____________________________________________
Place of purcahse: _______________________________________________
Oven Serial number ______________________________________________

DANIELA
DAN90ABO
USER MANUAL
DANIELA
DAN90ABO
USER MANUAL
Pg 28 Pg 29
MANUFACTURER GUARANTEE
This warranty is provided in Daniela Appliances Pty Limited ABN 92 614 898 869
You can contact our head office located in Smithfield NSW via phone: 02 9604
1. Warranty by Daniela
Under the following conditions*, this product’s guarantee is valid for 24 months
from the date of purchase. The guarantee includes free repair of any flaw resulting
from defective materials, components, or assembly or poor workmanship or
assembly
The conditions above mentioned are:
1. That the purchaser carefully follows all instructions packed with the product;
2. That the purchaser and/or installer carefully follows the installation instructions
provided and complies with electrical wiring regulations, gas and/or plumbing
codes;
3. That the purchaser carefully follows instructions provided in the owner’s
handbook relating to the proper use and care of the product and does not use
the product for any purpose other than the domestic use for which it has been
designed;
4. Commercial use of the product for professional or industrial purposes will void
this warranty;
5. That the product was purchased and installed in Australia
6. That this warranty does not extend to:
- consumable parts such as light bulbs or filters;
- damage to surface coatings caused by cleaning or maintenance using products
not recommended by this user manual.
- defects caused by normal wear and tear, accident, negligence, alteration, misuse
or incorrect installations.
- a product dismantled, repaired or serviced by any serviceman other than an
authorised service agent.
-a product not in possession of the original purchaser.
damage caused by power outages or surges
- damage caused by pests (eg. rats, cockroaches etc)
Missing parts are not covered by warranty.
Daniela Appliances Pty Ltd reserves the right to assess each request for missing
parts in a case by case basis.
Any parts that are not reported missing in the first week after purchase will not
provide free of charge.
Before making a warranty claim please ensure the steps below are undertaken
first.
(a) carefully check the operating instructions, user manual and the terms of this
warranty;
(b) have the model and serial number of the Appliance available;
(c) have the proof of purchase (e.g. an invoice) available;
Email our service team directly for fastest response time to your service call
The Australian Consumer Law requires the inclusion of the following statement with
this warranty:
Our goods come with guarantees that cannot be excluded under the Australian
Consumer Law. You are entitled to a replacement or refund for a major failure
and for compensation for any other reasonably foreseeable loss or damage. You
are also entitled to have the goods repaired or replaced if the goods fail to be of
acceptable quality and the failure does not amount to a major failure
Serving Sydney Since 1988
Daniela Appliances Pty Ltd
Unit 6/9 Hume Road
Smithfield NSW 2164
02 9604 1226
www.danielaappliances.com.au
Table of contents
Other Daniela Oven manuals

Daniela
Daniela DAN9MTB User manual

Daniela
Daniela DAN10MTP User manual

Daniela
Daniela DAN10MPB User manual

Daniela
Daniela DAN5TFS User manual

Daniela
Daniela DAN90ASO User manual

Daniela
Daniela DAN90AFS User manual

Daniela
Daniela DAN6FGS User manual

Daniela
Daniela DAN5AFS User manual

Daniela
Daniela DAN90ASS User manual