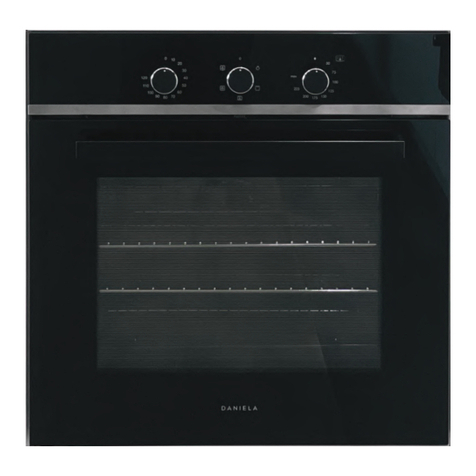
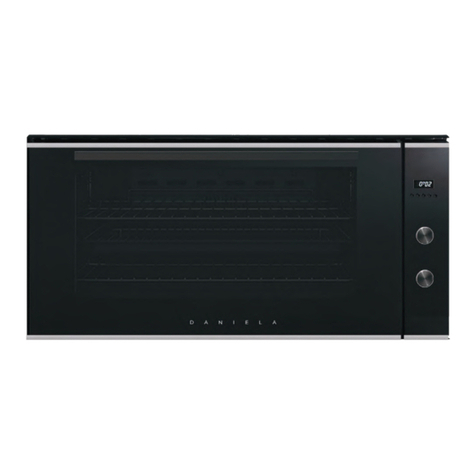
Daniela DAN90AFS User manual

Appliance User Manual
90CM BUILT IN 11 FUNCTION ELECTRIC OVEN
WITH ROTSSERIE
DAN90AFS
danielaappliances.com.au

PAGE 2
Daniela Appliances started in 1988. Formally known as Italnova,
the company began operating by selling other major leading brands.
Since then, Daniela Appliances has it’s own range, continuously
evolving, striving on delivering leading-edge quality products at
very competitive prices.
From an Italian heritage our brand Daniela was then established in
2005 from a father’s love to a daughter and naming it after Daniela, now
the new proprietor. Daniela has worked closely with her father for many
years learning from his decades of industry experience. Daniela with her
extensive knowledge and understanding of appliances, now continues
her father’s legacy with a modern flare.
Our products are extensively tested and come with ISO certification
certificates prior to importation. Daniela Appliances continuously
designs and sources the best parts, to bring you an elegant feel that will
last the test of time and for a third of the cost from a major brand.
Daniela Appliances is dedicated to oering our customers exceptional
products with exceptional service. Our commitment is to provide our
valuable customers the very best in technology with the very best in
safety that combines both the values that brings us market success.

PAGE 3
DAN90AFS
90CM BUILT IN 11 FUNCTION ELECTRIC OVEN
WITH ROTISSERIE

PAGE 4
IMPORTANT SAFETY & CARE INSTRUCTIONS
THESE WARNINGS ARE PROVIDED IN THE INTEREST OF SAFETY. PLEASE READ THEM
CAREFULLY BEFORE INSTALLING OR USING THE APPLIANCE.
• The manufacturer disclaims all responsibility if these instructions are not followed. Should
you have any doubts, seek the assistance of an authorised person.
To maintain the EFFICIENCY and SAFETY of this appliance, we recommend:
• Call only Service Centres authorized by DANIELA APPLIANCES PTY LTD
• Always use original Spare Parts.
1. This appliance is intended for non-professional use within the home and It is intended
solely for cooking foodstus, it comes with 24-month parts and labour warranty,
commencing date of purchase. Commercial warranty on Daniela Appliances are strictly
3 months from date of purchase.
2. Daniela Appliances Pty Ltd will not be held responsible for any damage due to: Incorrect
installation, improper, incorrect and irrational use.
3. Before using the appliance, read the user manual carefully. Always keep this user manual
close to hand since you may need to refer to it in the future.
4. After remove the packing, check that the appliance is not damaged. If you have any doubts,
NO NOT USE OR INSTALL the appliance, contact Daniela Appliances Pty Ltd or the store
where you purchased the appliance, failure in doing so may aect your warranty options.
5. Never leave the packing components (within the reach of children since they are a source
of potential danger).
SAVE THIS INSTRUCTION IN A SAFE PLACE FOR FUTURE REFERENCE
Thank you for choosing Daniela appliances!
Please read all instructions before using this appliance. This book contains valuable
information about operation, care and service. Keep it in a safe place for future
reference. Should the appliance be sold or transferred to another owner, or should
you move house and leave the appliance, always ensure that the book is supplied
with the appliance in order that new owner can be acquainted with the functioning of
the appliance and relevant warnings.
The manufacturer cannot be held responsible for any inaccuracies due to printing or
transcription errors that may be found in this handbook.
N.B.: the pictures shown in the figures in this handbook are purely indicative.

PAGE 5
6. The appliance must be installed only by a qualified person in compliance with the
instructions provided. The manufacturer declines all responsibility for improper installation
which may harm persons and animals and damage property.
7. The Appliance is not intended for use by persons (including children) with reduced
physical, sensory or mental capabilities, or lack of experience and knowledge, unless they
have been given supervised instruction concerning use of the appliance by a responsible
person for their safety. Cleaning and maintenance operations must not be carried out by
children without supervision.
8. The electrical safety of this appliance can only be guaranteed if the appliance is correctly
and eciently earthed, in compliance with current regulations on electrical safety. Always
ensure that the earthing is ecient; if you have any doubts call in a qualified electrician to
check the system. The manufacturer declines all responsibility for damage resulting from
a system which has not been earthed. plastic bags, foamed polystyrene, nails, etc.).
9. NOTE: When the oven is first used, an odour may be emitted, this will cease after a period
of use. This odour is due to temporary finish on oven liners and elements and also any
moisture absorbed by the insulation. It is recommended to burn out the excess finishing’s
on the liners of the oven before usage.
10. Ensure that the appliance is switched o before undertaking any maintenance,
by switching o the main switches and turning all knobs to “OFF” position.
11. The openings and slots used for ventilation and dispersion of heat on the rear and below
the control panel must never be covered.
12. The user must not replace the supply cable of this appliance. Always call an after-sales
servicing centre authorized by DanielaAppliances in the case ofcable damage or replacement.
13. This appliance must be used for the purpose for which it was expressly designed. Any
other use is considered to be improper and consequently dangerous. The manufacturer
declines all responsibility for damage resulting from improper and irresponsible use.
14. Parts of this appliance and its cooking surfaces, retain heat for considerable periods of time
after switching o when touching these areas before they have completely cooled down.
15. When the appliance is in use, the heating elements and some parts of the oven door
become extremely hot. Make sure you don’t touch them and keep children well away.
16. If you use the power code for single phase, the minimum cross-sectional area is 4mm2.
For three phases, the minimum cross-sectional area is 2.5 mm2.
17. The appliance that you have bought may be slightly dierent from the one illustrated in
this manual. Please refer to the information related to the model you have.
18. If the surface is cracked, switch o the appliance to avoid the possibility of electric shock.
(If the hob surface is of glass-ceramic or similar material and protects live parts).
19. A number of fundamental rules must be followed when using electrical appliances.
The following are of particular importance:

PAGE 6
PLEASE ENSURE YOU READ THESE INSTALLATION GUIDES, RULES, TERMS AND
CONDITIONS BEFORE CALLING FOR A SERVICE. FAILURE IN DOING SO MAY RESULT
IN DAMAGES TO THE APPLIANCE AND JOINERY – CHARGES MAY BE APPLICABLE AND
WARRANTY WILL BE VOIDED.
• Never allow the Mains Cable to be stretched, pulled or damaged if the appliance is moved
for cleaning etc. Do not use the appliance if the Mains Cable is damaged,
consult a qualified electrician.
• Do not modify or attempt to modify any of the characteristics of this appliance.
This would be dangerous to your safety.
• Do not leave the appliance outside under the sun, rain, etc.
• Do not touch any electrical appliance if hands or feet are wet or damp.
• Do not use the appliance bare footed.
• Do not allow the appliance to be used unsupervised by children or persons
unfamiliar with it.
• Do not use steam cleaners, as this may cause moisture build up.
• Do not use caustic oven cleaning products, abrasive chemicals, harsh solvents, wax
polish, metal scrapers or steel wool, as these may damage the cavity of your oven.
• Do not use harsh abrasive cleaners or sharp metal scrapers to clean the oven glass door
since they can scratch the surface, which may result in shattering of the glass.
• To clean both the electronic programmer window and the oven door, use a window
washing product applied to a soft cloth.
• Ensure that the appliance is switched o before cleaning.
• Warning: The glass on this door is made from a toughened material that can withstand
heat and cooling without breaking, however as a precaution do not wipe with cold water
while hot.
• Always clean after every use to avoid build up and the necessity of stronger
cleaning products.
• At the end of cooking, do not pick up oven or grill items (grid, rotisserie) with your bare hands.
• Never pull your appliance by the door handle.
• Do not grill with the oven door open.
• Do not use this appliance as a space heater.
• Do not use the base of the oven for cooking. This could damage the oven.

PAGE 7
• Do not use oven door as a shelf, bench or seat, and make sure that children are able
neither to climb nor sit on it.
• Do not push down on the open oven door.
• Before using your new oven, Run the oven at 200c Before using your oven for the first
time, heat it while empty for approximately 15 minutes. Please ensure you heat each
element in the oven before use.
• Note, that when first using the oven, ensure that the room is well ventilated (e.g. open a
window or use an extractor fan) and that persons who may be sensitive to the odour avoid
any fumes. It is suggested that any pets be removed from the room until the smell has ceased.
WARNING
• The appliance and the accessible parts of it will become hot during use. Be careful not to
touch the heated elements. Children must not be allowed to touch the appliance, unless
they are supervised continually.
• Only a qualified person in compliance with the instructions provided must install the
appliance. Appliance are fully assembled as in normal operation without any parts
removed. Daniela Appliances Pty Ltd declines all responsibility for improper installation,
which may harm persons and animals and damage property.
• Ensure that the appliance is switched o before undertaking any maintenance,
by switching o the main switches and turning all knobs to “OFF” position.

PAGE 8
INSTALLATION
• Remove all packaging, protective film and securing tape from the appliance.
• Position the appliance in a dry atmosphere.
• The following dimensions are provided as a guide for installation – your installer will carry
out the installation in accordance with the current regulations.
• Your installer will connect the power cable in accordance with the current regulations.
In order to ensure that the built-in appliance functions properly, the cabinet containing it
must be appropriate. The figure below gives the dimensions of the cut-out for installation
under the counter.
In order to ensure adequate ventilation, the back panel of the cabinet unit must be removed.
The oven must have a 40mm clearance between the oven and the rear timber panel.
The panels of the adjacent cabinets must be made of heat-resistant material. In particular,
cabinets with a veneer exterior must be assembled with glues which can withstand temperatures
of up to 100ºC.
In compliance with current safety standards, contact with the electrical parts of the oven must not
be possible once it has been installed.
The oven must be secured by 4 screws to the cabinet.

PAGE 9
ELECTRICAL CONNECTION
Those ovens equipped with a three-pole power supply cable are designed to operate with an
alternating current. The wire for earthling the appliance is yellow-green in colour.
FITTING ON A POWER SUPPLY CABLE
Opening the terminal board:
• Using a screwdriver, prize the bolt on the side tabs of the terminal board cover;
• Unscrew the bolt, pull open the cover of the terminal board.
To install the cable, proceed as follows:
• Remove the wire clamp screw and the three contact screws L-N –
• Fasten the wires beneath the screw heads using the following colour scheme:
Blue (N) Brown (L) Yellow-Green
• Fasten the supply cable in place with the clamp and close the cover of the terminal board.
CONNECTING THE SUPPLY CABLE TO THE MAINS
Install a standardized plug corresponding to the load indicated on the data plate. When
connecting the cable directly to the mains, install an omni polar circuit breaker with a minimum
contact opening of 3 mm between the appliance and the mains. The omni polar circuit breaker
should be sized according to the load and should comply with current regulations (the earth wire
should not be interrupted by the circuit breaker).

PAGE 10
The supply cable should be positioned so that it does not reach a temperature of more than
50ºC with respect to the room temperature, anywhere along its length, or protected by insulation
sleeping having an appropriate rating.
Before making the connection, check that:
• The electrical safety of this appliance can only be guaranteed if the oven is correctly and
eciently earthed, in compliance with regulations on electrical safety.
• Always ensure that the earthling is ecient; if you have any doubts call in a qualified
technician to check the system.
• The manufacturer declines all responsibility for damage resulting from a system which has
not been earthed.
• Before plugging the appliance into the mains, check that the specifications indicated on
the date plate (on the appliance and /or packaging) correspond to those of the electrical
mains system of your home.
• Check that the electrical capacity of the system and sockets will support the maximum
power of the appliance, as indicated on the data plate. If you have any doubts,
call in a qualified technician.
• If the socket and appliance plug are not compatible, have the socket replaced with a
suitable model by a qualified technician.
• The latter in particular, will also have to ensure that the cross section of the socket cables,
are suitable for the power absorbed by the appliance.
• The use of adapters, multiple sockets and /or extensions, is not recommended. If their
use cannot be avoided, remember to use only single or multiple adapters and extensions
which comply with current safety regulations. In these cases, never exceed the maximum
current capacity indicated on the single adapter or extension and the maximum power
indicated on the multiple adapter.
• The plug and socket must be easily accessible. IMPORTANT
• If the oven is to work properly, the kitchen housing must be suitable.
• The panels of the kitchen unit that are next to the oven must be made of a
heat resistant material.
• Ensure that the glues of units that are made of veneered wood can with stand
temperatures of at least 120 ºC.
• Plastics or glues that cannot withstand such temperatures will melt and deform the unit,
once the oven has been lodged inside the units, electrical parts must be completely
insulated. This is a legal safety requirement.

PAGE 11
• All guards must be firmly fixed into place so that it is impossible to remove them without
using special tools.
• Remove the back of the kitchen unit to ensure an adequate current of air circulates around
the oven. The hob must have a rear gap of at least 45 mm.
TECHNICAL SPECIFICATIONS
• DURING USE THE APPLIANCE BECOMES HOT! CARE SHOULD BE
TAKEN TO AVOID TOUCHING HEATING ELEMENTS INSIDE THE OVEN.
• ACCESSIBLE PARTS MAY BECOME HOT DURING USE. YOUNG
CHILDREN SHOULD BE KEPT AWAY.
• DO NOT USE HARSH ABRASIVE CHEMICALS TO SHARP METAL
SCRAPERS TO CLEAN THE OVEN GLASS!!! THEY CAN SCRATCH THE
SURFACE, WHICH MAY RESULT IN THE SHATTERING OF THE GLASS.
MODEL F948100STMR, F948101STIX
Power Source 220-240V – 50/60Hz
Volume (usable capacity) 105 L
Output Power 3,166-3,660 W
Weight Net 51kg approx
Weight Shipping 58.5kg approx
Dimensions (W x H x D)
Outside: 900 x 480 x 560.5 mm
Inner: 657 x 435 x 351 mm
Cutout: 867 x 470 x 550mm

PAGE 12
This multifunction oven combines the advantages of traditional convection oven with those of the
more modern fan assisted models in a single appliance.
It is an extremely versatile appliance that allows you to choose easily and safely between
dierent cooking modes.
Notice: The first time you use your appliance, we recommend that you set the thermostat to the
highest setting and leave the oven on for about half an hour with nothing in it, with the oven door
shut. Then, open the oven door and let the room air in. The odour that is often detected during
this initial use is due to the evaporation of substances used to protect the oven during storage
and until it is installed.
Notice: Place the dripping pan provided on the bottom shelf of the oven to prevent any sauce
and/or grease from dripping onto the bottom of the oven only when using the rotisserie (only
available on certain models).
Never place anything on the bottom of the oven during operation as this could damage the
enamel finishing. Place your cookware (dishes, aluminium foil, etc.) On the racks provided with
the appliance inserted especially along the oven guides.
HOW TO USE YOUR OVEN
A. Control Panel
G. Oven Rack
H. Side Support Rails
F. Baking Tray with Grill Insert

PAGE 13
Notice: to use the oven in manual mode (not using the end cooking time programmer);
the symbol must be aligned with the reference mark on the control panel.
ROTISSERIE
To start the rotisserie, proceed as follows:
• Insert the rotisserie rod “A” into the drive unit and groove “B” into bend “C”;
• Turn the plastic handle “D” anti-clockwise and slide the rack into the oven runners ensuring
that the rod “E” slots into the hole “F”;
• The rotisserie rack must always be fitted in the middle of the oven
(second position from bottom)
• Press the Oven function selection or to select setting

PAGE 14
BEFORE USING FOR THE FIRST TIME
SETTING AND CHANGING THE CURRENT TIME
The oven only operates when the time has been set.
When the appliance is connected to the electrical supply or when there has been a power cut,
the symbol for Time flashes automatically.
• To change a time that has already been set, press the Clock function button
repeatedly until the symbol for Time flashes.
• Using the or button, set the current time. After about 5 seconds, the flashing
stops and the clock displays the time of day set.
The appliance is now ready for use.
GETTING TO KNOW THE APPLIANCE
The appliance can be operated in test mode for testing or performing all operating steps.
The oven will not heat up during the test.
SWITCHING ON THE TEST MODE
1. Switch o the appliance using the On/O button.
2. Press and hold and buttons at the same time until an acoustic signal is heard
and “d” lights up in the display.
SWITCHING OFF THE TEST MODE
1. Switch o the appliance using the On/O button.
2. Press and hold and buttons at the same time until an acoustic signal is heard
and “d” goes up in the display.
OPERATING OF OVEN
• The oven light is switched on as long as an oven function is started.
• The oven light is switches o when the appliance switched o automatically.
The oven light is switched on or gone o by pressing the and buttons in turn, within
approx. 2 seconds when the appliance is switched o.
• Switch appliance o using the On/O button.

PAGE 15
THERMOMETER SYMBOL
• The slowly rising thermometer symbol indicates how hot the oven is as it heats up.
• The three segments of the thermometer symbol show that Fast Warm Up is working.
CHANGING THE OVEN FUNCTION
To change the oven function, Press the or button repeatedly until the desired oven
function is displayed.
SWITCHING OFF THE OVEN
Switch o the appliance using the On/O button.
PRE-HEAT POWER BOOST
After an oven function is selected, with the use of the additional function “power boost “
the empty oven can be pre-heated in a relatively short time.

PAGE 16
IMPORTANT
Do not put the food to be cooked into the oven, until the power boost is complete and the
oven is operating using the desired function.
• Select your desired function and If necessary, change the pre-programmed intuitive cooking
temperature.
• Press the “Power Boost” button. The symbol lights up:
• The bars flashing one after another show that Power Boost is in operation.
• When the temperature set is reached, the bars of the heat indicator light up.
• An audible signal sounds.
• The oven now continues heating according to the pre-set oven function and temperature.
You can now place the food in the oven.
MEMORY FUNCTION
The Memory function can be used to save a setting/function which is frequently used.
1. Set oven function, temperature and If necessary the clock functions Cook time and/or
End time.
2. Press and hold the button for approx. 2 seconds, until an acoustic signal sounds. The
setting is saved.
To save another setting, press the button for approx. 2 seconds. The previously saved
setting is replaced by the new one.
STARTING THE MEMORY FUNCTION
1. Switch the oven on using the On/O button.
2. Press the button call up the saved setting.
CLOCK FUNCTIONS
MINUTE MINDER
To set a countdown. A signal sounds after the time has elapsed.
This function does not aect the operation of the oven.
COOK TIME
To set how long the oven is to be in use.
C

PAGE 17
END TIME
To set when the oven is to switch o again.
TIME
To set, change or check the time (See also section “Before Using for the First Time”)
GENERAL INSTRUCTIONS
• After a clock function has been selected, the corresponding symbol flashes for approx.
5 seconds. During this time, the desired times can be set or modified
using the or button.
• When the desired times has been set, the symbol continues to flash for approx. 5 seconds.
• After this the symbol lights, up. The set Countdown begins to count down.
• The time set for Cook time and End time begins to count down after the selected
function starts.
MINUTE MINDER
• Press the Clock Function button repeatedly until the symbol for Minute Minder flashes.
• Set the desired Minute Minder time using the or button (max. 59.00 minutes).
• After approx. 5 seconds the display shows the time remaining.
• The symbol for Minute Minder lights up.
• When the time set has elapsed, an audible signal sounds for 1 minutes. “0.00” lights up and
the symbol for Minute Minder flashes.
To turn o the audible signal: Press any button.
COOK TIME
• Select oven function and using or button select temperature.
• Press the Clock Function button repeatedly until the symbol for Cook time flashes.
• Using the or button set the desired cooking time.
• The oven switches itself on. The symbol for Cook time lights up.
• By repeatedly pressing the Clock Function button, the current time can be called up.
• When the time has elapsed, an audible signal sounds for 3 times.
• The oven switches itself o. “0.00” is displayed and the symbol for Cook time flashes.
• To turn o the audible signal: Press any button.

PAGE 18
END TIME
• Select oven function and using or button select temperature.
• press the Clock Function button repeatedly until the symbol for End time flashes.
• Using the or button set the desired switch-o time.
• The symbols for End time and Cook time light up.
• The oven will automatically switch itself on.
• By repeatedly pressing the Clock Function button, the current time can be called up.
• When the time has elapsed, an audible signal sounds for 3 times.
• The oven switches itself o. “0.00”is displayed and the symbols for End time and Cook
time flash.
• To turn o the audible signal: Press any button.
DELAYED COOKING - COOK TIME AND END TIME COMBINED
Cook time and End time can be used simultaneously, if the oven is to be switched on and o
automatically at a later time.
• Select oven function and temperature.
• Using the Cook time function, set the time that the dish needs to cook for, e.g. 1 hour.
• Using the End time function, set the time at which the dish is to be ready for, e.g. 14:05.
• The symbols for Cook time and End time light up.
• The oven switches on automatically at the time calculated, e.g. 13:05.
• When the set cooking time has elapsed, an audible signal sounds for 3 times.
• The oven switches itself o, e.g. 14:05.
OTHER FUNCTIONS
SWITCHING OFF THE DISPLAY
You can save energy by switching o the display.
SWITCHING OFF THE DISPLAY
• If required, switch o the appliance using the On/O button.
• Press the Clock Function button and the button at the same time until the display
goes out.
• As soon as the appliance is switched on again, the display comes on automatically. When the
appliance is next switched o, the display goes out again.

PAGE 19
SWITCHING ON THE DISPLAY
• If required, switch on the appliance using the On/O button.
• Press the Clock Functions button and the button at the same time until the
display comes on again.
CHILD SAFETY DEVICE
As soon as the child safety device is engaged, the appliance can no longer be switched on.
ACTIVATING THE CHILD SAFETY DEVICE
• If necessary, switch on the appliance using the On/O button.
• No oven function must be selected.
• Press and hold the button until appears in the display.
• The child safety device is now activated.
DEACTIVATING THE CHILD SAFETY DEVICE
• To activate, switch on the appliance using the On/O button.
• Press and hold the button until disappears from the display.
• The child safety device is now deactivated and the appliance is again ready for use.
BUTTON BEEP
SWITCHING OFF BUTTON BEEP
• Switch o the appliance using the On/O button.
• Press and hold and buttons at the same time until a signal sounds
(approx. 2 seconds).
• The button beep is now switched o.
SWITCHING ON BUTTON BEEP
• Press and hold and buttons at the same time until a signal sounds
(approx. 2 seconds).
• The button beep is now switched on again.

PAGE 20
USE
LIGHT
This function turns the light on in your oven. Useful for when cleaning.
DEFROST
This function operates by using the fan only. The air is distributed inside the oven
allowing for food to defrost at a quicker rate, and without protein alteration.
CONVECTION
The top and lower heating element is switched on. Heat travels to the centre of
the oven by natural conduction. Perfect for when you are wanting to keep foods
moist while cooking or for foods that need to be cooked low and slow. Perfect
for roasts, cakes, casseroles, ribs, etc.
FAN FORCED
Both the fan and rear element operate together when using this function. This
function is perfect for multi-layer cooking and is suitable for all forms of roasting
and baking. Perfect for cookies, meringues, roasts, pastries, etc.
GRILL
This is perfect for grilling and gratin. This function must always be used with
half open door and control protection in position. For best results use with
a minimum temperature of 210 degrees. For best results use the to 3 shelf
positions when using this function.
FAN GRILL
This function utilises the rear fan and the full grill at the same time. The air
which is heated is circulated and evenly distributed around the oven. For best
results use with a minimum of 210 degrees. For best results use the to 3 shelf
positions when using this function. When using this function place your food
onto the frill inset rack to allow for air to flow between your food and the tray
below it. If used properly, there is no need to rotate your food when using this
function. Perfect for grilling meat, chicken, fish, sausages etc.
FUNCTION
Table of contents
Other Daniela Oven manuals

Daniela
Daniela DAN10MPB User manual

Daniela
Daniela DAN90ASO User manual

Daniela
Daniela DAN9MTB User manual

Daniela
Daniela DAN6FGS User manual

Daniela
Daniela DAN10MTP User manual

Daniela
Daniela DAN90ABO User manual

Daniela
Daniela DAN5AFS User manual

Daniela
Daniela DAN90ASS User manual

Daniela
Daniela DAN5TFS User manual