- 4 -
Powering ON and OFF
a. Short press the button to turn on the main unit.
b. When the main unit powers on, the user mode menu temporarily appears. From
this menu, press the or button to select either wireless mode or simulation
mode. If you do nothing, the unit will default to wireless mode. .
• Use the Wireless mode on the water.
• Use Simulation mode for learning on how to use the system with simulated sonar
data. Access Simulation mode by pressing the button once under user mode.
c. Press button for 3 second to turn off the fish finder.
• Press the button until Depth upper limit appears, Off (0 meter) is the
default setting.
However in some certain situation, you could
also manually select a depth range. .
For example, if you want to see the sonar
image of the 6~12M depth segment, then the
depth upper limit should be set to 6m and
depth lower limit to 12m. .
c. Shallow alarm (Off, 1 to 45 meter)
Press the button until Shallow alarm appears. Select Off for no Shallow alarm,
or select 1 to 45 to set the alarm depth. The main unit will make a sound when the
current water depth is equal to or less than the shallow alarm's setting.
d. Fish icon (Off or On)
Press the button until Fish icon appears. Select either Off to view “raw” sonar
returns, or On to view Fish symbols. Fish icon uses advanced signal processing
to interpret sonar returns,and will display a Fish Symbol when very selective
requirements are met. A select number of possible fish returns will be displayed
with their associated depth. .
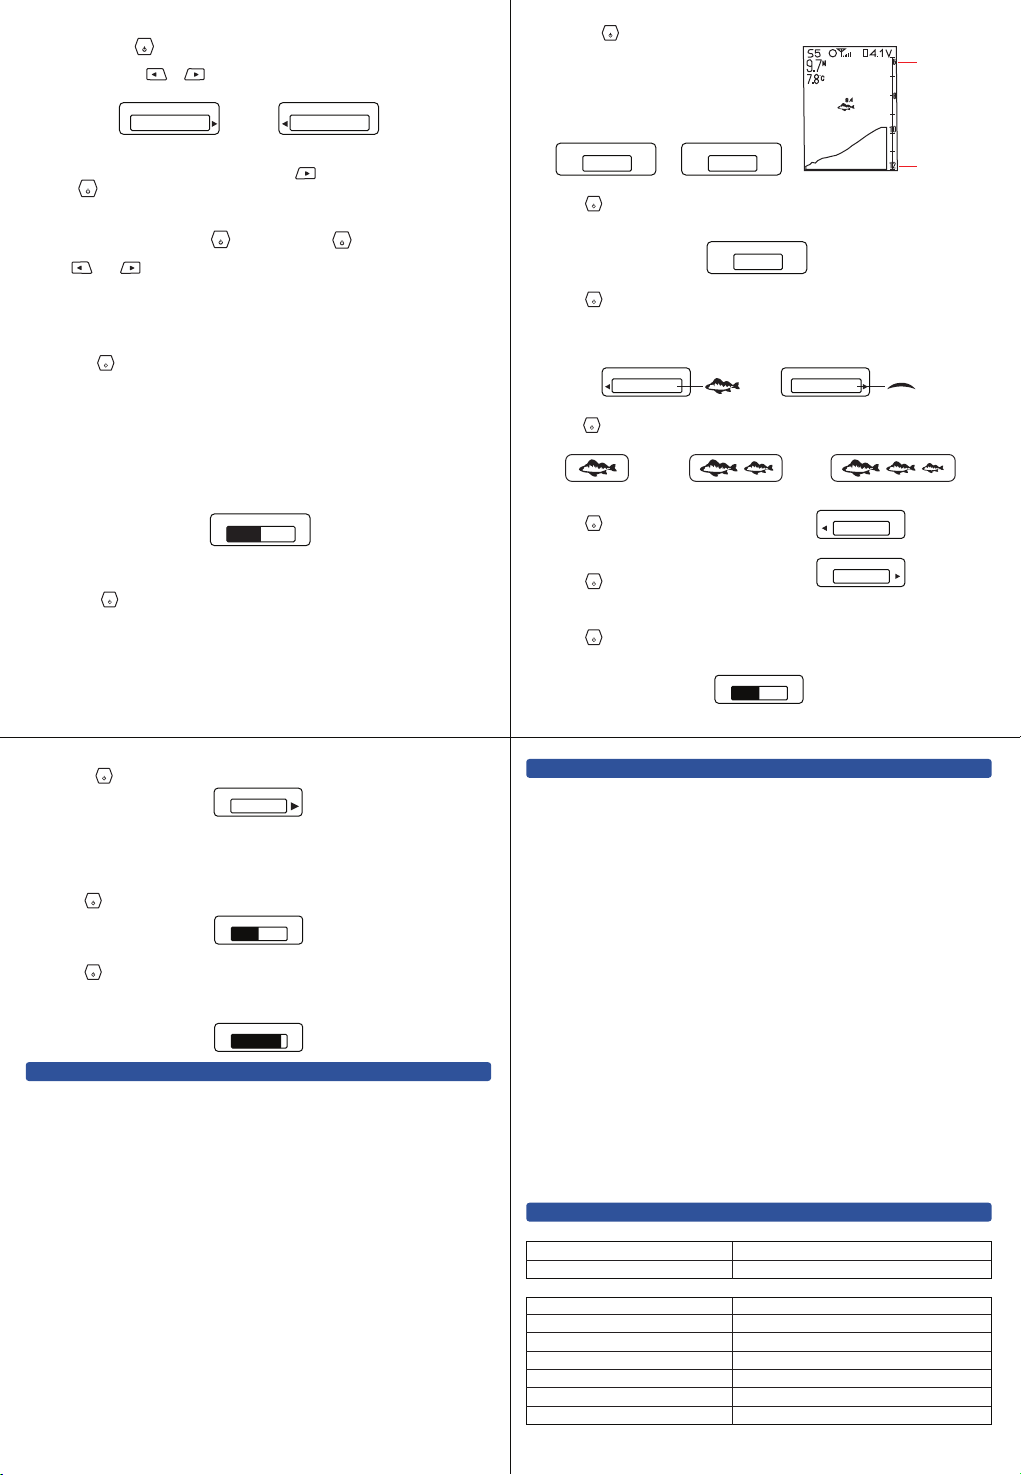
e. Fish alarm (Off, Large, Large/Medium, All)
Press the button until Fish alarm appears. Select “Off” for no fish alarm Or
select one of the following symbols to set the alarm. .
f. Units (M/°C, M/°F, Ft/°C,Ft/°F)
Press the button until Units appears.
Select either M/°C, M/°F, Ft/°C, Ft/°F.
g. Sonar color (Blue, Yellow, Red)
Press the button until Sonar color appears.
Select either Blue, Yellow or Red to suit your viewing preferences.
h. Low battery alarm (Off, 3.6V to 4.2V)
Press the button until Low battery alarm appears. Select “Off” for no battery
alarm or select from 3.6V to 4.2V to set the alarm. The main unit makes sounds
when the current battery voltage is equal to or less than the menu setting.
English
German
French
Italian
Spanish
Russian
Bulgarian
Chinese
Japanese
Korean
Dutch
Swedish
Polish
Finnish
Greek
Danish
Czech
Portuguese
Romanian
Hungarian
Slovak
j. Brightness (1 to 9)
Press the button until Brightness appears. There are 9 levels for you to adjust
the brightness of backlight.
k. Chart speed (1 to 9)
Press the button until Chart speed appears. Chart Speed control how fast the
sonar information moves across the screen. To achieve better images, try
adjusting the Chart Speed level to match the actual condition: stationary, drifting
slowly or running you boat at different speed. .
1. Main Unit .
Follow these simple procedures to ensure your main unit to deliver top
performance. .
• If the unit comes into contact with salt spray, wipe the affected surfaces with a
cloth dampened in freshwater. .
• Do not use a chemical glass cleaner on the lens - this may cause cracking in the
lens. .
• When cleaning the LCD protective lens, use a chamois and non-abrasive, mild
cleaner. Do not wipe while dirt or grease is on the lens. Be careful to avoid
scratching the lens. .
• Never leave the unit in a closed car or trunk - the extremely high temperatures
generated in hot weather can damage the electronics. .
2. Wireless Sonar Sensor .
• After using the sensor in salt water, wipe the affected surfaces with a clothdamp-
ened with fresh water. The contact pins at the bottom must be rinsed with fresh
water after exposure to salt water to prevent corrosion. .
• If the sensor remains out of the water for a long period of time, it may take some
time to wet it. .
• When returned to the water. Small air bubbles can cling to the surface of the
sensor and interfere with proper operation. Wipe the face of the sensor with a wet
cloth to remove them. .
• Never leave the sensor in a closed car or trunk - the extremely high temperatures
generated in hot weather can damage the electronics. .
1. The main unit loses signal, “NO SIGNAL” appears.
a.
b.
c.
d.
e.
2. When in very shallow water, I get gaps in the bottom reading and
inconsistent digital depth indication.
The wireless sonar sensor will work reliably in water 2 feet (0.7 meters) or deeper.
The depth is measured from the sensor. A wireless sonar sensor to main unit
distance of greater than 656 feet (200 meters) may cause intermittent screen
display. Excessively rough water may cause the sensor to submerge, again losing
contact.
3. The screen jumps and the bottom has an abrupt change. Sometimes a
vertical line is missing or a black line from top to bottom is displayed.
This screen image jump is due to an automatic change in depth. New returns
graphed at a different scale will not match up with the historic data already
graphed at a higher or lower scale. Vertical lines can also occur as the radio signal
from the wireless sonar sensor is lost and then regained in rough water conditions.
.
The wireless sonar sensor uses line-of-sight wireless technology. If objects
are placed between the main unit and the sensor, reception may be lost.
The wireless sonar sensor depth range is 2 to 147 feet (0.7 to 45 meters).
Erratic readings may occur in water that is shallower than 2 feet. In addition,
because of the nature of sonar, this product is not intended for use in swimming
pools or small enclosed bodies of water. .
Reeling the wireless sonar sensor too fast can cause loss of signal and the
screen will freeze. .
Check the buoyant balance between the wireless sonar sensor and your
tackle. Over 0.2 ounce will submerge the sensor causing signal loss.
The wireless sonar sensor may not obtain its maximum RF distance of 656 feet
(200 meters) unless the water is smooth. Waves or chop may reduce the RF
range significantly. .
Input Power
Display Type
Power requirement
Sonar operation Frequency
Sonar coverage
Depth capability
Surface water temperature
Wireless operational frequency
Wireless operational range
Fish Finder
Wireless sonar sensor
3.7 Volt rechargeable lithium battery
2.8 inch colour TFT LCD display
3.7 Volt rechargeable lithium battery
125 KHZ
90 degree
45 meters (147feet) /0.7 meters (2feet)
built in transducer
433.92 MHz
200 meters (656 feet)
MAINTENANCE
TROUBLESHOOTING
SPECIFICATION
- 5 -
- 6 - - 7 -
Fish icon
On
Unit
M / °C
Sonar color
Blue
Low battery alarm
Off 4.2
Language
English
Brightness
1 9
Chart speed
1 9
User mode
Wireless
User mode
Simulation
Sensitivity
110
Depth upper limit
Auto 45
Depth lower limit
Off 45
Shallow alarm
Off 45
Fish icon
Off
MENU
MENU
MENU
MENU
MENU
MENU
MENU
MENU
i. Language
Press the button until Language appears. Select the following display
languages for menus: .
MENU
MENU
MENU
MENU
The Menu System of Main Unit
A simple menu system allows you to access your main unit adjustable settings. To
activate the menu system, press button. Press the key repeatedly to display
the main unit menu settings, one at a time. When a menu setting is on the display,
use the and button to adjust the menu setting. Menu settings are removed
from the screen automatically after several seconds. In normal operating mode,
most menu settings saved to memory will not return to their default values when
the unit is turned off. See individual menu choices for more information.
a. Sensitivity (1 to 10)
• Press the button until Sensitivity appears. Sensitivity determines how echoes
will be displayed on the screen. .
• Increasing the sensitivity will make you see more details on the screen. In such
situations when you see too much clutter on the screen, decreasing the sensitivity
will play an effect. The larger the sensitivity is, the more relatively strong sonar
returns the screen will display. If the sensitivity is decreased too low, most sonar
returns (which maybe fish) will not be displayed. .
• In situation while water is clear or very deep, try increasing the sensitivity, which
will let you see even the very weak returns. However in situation while water is
turbid, try decreasing the sensitivity, which will make only the useful echo be
showed on the screen and the noise will be omitted. .
b. Depth lower limit (Auto, 1 to 45 meter) and Depth upper limit (Off, 1 to 45 meter)
Depth lower limit and Depth upper limit determine in which portion the bottom will
display in the screen. .
• Press the button until Depth lower limit appears, Auto is the default setting.
When the depth lower limit in Auto, the lower range will be adjusted by the unit to
follow the bottom, which will keep the bottom always display in a proper portion on
the screen. .
NOTE: In manual operation, if the current depth is greater than the lower range
settings, the bottom will not be visible on the display. Select Auto to return to
automatic operation. .
MENU
MENU
MENU
MENU
Depth upper
limit
Depth lower
limit
Large Only Large and medium Fish All Fish


