Dantherm 4000 Series User manual

DC Air Conditioner 4000/6000
Service manual
Rev. 2.0
en

Der tages forbehold for trykfejl og ændringer
Dantherm no se Responsabiliza por Cambio y Posibles Errores
Dantherm can accept no responsibility for possible errors and changes
Irrtümer und Änderungen vorbehalten
Dantherm n’assume aucune responsabilité pour erreurs et modications éventuelles

Introduction
Overview
This is the service manual for the Dantherm DC Air Conditioner 4000/6000 series.
Please see the below table of content for further information about the sections.
This service manual is designed for technicians who install and maintain the DC Air
Conditioner, as well as the users of the unit
Copying of this service manual, or part of it, is forbidden without prior written permission
from Dantherm Air Handling A/S.
Dantherm reserves the right to make changes and improvements to the product and the
service manual at any time without prior notice or obligation.
This service manual covers the following main topics:
Introduction .....................................................................3
Overview .............................................................................3
Warning ..............................................................................4
Product description ..............................................................5
Overall description ....................................................................5
Electronic control description..........................................................9
Connections .........................................................................10
Operation. . . . . . . . . . . . . . . . . . . . . . . . . . . . . . . . . . . . . . . . . . . . . . . . . . . . . . . . . . . . . . . . . . . . . . . . . . . . 12
Installation. . . . . . . . . . . . . . . . . . . . . . . . . . . . . . . . . . . . . . . . . . . . . . . . . . . . . . . . . . . . . . . . . . . . . . . . . . . 15
Service Guide .................................................................. 18
Preventative maintenance. . . . . . . . . . . . . . . . . . . . . . . . . . . . . . . . . . . . . . . . . . . . . . . . . . . . . . . . . . . . 18
Spareparts ...........................................................................20
Technical data. . . . . . . . . . . . . . . . . . . . . . . . . . . . . . . . . . . . . . . . . . . . . . . . . . . . . . . . . . . . . . . . . . . . . . . . 22
Electrical schematics .................................................................23
Cooling schematic ...................................................................27
Declaration of conformity ............................................................28
Index ................................................................................29
Introduction
Target group
Copyright
Reservations
Table of contents
3
en
DC 4000/6000 OIM 12_2015

Warning
This installation manual and the product use various displays and labels to ensure safe use.
Failure to follow these instructions could result in injury, death or damage to equipment.
Ignoring these displays and labels and incorrectly using the product could have results as
classied below.
Please read the following warning symbol information before reading the rest of this section,
and be sure to strictly observe all instructions.
This product is not intended for use by persons (including children) with reduced physical,
sensory or mental capabilities, or lack of experience and knowledge, unless they have been
given supervision or instruction concerning use of the product by a person responsible for
their safety.
Children should be supervised to ensure that they do not play with the product.
If the supply cord is damaged, it must be replaced by the manufacturer, its service agent or
similarly qualied person in order to avoid a hazard.
Failure to follow these instructions could result in death or serious injury
Failure to follow these instructions could result in injury or property damage.
This symbol means something that should NOT be done
Project safety is your responsibility!
Follow the instructions in this manual regarding the installation method and installation
orientation. All work should be performed by qualied personal using safe work practices.
All proper personal protective equipment should be used. PPE required for this installation
includes, but is not limited to:
• Safety glasses
• Hard hat
• Safety shoes
• Hearing protection
• Cut resistant gloves
• Face shield
• Proper work attire (long sleeve shirt and long pants)
Please strictly observe the following: Special Skill is required to install the Dantherm products.
Non-qualied personnel should not attempt any of the actions shown in this installation
guide. Dantherm shall not be responsible for improper installation or any accidents, damage,
or injury resulting from improper installation.
Introduction
General precaution
4

Product description
Overall description
This section describes the overall product and its functionality
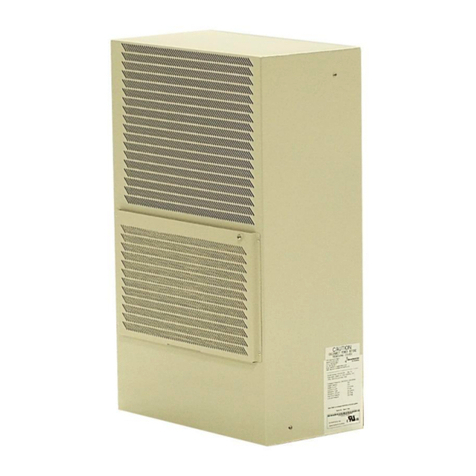
The Air Conditioner is designed to control the internal temperature of an outdoor enclosure.
The Air Conditioner removes dissipated heat from electronic equipment and is designed to
maintain correct temperature for electronic equipment.
This manual covers a series of air conditioners. Models available are:
Enclosure
size inch
Cooling
capacity/
btu
Heater
power /watt Voltage
External over
current
protection / A
Minimum supply
cord
dimension
H*W*D
29 -17.3-
11.3
4000 500 48VDC
(40-60 VDC) 15A DC AWG-10
48VDC
(40-60 VDC) 20A DC AWG-10
6000 500
This table shows the accessories available from supplier
No Description
707585 Air Filter, A/C 4000
Introduction
Model overview
Available
accessories
DC4000/6000 OIM 12_2015
5
en

Overall description, continued
This illustrates the unit’s outdoor view:
The table shows the part description for the outdoor parts shown in Fig. 1:
Part Description
1 Condenser air outlet
2 Removable front cover
3 Condenser Air inlet
This air conditioner includes a condensate
drain in the bottom of the unit which
routes condensed water away from the
unit..
Outdoor view
1
2
3
Fig. 1
Outdoor part
description
Drainage
Fig. 2
6

Overall description, continued
This illustrates the unit’s indoor view:
Fig. 3
1
3
2
4
The table shows the part description for the indoor parts shown in Fig. 3:
Part Description
1 Internal cooling controller
2 Evaporator fan
3 Removable front cover
4 Evaporator outlet
Introduction
Indoor part
description
DC4000/6000 OIM 12_2015
7
en

Overall description, continued
The illustration and table below show the airow of the Air conditioner. The two air ows
(internal/external) operate separately. External air is only used to cool down the condenser
which dissipates the heat absorbed by the indoor evaporator. The air ows are not mixed.
InternalExternal
Fig. 4
Warm, internal air is drawn into the unit by the internal evaporator fan, through the
evaporator, and then released into the enclosure, through the evaporator opening.
Cold, external air is drawn into the unit by the condenser fan, and routed through the
condenser, where it is cooling down the condenser. The air is returned to the external
environment after it passes through the condenser.
The external air inlet in the bottom of the unit, has an optional pre-lter. This will reduce the
instrusion of leaves or bugs in the air inlet.
The slide track in the bottom of the unit allows the user to slide in the pre-lter.
Accessory Embedded
Fig. 5
Functionallity
Internal air ow
External air ow
Filters
8

Electronic control description
This section describes key features of the electronic control and how it operates.
Never perform installation, maintenance or service, without disconnecting the AC power
supply.
Basic parameters of the built- in controller can be set via the on board control panel from
inside the unit. See more in operation section page 12.
Extended parameter settings, as well as logging of operation data, is possible through the SD
card interface.
The controller controls the fans, heater, and cooling compressor according to the temperature
in return air ow.
• At power up, the controller will initiate a self test procedure for a few seconds.
• During operation, the evaporator fan will repeatedly circulate the indoor air.
• The compressor will start when the temperature is higher than the setpoint, which then
initiates cooling.
• Then compressor stops at setpoint.
• The high temperature alarm will initiate an alarm on the alarm output when the temp is
higher than 60° C.
• The low temperature alarm will initiate an alarm on the alarm output when the temp is
lower than 1° C.
• The condenser fan operates only when the actual temperature on the condenser surface
requires this.
Alarm connection options can be found on page 11.
This illustrates the operation panel, seen from inside of the unit.
Keypad Display In/outputs RS 485 TTL (PC)
Green=OK
Red=alarm
SD card slot
Fig. 6
Introduction
Warning
Embedded
Controller
Control strategy
Operation panel
DC4000/6000 OIM 12_2015
9
en

Connections
This illustration shows the external connections to the controller
Fig. 7
Connections
illustration
10

Connections, continued
The air conditioner can operate as a stand alone cooling system. For enhanced usage, it is
possible to connect an external display with keypad.
See below table for options
Connection Usage Specication
Alarm 1
This output will toogle state open/close if
any operation errors occur.
Default open OR default close can be set
via a jumper on the PCB.
Factory setting is normally open
Potential free
Max. 42 VAC or 60 VDC. /
500mA
Galvanic isolated (500V)
AC 1
This output will toogle state open/close
if highest temperature limit setpoint is
exceeded.
Default open OR default close can be set
via a jumper on the PCB.
Factory setting is normally open
Potential free
Max. 42 VAC or 60 VDC. /
500mA
Galvanic isolated (500V)
Digital input 1
This input can control and overrule some
operation parameters. See more in the
parameters list
Active when low (0V)
0/12V DC
Internal pull up
Max. 10mA
Digital input 2
This input can control and overrule some
operation parameters. See more in the
parameters list
Active when low (0V)
0/12V DC
Internal pull up
Max. 10mA
Hotspot sensor Temperature sensor for placing inside the
enclosure, in a hotspot zone if required.
NTC -30 to 85°C
(-22 to 185°F)
DC4000/6000 OIM 12_2015
11
en

Operation
The unit can operate on the built in operation panel. All operation parameters are set via TTL
or SD card. Cooling and heating setpoints are available in the control panel.
The functionality on the control panel is as follows:
• Left key is step up
• Middle key is step down
• Right key is enter
Up Down Enter
Fig. 8
Introduction
Key operation
12

Operation, continued
Menu structure and navigation. Step up/down to jump through menues, end enter to select
the parameter to read or change.
Step Actions Display
Hibernate mode shows the actual room temperature. After 3 minutes without
any activity on the keys, the controllers exits any any menu and shows this.
Use up/down to select any below menu
24
CooL
Cooling set-point parameter
Press enter 2 sec. and change the value
followed by enter to save. C25
Heat
Heater set-point parameter
Press enter 2 sec. and change the value
followed by enter to save. H05
Err
Operation error list. See complete list
at section “Error list” on page 14
Press enter 2 sec. and change the read-
ings to see if more error are present
simultaneously. E05
Test
Over ride test. This will run a series of
component tests. See complete list
at section “Steps in test program”on
page 14
Press enter 2 sec. to start the test. The
test steps will increase by one after 60
seconds or be changed manually with
up/down. The test will auto disable
after 30 minutes, if not manually left
before, with enter key
In hibernate mode press and hold the Enter key for 5 seconds to toggle Celsius and
Fahrenheit unit in all temperature readings.
Navigating menu
Toggle Celsius to
Fahrenheit readings
DC4000/6000 OIM 12_2015
13
en

Operation, continued
The below table shows the meaning of each error.
Code Error cause
1 High Volt [PHV][0/1]: 1
2 Low Volt [PLV][0/1]: 0
3 High Curr. [PIH][0/1]: 1
4 Low Curr. [PIL][0/1]: 0
5 Room Temp H/L [THL][0/1]: 1
6 Fan 1 [F1][0/1]: 0
7 Fan 2 [F2][0/1]: 1
8 DC Comp. [DCK][0/1]: 0
9 Ret Air Sens [RAS][0/1]: 1
10 Hotspot Sens [HSS][0/1]: 0
11 Evap in Sens [EIS][0/1]: 1
12 Evap out Sens [EOS][0/1]: 0
13 Cond. Sens [CDS][0/1]: 1
14 Digi.1 I/P [D1][0/1]: 0
15 Digi.2 I/P [D2][0/1]: 1
16 HP Pressure [HPE][0/1]: 0
17 DCC HeatSink [DHS][0/1]: 1
18 DCC Dig. 1 [DD1][0/1]: 0
19 DCC Dig. 2 [DD2][0/1]: 1
The below table shows the steps in the self test program.
Step Test
0 NONE
1 AC_COMPR
2 AC_1
3 AC_FAN_1
4 AC_FAN_2
5 HEATER
6 EC_FAN_1
7 EC_FAN_2
8 DC_COMPR
9 ALARM
10 EEXP_VALVE
Error list
Steps in test
program
14

Installation
This unit is designed to be mounted outdoor, ush to the wall. No other installation method
isn’t recommended.
Never perform installation, maintenance or service, without disconnecting the AC power
supply.
Any installation should allow good air ow inside the enclosure. The unit has cold
temperature supply in the lower part and return air in the upper part of the unit as shown
on page 8. Please consider how to achieve the best possible air ow when selecting
appropriate placement.
A gaskit is included with the air conditioner unit. Additionally, we recommend the
installation of polymer sealing on the exterior to prevent water instrusion
Please mark the cutout area and holes, according the below dimensions:
Fig. 9
Cut the two openings and drill the 9 pcs. with appropriate tools ( 8mm / 0,315”) to ensurr that
no dust and debrees will accumulate into the enclosure.
Introduction
Installation
placement
Air Con
wall cut out
DC4000/6000 OIM 12_2015
15
en

Installation, continued
Unpack the unit and place onto a table or similar stable placement.
The unit has small sheet metal parts that must be hand bent 90° in order for it to support the
unit when attaching and securing the bolts and intalling the unit permanently to the wall.
The gasket (if not already installed onto the unit) can be found in the unit packaging. This
should be installed according to illustrations below.
90° bend
Sealing strip
Fig. 10
Lift the unit into the cutouts and place it on the two brackets. Place the bolt from the in-
side, and secure them one by one, taking great care that no damage is done to the unit or
enclosure due to small variation in enclosure structure.
After fastening all the bolts, the unit should be sealed on the outside, top and side junctions
towards the enclosure.
Fig. 11
Preparation
Installation
16

Installation, continued
Please incorporate the following imperative requirements when installing the electrical
connections:
• Installation should always be in accordance with national wiring regulations.
• AC external supply should be protected with an external disconnecting device that has
a contact separation of at least 3 mm. This external AC supply must also be over current
protected. The disconnecting device must always be labeled with rated voltage as well as
rated current.
• The unit’s earth connections must always be connected to the enclosures ground.
• All cables in a permanent installation, must be installed and secured properly to
prevent any damage to equipment and/or humans. Secure all cables with cable ties or
appropriate cable fasteners made for this purpose.
After unit installation, the electrical connections should be completed, following below
requirements:
1.The power and/or additional connections should be routed, secured, and connected to
appropriate sources. The Air Conditioner is either delivered with:
A.5 ft. cable with
Black lead: +48V
Red Lead: -48V
B.6 ft. cable with
Black lead: +48V
Blue Lead: -48V.
2.If the power supply cord needs to be extended, always use at minimum, the same AWG.
3.All power supply connections should be secured with an external disconnection device.
Also ensure the connections are over current protected. The fuse specication for the
referring unit type/size can be found in the model overview table on page 5.
4.Connect any accessory needed according the specication to be found in the chapter for
external connections on page 11, Fig. 7.
Electrical
requirements
Electrical
connections
DC4000/6000 OIM 12_2015
17
en

Service Guide
Preventative maintenance
Preventive maintenance has to be performed in order to:
• Continue operation in specied range
• Avoid malfunctions
• Avoid inecient operation
• Maximize the unit’s lifetime
The factory warranty is only valid if documented preventive maintenance has been
performed within time interval of:
• Maximum 6 months when unit is located in normal air quality environment
• Maximum 2 months when unit is located in bad quality air environment
A written log at site is adequate documentation for preventive maintenance.
• Switch o power supply before working on the unit.
• Make sure that all work has been performed correctly before switching power back on.
The unit must be cleaned according to the recommended preventive maintenance plan.
Tools required:
• Vacuum cleaner or compressed air
• Soft brush
• TX20 screwdriver
• AC cleaning agent if it is very dirty
Phase Description
1 Check and clean the outside air inlet grill. See page 8
2 Open the unit’s outer cover by removing the two screws in the lower edge of the
cover
3 Vacuum the condenser coil and the visible part of the fan
4 Vacuum the evaporator coil from the inside of the enclosure.
5 IF any of the coils are still dirty, please apply AC cleaning agent on coil ns, and
after 5 minutes, rinse gently with water WITHOUT spraying water on any electrical
parts.
6 Perform end inspection according to the list in next section.
Introduction
CAUTION
Cleaning
18

Preventative maintenance, continued
The unit must be inspected prior to any re-assembly and put back into service. Please follow
below steps:
Phase Description
1 Are the fans clean and free of any corrosion?
2 Are the coolant pipes free of obstructions, damage, corrosion and show no
obvious signs of leakage?
3 Are the coil lamellars clean and undamaged?
4 Are all fan blades free of any obstructions, cracks or missing blades?
5 When rotating the fans with the ngers, do the fans rotate freely without
vibrations and noise?
6 Is all wiring and insulation undamaged?
7 Are all connectors secured properly and in good condition?
8 Inspect the drain hose (if any) for damages.
9 Are any alarms visible on the controller? See page 9
The cooling circuit is designed for long durability, and is comprised of a few components.
Any test of the circuit should be conducted only if a relevant problem has arisen.
Open the unit outside cover by removing the two screws in the lower part.
Locate the service valve and connect a pressure gauge. Conrm that the pressure is aligned
with the present temperature according the read pressure.
Please be aware that with very low amount of refrigerant, its critical to use short hoses to the
pressure gauge meter.
The compressor’s safety switch (Klixon) can be tested manually. Make sure that the unit’s
cooling circuit is working before initiating this test.
Cover the condenser air inlet in the bottom of the outer cabinet with a piece of plastic
or something similar. Bring the unit into continuous operation (lower setpoint inside the
shelter), and expect shut down within a maximum one hour. If not, the switch is not working.
Inspection
Test cooling circuit
Test safety shut
down
DC4000/6000 OIM 12_2015
19
en

Spare parts
Below illustration shows the available spare parts for the condenser section of the unit.
1
2
3
Fig. 12
This list shows available spare parts for the condenser section of the unit.
Pos. Number Description
1 081943 Coil, Compressor, DC4000 & DC6000
2 707746 Fan, 48VDC, DC4000 & DC6000
3 216796 Compressor, DC4000
3 707752 Compressor, DC6000
707769 Compressor Electrical Harness, DC4000 & DC6000
707594 Screw, M6 x 25, HEX Head, SS, DC4000 & DC6000
298043 Washer, 1/4", Flat, SS, DC4000 & DC6000
298044 Washer, 1/4", Spring Lock, SS, DC4000 & DC6000
707617 Gasket Kit, DC4000/6000 Mounting, DC4000 & DC6000
430651 Danaseal, DC4000 & DC6000
705842 NAMEPLATE MATERIAL, rev.b, DC4000 & DC6000
Illustration, external
parts
Sparepart list
External
20
Other manuals for 4000 Series
1
This manual suits for next models
1
Table of contents
Other Dantherm Air Conditioner manuals

Dantherm
Dantherm Flexibox 900 User manual

Dantherm
Dantherm 4000 Series User manual

Dantherm
Dantherm CDT 90 MKII User manual

Dantherm
Dantherm AC-24 User manual

Dantherm
Dantherm ACT-7 Series User manual

Dantherm
Dantherm Classic 20 CS020020A Dimensional drawing

Dantherm
Dantherm Master BCF 330AB Manual

Dantherm
Dantherm iA/C T Series Quick setup guide

Dantherm
Dantherm Combo Cooling 10000/1000 User manual

Dantherm
Dantherm 3000 User manual