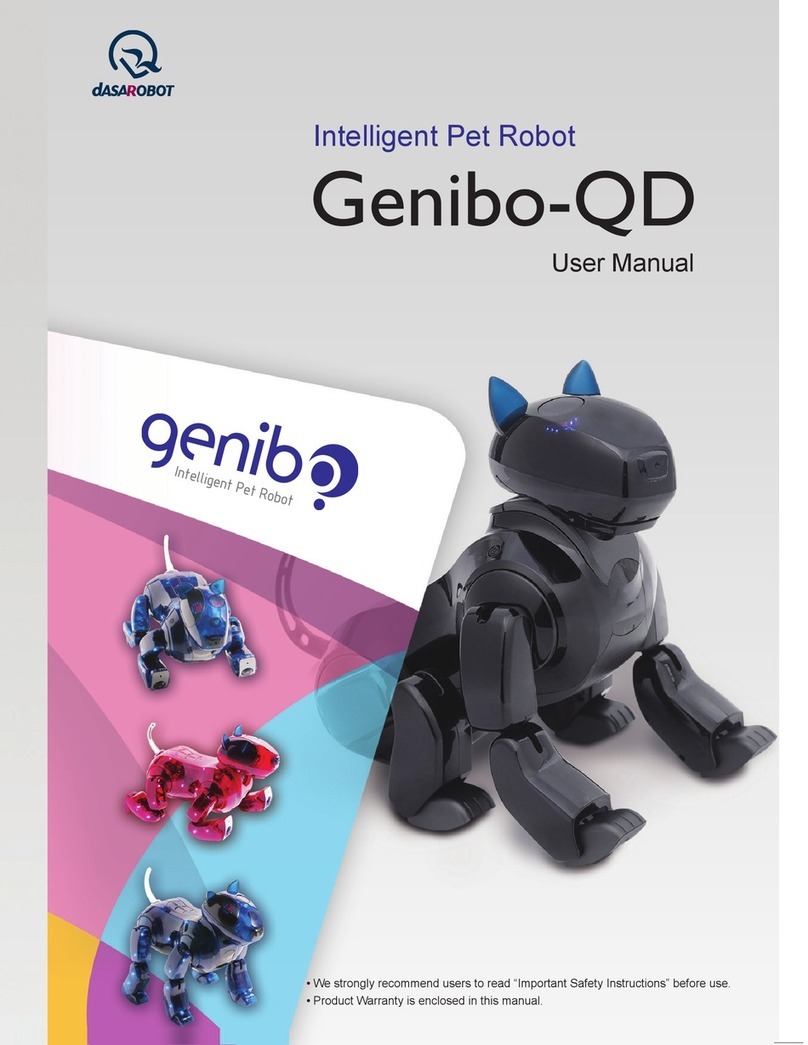
Dasarobot Genibo-QD User manual

• We strongly recommend users to read “Important Safety Instructions” before use.
• Product Warranty is enclosed in this manual.
Control Manager User Manual
Intelligent Pet Robot
Service Request & Information
+82-32-329-5551 (ext. 112)
10:00~17:00 (except holidays)
www.dasarobot.com
www.genibo.com

Control Manager User Manual
Intellignet Pet Robot
Model: Genibo-QD
For information about our product, call us at +82-32-329-5551 (ext. 112).
(Weekdays: 10:00~17:00)
●
For any problem or inconvenience during use of your product, please contact DASA ROBOT CUSTOMER SERVICE CENTER.
●
Warranty Period is 6 months. (Except for spare parts, such as a battery.)
● Service Request and Information Customer Service Center:
Telephone +82-32-329-5551 (ext. 112), 10:00-17:00 (except holidays)
Performance,
functional failure
naturally occurred
during normal use
Performance &
functional
Failure on purpose
or user's mistake
•
Failure occurred due to natural disasters (fire, sea water, gas, earthquake, flood, storm)
• Exchange of spare parts worn out naturally
• Failure occurred due to abnormal power supply or defects in the supply device
• Due to an external factor, rather than a defect in the product.
• Failure occurred because the product was repaired or remodelled by someone
other than a repairman of our company>s sale store or Customer Support Centre.
Major repair required within ten days of purchase
Repair of important parts required within one month of purchase
Major repair for exchanged product required within one month of exchange
If exchange is impossible
Product defect
Defect recurred (4th time) even after repair of the defect
Failure of several parts recurred (5th time) after 4 times of repair
Irreparable
Irreparable because there is no spare part for repair
Serviceman lost the product that consumer provided for repair.
Damage caused during transportation or installation of the product
Reparable
Irreparable because there is no spare part for re pair
Trouble Types
Exchange or
refund
Exchange
Refund
Free-of-charge
repair
Exchange or
refund
Exchange after an
amount equivalent of
repair charge is paid.
Paid repair
Within Warranty
Period
Compensation Details
After Warranty
Period
Paid repair
Refund by adding
10% to the
depreciated amount
Consumer Compensation Info.
DASAROBOT CO., LTD.,
11th floor, Bucheon Techno Park Bldg. 401, Yakdae-dong, Wonmi-gu, Bucheon-city, Gyunggi-do,
Republic of Korea, 420-734

Contents
1. Overview
2. Software License
3. Package Components
4. System Requirements
5. Wireless LAN Settings
6. Installing the Control Manager Program
7. Reinstalling/Upgrading the Control
Manager Program
8. Main Menu
9. Connecting to the Genibo
10. Instructions for Use
Instructions for User Modes
Controlling Basic Actions
3D Simulator
Executing the Basic Actions of the Genibo
Displaying the Mood/Emotion of the Genibo
Viewing Today’s Schedule
Taking Pictures
View Album
Basic Settings
AI Index
Save MP3
Add and Edit Contents
Edit Emoticon
Voice Memo
Help
Schedule Management
Action Editing
11. Appendix
12. Important Safety Instructions
13. Troubleshooting
14. Service Information
Product Warranty / Consumer Rights / Consumer
Compensation Info.
4
5
7
8
9
13
14
15
17
20
20
21
22
22
24
25
26
27
28
29
30
31
32
36
37
38
40
50
66
70
72

Overview
What is the Genibo Control Manager?
The Genibo Control Manager is a program designed for the user to control all
the Genibo’s functions once the Genibo is connected wireless on PC.
The Control Manager allows the user to create motions and sounds, add them to
the Genibo’s action list, and custom-make it as the user desires.
Offers a completely new type of entertainment through listening to the latest
songs, dancing, remote control, taking pictures, and real-time view of videos.
Provides enhanced user convenience through morning call service and voice
recording.
♥ To control the Genibo using the Control Manager, the Control Manager
Program offered at time of purchase must be installed on PC first.
Once the Genibo and PC are all connected to wireless router, the Control
Manager will be ready for use.
4

Overview
5
Software License
End User Software License Agreement
[Note 1] Important: Read the following carefully.
This End User Software License Agreement (“License Agreement”) is a contract between you
(an individual or a business entity) and DASA ROBOTCO., LTD. which grants you a license
to use software products developed, sold, and distributed by DASA ROBOT CO., LTD.
The licensed software of DASA ROBOT CO., LTD may include not only computer
software but also related media, printed materials, and “online” or electronic documents
(“Software”).
By installing and copying “Software,” you agree to the terms of this “License Agreement.”
Unless you agree to the terms of this “License Agreement,” you are not permitted to use
“Software.”
- Software License -
License
Upon agreeing to this “License Agreement,” you will be granted the rights below.
DASA ROBOT CO., LTD. grants the user who purchased this “Software” by fair means rights
to use the number of licenses in the certificate enclosed in “Software,” and grants unlimited
rights to use this “Software” to only those individuals for non-profit purposes.
For your fair use of “Software,” you are permitted to download or copy this “Software.” You
may also make backup copies of this “Software.”
Copyrights and Limited Purposes
All originals and copies of this “Software” must contain copyright information. The copyright and
intellectual property of all derivative works, designs, derivative printed materials, and copies of
software included in this “Software” and the product belong to DASA ROBOT CO., LTD.
These rights are protected by the Copyright Law of Republic of Korea and the WIPO (World
Intellectual Property Organization) Copyright Treaty.
The end user must use this “Software” in compliance with Korea’s Copyright Law, the WIPO
Copyright Treaty, and other applicable law, and cannot reverse-engineer, decompile, or
disassemble this “Software” beyond the expressly permitted limits by the applicable law,
nor can it copy, alter, or adapt the components of this “Software” in its entirety or in part; nor
can it arbitrarily make a copy of or duplicate and distribute this product or the related printed
materials without prior consent of DASA ROBOT CO., LTD.
1
2

6
Software License
DASAROBOT CO., LTD.
11th floor, Bucheon Techno Park Bldg. 401, Yakdae-dong, Wonmi-gu, Bucheon-city, Gyunggi-
do, Republic of Korea, 420-734
http://www.genibo.com
Package Components
3
4
5
6
7
In the event that the copyright of DASA ROBOT CO., LTD. Is infringed, thereby causing
damage due to the user’s breach of any of the clauses above, DASA ROBOT CO., LTD
is fully entitled to compensation for all damages caused by the end user’s copyright
infringement.
Liability for Consequential Damages
DASA ROBOT is not responsible as long as the applicable law permits for business
damages, including but not limited to gain/loss, suspension, loss of business information,
or pecuniary loss, as well as incidental and indirect damages, which occur because of the
user’s inability to use this “Software” or insufficient knowledge of the instructions for use,
even if it is already aware of the possibility of such damages.
With respect to jurisdiction, liability for consequential or incidental damages as described above
may not be excluded or restricted. Be advised that the limits above may not apply to you.
Acknowledgement of Agreement
You acknowledge that you have read and fully understand all statements in this “License
Agreement” and you agree to the terms of this contract.
Termination of Agreement
In the event that you do not comply with the terms of this “License Agreement,” DASA
ROBOT CO., LTD. may terminate this contract without prejudice to any other rights.
Choice of Law and Jurisdiction
This “License Agreement” shall be governed by law of Republic of Korea, and all legal
matters arising in connection with this software license, such as litigation, are subject to
jurisdiction of the Seoul Central District Court in Republic of Korea.
Information about the Agreement
If you have questions related to the software license certificate or “License Agreement,”
please contact us as below:

7
※
Product specifications and components are subject to change without
notice to improve system performance.
Package Components
Wireless router Install Guide Control Manager User Manual Control Manager
Install Program CD
Wireless router Body Set Wireless router Adapter Wireless router / PC UTP
Cable

8
System Requirements
• Operating system: Windows 2000 or higher
• Video card with resolution of 1024X768 or higher. (DirectX 9.0 or higher can be installed/ 3D
can be supported)
• Pentium or higher
• Memory requirements: 512 M bytes or higher
• Spare space of Free space of hard disk: 50M bytes or more
Hardware Requirements for the Control Manager
• To connect the Control Manager to the Genibo, wireless router setup must be complete.
• Wireless router, offered in conjunction with the Control Manager, is available as completely
set up and can be used immediately.
• If you must replace wireless router or if your wireless router has been initialized, see
“5. Wireless LAN Settings” and the wireless router Setup Guide enclosed in the router.
Preparing Wireless router
Wireless LAN Settings

9
• The Genibo does not come with wireless LAN installed in the body.
• To use the Control Manager, set up wireless LAN enclosed in this Control Manager
package as the picture below shows.
[Tip] Two cross-head screws are underneath the ‘Power Switch’ and the ‘Main Power
Switch’, respectively.
[Tip] Open the rear case to mount wireless LAN on the buttocks.
Setting Up Wireless LAN in the Genibo
Wireless LAN Settings

Wireless LAN Settings
10
Wireless LAN Settings
• First, connect the wireless router offered with the product to wired PC.
• For user’s PC network setup, set to to Obtain an IP Address Automatically.
• The wireless router and the Genibo will exchange signals by wireless.
• The wireless router is set as being able to communicate with the Genibo.
Connecting to the Genibo (Wired Connection)

11
Wireless LAN Settings
• To connect to a laptop or connect to a wireless network, the user must supply power to the
provided wireless router, and browse a wireless network on PC.
• Of all the wireless networks found on PC, choose dasa_genibo, and enter a WEP key.
• The default WEP key is 1234567890.
• Once the key is entered, connection between PC and wireless router is complete.
Connecting to the Genibo (Wireless Connection)
Item Setting
Wireless router SSID dasa_genibo
WEP Key 1234567890

12
Installing the Control Manager Program
Wireless LAN Settings
Overview of Wireless Router Ports, Buttons, and Power Supply
Overview of LEDs Indicating the Status of Wireless Router
Factory Initialization
(Initialization) : Keep the
power pressed for 10
seconds to start factory
initialization.
Internet : Port for internet cable connection of
modem LAN port/ wall port
LAN Ports (Port 1~4) : PC or network
equipment for wired connection
Power Connection : 5V
1.2A Power Adapter
External Antenna :
Detachable external
antenna
Status LED : Check the
status (blink in normal
operation)
LAN LEDs (1~4) :Check
the status of connected
ports. (The LED of a port
blinks if the port is ON
and connected)
Wireless Status LED : Check whether
wireless is working properly (ON in
normal operation)
Internet LED :
Check the connection status
(blink in normal operation)
Power LED : Check the
power status (if power
connected, ON)

13
Installing the Control Manager Program
• Insert the Control Manager CD into your PC.
• Once the Auto Install Program starts running, installation will automatically begin.
• If manually installed, run the Control Manager Install Program.
• Once the program starts running, proceed as follows.
Installing program

Main Menu
14
Reinstalling/Upgrading the Control Manager Program
• When the Control Manager program gives you an error by unknown reason, you can easily
reinstall the program referring to the following images.
• If you want to install the newest Control Manager program, visit our webpage (http://www.
genibo.com), download the newest one, and install it referring to the following images.
Reinstalling or Upgrading Program

15
Main Menu
Before connecting to the Genibo, although the user can edit emoticons or edit actions, there
are a few restrictions, making work more difficult.
Connecting to the Genibo
Going to the main menu
Switching to a scheduler
Going to an action editor
Activating an emoticon editor
Help
Minimizing or closing the Control Manager
Active Menus Before Connecting to the Genibo
2 3 4 7
1
6
5
2
3
4
7
1
6
5

16
Main Menu
Active Menus After Connecting to the Genibo
1 2 3
30
21 22
23 24
25
26
27
28
29
20
31
56
7
89 10 11
12
32
13 14 15
18
16 17
Going to the main menu
Switching to a scheduler
Going to an action editor
3D simulator; real-time motion viewer
Selecting the speed of 3 basic actions
Doing 3 basic actions
Moving in 3 basic poses(forward/backward/
left/right/clockwise/counterclockwise)
Play button for the right three categories
(action,emoticon,effect)
List of actions
List of Emoticons
List of effect sounds
The Genibo mood/emotion indicator
Default settings(for the Genibo)
AI Index editor
Help
2
3
4
7
1
6
5
9
10
11
14
8
13
16
15
12
Saving/Managing MP3 files
Contents manager
Emoticon editor
Recording/managing Voice memos
Displaying the today's nearest schedule
The Genibo's current time
Minimizing/closing button
Connecting to/disconnecting from the Genibo
Switching to Autonomous/Manual Mode
Live view display
Sending/Cutting live view
Taking pictures
Viewing Album
Head direction controller
Displaying the status of wireless connection
Controlling the Genibo's volume
Displaying the battery remains
18
19
20
23
17
22
21
25
26
27
30
24
29
32
31
28
4
19

17
Connecting to the Genibo
Connecting the Genibo to the wireless router
• Connect when connection settings of the wireless router, PC, and the Genibo are
complete, and when the Genibo is powered on and working properly.
• Attempt wireless LAN connection by operating the Genibo in auto mode with the controller.
• The Genibo will speak directions for connection process and as to whether connection has
been made properly.
• Once connected properly, run the Control Manager Program on PC.
1
7 + OK Button

Connecting to the Genibo
18
Connecting to the Genibo
• If connection keeps failing although the Genibo is connected to a wireless LAN, see “Wireless
LAN Settings” in this manual, and check if the connection settings are proper.
2
Properly Connected
Connection Error
Click the Connect button on main screen, and enter your ID and password.
• The default ID is “genibo” and password “1234”.
• After connection, on the Basic Settings window, you can change ID and password.
[Note 1] The Genibo can monitor the state of affairs in a remote place by wireless.
[Note 2] For security purposes, it is strongly advised to change to new ID and password.
[Note 3] You can have an ID up to 20 characters long, including English alphabets/
numbers, and a password from 6 up to 20 characters, including alphabets/
numbers.
• In the event connection is not made properly, check the wireless connection status of the
wireless router and of the Genibo and try again.

19
Connecting to the Genibo
Once the Control Manager is connected to the Genibo, the main screen will
activate and display the related buttons and lists.
ⓐ
The ‘Connect’ button can double as the ‘Disconnect’ button.
ⓑ
The button to switch modes.
• The mode is divided into Auto Mode and Manual Mode.
• Once the Control Manager is connected, the default mode is Manual Mode. Click the
button to switch modes.
• In Manual Mode, all motions are made as the Control Manager commands.
• Auto mode means that the Genibo is in Autonomous mode.
However, the Genibo will respond to and follow an order via the Control Manager.
[Note] Edit Action and Edit Emoticon must be done in Manual Mode.
All menus on main screen are running normally unless there is an error in the
network with the Genibo.
In the event of any communication problem, the user cannot use menus on
main screen.
ⓒ
Displays the time currently set in the robot. Used as the default time for
activating alarm. Can be changed on the Settings window.
ⓓ
The buttons to minimize and close window respectively. The former hides
the Control Manager at the bottom of the windows; the latter closes the
program.
ⓔ
This Display Window displays the communication (connection) status of
the Control Manager and the Genibo.
3
ⓐⓑ
ⓒ
ⓔ
ⓓ

Instructions for Use
20
Instructions for Use
Instructions for User Modes
Manual Mode
• In this mode, the robot will move according to commands by the Control Manager.
• Once the Control Manager is connected to the robot, the default mode is Manual Mode.
• As the picture below shows, the button to switch modes is displayed as ‘Auto Mode’.
Click this button to switch to Auto Mode.
• Will not respond to all remote buttons, touches, or sensors.
• User can control the robot as they please, using Create/Edit Action or Emoticon, or basic
commands.
• However, when given a command to walk, the robot will stop at an obstacle or a cliff.
The status of Mode button in Manual Mode
1
Auto Mode
• Click the Mode button to switch from Manual to Auto Mode. The Mode button is displayed
as below.
• In this mode, the Genibo will automatically decide all motions and respond to them, and will
respond to sensors or voice/image recognition as usual.
• However, the robot will not respond to remote input. Will not switch to Sleep Mode even if
there is no interaction with the user for some time.
• The robot will respond to commands by the Control Manager even in Auto Mode.
2
Other manuals for Genibo-QD
1
Table of contents
Other Dasarobot Toy manuals
