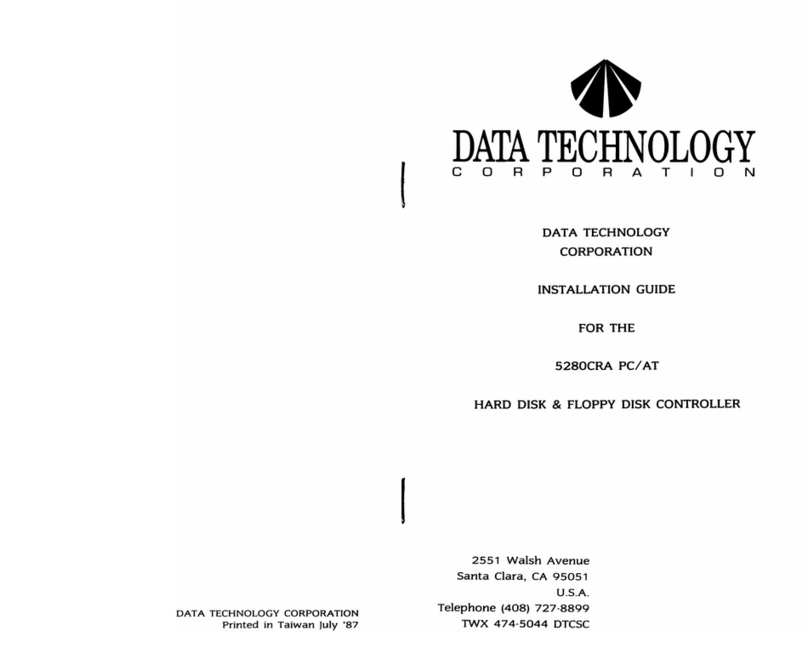
Data Technology 5150X User manual

Revisiol1
Record
ECO#
Rev
Date
Description
A
06-17-88
Initial
release
B
08-08-88
AT LED
connector
•
C
10-OS-88
BIOS
address
jumpers
DATA
TECHNOLOGY
p
c o R o R A T o N
I
5150X
DISK
CONTROLLER
INSTALLATION
GUIDE
TABLE
OF
CONTENTS
~
1
.0
Introduction
.......................................................................................1
2.0
Jumper
Option
Setup
Instructions
............................................1
2.1 BIOS
Address
Jumpers
.........................................................1
2.2
Software
Readable
Jumper.
.................................................2
2.3
AT
LED
Connector
.................................................................2
3.0
Cable
Requirements
........................................................................2
4.0
Formatting
The
Disk
......................................................................2
4.1
Drive
Type
Table
for
CXD BIOS ...........................................S
I
Data
Technology
corporation
Part
Number
09·00440C·1
Revision
C
October
S,
1988
This
installation
guide
and
the
associated
software
and
firmware
are
copyright
protected.
(q
1
988,
Data
Technology
Corporation
IBM
and
PC/XT
are
registered
trademarks
of
International
Business
Machines
Corporation.
-6-

* * * WARNING * * *
This
equipment
generates
and
uses
radio
frequency
energy
and
if
not
installed
and
used
properly,
that
is,
in
strict
accordance
with
the
manufacturer's
instructions,
may
cause
Interference
to
radio
and
television
reception.
It
has
been
type
tested
and
found
to
comply
with
the
limits
for
a
Class
B
computing
device
in
accordance
with
the
specifications
in
subpart
J
of
Part
1S
of
FCC
Rules,
which
are
design-
ed
to
provide
reasonable
protection
against
such
interference
in
a
residential
installation.
However,
there
is
no
guarantee
that
interference
will
not
occur
in
a
particular
installation.
If
this
equipment
does
cause
interference
to
radio
or
television
reception,
which
can
be
determined
by
turning
the
equipment
off
and
on,
the
user
is
encouraged
to
try
to
correct
the
interference
by
one
or
more
of
the
following
measures:
*
Reorient
the
receiving
antenna.
*
Relocate
the
computer
with
respect
to
the
receiver.
*
Move
the
computer
away
from
the
receiver.
*
Plug
the
computer
into
a
different
outlet
so
that
computer
and
receiver
are
on
different
branch
circuits.
* If
necessary,
the
user
should
consult
the
dealer
or
an
experienced
radio/television
technician
for
additional
suggestions.
The
user
may
find
the
following
booklet
prepared
by
the
Federal
Communications
Commission
helpful:
"How
to
Identify
and
Resolve
Radio-TV
Interference
Problems"
This
booklet
is
available
from:
U.S.
Government
Printing
Office
Washington,
DC
20402.
Stock
No.
004-000·00345·4
NOTE:
When
interfacing
with
an
external
device,
a
shielded
cable
must
be
used
to
comply
with
FCC
regulations.
1.0
Introduction
This
easy
to
install
hard
disk
controller
is
able
to
control
a
maximum
of
two
ST·506
type
industry
standard
3'1/2"
or
5'1/4"
Winchester
disk
drives
under
IBM PC DOS
version
2.0
or
later
on
an
IBM
PC/XT
or
compatible.
PLEASE READ THIS INSTALLATION GUIDE CAREFULLY BEFORE
STARTING [NSTALLATION
0
,6
'6
dMh
12
.6
IS
13
W2
:l!
8
CI
rn
~
c::::::J
W3
l'!
:z:
~
BIOS
<
" I
FIGURE 1. JUMPER AND CONNECTOR LOCATIONS
ON
DTC·5150X
2.0
Jumper
Option
Setup
Instructions
The
following
information
pertains
to
the
DTC·5150X
when
used
with
Data
Technology
Corporation's
CXD
B[OS.
2.1 BIOS
Address
Jumpers
(W2)
The
BIOS
address
jumpers
(W2
pins
3-4
and
5·6)
allow
the
B[OS
address
to
be
relocated.
The
default
setting
places
it
at
address
C800:0000.
As
shown
below,
alternate
addresses
can
be
selected
by
changing
the
jumpers.
-1-

2.1
Con't
4.0
Con't
A
reserved
jumper
(W2
pins
7·8)
is
for
internal
a.
Place
a
copy
of
IBM DOS
2.0
or
later
into
use
only
and
must
be
installed
for
the
controller
floppy
drive
A:
and
apply
power
to
the
system
to
operate
properly.
in
the
normal
sequence.
W>2:
3·4
5·6
BIOS ADDRESS
b.
After
booting
DOS
successfully
from
the
ON
ON
C800:0000
floppy
drive,
execute
the
following
command
ON OFF
CAOO:OOOO
upon
receiving
the
"A>"
prompt:
OFF
ON
0800:0000
OFF OFF
F400:0000
debug
]
2.2
Software
Readable
Jumper
(W3)
(If
your
DOS
came
on
two
diskettes,
the
DEBUG
This
jumper
is
used
to
manually
set
the
.
Winchester
drive
type.
The
factory
settmg
IS
for
W3
to
be
installed
for
ST225
drive
types.
By
removing
W3,
a
screen
menu
for
drive
definition
(Sea
Section
4.1)
will
be
selected.
2.3
AT LED
Connector
(15)
If
the
controller
is
used
in
AT·type
systems,
this
connector
is
provided
for
the
proper
operation
of
the
drive
activity
LED
indicator.
3.0
Cable
Requirements
a.
The
following
ribbon
cables
are
required
for
these
configurations.
1.
One
internal
drive:
One
20·conductor
cable
One
34·conductor
cable
2.
Two
internal
drives:
Two
20·conductor
cables
One
34·conductor
twisted
or
flat
daisy'
chain
cable
b.
This
34
pin
cable
connects
to
)1
on
the
5150X,
(Note:
When
using
a
twisted
cable,
both
drives
must
be
set
to
drive
select
2.)
c.
The
20
pin
cable
connects
to
)2
andlor
)3.
The
drive
logical
unit
number
is
determined
by
a
setting
on
the
disk
drive,
not
by
the
choice
of
cable
connector
)2
or
)3
(See
Figure
for
location
of
cable
connectors)
4.0
Formatting
The
Disk
:rak"nirg!
The
Data
Technology
Corporation
hard
is
ormatting
utility
will
erase
all
data
on
the
hard
disk!
It
should
only
be
run
once,
the
first
time
you
install
your
hard
disk.
-2-
program
may
be
on
the
second
diskette).
Debug
will
respnd
with
a
,<...',
prompt.
C.
Respond
to
the
"-"
prompt
with
the
command:
g=c800:5
d.
This
will
initiate
the
hard
disk
format
utility
and
the
following
message
will
appear:
*
Format
Utility
*
Drive
no
(1-2):
(Enter
the
drive
number
that
you
want
to
format.)
Interleave
(2·9):
(Enter
the
interleave
factor
desired.
For
optimal
system
performance
an
interleave
of
3
is
recommended).
e.
With
jumper
W3
installed,
the
follOWing
information
is
displayed:
* Cyl:
615
*
Heads:
4
*
Precomp:
256
*
Reduced
write
current:
615
*
Step
rate:
10
micro
sec
1
Enter
drive
defect
table?
(V
IN)
J
Is
above
all
correct?
(V
IN)
Ready
to
ERASE
entire
disk?
(V
IN)
f. If
jumper
W3
is
not
installed,
a
drive
table
(See
Section
5.1)
will
appear
on
the
screen.
After
you
have
selected
the
correct
drive
type
by
the
table
number,
the
system
will
display
the
drive
configuration
that
has
been
selected.
Answer
the
following
questions
that
will
appear
below
the
drive
configuration.
-3-

4.0
Con't
Correct
drive
type
(V
IN)?
Split
into
2
logical
units?
(V
IN)
Enter
drive
defect
table?
(V
IN)
Is
above
information
correct?
(V
IN)
Ready
to
ERASE
entire
disk?
(V
IN)
g.
If
the
drive
type
that
you
have
is
not
listed
in
the
drive
table,
select
table
number
15
for
FREE
FORMAT.
The
following
questions
will
appear:
Cylinders
(1-2048):
Heads
(1-16):
Step
rate
(micro
sec):
(default
=
40)
(5,
10,
20,
30,
40,
50,
60,
70)
Reduced
Write
Current
at
Cylinder:
(0
to
Max
Cylinders)
(default
= NONE)
Write
Precompensation
at
Cylinder:
(0
to
Max
Cylinder)
(default
= NONE)
Split
into
2
logical
units?
(V
IN)
Enter
drive
defect
table?
(V
IN)
Is
above
all
correct?
(V
IN)
Ready
to
ERASE
entire
disk?
(V
IN)
h.
When
the
format
is
done,
the
following
message
will
appear:
Format
Complete.
Insert
DOS
diskette
in
drive
A
Proceed
to
FDISK
and
FORMAT.
Hit
any
key
to
reboot
the
system.
i.
If
you
have
more
than
one
hard
disk,
repeat
the
same
procedure
for
the
next
physical
hard
disk.
i.
Proceed
with
the
normal
DOS
procedure
for
bringing
up
a
hard
disk
using
FDISK
and
FORMAT
commands.
See
your
DOS
manual
for
further
instructions.
-4-
4.1
Drive
Type
Table
for
Drive
Type
0:
ST-225
1:
ST-4038
2:
Miniscribe-3425
3:
ST-212
4:
Priam-V150
5:
Priam-V170
6:
Miniscribe-8425
Kyocera-20A/20B
7:
ST-138
8:
ST-4051
9:
ST-251
1251-1
10:
Microscience-725
11:
ST-4053
Miniscribe-3053/6053
12:
Maxtor-1085
Newbury
Data-1085
Miniscribe-6085
13:
ST-4096
14:
Maxtor-1140
Newbury
Data-1140
1
5:
Free
Format
CXD
BIOS
Hds
4
5
4
4
5
7
4
6
5
6
4
5
8
9
15
Precomp
~
615
256
733
300
615
128
306
987
987
615
615
977
820
612
1024
1024
1024
918
-5-
Other Data Technology Controllers manuals
Popular Controllers manuals by other brands
Gemu
Gemu ADA Series operating instructions

Infinite Potential
Infinite Potential AVIS Quick Start Guide & Safety Instruction Manual
Nice
Nice ROBO PLUS Installation instructions manual

Cypress
Cypress CY82C599 manual
AIA
AIA X-SEL Operation manual
Ruckus Wireless
Ruckus Wireless SmartZone 100 Quick setup guide

Bernard
Bernard INTELLIBUS FF Instructions for use
Cypress
Cypress CY3280-20x66 Universal CapSense Guide
Micropelt
Micropelt EnOcean MVA003E User manual and device specification
Hunter
Hunter PRO-C PC Series Owner's manual and installation instructions
Delta Electronics
Delta Electronics Programmable Logic Controller DVP-EC3 instruction sheet
Grieve
Grieve WATLOW PM PID Basic operation


