Dato CL200 User guide

CL
Smart Camera
Quick Operation Guide

APP Operation Guide
APP Download Instructions
①
Scan the QR code on the right to download the APP for Android and IOS.
②
The Android software can be downloaded by searching for "Dato AI" in the
Google Play App Market Center.
③
The iOS version software can be searched for "Dato AI" in the APP Store
application market center to download.

Camera Set Up
Please make sure that the camera is in the same
room, close to the router, before performing the
setup.
First, insert the Ethernet cable into your router, and then into the appropriate cable on
the three-pronged cable attached to the camera. Then using the included power supply
(110V or 220V), plug it into the appropriate cable on the three-pronged connecting wire,
and connect to the power. Remove the safety cap on the back of the camera and
carefully twist on the antenna to the back of the camera. The indicator light on the end
of the camera connection cable will now light up.
Connect your mobile phone with 2.4G Wi-Fi. (5G is not supported on the camera). If you
are using a dual band router, make sure your 2.4G Wi-Fi name is different than your 5G
one.
Tips:
Once your camera is set up, you can relocate it to wherever you want. Simply unplug it
and move it to the new location and plug it in, the camera will connect automatically, and
there is no need to set it up each time you turn it on. Make sure this new location is
within your router’s range.

Connect to the network
1. Once you have downloaded the Dato APP open the APP and register your account with
your email.
2. Press the “+” on the corner of the screen in order to register the product. Press the
manual add prompt and click on the camera section, then select the CL-200 Camera.
Once prompted, scan the QR code on your camera with your phone.
3. Hold the “Reset” button for about 3-5 seconds until you see the solid green light.
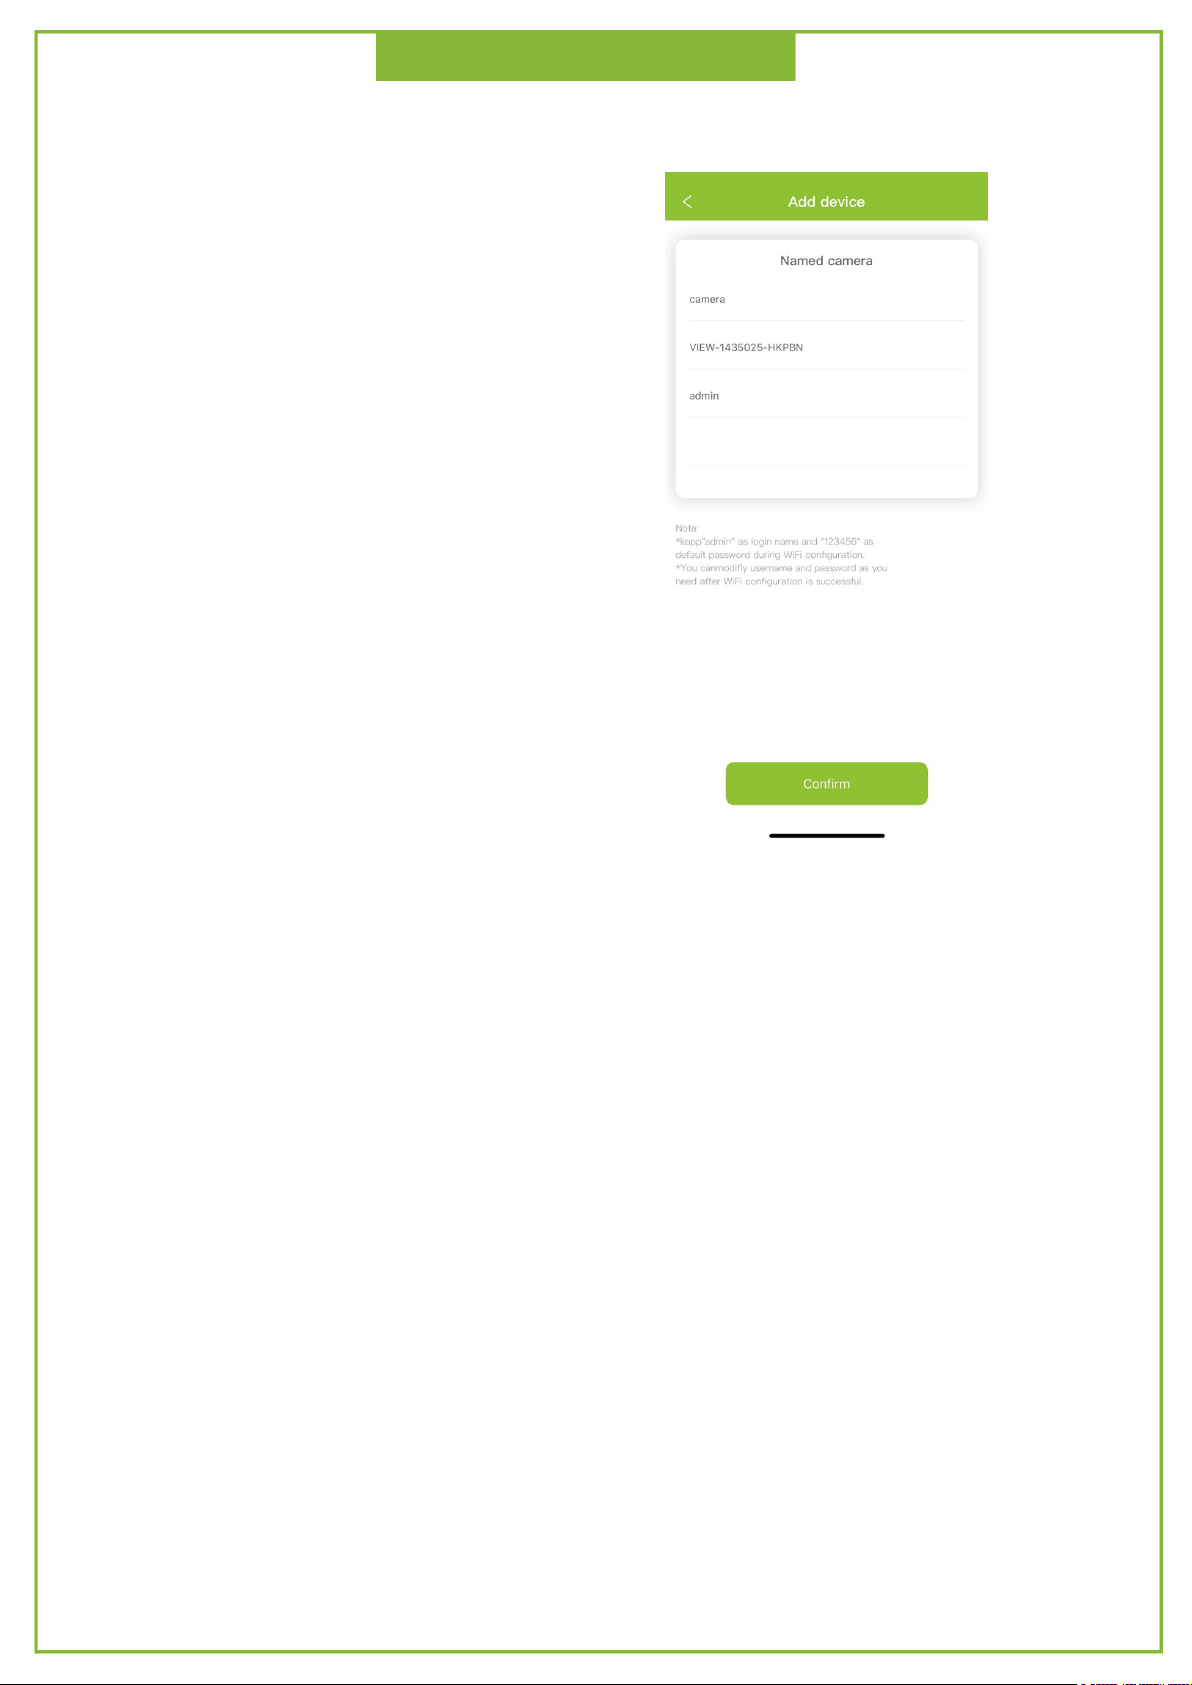
4. Name the camera, then press [Next].
5. Input your Wi-Fi password and then click on [Connect to Wi-Fi]
6. Use the camera to scan the QR Code, Click Yes on the [The camera is successfully
connected. Would you like to connect to Wi-Fi?] prompt to connect to the Wi-Fi. The green
light should now be rapidly blinking.
7. The APP should then inform you when you are online. Congratulations! Your camera is
all set up. Click on the image of your camera to view it and change the control settings.
8. Turn on the online camera to adjust the parameters and real-time monitoring.
9. To keep the phone connected with Wi-Fi, click the menu settings in the upper right
corner of the connected camera, connect to Wi-Fi according to the prompts, and enter the
Wi-Fi name (usually automatically recognized) and password. After successfully connecting
to Wi-Fi, you can unplug the network cable.
Connect to the network
Camrea QR Code
You
can find your camera’s ID and QR code
on the label on the camera.
Ex:
Username: admin
Password: 123456
DID: VIEW-XXXXXX-CEOWH
DDNS: xxxxxx.nwsvr1.com
Tips:
If you have several cameras, please configure them one by one. This process will only
work one camera at a time.
The camera is on a 2.4GHz network. If you are having issues connecting the camera
through the app, double check that you are on the appropriate 2.4Ghz before
attempting to set-up.
After the camera has booted up, press and hold the Reset button for 3-5 seconds.

APP Operation Guide
Fingerprint Management
Fingerprint management refers to the fingerprint password management of the door
lock. After the administrator successfully adds the lock, the administrator will have the
highest management rights of the door lock. He can authorize others to add fingerprints
and set a validity period. You can choose time-limited and permanent fingerprint
Permissions. Administrators can manage all fingerprints that they are authorized to add.
( Including deleting fingerprints and modifying fingerprints, and viewing fingerprint
unlock records )
Key Management
Key management refers to Bluetooth key management. After the lock is successfully
added, the administrator will have the highest management authority for the lock. He
can send keys to other people and set the validity period. The email account or mobile
phone number is sent, and the receiver's APP interface automatically adds the lock and
permission. Administrators can manage all keys sent by them, including deleting keys,
sending keys, and viewing unlock records of keys.
System Reset
If you forget the password, hold down the
“Reset” button for around 6 seconds until the cable light is off and then let
go of the “Reset” button. Then disconnect the power cord and reconnect it.
After that, the camera will be restored to the factory default. The default
username/password is admin/123456. After factory resetting the camera, repeat
the instructions as listed.

Installation Instruction
To mount the camera from the base, first you’ll need to use a drill tool to make three
holes on the surface of the object you’re attaching. Place them where you want the
camera to be, making sure nothing is obstructing its view. It is recommended that you
use a pencil to mark these spots before drilling. The diameter of the hole should be
about 1 cm, and the hole depth should be 5cm.
After drilling the holes, screw the three plastic mounting brackets into the holes, and
then line them up with the camera once you have confirmed they are secure. Then align
the holes in the base of the camera with the brackets and secure them with the screws.
You can now correctly set the angle for your camera, and it is ready to go.
Other manuals for CL200
1
Table of contents
Other Dato Digital Camera manuals


