manuals.online logo
Brands
  1. Home
  2. •
  3. Brands
  4. •
  5. DaytonAudio
  6. •
  7. Amplifier
  8. •
  9. DaytonAudio DAX88 User manual

DaytonAudio DAX88 User manual

8-SOURCE 8-ZONE
DISTRIBUTED AUDIO
MATRIX AMPLIFIER
Model: DAX88 User Manual
DAX88 User Manual
Page | 
Table of Contents
Safety ............................................................................................................................. 
Overview ........................................................................................................................ 
Installation ................................................................................................................... 
Dayton Audio Matrio App Description....................................................................... 2
DAX88 Wi-Fi Streaming with Dayton Audio Hi-Fly ................................................... 2
DAX88 Specifications ................................................................................................. 2
RS232 Serial Control................................................................................................... 2
 ............................................................................................................. 
Safety
Page | 3
WARNING! TO REDUCE THE RISK OF FIRE OR ELECTRIC SHOCK, DO NOT EXPOSE THIS
APPLIANCE TO RAIN OR MOISTURE.
CAUTION! TO REDUCE THE RISK OF SHOCK, DO NOT REMOVE THE COVER, NO USER
SERVICABLE PARTS INSIDE. REFER SERVICE TO A DAYTON AUDIO AUTHORIZED DEALER.
IMPORTANT SAFETY INSTRUCTIONS
•
Read and keep these instructions.
•
Heed all warnings and follow all instructions contained within this manual.
•
Do not use this unit near water.
•
Clean only with dry cloth.
•
Do not block any ventilation openings. Install in accordance with the manufacturer’s instructions.
•
Do not install near any heat sources such as radiators, heat registers, stoves, or other apparatus
(including amplifiers) that produce heat.
•
Do not defeat the safety purpose of the polarized or grounding-type plug. A polarized plug has
two blades with one wider than the other. A grounding type plug has two blades and a third
grounding prong. The wide blade or the third prong are provided for your safety. If the provided
plug does not fit into your outlet, consult an electrician for replacement of the obsolete outlet.
•
Protect the power cord from being walked on or pinched particularly at plugs, convenience
receptacles, and the point where they exit from the unit.
•
Only use attachments/accessories specified by the manufacturer.
•
Unplug this unit during lightning storms or when unused for long periods of time.
•
Refer all servicing to qualified service personnel. Servicing is required when the unit has been
damaged in any way, such as when the power-supply cord or plug is damaged, liquid has been
spilled, or objects have fallen into the unit, the unit has been exposed to rain or moisture, does
not operate normally, or has been dropped.
•
Operate the unit only with the voltage specified on the rear. Fire and/or electric shock may result
if a higher voltage is used.
•
Do not modify, kink, or cut the power cord. Do not place the power cord in close proximity to
heaters and do not place heavy objects on the power cord and/or the unit itself, doing so may
result in fire or electrical shock.
•
Do not touch the speaker terminals as electric shock may result.
•
Ensure that the safety ground terminal is connected to a proper ground. Never connect the
ground to a gas pipe, as a severe explosion and/or fire may result.
•
Be sure the installation of this product is stable, avoid unlevel surfaces as the product may fall and
cause injury, property damage, electrocution and/or fire.
•
Note that when the unit is turned off, it is not completely disconnected from the AC power outlet.
Do not open the cover.
REFER ALL SERVICE TO A QUALIFIED SERVICE TECHNICIAN
FCC Statement
Page | 4
FCC Statement
1. This device complies with Part 15 of the FCC Rules. Operation is subject to the
following two conditions:
(a) This device may not cause harmful interference.
(b) This device must accept any interference received, including interference that
may cause undesired operation.
2. FCC Radiation Exposure Statement: Mobile device.
This equipment complies with FCC radiation exposure limits set forth for an uncontrolled environment.
In order to avoid the possibility of exceeding the FCC radio frequency exposure limits, human proximity
to the antenna shall not be less than 20cm (8 inches) during normal operation.
Changes or modifications not expressly approved by the party responsible for compliance could void the
user's authority to operate the equipment.
NOTE: This equipment has been tested and found to comply with the limits for a Class B digital device,
pursuant to Part 15 of the FCC Rules. These limits are designed to provide reasonable protection
against harmful interference in a residential installation.
This equipment generates uses and can radiate radio frequency energy and, if not installed and used in
accordance with the instructions, may cause harmful interference to radio communications. However,
there is no guarantee that interference will not occur in a particular installation. If this equipment does
cause harmful interference to radio or television reception, which can be determined by turning the
equipment off and on, the user is encouraged to try to correct the interference by one or more of the
following measures:
•
Reorient or relocate the receiving antenna.
•
Increase the separation between the equipment and receiver.
•
Connect the equipment into an outlet on a circuit different from that to which the receiver is connected.
•
Consult the dealer or an experienced radio/TV technician for help.
Overview
Page | 
The DAX88 8-source 8-zone Distributed Audio system provides ultimate audio control
for 6 amplified zones, and 2 line level zones. Perfect for whole home audio systems or
for business,the DAX88 is a true matrix audio system that delivers an extensive list of
features for professional and residential installations. The DAX88 was designed for
ease of installation by the integrator, and be simple to operate for the user. The DAX88
is fully controllable with the iOS and Android compatible Dayton Audio Matrio
application, and is also controllable with wall keypads and IR remote controls.
The DAX88 kit includes the following parts:
y1 x Master Controller/Amplifier
y1 x Rack Mounting Kit
y1 x Installation Guide/Operation Manual
y6 x Phoenix Connector Plugs for Speaker connection
The following optional accessories are available and can be purchased separately.
yDAX88
DAX88KP DAX88IR
DAX88HUB
KP – Wall mountable keypads that will allow control of all basic functions
per each zone
yDAX88HUB – Rack Mountable Hub to connect all keypads to the DAX88
yDAX88IR – IR Remote Control that can control keypads
Overview
Page | 6
DAX88 Front Panel
DAX88 Rear Panel
SIGNAL LED ZONE STATUS LED POWER LED POWER ON/OFF
KEYPADS
Input connects
to keypad hub
WIRED NETWORK
CONNECTION
MODE SWITCH:
BRIDGE/STEREO
ZONE 7 & 8
RCA SIGNAL OUTPUT
for connection of
external amplier
STEREO
3.5MM
INPUTS
STEREO
RCA
INPUTS
CHANNELS 5 & 6
TOSLINK OPTICAL INPUT
CONNECTIONS
WiFi ANTENNA
for wireless network
connection
VOLTAGE
SELECTOR
115-230V
SPEAKER OUTPUT
CONNECTIONS
12VDC
TRIGGER OUTPUTS
for activating
external devices
12VDC
TRIGGER INPUT
BI-DIRECTION
RS-232 PORT
AC INPUT
Overview
Page | 
DAX88HUB- Keypad Hub (Optional)
The DAX88 Keypad Hub allows up to 8 keypads, 1 per zone, to be hooked up to your DAX88
RJ45 OUTPUT CONNECTION
for connection to DAX88
8 RJ45 INPUTS
for connection of individual wired keypads
Overview
Page | 
DAX88IR – IR Remote for Keypads (Optional)
The DAX88IR infrared remote control provides complete zone control through the IR
receiver on the DAX88 keypads. All keypad functions can be accessed using the
DAX88IR. In addition to the keypad functions, the DAXRC has a MUTE button to
temporarily mute audio in the zone. Once the MUTE function is activated the keypad's
LED display will flash, indicating the mute status. Press the MUTE button to continue
playing music, or press the keypad volume up or down buttons to un-mute the zone.
Mute
Source toggle
Treble up/down
Bass up/down
Volume up/down
Balance left/right
Infrared IR emitter
Zone power on/o
Overview
Page | 
DAX88KP – Keypad (Optional)
The DAX88 keypad is designed for ease of use with a maximum ability to control sound.
Soft-touch backlit buttons and a backlit LED display provide convenient control of the
zone; ON/OFF, source 1 ~ 8 selection, volume, treble, and bass. A built-in IR target or
external IR target connected to the EXT-IR terminals on the rear of the keypad, relay
commands to the DAX88 main unit through your DAX88IR IR Remote.
Five LEDs on the keypad face indicate the operation mode of the keypad. The EXT LED
indicates that the system is receiving a trigger command from an external device.
Numeric LED display
Ext/Mute/PA selection LED
Volume up/down LED
Source selection LED
Infrared (IR) target
Source select 1 ~ 
descending
Down, volume, treble,
bass, un-mute
Treble up/down LED
Bass up/down LED
Up, volume, treble, bass, un-mute
Source select 1 ~  ascending
Power ON/OFF & mode select
Press and hold for zone on/off, press
to toggle through volume, source,
treble and bass adjustment mode.
Use the select button with the volume
up/down buttons to adjust volume levels,
treble and bass levels
The select button emits a soft glow
when the zone is powered off
Installation – Main Unit
Page | 
Install the DAX88 in a well-ventilated location; do not block the vents on the sides or top
of the chassis, proper ventilation is required for normal operation. Do not expose the
unit to excessive dust, do not allow dust to build up on the unit , and do block the vent
holes in the chassis. Do not place the DAX88 above or below heat-generating
components such as another audio amplifier. Be sure to leave at least 2 inches of space
to the sides of the chassis with open air flow above and below the unit. Due to the
weight of the unit, we recommend using four-post racks at minimum.
Overview
1. The DAX88 and DAX88 Keypad Hub can be mounted in an equipment rack using
the included rack mount kit.
2. Always disconnect AC power before making connections to the DAX88.
3. Use high quality 12 or 14 AWG stranded copper speaker wire for all speaker
connections.
4. Use high quality cable for connection of the keypads to the master
controller/amplifier; we recommend Cat5e to connect keypads. Buying Cat5e pre-
terminated with RJ45 connectors (ethernet patch cables) might be desirable if you
do not want to terminate the wire yourself.
5. The DAX88 uses a Keypad Hub to connect all keypads to the DAX88. Further detail
is found in the keypad section. Install the keypad hub close to the master
controller/amplifier. A Cat5e cable terminated with RJ45 connectors (a standard
ethernet patch cable) is necessary to connect the keypad hub to the DAX88 main
unit.
Installation – Main Unit
Page | 
Installing Multiple DAX88 Units
Because of the thoughtful design of the app that controls the DAX88, Dayton Audio
Matrio, there is no limit to the amount of DAX88 devices that can be used on a single
network. The app will seamlessly add any DAX88 units it can find on the network with
no additional setup. The group control mode of the app can even control multiple zones
from different DAX88 units at the same time. Make sure to space out DAX88 units, do
not stack them directly on top of each other, make sure there is an air gap between
units.
How to Wire inputs to multiple devices
If you have multiple DAX88 units and want to feed them the same input, you will need to
split your input and route it to both devices. There are many devices and cables
available from your Dayton Audio retailer that will split an analog or TOSLINK signal so
you can hook it up to multiple DAX88 devices. Pay special attention to the app setup
guide where it says to name these inputs exactly the same on each device. This will
ensure that group control will work properly for input switching.
Note: If you have multiple devices and plan to group them together in the Hi-Fly app so
you can Wi-Fi stream to both at the same time, your devices must be hard wired to the
network or physically very close together for grouping to work properly.
Installation – Speakers
Page | 1
Speakers
xUse good quality 12-14 AWG stranded copper speaker wire. Most jurisdictions
require the use of CL2 rated in-wall speaker wire, refer to your local building code
enforcement office for the proper cable type for your installation.
xIf speaker wires must be run parallel to AC wires, keep the speaker wires and AC
wires at least 10 inches apart. If you must cross AC wires, always cross at a 90
degree angle. The DAX88 amplifiers are capable of driving 4 ~ 8 ohm speaker
loads in stereo mode, and 8 ohm loads in bridge mode.
xImproper speaker installation can damage the amplifiers and void the warranty. If
you are unsure how to connect speakers to the DAX88, contact a qualified
technician
oNever connect more than two 8 ohm speakers wired in parallel to a single
amplifier channel in stereo mode.
oNever connect more than one 8 ohm speaker to a single channel in bridge
mode.
oNever connect the Left & Right channels of the amplifier together or
combine the (–) negative channels of the amplifier.
xRemove the terminal block connector and make sure that all contacts are open
by turning each set screw counter clockwise. This helps ensure that the speaker
wire will not fray when inserted into the terminal. After inserting the speaker wire
into the terminal, turn each set screw clockwise until tightly connected. Pay
special attention to the polarity ( + and - ) so you wire your speakers correctly in
phase.
Installation – Speakers
Page | 13
Connecting speakers to the DAX88 in STEREO MODE
Set the amplifier mode switch to STEREO. Remove approximately 5 inches from the
cable jacket, strip 1/4" of insulation from the speaker wire, and twist the copper strands.
Insert the speaker wires into the connector per the label below the output terminals and
tighten the set screws. Repeat for the remaining zones.
4 ~ 8 ohm speakers
Left
Right
Set the MODE switch to STEREO
Installation – Speakers
Page | 14
Connecting speakers to the DAX88 in BRIDGE MODE
In BRIDGE mode the amplifier LEFT and RIGHT outputs are combined into a more
powerful MONO output, thus doubling the output power to 50 watts with a minimum
speaker load of 8 ohms. Remove approximately 5 inches from the cable jacket, strip
1/4" of insulation from the speaker wire, and twist the copper strands. Insert the speaker
wires into the connector per the label below the output terminals and tighten the set
screws. Repeat for the remaining zones. It is permissible to mix STEREO and Bridged
MONO outputs on one DAX88.
-+
8 ohm speaker
MONO
Set the MODE switch to BRIDGE
Installation – Speakers
Page | 15
Using DAX88 Pre-Amp Outputs
Zone 7 and 8 of the DAX88 are pre-out zones and are represented on the back of the
unit as stereo RCA jacks. These zones can be used for connecting external amplifiers
to expand the available power in a large zone or multiple zones, or can even be used to
add a powered subwoofer to a room. These outputs could even be used to feed an
audio signal into another DAX88 unit.
The DAX88 can be used as the master controller in large commercial audio systems
with constant voltage 25/70V amplifiers connected to these PRE-AMP outputs. The
PRE-AMP output levels are variable and are controlled from the Matrio App, DAX88
keypad or even RS232 from an automation system. For best performance, the PRE-AMP
output cables should be less than 25 feet long and be high-quality, shielded cables.
Set the MODE switch to STEREO
4 ~ 8 ohm speakers 70 volt speakers
Powered subwoofer
Installation – Audio Sources
Page | 16
The DAX88 provides 8 source inputs that can be accessed by any zone.
yInputs 1 ~ 4 are stereo, unbalanced, line level source inputs via RCA style female
connectors or a female 3.5mm jack. If both inputs are present, they will mix together.
yInputs 5 ~ 6 have options for Toslink (optical) input, or analog audio through a
3.5mm jack.
oIf using Toslink, make sure to use “PCM-Stereo” or Auto detect settings on
your source device. Your device should be set to auto detect by default and
work properly, but if not, you can usually find these settings in settings ->
Audio -> S/PDIF or something similar. Refer to the user manual of your
source device. You will know if your settings are correct or not, because if
they are incorrect, the sound will be loud digital noise rather than proper
audio.
oThe 3.5mm jack will take priority over the Toslink input, meaning that if
anything is plugged into the 3.5mm jack at all, the Toslink input will be
disabled. These inputs will NOT mix.
yInput 7 is a 3.5mm jack for analog, stereo audio.
yInput 8 is the Wi-Fi /Dayton Audio Hi-Fly input, thus you cannot plug anything into
this input, and is represented with the Wi-Fi antenna. Further details about how to
use the Hi-Fly input are found in later sections of this guide.
S-VIDEO OUTSATELLITEIN VIDEO OUT AUDIO OUT HDMI SATA
POWER
PHONE LINEETHERNET
DIGITAL
AUDIOOUT
COAX
(OPTICAL)
RCA
Digital
optical
3.5mm stereo
RCA
CD, DVD or music player
IR emitter
Installation – Keypads
Page | 17
yEach DAX88 zone can be controlled outside of the app with keypads that can be
mounted into a wall. Because the DAX88 is app controllable, you can install as
few or as many keypads as you want (up to 8). These keypads offer convenient
control for volume, source input, bass and treble. The keypads also feature an IR
sensor that can be used with the DAX88 Remote.
yUse high quality Cat5e/6 cable between the controller/amplifier and the keypads.
Proper installation techniques will guarantee that the keypads will work properly
up to 600 feet from the controller/amplifier. The use of RJ45 (typical ethernet)
connectors on the keypads and keypad hub means that pre-terminated cables
can be easily sourced, and the equipment to terminate Cat5e/6 cable yourself
can be easily found, if necessary. The typical keypad installation will utilize a
DAX88 Keypad Hub, with up to 8 keypads attached to it.
DAX88
DAX88HUB – Keypad Hub
DAX88KP – Keypad
Installation – Keypads
Page | 1
xUse standard electrical boxes or low voltage rings to mount the keypads.
Connect the keypad hub to the master controller/amplifier using a standard
Ethernet patch cable.
xAlthough the DAX88 Keypad Hub is labeled as 1 – 8 for each of the 8 ports, the
dip switches on the back of the keypads must be set so they correspond to the
correct zone like the chart below shows. This gives each keypad a distinct
address. The up position is ‘ON’, whereas the down position is ‘OFF’ This chart is
also found on each keypad for ease of installation. The example on the right has
the correct settings for “Zone 3”. If you do not complete this step for each
keypad, your keypads will not control the correct zone.
Zone
1
2
3
Zone 1
ON
ON
OFF
Zone 2
ON
OFF
ON
Zone 3
ON
OFF
OFF
Zone 4
OFF
ON
ON
Zone 5
OFF
ON
OFF
Zone 6
OFF
OFF
ON
Zone 7
OFF
OFF
OFF
Zone 8
ON
ON
ON
Installation – Network Connection
Page | 1
Because the DAX88 is a network-based device, initial setup will require adding the
device to your network. This will enable app control and Wi-Fi streaming, and can be
done in 2 different ways
Option 1: (Recommended) Hard wire the DAX88 to your network using a standard
ethernet cable connected to the jack on the back of the DAX88 device labeled
“Network”.
Option 2: If you cannot hard-wire your DAX88 with an ethernet patch cable, add the
DAX88 to your network with Wi-Fi using the Dayton Audio Hi-Fly app available on the
iOS App Store and the Android Google Play Store.
1) Download the Hi-Fly App from the iOS or Android App Store
2) Make sure your DAX88 is powered on and close to your nearest Wi-Fi access
point.
a. Your DAX88 will broadcast its own Wi-Fi network out of the box from the
factory. Once the DAX88 is configured in the Hi-Fly app, it will stop
broadcasting its internal Wi-Fi.
Installation – Network Connection
Page | 
3) Open the Hi-Fly app and press “Add Device” on the following screen.
4) Follow the on screen instructions in the Hi-Fly app.
a. The first step of connection will require you to connect to the DAX88’s
internal Wi-Fi. The Wi-Fi SSID of your DAX88 device will be
DAX88_XXXX, where XXXX is a unique identifier of your DAX88. This will
be labeled on the back right side of your DAX88 device with a sticker.
Once connected, your device will tell you that internet is unavailable with
this Wi-Fi connection. This is normal—you will connect back to your usual
Wi-Fi network in the next step.
b. The second step will require you to connect the DAX88 to your Wi-Fi
network. Make sure you are adding your DAX88 to the Wi-Fi network that
the devices you will use the Matrio control app are on. Your mobile device
running the Matrio app and the DAX88 units you wish to control must be
on the same network.
5) Once this process is finished, your DAX88 will be ready to use with the Matrio
app and is also ready to have audio streamed to it with the Hi-Fly app. This can
be Apple Air Play, Spotify, TuneIn Radio and more. All streamed music is
represented as the “Hi-Fly input” or input 8.

Other manuals for DAX88

1

This manual suits for next models

3

Other DaytonAudio Amplifier manuals

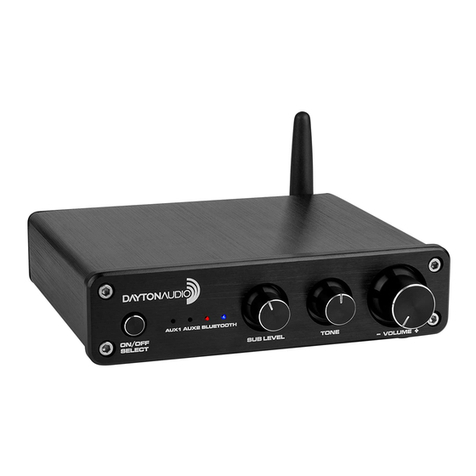
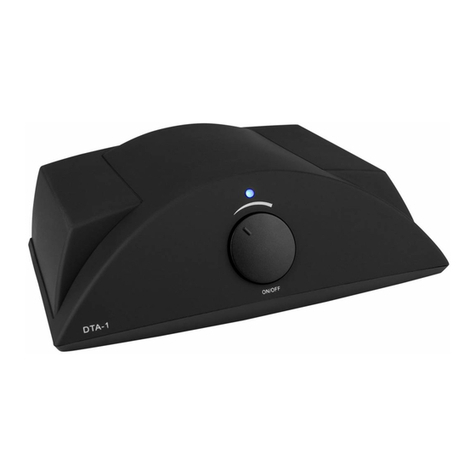
DaytonAudio DTA-1 User manual

DaytonAudio

DaytonAudio DTA-1 User manual

DaytonAudio PMA250 User manual

DaytonAudio

DaytonAudio PMA250 User manual

DaytonAudio HTA50BT User manual

DaytonAudio

DaytonAudio HTA50BT User manual

DaytonAudio PPA800DSP User manual

DaytonAudio

DaytonAudio PPA800DSP User manual

DaytonAudio MCWA60 User manual

DaytonAudio

DaytonAudio MCWA60 User manual

DaytonAudio APA102 User manual

DaytonAudio

DaytonAudio APA102 User manual

DaytonAudio DSPB Series User manual

DaytonAudio

DaytonAudio DSPB Series User manual

DaytonAudio MA1240a User manual

DaytonAudio

DaytonAudio MA1240a User manual

DaytonAudio MA1240 User manual

DaytonAudio

DaytonAudio MA1240 User manual

DaytonAudio MA1260 User manual

DaytonAudio

DaytonAudio MA1260 User manual

DaytonAudio WF60PA User manual

DaytonAudio

DaytonAudio WF60PA User manual

DaytonAudio SA1000 User manual

DaytonAudio

DaytonAudio SA1000 User manual

DaytonAudio WF40A User manual

DaytonAudio

DaytonAudio WF40A User manual

DaytonAudio SA240 User manual

DaytonAudio

DaytonAudio SA240 User manual

DaytonAudio HTA200BT User manual

DaytonAudio

DaytonAudio HTA200BT User manual

DaytonAudio DTA-120BT User manual

DaytonAudio

DaytonAudio DTA-120BT User manual

DaytonAudio DTA3116S User manual

DaytonAudio

DaytonAudio DTA3116S User manual

DaytonAudio SPA100-D User manual

DaytonAudio

DaytonAudio SPA100-D User manual

DaytonAudio DA60R User manual

DaytonAudio

DaytonAudio DA60R User manual

DaytonAudio HTA20 User manual

DaytonAudio

DaytonAudio HTA20 User manual

DaytonAudio MA1240a User manual

DaytonAudio

DaytonAudio MA1240a User manual

DaytonAudio DTA-2.1BT2 User manual

DaytonAudio

DaytonAudio DTA-2.1BT2 User manual

DaytonAudio DTA-100ST User manual

DaytonAudio

DaytonAudio DTA-100ST User manual

DaytonAudio SBA302-BT User manual

DaytonAudio

DaytonAudio SBA302-BT User manual

Popular Amplifier manuals by other brands

For-x XAQ-4.80SQ owner's manual

For-x

For-x XAQ-4.80SQ owner's manual

Texas Instruments TPA0103 user guide

Texas Instruments

Texas Instruments TPA0103 user guide

Rotel RB-930AX owner's manual

Rotel

Rotel RB-930AX owner's manual

DFE TRUETENSION TA1 instruction manual

DFE

DFE TRUETENSION TA1 instruction manual

FONESTAR MAZ-4250E instruction manual

FONESTAR

FONESTAR MAZ-4250E instruction manual

ADS Power Plate 850MX owner's manual

ADS

ADS Power Plate 850MX owner's manual

McIntosh MA7900 owner's manual

McIntosh

McIntosh MA7900 owner's manual

DirekTronik 1x2 Dual Link DVI Distribution Amplifier user manual

DirekTronik

DirekTronik 1x2 Dual Link DVI Distribution Amplifier user manual

Ehrhorn Technological Operations ALPHA 86 Operating and technical manual

Ehrhorn Technological Operations

Ehrhorn Technological Operations ALPHA 86 Operating and technical manual

Rakoso SA100 user manual

Rakoso

Rakoso SA100 user manual

Plinius 9200 instruction manual

Plinius

Plinius 9200 instruction manual

Polk Audio C300.2 owner's manual

Polk Audio

Polk Audio C300.2 owner's manual

Dynacord LX 1600 Brochure & specs

Dynacord

Dynacord LX 1600 Brochure & specs

Grace Digital GDI-BTAR513 user guide

Grace Digital

Grace Digital GDI-BTAR513 user guide

Ace Plus EX-G048C user manual

Ace Plus

Ace Plus EX-G048C user manual

Chevin Research A Series user manual

Chevin Research

Chevin Research A Series user manual

NAD M12 Service manual

NAD

NAD M12 Service manual

Routline TTM 8K4 user manual

Routline

Routline TTM 8K4 user manual

manuals.online logo
manuals.online logoBrands
  • About & Mission
  • Contact us
  • Privacy Policy
  • Terms and Conditions

Copyright 2025 Manuals.Online. All Rights Reserved.