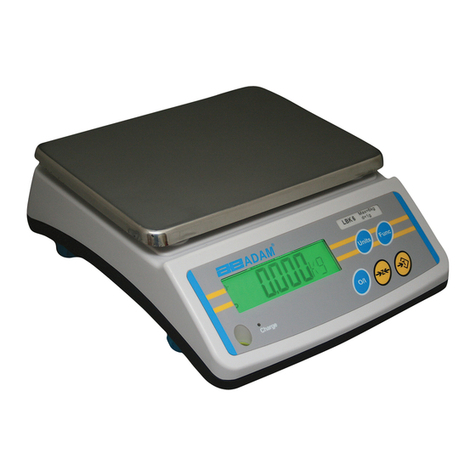
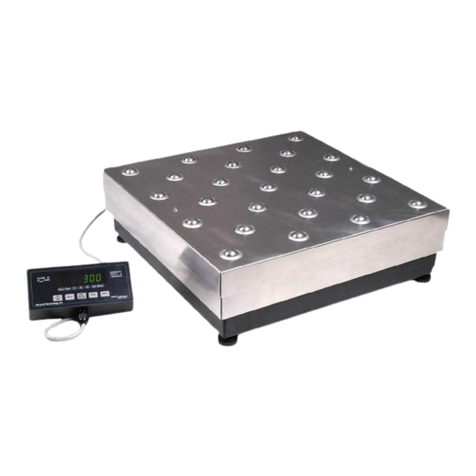
DB Electronics DSW-100 Series User manual

DSW-100
SHANGHAI DIGITAL BALANCE ELECTRONIC CO., LTD
version1.4 2020.12

INTRODUCTION
Thank you for purchasing the DSW-100 series simple weighing scale from SHANGHAI
DIGITAL BALANCE ELECTRONIC CO., LTD.
The DSW-100 series has many features and designed functions that are conducive to
operate and increase customer satisfaction. We believe that all your needs will be fully match.
You can discover many convenient functions and features through this manual.
DSW-100 has weighing and counting functions.
Backlit display with automatic energy saving mode. In addition, the brightness of
the backlight and the auto-off time are set by the user.
In addition to using the AC adapter, it can also be powered by a built-in universal
dry battery (alkaline dry battery with battery model R20P SIZE-D 1.5V), which is
very suitable for use in a mobile working environment.
Display backlight brightness level can be set from 0 to 9, level 0 turns off the
backlight, level 9 is the brightest.
SCALE FEATURE

I
Contents
Operational Warning.................................................................................... I
Precautions................................................................................................... II
1. Conventional............................................................................................ 1
1.1 Product Specifications................................................................................... 1
1.2 Indicator display ............................................................................................ 2
1.3 Basic function keys ....................................................................................... 2
1.4 Global view.................................................................................................... 3
1.5 Interface......................................................................................................... 4
1.6 Display........................................................................................................... 4
2. Basic operation........................................................................................ 5
2.1 Boot operation ............................................................................................... 5
2.2 Shutdown operation...................................................................................... 6
2.3 Zero operation ............................................................................................... 7
2.4 Tare operation ............................................................................................... 8
2.5 Counting and weighing operation.................................................................. 9
2.6 Weight unit switch.......................................................................................... 12
2.5 Backlight brightness setting........................................................................... 13
3. Edit settings............................................................................................. 14
3.1 Keyboard shortcuts ....................................................................................... 14
3.2 Customer function entry ................................................................................ 15
3.3 Customer function SPEC definition ............................................................... 16
3.4 System function entry.................................................................................... 18
3.5 System function definition.............................................................................. 19
4. Calibration operation ............................................................................... 23
4.1 Full scale calibration...................................................................................... 23
4.2 Full scale rate correction ............................................................................... 25
4.3 Internal code check/display ........................................................................... 27
5. Factory settings ....................................................................................... 28
5.1 Reset ............................................................................................................. 28
5.2 Factory default............................................................................................... 29
6. Prompt message ..................................................................................... 30
Prompt information list......................................................................................... 30
7. Serial and USB........................................................................................ 31
7.1 POS serial protocol used in China ................................................................ 31
7.2 Standard POS serial port protocol................................................................. 35
Please follow the instructions below to operate the
product to ensure product and personal safety.
Before installation,
it is important to
check whether
the power supply
indicated by the
brand name matches
to ensure the normal
operation of the
machine.
Sharing sockets with
other high-power
devices can cause
large fluctuations.
Make sure that one
scale uses a matching
power outlet.
Do not insert metal
or ammable objects
at the interface to
avoid damage to the
machine or re.
If the scale falls,
please turn off the
switch and power
Plug immediately,
suspend use, and
contact the service
personnel in time to
avoid re or electric
shock.
Make sure that the
scale and extension
cable are properly
grounded, as this
can cause external
metal parts to be
electrostatically
charged to prevent
re or electric shock.
Immediately turn
off the switch and
Plug when metal
fragments or liquids
enter the interior,
suspend use and
contact service
personnel to avoid
re or electric shock.
Metal objects or
liquids can cause
fire or rust in the
scale. Keep an
appropriate distance
from the scale to
avoid damage.
Do not scratch
or modify the
power cord, bend
excessively or place
heavy objects on
top to avoid fire or
short circuit.
When the scale
emits smoke or
strange smell,
please stop using it
immediately, turn
off the switch and
power supply, and
contact the service
personnel in time.
To avoid
disconnection of
the power cord or
peeling of the cord
when unPlugging
the power cord, do
not pull on the cord.
Do not remove,
repair or modify the
scale body, high-
voltage, high-heat
parts or internal
edges to ensure
personal safety.
Keep your fingers
dry when inserting
or removing the
power Plug to avoid
electric shock.
OPERATIONAL WARNING

1
II
Maximum range
Internal fractional value
Display division value
Nonlinear error
Maximum counting range
Display device
3 kg 6 kg 15kg 30kg 30lb
60lb 3/6kg 6/15kg 15/30lb 30/60lb
Up to 100,000
Range 1000 ~ 20000
<0.008% FS (display only)
0 ~ 60000PCS
Operating temperature
Use relative humidity
0 ~ 40℃
15% ~ 85%RH( No condensing )
Monitor
Capacity indicator
Unit of weight
Status Indicator
Decimal symbol
Operation buttons
Power supply
Interface
6-digit LCD, 14 indicators
4
5 of them, g/kg/lb/oz/pcs
6 of them are ZERO/STABLE/NET/S1/S2/S3
You can choose "." or ","
[REZERO]/[UNIT/ ← ]/[TARE/ ↑ ]/[ON/OFF]
1. 4 R20P SIZE D 1.5V dry batteries
2. External AC adapter DC 5~12V/0.5A
1 RS-232 interface (data 600 ~ 57600 bit/s
baud, 8bit Data, 1bit Stop, No parity bit)/1
USB communication interface
1.1 Product specications
1000
3000 4000 5000 6000 7500
10000 12500 20000
1250 1500 2000 2500
Please avoid placing the product in the following locations:
If the temperature is too high or too low, direct sunlight, wet place;
At the shared power supply, excessive vibration, dust, and moisture.
Do not press the button too hard, please touch the button.
Do not suddenly bump into the machine to avoid damaging the load cell.
Do not press the center of gravity on the weighing platform to avoid damage to the load cell.
To clean the weighing pan and keyboard, use a dry cloth and wipe with a detergent. Do not use
thinner or other volatile solvents.
In order to ensure the normal use of the scale, before starting the operation every day, adjust the
level and lock the foot nut, and place a known weight of the item on the weighing platform to check
the weighing of the scale.
Do not place the instrument on an unstable or inclined surface to avoid dropping.
Use standard thermal paper to store thermal paper under direct sunlight, high temperatures, dust, or
moisture.
When the mechanical equipment is moved to a higher temperature in a place with a lower
temperature (such as a refrigerating room), because the temperature difference is large, the power
supply cannot be turned on immediately to prevent the condensation of the water vapor and cause
damage to the machine.
Keep one socket and one machine, avoiding high voltage or equipment that may cause power
interference.
Thermal print head failure is not covered by the warranty. Please use and maintain the equipment
properly according to the instructions or service personnel's recommendations.
Do not use the long-distance line of the power Plug of the scale. Be sure to keep it in the AC
socket. Keep the hand dry when pulling the Plug. Excessive bending and pulling will damage the
power cord and cause re or electric shock.
Please follow the prompts to extend the life.
*NOTICE
PRECAUTIONS
If you have any questions,
please contact your local
dealer or visit our website:
www.dbscale.com.cn
Thank you.
1. CONVENTIONAL
1.1 Product specications

3
2
Front view Back view
Side view
Top view
1.4 Global view
1.2 Indicator display
®
-
100
W
1 2 3
·Weight zero
indicator, light when
the weight is "0"
·When the weight
value is stable, the
indicator lights
·When the displayed
value is net weight, the
indicator lights ·When the counting mode is
set in the number of samples,
this indicator lights
·When S2 is displayed, when the electronic
scale is in the process of setting and
calibration, this indicator lights
The unit of weight is “g”
(gram)/“kg” (kg)/“lb” (pound)/“oz”
(ounce)/when in counting mode,
the corresponding “g”/“kg”/“lb”/
"Oz"/"PCS" indicator lights
·When S3 is displayed,
when the weight is locked
(HOLD), the indicator lights
It is the operation confirmation and data
save button in the setting mode, and the zero
operation button in the weighing mode
Host power switch, exit setting in setting mode
In the setting mode, select the set digit, in
the weighing mode, the peeling operation or
long press for 3 seconds to enter the function
(counting mode) button key (only valid under
the conditions allowed by the counting mode)
In setting mode, select set digit, in weighing
mode, unit conversion and or counting sampling
confirmation button (only valid under the
conditions allowed by counting mode)
1.3 Basic function keys
UNIT
←
TARE
↑
REZERO
ON
OFF
Zero key
Power key
Tare mode key
Unit
conversion
key
Keyboard type Specic display
1. CONVENTIONAL 1. CONVENTIONAL
1.2 Indicator display
1.4 Global view

5
4
Main/sub screen
USB socket
RS232
1.5 Interface 2.1 Boot operation
1.6 Display
·Toggle the reset switch on the bottom left side of the scale
Note:
1. During the field check, press the [REZERO] key to exit the field check
and enter the weighing mode.
2. When the battery capacity indicator shows only one frame, it means
that the internal battery voltage is too low, please replace the battery.
(Please use 4 alkaline batteries with R20P SIZE-D 1.5V battery type).
3. DSW100 is the instrument model; Ur.341 is the software version
number
1. CONVENTIONAL 2. BASIC OPERATION
1.5 Interface
2.1 Boot operation

7
6
2.2 Shutdown operation
Method one: click [ON/OFF] button to shut down Make sure that the scale is in a stable state and put a heavy
object, the weight must be less than the set allowable zero
setting range, such as 0.500kg
Method 2: Turn o the reset switch
Click [REZERO] and remove the heavy object, which shows
-0.500kg
Method 2: Unplug the AC power and shut down
Click [REZERO] again to reset to zero
ON
OFF
Note:
When charging is not required, unplug the AC power
Note:
1. If the placed weight exceeds the zero setting range, press the
[REZERO] key, and the tare operation will be completed.
2. The zero setting range can be selected by setting SPEC 04 BIT 3,
BIT2.
2.3 Zero operation
REZERO
REZERO
2. BASIC OPERATION 2. BASIC OPERATION
2.2 Shutdown operation
2.3 Zero operation

9
8
2.4 Tare operation 2.5 Counting and weighing operation
Make sure that the scale is in a stable state and put on heavy
objects. The weight must be less than the set allowable
peeling range, such as 2.500kg
Click [TARE] and remove the heavy object, which is displayed
as -2.500kg
Click [TARE] again to resume zero setting
Note:
1. If the placed weight exceeds the allowable zero setting range, the tare
operation will be performed after pressing the tare key.
2. The peeling range can be modified by SPEC 04 BIT 0 to select the
allowed peeling range of 50%FS or 100%FS
TARE
↑
(1) Ensure that the scale is in a stable state
(2) Press and hold the [REZERO] button for a long time, and
click the [ ← ] button three times to enter the customer
function settings
(3) Click the [REZERO] button to turn down to Spec03
(4) Modify the default "1011" to "1010"
(5) Click the [REZERO] button to save, press [ON/OFF] to exit
the setting
Method one
Enter weighing mode by setting button
REZERO
REZERO
TARE
↑
REZERO
ON
OFF
2. BASIC OPERATION 2. BASIC OPERATION
2.4 Tare operation
2.5 Counting and weighing operation

11
10
(6) Click the [ ↑ ] button to enter the counting operation,
the default display is 10 pieces, you need to put 10 pieces of
goods on the weighing pan to count
(2) Click the [ ↑ ] button to enter the counting operation, the default
display is 10 pieces, you need to put 10 pieces of goods on the weighing
pan to count
(7) Click the [ON/OFF] button to check the total weight. If
the number of pieces placed on the weighing pan exceeds
10 pieces, click the [ ↑ ] button to increase the number of
objects placed on the weighing pan
(3) Click the [ON/OFF] button to view the total weight. If the number
of pieces placed on the weighing pan exceeds 10 pieces, click the [ ↑ ]
button to increase the number of objects placed on the weighing pan
Make sure the scale is stable
(1) Press and hold the [ ↑ ] key for 5 seconds to enter the weighing mode
If there is already weight on the weighing pan when entering
the counting and weighing, click the [REZERO] button to
execute the peeling function, after which the weighing items
can be placed
Click [ ← ] key again to select the quantity, click [ON/OFF]
key to exit the selected state
ON
OFF
ON
OFF
Method Two Long press【↑】key to enter weighing mode
Note:
Increase the number of pieces by increasing to "10, 20, 30, 40, 50, 100,
200, 300, 400, 500, 1000", after reaching the maximum value "100",
then press [ ↑ ] will display the total weight interface, again Click [ ↑ ] to
enter the counting and weighing default "10 pcs"
REZERO
ON
OFF
2. BASIC OPERATION
2.5 Counting and weighing operation
2. BASIC OPERATION
2.5 Counting and weighing operation

13
12
2.6 Weight unit switch 2.7 Backlight brightness setting
Make sure the scale is stable Make sure the scale is stable
Press and hold the [ ← ] key for 5 seconds, knowing that "bL.S
3" appears on the screen, and the displayed "3" is the backlight
brightness level
Click [ ← ] to increase the brightness, the minimum brightness is 0
(without backlight), and the maximum brightness is 9
Click [REZERO] to save and exit
Put a heavy object on the weighing pan, such as 0.545kg
Click the [ ← ] key, it is displayed as 1.202lb; click the [ ← ] key
again, it is displayed as 19.22oz; the third click the [ ← ] key, it
is displayed as 545g; the fourth time it is restored to 0.545kg
After removing the heavy objects, click [REZERO] to resume zero setting
REZERO
Note:
To enable this switching function, SPEC03 bit.2 must be set to 0
Note:
When working with batteries, reduce the brightness level of the
backlight as much as possible. To reduce battery consumption and
extend battery life
UNIT
←
UNIT
←
2. BASIC OPERATION 2. BASIC OPERATION
2.6 Weight unit switch
REZERO
2.5 Backlight brightness setting

15
14
3.1 Keyboard shortcuts 3.2 Customer function entry
No. Setting type Quick operation
1+
+
+
+
+
2
3
4
5
Enter user function
setting mode
Enter system function
setting mode
Enter system internal
code detection mode
Enter the system full
calibration mode
Restore factory SPEC
settings
REZERO
REZERO
REZERO
REZERO
REZERO
UNIT
←
UNIT
←
UNIT
←UNIT
←
UNIT
←
UNIT
←
UNIT
←
UNIT
←UNIT
←+
REZERO UNIT
←UNIT
←UNIT
←
TARE
↑
TARE
↑
TARE
↑
TARE
↑
TARE
↑
TARE
↑
TARE
↑
ON
OFF
Note:
(1) When performing quick operations, you need to hold down the
[REZERO] key for a long time while pressing other keys;
(2) Before restoring the factory SPEC settings, you need to open the
calibration switch at the bottom of the scale body
Press and hold the [REZERO] button, and click the [ ← ]
button three times to enter the spec setting
Click [ ↑ ] key to enter the setting, [ ← ] key becomes the shift
key, will increase "0" from right to left; [ ↑ ] key becomes the
increment key, increase "1" from right to left
After the operation, click [REZERO] to save and enter the next
item; click [ON/OFF] to exit without saving
REZERO
ON
OFF
3. EDIT SETTINGS 3. EDIT SETTINGS
3.1 Keyboard shortcuts
3.2 Customer function entry

17
16
3.3 Customer function SPEC definition
SPEC NO.00
SPEC NO.03
SPEC NO.01
00:10 seconds
00:Weight display
lock(HOLD)
000: Port closed
100: 9600
00:10 seconds
【BIT 3/BIT 2】Backlight auto-off time setting
【BIT 3】Allow "comma" as decimal point
【BIT 3】Backlight function settings
【BIT 0】Automatic shutdown time setting (after 3 minutes of no operation)
【BIT 1/BIT 0】[TARE/ ↑ ] key function setting (in weighing mode) after the clock)
01:20 seconds
01: Gross weight/
net weight
switch
001: 1200
101:19200
0:Allow
0:Allow
0:Allow
0:Allow
10:30 seconds
10: Function
key for counting
mode
010: 2400
110:38400
1:Forbid
1:Forbid
1:Forbid
1:Forbid
10:30 seconds
11:Do not close
11: Tare
operation key
only
011: 4800
111: 57600
【BIT 1】Allow automatic entry into power saving mode
【BIT 2】Weight unit conversion (kg/LB) [UNIT / ← ]
【BIT 2/BIT 1/BIT 0】RS-232 baud rate setting
Note:
(1) When the backlight brightness is set to "0", the backlight will not
automatically turn on;
(2) 60 seconds to enter power saving mode
*The default is 1100, the backlight does not turn off automatically; allow to
enter the power saving mode; no automatic shutdown
*The default is 1011, it is forbidden to use a comma as the decimal point; it
is allowed to use the [ ← ] key to switch the weight unit; [ ↑ ] key is only the
tare operation key in the weighing mode
*The default is 0100, the backlight function is turned on; the baud rate of
RS-232 is 9600
3. EDIT SETTINGS 3. EDIT SETTINGS
3.3 Customer function SPEC denition
3.3 Customer function definition
0:Allow
0:Standard
1:Forbid
1:Special
SPEC NO.02
【BIT 3/BIT 2】RS-232/USB communication mode setting
【BIT 1】Allow RS-232 port data output when the weight is unstable
【BIT 0】RS-232 port data output format setting
00:General command response method
10: POS/ECR communication method
01: Simple command (A) response method
11: Continuous weight data output method
*The default is 1000, the RS-232/USB communication mode is set to POS/
ECR communication mode; the RS-232 port data output is allowed when the
weight is unstable; the standard RS-232 port data format is output
00: 8 data bits,
NO Parity
01: 7 data bits,
Even Parity
00: Special format 1: Data format protocol 1
10: 7 data bits,
Odd Parity
01: Special format 2: Data format protocol 2
11: 7 data bits,
Mark Parity
SPEC NO.20
【BIT 1/BIT 0】RS-232 SERIES DATA BIT AND PARITY VALUES
【BIT 3/BIT 2】RS-232 SPECIAL DATA MODE SELECT
10: Special format 3: TOLEDO MODE protocol 11: Special format 4: DIGI MODE protocol
*The default is 0000, the special data format protocol 1; RS-232
communication protocol uses 8 data bits, no check
SPEC NO.21
000: POS/ECR
TYPE-0
Most P.O.S, ECRs
and Some TEC
P.O.S System
100: POS/ECR
TYPE-4
CRS, NCR2170
and Many other
ECRs, Most P.O.S
110: POS/ECR
TYPE-6
SAMSUNG ER-670,
ER-5100, SPS-520,
Most P.O.S
111: POS/ECR
TYPE-7
DELTA cash
register protocol
101: POS/ECR
TYPE-5
NCI General,
SAMSUNG SPS-300,
ER-900, Most P.O.S
001: POS/ECR
TYPE-1
NOT USE
010: POS/ECR
TYPE-2
SHARP ER-Axxx,
ER-A450T, New
SANYO ECRs
011: POS/ECR
TYPE-3
NOT USE
[BIT 2/BIT 1/BIT 0] POS/ECR communication protocol selection
(can be switched by pressing [Tare key] when turning on)
0: Synchronize with the displayed weight unit 1: Use the original set weight unit
【BIT 3】Data (serial port) output weight unit selection
Note:
1. SPEC21 command "D, CR, LF" response mode
2. For the PROTOCOL (interface protocol) of POS/ECR TYPE-0 ~ 7 in
SPEC21, please refer to the following description of this article (POS/ECR
INTERFACE) 9600 Baud rate, 7 Data bit, Even Parity, 1 Stop bit
(TYPE-6: 9600 Baud rate, 8 Data bit, None Parity, 1 Stop bit)
3. Set the unused setting bits to "0"

19
18
4. RS232C interface data format, stop bit is 1 bit, data bit 7 or 8 bits are
optional. (SPEC 01,02 = SELECT .)
5. After the USB port is connected, the machine will automatically detect the
data input by the USB port. If there is data input, the data communication of
the USB port will be turned on
*The default BIT 3 is 1, use the original set weight unit
No default BIT 2/BIT 1/BIT 0, POS/ECR communication protocol selection
(can be switched by pressing [Tare key] when turning on)
3.4 System function entry
Use the tool to click the (SPAN SW) button at the bottom of the
screen to make the calibration switch on.
Press and hold the [REZERO] key for a while, and click [ ← ] [ ↑ ] [ ← ]
to enter the spec setting.
+
REZERO UNIT
←UNIT
←
TARE
↑
UNIT
←
TARE
↑
After clicking the [ ↑ ] key to enter the setting, the [ ← ] key becomes
a shift key and will increase "0" from right to left; the [ ↑ ] key
becomes an incremental key and increases "1" from right to left.
After the operation, click [REZERO] to save and enter the next
item; click [ON/OFF] to exit without saving.
REZERO
ON
OFF
3.5 System function definition
SPEC NO.04
SPEC NO.05
00: ± 2% FS
00: ± 2% FS
0:<50% FS
0:Allow
【BIT 3/BIT 2】Reset range selection
【BIT 3】Auto clear conduction
【BIT 0】TARE RANGE
【BIT 0】AUTO CLEAR TARE
01: ± 4% FS
01: ± 4% FS
0:Forbid
0: When the net weight is greater
than 5d
10: ± 10% FS
10: ± 10% FS
1:Allow
1: When the net weight is greater than 5d
and the gross weight is greater than 21d
1: <100% FS
1:Forbid
11: Unlimited
11: Unlimited
【BIT 1】NO PRESET TARE OP.
【BIT 2/BIT 1】SYSTEM ON START ZERO RANGE
*The default is 0100, the reset range is ±4%FS; preset tare weight is
prohibited; tare range <50% FS
*The default is 1101, then the automatic clearing conditions are when the net
weight is greater than 5d and the gross weight is greater than 21d; the initial
zero point is allowed to be within ± 10% FS; automatic tare weight removal
is prohibited
3. EDIT SETTINGS 3. EDIT SETTINGS
3.4 System function entry
3.5 System function definition

21
20
【BIT 3】Do not use
0:Allow
0:Allow
【BIT 1】Manual TARE CLEAR
【BIT 0】When the calibration permission switch is
closed, the weight inner code display is allowed
1:Forbid
1:Forbid
*The default is 1001, there is no negative weight prompt display, showing
the weight value; manual tare weight clearing is allowed; weight inner code
display is prohibited when the calibration switch is allowed to be closed
SPEC NO.09
SPEC NO.10
【BIT 3】 NO Tare Accumulation
【BIT 1】Reset after peeling
0:Forbid
0: Weight calibration mode
0: Allow
0: Forbid
0: Free weight full value setting
1: Allow
1: Full correction mode
1: Forbid
1: Allow
1: Fixed weight full value setting
【BIT 2】 No Tare Subtraction
【BIT 0】 System mode select
*The default is 1010, both are dual range display; dual range is automatically
converted to single range; fixed range is 3000
*The default is 1100, which allows tare weight increase operation; allows tare
weight decrease operation; allows zero reset operation after tare removal;
range setting mode selection is set by free weight full value
*The default is 0011, the weight display decimal places are three decimal
places (000.000)
*The default is 0001, then the full-scale calibration method is the heavy
calibration mode; the minimum weight division value is 2
【BIT 2/BIT 1/BIT 0】
Decimal point position on of scale
【BIT 3】CALIBRATION MODE
【BIT 3】Dual rang weight check by
0:Only the net weight is dual range
0:Single range
1:Both are dual range display
1:Dual range
【BIT 2】Dual range automatic conversion (fixed range)Multi interval (only for fix mode1)
SPEC NO.11
SPEC NO.12
000: No decimal
point
100: Four decimal
places(00.0000)
001: One decimal
(00000.0)
101: Five decimal
places(0.00000)
010:Two decimal
places(0000.00)
011: Three decimal
places(000.000 )
000: 1
100: 20
001: 2
101: 50
010: 5
110: 100
011: 10
111: Not used
【BIT 2/BIT 1/BIT 0】Weight minimum division value
3. EDIT SETTINGS
3.5 System function definition
3.5 System function definition
3. EDIT SETTINGS
SPEC NO.06
【BIT 3/BIT 2】Negative weight display
00: When the net
weight is less
than negative 2D,
"UF." is displayed
01: When gross
weight is less
than negative 2D,
"UF." is displayed
10: There is no
load weight
prompt display,
showing the load
value
11: Invalid
setting
【BIT 1/BIT 0】Fix full capacity select mode(Only
when SPEC 10, bit0=”1”)
00: 6000 01: 15000 10: 3000 11: Invalid setting
0:Allow
0:Allow
0:Allow
1:Forbid
1:Forbid
1:Forbid
【BIT 3】After the weight unit is converted,
the weight unit symbol flashes to allow setting
【BIT 2】Do not use
【BIT 1】Allow counting operation
【BIT 0】Exceeding the zero point area at
startup allows the use of the original zero position
*The default is 0001, the weight unit symbol is allowed to flash after the
weight unit is converted; counting operation is allowed; the original zero is
forbidden to be used when the area exceeds the zero point when starting
SPEC NO.07
00: g
0:Allow
0:Allow
01: kg 10: lb
1:Forbid
1:Forbid
11: OUNCE
【BIT 0】Not Stable Hold
SPEC NO.08
*The default is 1101, then the base (when calibration) weight unit is OUNCE;
when the weight is not zero, zero setting is allowed; when the weight is
unstable, locking is prohibited
【BIT 3/BIT 2】Benchmark (when calibrated) weight unit (g/kg/lb)
【BIT 1】WHEN WEIGHT IS NOT ZERO, NO PRESE TARE OP.

23
22
*The default is 1001, the number of divisions allowed for overload display is 9d
*The default is 0000
*The default is 1111
*The default is 1111, which allows displaying the measured internal value
*The default is 0000, the battery voltage is displayed in the project clock for
measuring voltage
SPEC NO.14
SPEC NO.15
SPEC NO.16
SPEC NO.17
SPEC NO.18
0000: 0d
1000: 8d
0100: 4d
1100: 12d
0001: 1d
1001: 9d
0101: 5d
1101: 13d
0010: 2d
1010: 10d
0110: 6d
1110:14d
0011: 3d
1011: 11d
0111: 7d
1111:15d
【BIT 3/BIT 2/BIT 1/BIT 0】Allow overload to display the number of divisions
【BIT 3/BIT 2/BIT 1/BIT 0】Do not use
【BIT 3/BIT 2/BIT 1/BIT 0】Do not use
【BIT 3/BIT 2/BIT 1】Do not use
【BIT 3/BIT 2/BIT 1】Do not use
0: Allow
0: Display battery voltage
1: Forbid
1: Displays the percentage of
battery power remaining
【BIT 0】Display measured internal values
【BIT 0】Display items for measuring voltage
*The default is 0000
SPEC NO.19
【BIT 3/BIT 2/BIT 1/BIT 0】Do not use
Note:
1. Set the unused setting bits to "0"
2. FS is full weighing value
3. The system function is used to define the setting of measurement
specifications. The user cannot change it by himself, and it must be set by a
professional technician.
4.1 Full scale calibration
Modify BIT 3 of SPEC 12 to "0"
Click [REZERO] button to save
Click the switch below the scale body to open the calibration
Turn on the calibration switch again. Long press [REZERO],
click [ ← ] [ ↑ ] [ ↑ ] to enter the calibration, display the
maximum weight of calibration
REZERO
+
REZERO UNIT
←TARE
↑
TARE
↑
3. EDIT SETTINGS
3.5 System function definition
4.1 Full scale calibration
4. CALIBRATION OPERATION
*The default is 0101, the resolution is 3000d
1000: 6000d
1100: 15000d
1001: 7500d
1101: 20000d
1010: 10000d
OTHERS
1011: 12500d
Not used
SPEC NO.13
0000: 1000d
0100: 2500d
0001: 1250d
0101: 3000d
0010: 1500d
0110: 4000d
0011: 2000d
0111: 5000d
【BIT 3/BIT 2/BIT 1/BIT 0】Resolution selection

25
24
Modify BIT 3 of SPEC 12 to "1"
Click [REZERO] to enter zero calibration and wait
Put the corresponding weights, and click the [REZERO] button to
enter the full-scale calibration
Remove the weight to complete the calibration and return to the
weighing interface
Note:
1. The DSW-100 instrument system can be fully calibrated with a standard
weight greater than 10% of the full weight
2. The calibration switch (SPAN SW) must be on
4.2 Full scale rate correction
Click [REZERO] button to save
Click the switch below the scale body to open the calibration
Put a heavy object on the weighing platform, such as 10.005,
the weight has deviation
REZERO
Turn on the calibration switch again. Long press [REZERO],
click [ ← ] [ ↑ ] [ ↑ ] to enter the calibration, display the
previous calibration Scaling parameters, such as 37.500
+
REZERO UNIT
←TARE
↑
TARE
↑
4. CALIBRATION OPERATION
4.1 Full scale calibration
4. CALIBRATION OPERATION
4.2 Full scale rate correction
Click [ ← ] Shift, [ ↑ ] Increment, can be modified to the
weight to be calibrated, such as 5kg

27
26
4.3 Internal code check/display
Click[ ← ] Shift, [ ↑ ] Increment, modify to the calculated
scale parameter
Modify BIT0 in SPEC 05 to "1"
Remove the heavy object, and press [REZERO] to enter the
zero conrmation and wait, click [REZERO] again to enter the
zero conrmation
Put on the weight, and display the actual weight value of the
modied weight
Remove heavy objects and return to weighing mode
Note:
1. When there are items on the load-bearing table or zero confirmation is
not required, you can press the [ON/OFF] key to directly exit the calibration
mode and return to the weighing mode.
2. The calibration switch (SPAN SW) must be turned on.
3. Calculation of the new standard rate:
Actual weight W1=10.00kg Display weight W2=10.005kg The original
standard rate of the instrument is V1= 37.500
Then the correction rate V2 = W1*V1/W2=10.00*37.500/10.005=37.48
Click [REZERO] button to save
Click the switch below the scale body to open the calibration
Long press [REZERO] key, click [ ↑ ] [ ↑ ] [ ← ] to enter the
internal code check
Click [ ↑ ] button to display [A/D] internal code
Click [ON/OFF] key to return to weighing mode
REZERO
ON
OFF
4. CALIBRATION OPERATION
4.2 Full scale rate correction
4.3 Internal code check/display
4. CALIBRATION OPERATION

29
28
5.1 Reset 5.2 Factory default
Click the button below the scale body to turn on the
calibration switch
Long press [REZERO] key and click [ ↑ ] [ON/OFF] [ ← ] Restore
factory settings
+
REZERO UNIT
←
TARE
↑
ON
OFF
Note:
Restoring factory settings does not include restoring the modified values of
BIT 3/ Spec 10 BIT 0/ Spec 09/ Spec 11/ Spec 12/ Spec 13
Coding Coding
SPEC00
SPEC01
SPEC02
SPEC03
SPEC20
SPEC21
Defaults Defaults
1100
0100
0100
1011
1100
0000
SPEC04
SPEC05
SPEC06
SPEC07
SPEC08
SPEC09
SPEC10
SPEC11
SPEC12
SPEC13
SPEC14
SPEC15
SPEC16
SPEC17
SPEC18
SPEC19
0100
1101
1001
1010
0111
1010
1100
0011
0001
0101
1001
0000
1111
1111
0000
0000
5. FACTORY SETTINGS 5. FACTORY SETTINGS
5.1 Reset
5.2 Factory default

31
30
Prompt information list 7.1 POS serial protocol used in China
Weight overload
Gross or net weight is negative
When the [REZERO] button is pressed
System zero error
System zero exceeds the allowable range
Calibration switch is in "on" state
Calibration switch is in "o" state
OF
UF.
888888
0 – E r
z r . E r r
S O n
S O F F
6. PROMPT MESSAGE 7. SERIAL AND USB
6. Prompt information list
7.1 POS serial protocol used in China
7.1.1. RS232C Interface protocol: The baud rate is set by SPEC01,
bit2~0 (1200~57600). The stop bit is 1 bit and the data bit is 8 bits.
7.1.2. The RS232C interface can be used by setting SPEC 02, 20,
21.
7.1.3. The RS232C interface is commonly used as a digital
communication protocol. Provide continuous weight data output
format.
The factory settings are: baud rate=9600bit/s, data=8, STOP=1,
no parity bit.
SPEC 01=X100, Baud=9600bit/s
SPEC 02=1100, continuous weight data output
SPEC 20=XX00, Data=8bit, Stop=1bit, no parity
SPEC 21=0XXX. The output data is synchronized with the display
data (when there is weight unit conversion)
SPEC 21=1XXX. The output data is not synchronized with the
display data (only the output calibration is the set weight unit)
7.1.4. Digital weighing protocol, continuous weight data output
(standard) format: (according to factory settings)
Standard format of serial data output:
SPEC SETUP: SPEC 01=0100,SPEC 02 = 1100,SPEC 20 = 0000,
SPEC 21 = 0000。
DATA FORMAT. 06 20 67 30 0D 47 30 30 31 2E 30 30 30 0D 54
① ② ③ ④ ⑤ ⑥ ④ ⑤
30 31 30 2E 30 30 30 0D 0A
⑥ ④ ⑦
① 06H boot byte, the rst byte of the message output.
② 20H 67H "_ g" weight unit, (6BH, 67H "kg", 6CH, 62H "lb", 6CH,
7AH "oz")
③ 30H/31H weight is stable/weight is unstable.
④ 0DH data segment separator.
⑤ 47H "G" gross weight data eld start byte, 4EH "N" net weight
data eld start byte, 54H "T" tare data eld start byte
⑥ Weight data eld
⑦ 0AH End of telegram.
7.1.5. Serial continuous weight data output special format
7.1.5.1Continuous data output, special format 1 (Special data type
1)
SPEC SET: SPEC02 =11X1 ,SPEC20= 0000,SPEC21= XXXX
DATA FORMAT. 3DH(=),3XH(MSB),3XH,3XH,2EH(“.”),3XH,

33
32
[SW2] and [SW3]
Ex1. The NET WEIGHT is -124.50kg
The data format is 0x02,0x7c,0x59,0x70,0x30,0x31,0x32,0x34
,0x35,0x30, 0x30,0x31,0x32,0x34,0x35,0x30,0x0d.
7.1.5.4 Special data type 4 TERAOKA SCALES TYPE
DIGI RS232 Communication type.
SPEC SET: SPEC02 =11X1 ,SPEC 20= 1100,SPEC 21= XXXX
The mode efficiency NET WEIGHT data length is 7 digital With
decimal point & with stable word .
STABLE word 0x30 (30H)= STABLE , 0x31(31H) = UNSTABLE
RS_CR 0x0D (0DH)
RS_LF 0x0A (0AH)
Note 1: The above setting value 'X' is the bit that does not
aect this mode of operation, (0/1 is ok)
Note 2: No weight unit symbol. When weight is converted, the
value output is the value of the unit of weight set at the time of
calibration.
Ex1. The NET WEIGHT is -124.50kg (The negative weight
display function spec06.bit3,2=10 has been set)
The data format is 0x30,0x2d,0x31,0x32,0x34,0x2e,0x35
,0x30,0x0d,0x0a
Ex2. When NET WEIGHT is overload. (Weight overload)
The data format is 0x30,0x20,0x20,0x20,0x20,0x20,0x4F,0
SPECIAL DATA TYPE
7.2
SPECIAL DATA TYPE
7.2
7. SERIAL AND USB 7. SERIAL AND USB
3XH,3XH(LSB),0DH
7.1.5.2 Continuous data output, special format 2 (Special data
type 2)
SPEC SET: SPEC02 =11X1, SPEC 20= 0100, SPEC 21= XXXX
DATA FORMAT. 3XH(MSB),3XH,3XH,3XH, 2EH("."),3XH,3XH(LSB),
0DH
Note 1: All characters are printed in ASCII code. Contains only
the numerical symbol, the net weight value, and the ending
character CR(0DH), with the higher value coming first. When
the value is "negative", the highest bit output is 2EH(" - "). The
numeric elds are 7-byte (ASCII) characters.
Note 2: No weight unit symbol. When weight is converted, the
value output is the value of the unit of weight set at the time of
calibration.
For example: 1. The weight value of 2.56,
The output data: 30H, 30H, 30H, 32H, 2EH, 35H, 36H, 0DH
2. The weight value of -2.56,
The output data: 2DH, 30H, 30H, 32H, 2EH, 35H, 36H, 0DH
7.1.5.3 Continuous data output, Special data type 3 (TOLEDO
SCALES TYPE)
SPEC SET: SPEC02 =11X1 ,SPEC 20= 1000,SPEC 21= XXXX
No decimal point command. Total has 17 digital ASCII code.
[STX] WORD ASCII START FLAGE (02H) , [CR] WORD ASCII (0DH)
STATE WORD ,[SW1]
STATE WORD 1
BIT 0,1,2
BIT 0 BIT 1 BIT 2 DECIMAL POINT POSITION
DISPLAY SUBBSECTION
BITS 3 BITS 4
1
1
1
1
1
1
1
1
0
0
0 0
0
0
0
0
XXXXX0
XXXXXX
XXXX, X
XXX. XX
XX. XXX
X1
0
0
0
BITS 5
BITS 6
BITS 7
1
1
1
0 X2
X5
=“1”
=“1”
=“0”
SW 2 STATE WORD 2 SW 3 STATE WORD 3
BITS BITSFOUNCTION FOUNCTION
GROSS =”0”, NET =”1”
NEGTIVER =”1” positive=”0”
Stable=”1”,Not stable“0”
Weight Unit :
g=”00”,kg=”01”lb=”10”,
once=”11”
OVER FULL =”1”,NOMRA=”0”
0 0
1 1
“1”
“0”
=“0”
=“0”
=“0”
=“0”
=“0”
=“1”
=“1”
=“1”
2 2
3 3
4 4
5 5
6 6
7 7
STX
NET WEIGHT TARE WEIGHT
SW 1 SW 2 SW 3
CR
STABLE WORD NET WEIGHT TEXT (With decimal point) + RS_CR + RS_LF
CR
NET WEIGHT(XXX.XXX)
Table of contents
Other DB Electronics Scale manuals
