DCS WOT-127SS User manual

WALL OVEN
Installation Guide
MODELS:
WOT-227
WOT-230
WOTD-227
WOTD-230
WOT-127
WOT-130


1
A MESSAGE TO OUR CUSTOMERS
Thank you for selecting this DCS Professional Wall Oven. Because of this appliance’s unique features we have
developed this Installation Guide. It contains valuable information on how to properly install your new appliance
for years of safe and enjoyable cooking.
For your convenience, product questions can be answered by a DCS Customer Care Representative by phone:
or by mail:
Fisher & Paykel Appliances, Inc.
Attention: DCS Customer Care
5900 Skylab Road
Huntington Beach, CA 92647
WARNING!
Improper installation, adjustment, alteration, service or maintenance can cause property damage, injury or death.
Read the installation, operating and maintenance instructions thoroughly before installing, using or servicing this
equipment.
WARNING!
If the information in this manual is not followed exactly, a fire or electrocution may result causing property
damage, personal injury or death. Do not store or use gasoline or other flammable vapors and liquids in the
vicinity of this or any other appliance.
WARNING!
To reduce the risk of injury to persons in the event of a grease fire, observe the following: Turn oven off first.
Smother flames with a close-fitting lid, cookie sheet, metal tray, baking soda or use a dry chemical or foam-type fire
extinguisher. Be careful to prevent burns. If the flames do not go out immediately evacuate and call the fire
department. Never pick up a flaming pan - You may be burned. DO NOT USE WATER ON GREASE FIRES, including
wet dishcloths or towels - a violent steam explosion will result. Use an extinguisher ONLY if:
1. You know you have a Class ABC extinguisher, and you already know how to operate it.
2. The fire is small and contained in the area where it started.
3. The fire department is being called.
4. You can fight the fire with your back to an exit.
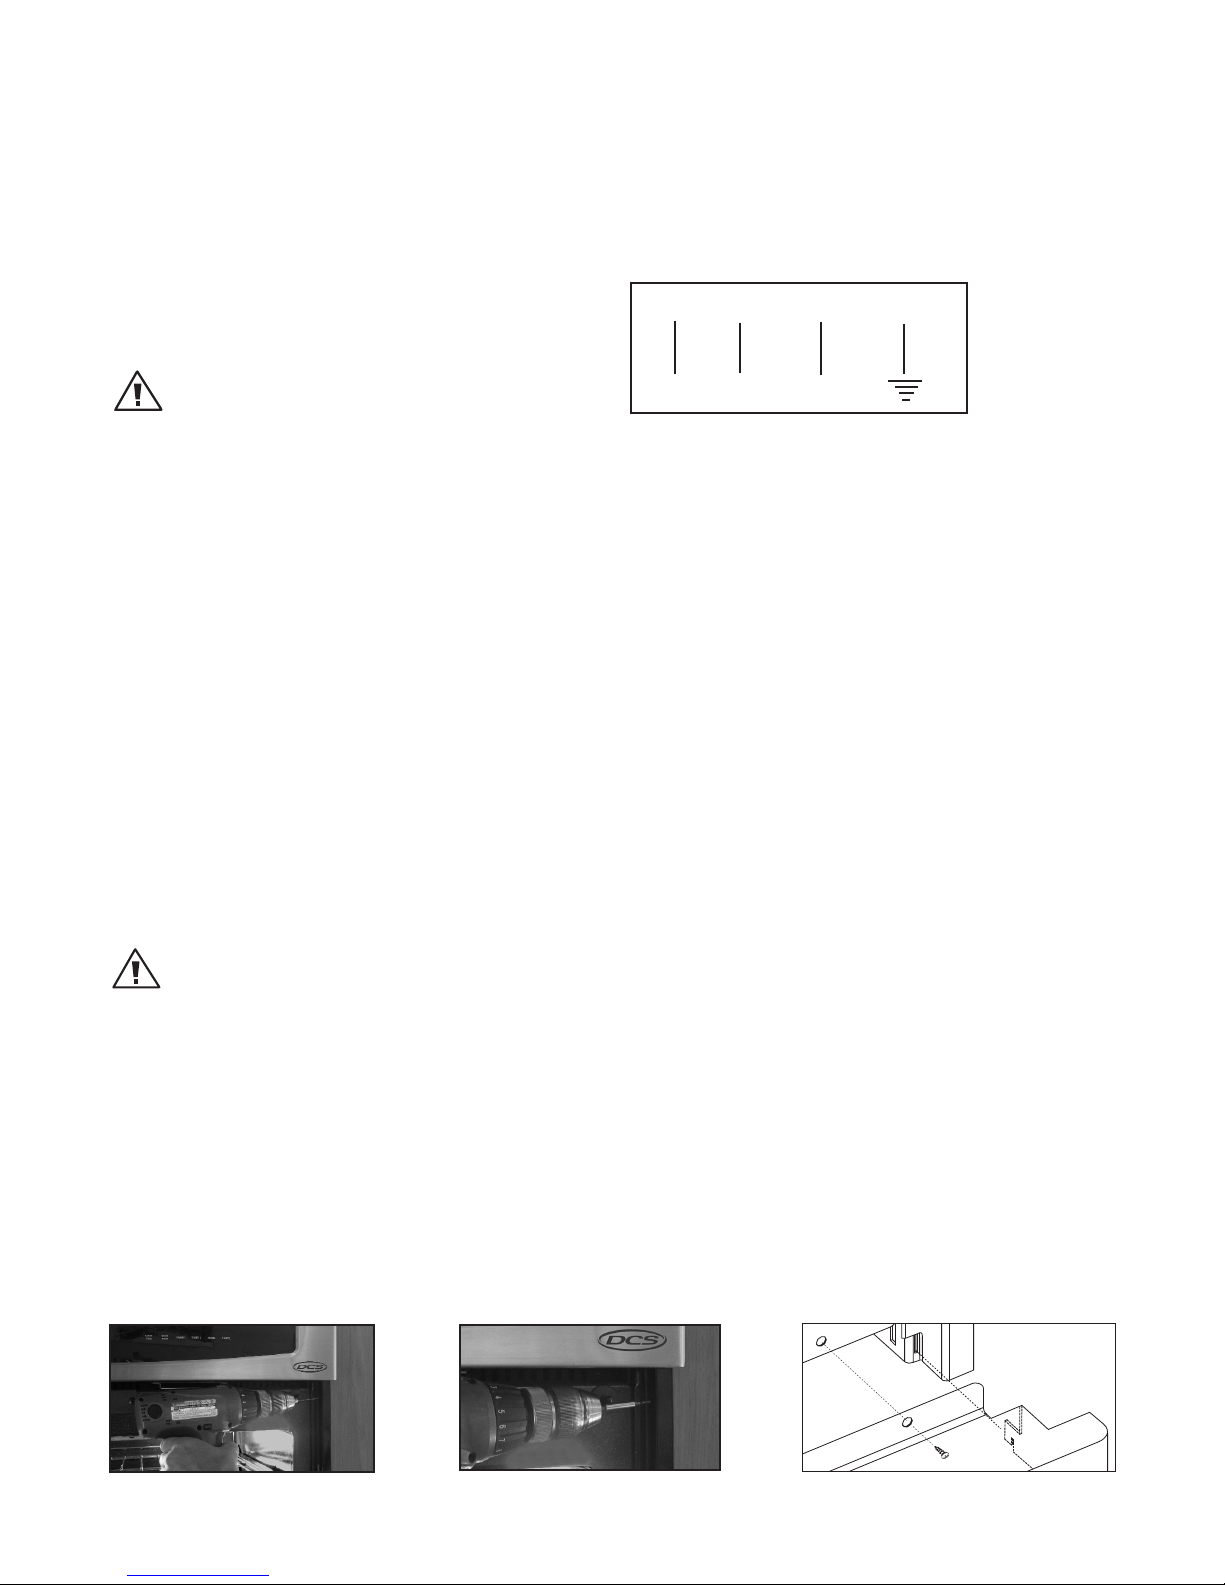
SAFETY WARNING!
Turn off power circuit at service panel and lock out panel, before wiring this appliance.
PLEASE RETAIN THIS MANUAL FOR FUTURE REFERENCE.

2
TABLE OF CONTENTS
WALL OVEN DIMENSIONS
WOT/WOTD-227 27” Double Wall Oven 3
WOT-127 27” Single Wall Oven 3
WOT/WOTD-230 30” Double Wall Oven 4
WOT-130 30” Single Wall Oven 4
CABINET INSTALLATION
WOT/WOTD-227 27” Double Wall Oven 5
WOT-127 27” Single Wall Oven 5
WOT/WOTD-230 30” Double Wall Oven 6
WOT-130 30” Single Wall Oven 6
UNDER COUNTER INSTALLATION
WOT-127 & 130 Single Wall Oven 7
MOUNTING THE WALL OVEN
8
HOW TO OBTAIN SERVICE
9
WARRANTY
10

3
WALL OVEN DIMENSIONS
Bottom Trim screws
24-3/8"
23-5/8"
28-13/16" 26-1/2"
26-7/8"
Interior Dimension = 16"H x 22"W x 18-5/8"D
Rack Dimension = 21-3/8" W x 15"D
22-1/8"
1-9/16"
WOT-127 27” SINGLE WALL OVEN
Bottom Trim screws
24-3/8"
51-5/16"
53-11/16"
Interior Dimension = 16"H x 22"W x 18-5/8"D
Rack Dimension = 21-3/8"W x 15"D
26-7/8" 23-5/8"
26"
22-1/8"
1-9/16"
WOT/WOTD-227 27” DOUBLE WALL OVEN

4
WALL OVEN DIMENSIONS
Bottom Trim screws
53-11/16"
29-7/8"
Interior Dimension = 16"H x 25"W x 18-5/8"D
Rack Dimension = 24-3/8"W x 15"D
26"
24-3/8"
51-5/16"
23-5/8"
22-1/8"
1-9/16"
WOT/WOTD-230 30” DOUBLE WALL OVEN
Bottom Trim screws
29-7/8"
28-13/16"
Interior Dimension = 16"H x 25"W x 18-5/8"D
Rack Dimension = 24-3/8"W x 15"D
24-3/8"
23-5/8"
26-1/2"
22-1/8"
1-9/16"
WOT-130 30” SINGLE WALL OVEN

5
Our Ovens are designed to be installed into a 27” and 30” minimum width cabinet. For the best appearance, to
conceal the raw edges and to ensure a snug and secure fit, the cutouts must be precise. Use the wall oven cutout
dimensions provided for your installation. Ovens are very heavy, we suggest two installers to lift ovens into the
cabinet opening.
■Cut 2” x 4” runners or create a solid shelf to support the oven unit at the bottom.
■The bottom support must be level and capable of supporting the weight of the oven unit –
(i.e 445 pounds – double oven or 275 pounds – single oven.)
■The electrical cable should be a 3 conductor or 4 conductor wire as required by local codes
(must be hard wired and dedicated).
■U. L. Listed conduit connector required.
■The conduit box is to be located in the center below the oven, 2 inches below the bottom.
■Power supply wiring should be connected prior to installing the oven to the cabinet.
Cut Out Dimensions
Cabinet Dimensions
2x4's or
similar
runners
or solid
structure
support
Conduit
box centered
2" below bottom
of oven
2x4's or
similar supports Floor
(Suggested
distance from
floor 12" min.)
27"
min.
25-1/2 "
53-1/4 "
+1/16"
- 0"
Floor
(Suggested
distance from
floor 20" min.)
Cut Out Dimensions
25-1/2 "
28-5/16 "
+1/16"
- 0"
Cabinet Dimensions
2x4's or
similar
runners
or solid
structure
support
Conduit
box centered
2" below bottom
of oven
2x4's or
similar supports
27"
min.
CABINET INSTALLATION
WOT/WOTD-227 27” DOUBLE WALL OVEN
WOT-127 27” SINGLE WALL OVEN

6
NOTE:
Do not use an extension cord with this appliance, the unit must be hard wired directly to
the electrical source.
Conduit
box centered
2" below bottom
of oven
2x4's or
similar
runners
or solid
structure
support
30"
2x4's or
similar supports Floor
(Suggested
distance from
floor 12" min.)
min.
Cut Out Dimensions
Cabinet Dimensions
28-1/2 "
53-1/4 "
+1/16"
- 0"
Floor
(Suggested
distance from
floor 20" min.)
Cut Out Dimensions
28-1/2 "
28-5/16 "
+1/16"
- 0"
Cabinet Dimensions
2x4's or
similar
runners
or solid
structure
support
Conduit
box centered
2" below bottom
of oven
2x4's or
similar supports
30"
min.
CABINET INSTALLATION
WOT/WOTD-230 30” DOUBLE WALL OVEN
WOT-130 30” SINGLE WALL OVEN

7
Min.
Cabinet Face
19-3/4"
34-3/4"
for CTD-365
28-5/8"
for CTD-304
1-1/2"
4-3/4"
25-1/2"
28-5/16"
+ 1/16"
- 0"
(27" Oven)
28-1/2"
(30" Oven)
36"
24"
Electric Box
UNDER COUNTER INSTALLATION
WITH CTD-365 & CTD-304
WOT-127 & 130 SINGLE WALL OVENS
The WOT-127 and WOT-130 single ovens may be installed below the DCS CTD-365 or CTD-304 gas cooktop in a
standard 36” tall (to counter surface) base cabinet. Refer to diagram shown below for cabinet and countertop
cutout dimensions.
The gas shut-off valve and power supply receptacle for the cooktop must remain accessible from the front after
the units are installed. It is suggested that the valve and receptacle be located in the cabinet adjacent to the
wall oven on the right. To prevent interference with the wall oven chassis, the cooktop gas regulator must be
mounted at the shut-off valve. Use approved flexible gas tubing to make the connection between the regulator
and the cooktop.
Install the cooktop into the countertop first. Make the connections to the gas and power supplies as per the
cooktop installation instructions. Verify that the electrical service to the oven is shut off. Make the power
supply connections for the wall oven and then slide the unit into the cabinet.
CAUTION!
If the power leads are connected improperly, damage to the oven will result.
Secure unit to cabinet as noted in “Mounting the Wall Oven” section. Turn on all utilities and check both units
for proper operation.
WARNING!
When pushing wall oven into cabinet, be careful not to pinch the gas connection to the cooktop.

8
MOUNTING THE WALL OVENS
FIG. 4
L1 COMMON L2 GROUND
RED WHITE BLACK
Our built-in ovens require a dedicated and properly grounded 4-wire 120/240 volt, 60 Hz power supply, protected
by a time delay fuse or circuit breaker. Ovens are supplied with a flexible power cable which must be hard wired
to a junction box.
AMPERAGE:
■WOT/WOTD-227& WOT/WOTD-230 = 50A
■WOT-127& WOT-130 = 35A
WARNING !
Electrical Shock Hazard!! Follow these instructions!
CAUTION!
If the power leads are connected improperly (reversing L1 and N, or L2 and N (fig. 1), damage to the oven will result.
■The electrical power to the oven branch circuit must be shut off while line connections are
being made.
■Use the proper sized copper wiring only.
■Electrical grounding is required on this appliance. The free end of the bare copper ground
wire must be connected to a suitable ground. This wire must remain grounded to the oven.
■If cold water pipe is interrupted by plastic, non-metallic gaskets, union connections or other
insulating materials, Do Not use for grounding.
■Do Not ground to a gas pipe.
■Do Not have a fuse in the Neutral or Grounding circuit. This could result in an electrical shock!
■If you are in any doubt as to whether the appliance is properly grounded, check with a
qualified electrician.
MOUNTING THE WALL OVEN:
WARNING:
Failure to follow these instruction could result in serious injury or death!
1 Remove all cardboard, packing materials, the bottom wood pallet and metal mounting brackets. Remove the oven
doors and oven racks (see Use & Care manual page 18).
2 After creating your precision cabinet cutout and supports, position the oven in front of the cutout. Make the
power supply connections as specified in this guide, and then slide the unit carefully into the cabinet opening.
3 When in place, drill 3/32” holes into cabinet frame through the mounting holes in the oven side trim. See fig. 2.
4 Secure oven to the cabinet with screws furnished as shown in figure 3 (uses 2 screws, 1 on each side, top oven
only).
5 Slip tabs on rear of bottom trim into mating slots in oven trim posts (see fig.4). Attach the bottom trim with the 2
screws provided.
FIG. 1
4-WIRE CONNECTIONS
FIG. 3
FIG. 2

9
SERVICE
HOW TO OBTAIN SERVICE:
For warranty service, contact your local DCS authorized service agency. Provide him/her with the Model Number,
Serial Number, and date of installation, and a brief description of the problem. If you need assistance in locating
the authorized service agency in your area please contact our DCS Customer Care Representative for an
authorized service agent near you, our number is (888) 281-5698,
Your satisfaction is of the utmost importance to us. If a problem cannot be resolved to your satisfaction, please
write or email us at:
Write:
Fisher & Paykel Appliances, Inc.
Attention: DCS Customer Care
5900 Skylab Road
Huntington Beach, CA 92647
email: [email protected]
BEFORE YOU CALL FOR SERVICE:
1. Is the circuit breaker tripped or the fuse blown?
2. Is there a power outage in the area?
3. Have you recently set the child safety mode? See page 17 for resetting in the Use and Care Guide.

10
WARRANTY
LIMITED WARRANTY
When you purchase a new DCS built-in wall oven you automatically receive a One year Limited Warranty
covering parts and labor for the entire product, and a Ten year Limited (parts only) Warranty on the porcelain
oven cavity and porcelain inner door panel for servicing within the 48 mainland United States, Hawaii,
Washington D.C. and Canada. In Alaska the Limited Warranty is the same except that you must pay to ship the
Product to the service shop or the service technician’s travel to your home. Products for use in Canada must be
purchased through the Canadian distribution channel to ensure regulatory compliance.
FISHER & PAYKEL UNDERTAKES TO:
Repair without cost to the owner either for material or labor any part of the Product, the serial number of which
appears on the Product, which is found to be defective. In Alaska, you must pay to ship the Product to the
service shop or for the service technician’s travel to your home. If the Product is installed in a motor vehicle,
boat or similar mobile facility, you must bring it to the service shop at your expense or pay for the service
technician’s travel to the location of the Product.
If we are unable to repair a defective part of the Product after a reasonable number of attempts, at our option
we may replace the part or the Product, or we may provide you a full refund of the purchase price of the
Product (not including installation or other charges).
This warranty extends to the original purchaser and any succeeding owner of the Product for products
purchased for ordinary single-family home use. All service under this Limited Warranty shall be provided by
Fisher & Paykel Appliances Inc. or its Authorized Service Agent during normal business hours.
HOW LONG DOES THIS LIMITED WARRANTY LAST?
Our liability under this Limited Warranty for the entire product expires One year from the date of purchase of
the Product by the first consumer. Our liability under this Limited part Warranty for the porcelain oven cavity
and porcelain inner door panel expires Ten years from the date of purchase of the Product by the first
consumer.
Our liability under any implied warranties, including the implied warranty of merchantability (an unwritten
warranty that the Product is fit for ordinary use) also expires One year (or such longer period as required by
applicable law) from the date of purchase of the Product by the first consumer. Some states do not allow
limitations on how long an implied warranty lasts, so this limit on implied warranties may not apply to you.
THIS WARRANTY DOES NOT COVER:
A. Service calls that are not related to any defect in the Product. The cost of a service call will be charged if the
problem is not found to be a defect of the Product. For example:
1. Correct faulty installation of the Product.
2. Instruct you how to use the Product.
3. Replace house fuses, reset circuit breakers, correct house wiring or plumbing, or replace light
bulbs.
4. Correct fault(s) caused by the user.
5. Change the set-up of the Product.
6. Unauthorized modifications of the Product.
7. Noise or vibration that is considered normal, for example, drain/fan sounds, regeneration noises or user
warning beeps.
8. Correcting damage caused by pests, for example, rats, cockroaches etc.
B. Defects caused by factors other than:
1. Normal domestic use

11
WARRANTY (continued)
2. Use in accordance with the Product’s Use and Care Guide.
C. Defects to the Product caused by accident, neglect, misuse, fire, flood or Act of God.
D. The cost of repairs carried out by non-authorized repairers or the cost of correcting such unauthorized repairs.
E. Travel Fees and associated charges incurred when the product is installed in a location with limited or restricted
access. (i.e. airplane flights, ferry charges, isolated geographic areas).
F. Normal recommended maintenance as set forth in the Product’s Use and Care Guide.
G. Damage to cabinets or floor done by a service agent.
If you have an installation problem contact your dealer or installer. You are responsible for providing adequate
electrical, exhausting and other connection facilities.
We are not responsible for consequential or incidental damages (the cost of repairing or replacing other property
damaged if the Product is defective or any of your expenses caused if the Product is defective). Some states do
not allow the exclusion or limitation of incidental or consequential damages, so the above limitation or exclusion
may not apply to you.
HOW TO GET SERVICE
Please read your Use and Care Guide. If you then have any questions about operating the Product, need the name
of your local DCS Authorized Service Agent, or believe the Product is defective and wish service under this
Limited Warranty, please contact your dealer or call us at:
TOLL FREE 1-888-281-5698 or contact us through our web site: www.dcsappliances.com
You may be required to provide reasonable proof of the date of purchase of the Product before the Product will
be serviced under this Limited Warranty.
COMMERCIAL USE
This warranty applies to appliances used in residential applications; it does not cover their use in commercial
situations.
NO OTHER WARRANTIES
This Limited Warranty is the complete and exclusive agreement between you and Fisher & Paykel Appliances
Inc.regarding any defect in the Product. None of our employees (or our Authorized Service Agents) are authorized
to make any addition or modification to this Limited Warranty.
WARRANTOR: FISHER & PAYKEL APPLIANCES, INC.
If you need further help concerning this Limited Warranty, please call us at the above number, or write to:
Fisher & Paykel Appliances, Inc.
Attention: DCS Customer Care
5900 Skylab Road, Huntington Beach, CA 92647
This Limited Warranty gives you specific legal rights, and you may also have other rights which vary from state to
state.
Fisher & Paykel Appliances Inc. is a leading manufacturer of premium quality cooking and specialty appliances
under the Fisher & Paykel and DCS brands.

NOTES
12

FOUR MURAL
Guide d'installation
MODÈLES :
WOT-227
WOT-230
WOTD-227
WOTD-230
WOT-127
WOT-130

1
A L'INTENTION DE NOS CLIENTS
Nous vous remercions d'avoir choisi ce four mural professionnel DCS. Nous avons conçu ce Manuel d'installation
pour expliquer ses fonctions uniques. Il contient des informations extrêmement utiles sur la façon d'installer
correctement votre nouvel appareil. Vous pourrez ainsi en profiter pendant des années en toute sécurité.
Si vous avez des questions au sujet de notre produit, communiquez avec un représentant du Centre de service à
ou par courrier :
Fisher & Paykel Appliances, Inc.
Attention: DCS Customer Care
5900 Skylab Road
Huntington Beach, CA 92647
AVERTISSEMENT!
Toute installation, ajustement, altération ou entretien incorrect peut causer des dommages matériels, des blessures
ou la mort. Veuillez lire soigneusement ces instructions d'installation, d'utilisation et d'entretien avant d'installer,
utiliser ou effectuer l'entretien de cet appareil. VEUILLEZ CONSERVER CE MANUEL À TITRE DE RÉFÉRENCE.
AVERTISSEMENT!
Si les informations de ce manuel ne sont pas suivies à la lettre, un incendie ou une électrocution peuvent se
produire et causer des dommages matériels, des blessures ou la mort. Évitez de stocker ou d'utiliser de l'essence ou
tout autre liquide et vapeur inflammable à proximité de cet appareil électroménager ou de tout autre.
AVERTISSEMENT!
Pour réduire les risques de blessures en cas de feu de graisse sur la table de cuisson, respectez les consignes
suivantes : Éteignez d'abord le four. Étouffez les flammes à l'aide d'un couvercle hermétique, d'une plaque à
biscuits d'un plateau métallique, de bicarbonate de soude ou à l'aide d'un extincteur à poudre ou à mousse.
Attention à ne pas vous brûler. Si les flammes ne s'éteignent pas immédiatement, évacuez les lieux et appelez les
pompiers. Ne prenez jamais en main une poêle ou une casserole qui a pris feu; vous pourriez vous brûler.
N'UTILISEZ PAS D'EAU SUR UN FEU DE GRAISSE, y compris des serviettes mouillées; une explosion de vapeur
violente pourrait en résulter. Utilisez un extincteur SEULEMENT si :
1. Vous êtes sûr qu'il s'agit d'un extincteur de classe ABC et savez comment le faire fonctionner.
2. L'incendie est limité et se limite à l'endroit où il s'est déclenché.
3. Vous êtes en train d'avertir les pompiers.
4. Vous pouvez combattre l'incendie le dos tourné vers une sortie.
AVERTISSEMENT RELATIF À LA SÉCURITÉ :
Coupez le circuit électrique au niveau du panneau de service et verrouillez le panneau avant de brancher cet
appareil électroménager.

2
TABLE DES MATIERES
DIMENSIONS DU FOUR MURAL
Fours doubles WOT-227 27 po 3
Fours simples WOT-127 27 po 3
Fours doubles WOT-230 30 po 4
Fours simples WOT-130 30 po 4
INSTALLATION EN ARMOIRE
Fours doubles WOT/WOTD-227 27 po 5
Fours simples WOT-127 27 po 5
Fours doubles WOT/WOTD-230 30 po 6
Fours simples WOT-130 30 po 6
INSTALLATION SOUS COMPTOIR
Fours simples WOT-127 et 130 7
MONTAGE DU FOUR MURAL 8
POUR L'OBTENTION DE SERVICE 9
GARANTIE 10-11

3
DIMENSIONS DU FOUR MURAL
Vis de garniture inférieure
62 cm
(24-3/8 po)
60 cm
(23-5/8 po)
73 cm
(28-13/16 po) 67 cm
(26-1/2 po)
68 cm
(26-7/8 po)
Dimensions intérieures (H x l x p) = 40,6 x 55,9 x 47,3 cm
(16 x 22 x 18-5/8 po)
Dimensions de grille (l x p) = 54,3 x 38,1 cm
(21-3/8 x 15 po)
56 cm
(22-3/8 po)
4 cm
(1-9/16 po)
FOUR SIMPLE WOT-127 27 PO
Vis de garniture inférieure
136 cm
53-11/16 po)
76 cm
(29-7/8 po)
Dimensions intérieures (H x l x p) = 40,6 x 55,9 x 47,3 cm
(16 x 25 x 18-5/8 po)
Dimensions de grille (l x p) = 62 x 38,1 cm
(24-3/8 x 15 po)
66 cm
(26 po)
62 cm
(24-3/8 po)
130 cm
(51-5/16 po)
60 cm
(23-5/8 po)
56 cm
(22-1/8 po)
4 cm
(1-9/16 po)
FOUR DOUBLE WOT/WOTD-227 27 PO

4
DIMENSIONS DU FOUR MURAL
Vis de garniture inférieure
62 cm
(24-3/8 po)
130 cm
(51-5/16 po)
136 cm
(53-11/16 po)
Dimensions intérieures (H x l x p) = 40,6 x 55,9 x 47,3 cm
(16 x 22 x 18-5/8 po)
Dimensions de grille (l x p) = 54,3 x 38,1 cm
(21-3/8 x 15 po)
68 cm
(26-7/8 po) 60 cm
(23-5/8 po)
66 cm
(26 po)
56 cm
(22-1/8 po)
4 cm
(1-9/16 po)
FOUR DOUBLE WOT/WOTD-230 30 PO
Vis de garniture inférieure
76 cm
(29-7/8 po)
73 cm
(28-13/16 po)
Dimensions intérieures (H x l x p) = 40,6 x 55,9 x 47,3 cm
(16 x 25 x 18-5/8 po)
Dimensions de grille (l x p) = 62 x 38,1 cm
(24-3/8 x 15 po)
62 cm
(24-3/8 po)
60 cm
(23-5/8 po)
67 cm
(26-1/2 po)
56 cm
(22-1/8 po)
4 cm
(1-9/16 po)
FOUR SIMPLE WOT-130 30 PO

5
Nos fours sont conçus pour être installés dans une armoire d'une largeur minimum de 68,6 et 76,2 cm (27 et 30
po). Pour donner une belle apparence à l'appareil, les découpes doivent être précises afin d'en dissimuler les
bords bruts et de permettre un ajustement serré et solide. Utilisez les dimensions de découpe pour four mural
fournies pour votre installation. Comme les fours sont très lourds, nous suggérons que deux installateurs se
chargent de les soulever et les placer dans l'ouverture de l'armoire.
■Coupez des pièces d'appui 2 x 4 ou construisez une étagère solide pouvant support
erlefourau fond.
■Le support inférieur doit être de niveau et capable de supporter le poids du four - (c.-à-d. 202 kg/445 livres -
four double ou 125 kg/275 livres - four simple).
■Le câble électrique doit comporter un fil à 3 ou 4 conducteurs conformément à la réglementation en vigueur
(doit être câblé et dédié).
■Raccord de conduit homologué UL requis.
■La boîte de raccordement doit être située au centre sous le four, à 5 cm (2 pouces) en dessous de sa partie
inférieure.
■Le câblage d'alimentation doit être connecté avant l'installation du four dans l'armoire.
Dimensions de découpe
Dimensions de l'armoire
2x4 ou
pièces
d'appui
similaires
ou support
solide de
structure
Boîte de
raccordement
centrée 5 cm (2 po)
en dessous de la
partie inférieure
du four
2x4 ou
supports
similaires Plancher
(Distance
suggérée à
partir du
plancher 30,5
cm/12 po min.)
68,6 cm (27 po)
min.
64,8 cm
(25-1/2 po)
135,3 cm
(54-1/4 po)
+1,5 mm
(+1/16 po)
-0 cm
Plancher
(Distance
suggérée à
partir du
plancher 50,8
cm/20 po min.)
Dimensions de découpe
64,8 cm
(25-1/2po)
71,9 cm
(28-5/16 po)
+1,5 mm
(+1/16 po)
-0 cm
Dimensions de l'armoire
2x4 ou
pièces
d'appui
similaires
ou support
solide de
structure
Boîte de
raccordement
centrée 5 cm (2 po)
en dessous de la
partie inférieure
du four
2x4 ou
supports similaires
68,6 cm (27 po)
min.
FOUR DOUBLE WOT/WOTD-227 27 PO
FOUR SIMPLE WOT-127 27 PO
INSTALLATION EN ARMOIRE
This manual suits for next models
11
Table of contents
Languages:
Other DCS Oven manuals