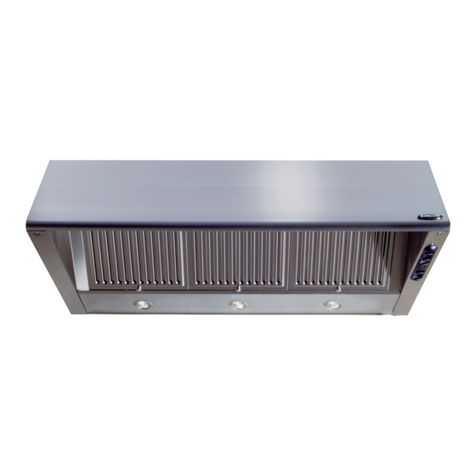
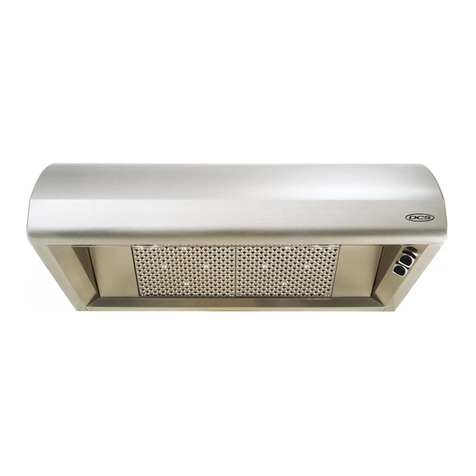
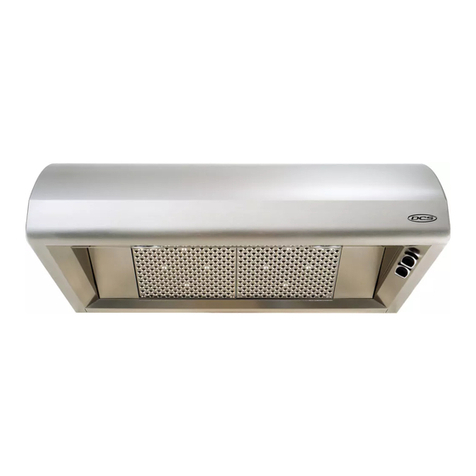
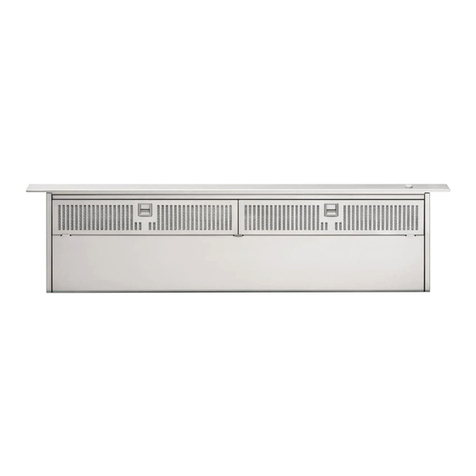
manuals.online logo
Brands
  1. Home
  2. •
  3. Brands
  4. •
  5. DCS
  6. •
  7. Ventilation Hood
  8. •
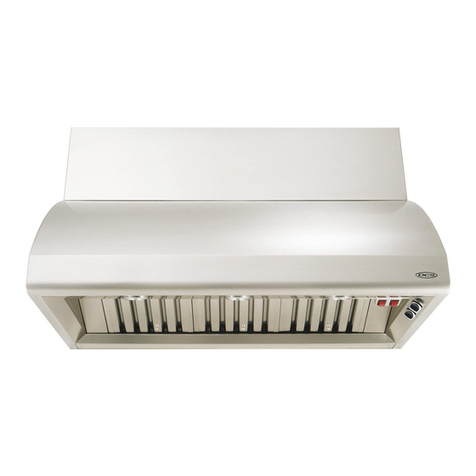
  9. DCS EH-30SS User manual

DCS EH-30SS User manual

PERFECT hEAT_
THE PROF
EU
installation Manual
MODELS:
EH-30SS
EH-36SS
A MESSAGE TO OUR CUSTOMERS
Thank you for selecting this DCS Updraft Euro Hood. Because of its unique features, we have developed this
Installation Guide. tt contains valuable information on how to properly install and maintain your new
Updraft Euro Hood for years of safe and enjoyable service.
For your convenience, product questions can be answered by a DCS Customer Service Representative by
phone: 1-888-281-559& Fax: 714-372-7004, email: [email protected]
or by mail:
DCS
Attention: CustomerService
5800Skylab Road
Huntington Beach,CA92547
www.dcsappliances.com
WARNING
TO REDUCE THE RISK OF A RANGE TOP GREASEFIRE:Never leave surface units
unattended at high settings. Bollovers cause smoking and greasy spitlovers
that may ignite. Heat oils slowly on low or medium setting. Always turn the
Euro Hood "ON" when cooking at high heat or when cooking flaming foods.
Clean ventilating fans frequently. Grease should not be allowed to accumulate
on fan or filter. Use proper pan size. Always use cookware appropriate for the
size of the surface element.
WARNING
TO REDUCE THE RISK OF INJURY TO PERSONS IN THE EVENT OF ARANGE TOP
GREASE FIRE, OBSERVE THE FOLLOWING: SMOTHER FLAMES with a dose-
fitting lid, cookie sheet, or metal tray, then turn off the burner. BE CAREFUL TO
PREVENT BURN5. tf the flames do not go out immediately EVACUATEAND CALL
THE FIRE DEPARTMENT. NEVER HCK UP A FLAMING PAN -You may be burned.
DO NOT USE WATER, induding wet dishdoths or towels -a violent steam
explosion will result. Use an extinguisher ONLY if:
1. You know you have a Class ABC extinguishe_ and you already know how to
operate it.
2. The fire is small and contained in the area where it started.
3. The fire department is being called.
4. You can fight the fire with your back to an exit.
PLEASE RETAIN THIS MANUAL FOR FUTURE REFERENCE.
TABLE OF CONTENTS
SAFETY PRACTICES& PRECAUTIONS
SPECIFICATIONS 4
PLANNING THE INSTALLATION 5
INSTALLATION INSTRUCTIONS _o
--o_: Needed d_
S,_ d:_d D _ens ons ,_d Ce _g Hegh V#_c,__:es 7
Cc_:u,_eDuc Ruble g_h 8
W_ Pep;:_,_ on 8f9
sl_ gEuoHood _S 0
Op o ,_ Du_: ess K s 10
WIRING DIAGRAM __
NOWTO OBTAIN SERVICE _
WARRANTY __
SAFETY PRACTICES& PRECAUTIONS
This Euro Hood system is designed to remove smoke, cooking vapors and odors from the cooktop
area.
WARNING:
ALL WALL AND FLOOR OPENINGS WHERE THE Euro Hood ISiNSTALLED MUST
BE SEALED.
ConsuHt the cooktop or range instaHHation instructions given by the manufacturer before making any
cutouts. MOBHLE HOME HNSTALLATHON-The instaHHation of this Euro Hood must conform to the
Manufactured Home Construction and Safety Standards, TitHe 24 CFB, Part 3280 (formerHy FederaH
Standard for Mobile Home Construction and Safety, TitHe24, HUD, Part 280). Three wire power suppHy
must be used and the appHhnce wiring must be revised. See EHectricaHRequirements (page 5).
[] Venting system MUST terminate outside the home.
[] DO NOT terminate the ductwork in an attic or other encHosed space.
[] DO NOT use 4" Haundry-type waHHcaps.
[] FHexibHe-type ductwork is not recommended.
[] DO NOT obstruct the flow of combustion and ventiHation air.
[] FaiHureto foHHowventing requirements may resuHt in a fire.
[] EHectricaHground is required on this Euro Hood.
[] HfcoHd water pipe is interrupted by pHastic, non-metaHHic gaskets or other materiaHs, DO NOT us
for grounding,
[] DO NOT ground to a gas pipe.
[] DO NOT have a fuse in the neutraH or grounding circuit. A fuse in the neutraH or grounding
circuitcouHd resuHtin eHectricaHshock.
[] Check with a quaHified eHectdcian if you are in doubt as to whether the Euro Hood is properHy
grounded.
[] FaiHureto foHHoweHectricaHrequirements may resuHtin a fire.
WARNING:
TO REDUCE THE RiSK OF FIRE, ELECTRICAL SHOCK, OR iNJURY TO PERSONS,
OBSERVETHE FOLLOWING:
Use this unit only in the manner intended by the manufacturer. Hfyou have any questions, contact the
manufacturer. Before servicing or cHeaning unit, switch power offat service pane[ and Hockthe service
disconnecting means to prevent power from being switched on accidentaHHy. When the service
disconnecting means cannot be [ocked, secureHy fasten a prominent warning device, such as atag, to
the service panel HnstaHHationWork And EHectdca[ Wiring Must Be Done By QuaHified Person(s) Hn
Accordance With AM[AppHicabHe Codes And Standards, HncHuding Fire-Rated Construction. Sufficient
air is needed for proper combustion and exhausting of gases through the flue (chimney) of fue[
burning equipment to prevent backdrafting. FoHHowthe heating equipment manufacturer's guideHine
and safety standards such as those pubHished by the Nationa[ Fire Protection Association (NFPA),and
the American Society for Heating, Refrigeration and Air Conditioning Engineers (ASHRAE), and the
[oca[ code authorities. When cutting or driHHing into wall[ or ceiHing, do not damage eHectrica[ wiring
and other hidden utiHities.
NOTE: Ducted fens must elweys be vented to the outdoors.
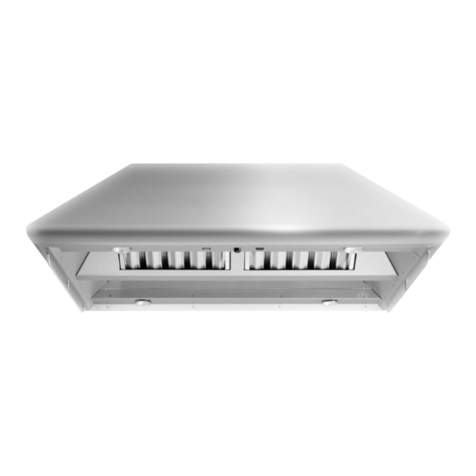
SPECIFICATIONS
I t 8 3/4"
29 7/8" - 30" Hood
35 7/8" - 36" Hood ./ 191/2''j_-i
F/G.O 1Hood with optional Chimney
Moun_ing Screw (provided)
2 5/16"
Conduit Knockout
FfG.O2a Duct/Bracket/Electrical Dimensions 30"Hood
Is SLY"/
U4._ i
Conduit Knockout
FIG.O2b Duct / Bracket / Electrical Dimensions 36" Hood
PLANNING THE INSTALLATION
VENTING REQUIREMENTS
De_e r/ ew_ch vet/ <] _n</hod s be_,/fl:> yo_ a/)/) ca o Duc/wokcanexe d eBe hou_;h
Be wa o _he oo/ The e 9/h o _ e ductw( kand Be unbe ofebows sho d be ke/sq _c a
n ] _r/u] _:)povdee_cer pe___:}]asce_--hes eo _heduc/wo kshoudbe(r _o _r/_ Do so_ ssta
woebows ogethe Use duc/ ape /o s( a a }<) /s heducwoksys/em (secauk q k:)sea
eeo wa of _oo oper sg aousd Be cap Fexbe duc/wo k s so eco_r esded_ _ _ s used,
ea,:h fl)c o/exb( duc_wo k used s equvae /o _wo ke o s agh sea duc/wc k whe
ca_:ua_ sg_heduc_ us englh --hus, a_exbeebowequas wos/asdadebows_ Make sue_he/e s
pope ceaa cew/h _hewa offoo fo exhaus duc befoe nak gcuou/s Do o <u_a os o
sud u ess absouey ecessa/y a os (7/ sud nus becu her a suppo 9 /ane nus be
co] s__uc ed
WARNING:
TO REDUCE THERISK OF FIRE,USE ONLY METAL DUCTWORKo
RECOMMENDED ORDER OF INSTALLING COMPONENTS
(if installing Full Backguard System)
A°Vent Hood B°Backguard System C°Range
1 Locaea d eve a ge ac(x d gt( _:]ange sta ato nstucto s
2 Measu/edsta cef/omfoo/b: t{pof sa d t m</a ge add gS/8'fo backgua/dcea/a ce
3--/ansfe thsmeasue_r/e_stt< thewa --hsw _r/akthebotto_r/o you backguad_
4 F_or_ths s<: _ e4s /e 8 ]/8" up wa to _/a k top of _O'backguad -_hs s the rn rnurn heght
that the bottom o/ you ve t hood ca be sta ed_
_]Fo(w vet h((d ma ufactue % sta ato stucto s be)sta ve_t hood
6 Fo owbackguad sta ato rstuctcrstc sta backguad_
7 Co ectgas a d eect c c< ecru: s a d s de/a ge top(st<
ELECTRICAL REQUIREMENTS
A]20vo GO_lzACo y'eec ca '_uppy s equ edona'_epaa/el_}an/> c cu ,u'edo b<_hsdes
oF he e_ A_ nedehyfuseo c cu beake s e<onnendec:L --hefuse _nus_ beszed pe oca
codes accoda cew/h_heeec/_ca a/ gof_hsu asspe<fedo hes,:_a/_a gpae ocaed
sde he u nea he fieldwg
THS IN-- MrS BE(_()N_EC-ED W--H (OPPEk WAE ONlY We szes _nust c< rio m to the eq e
set/so _ ( Na_ona Ee<::t_ca (ode, ANS/NFPA70 aes ed ona da o<a (cdesa d od a _:es
W esTeasd (onnec ons _r/us/coso _-/w_h_he a_ sgol heapp as(e -_hsapp a ceshoudbe
co ec/ed d e_:/y_:)hefusec sconec o _./cu/beake/} houghfexbea/noedo on nea c
shea/hedcoppe_ abe A owsossesack n_hecabeso_heapp asce(:asbe w:)ved _se_vcisg s
eve/ e<essay A/LLsed ]/2"co du/co e_: o _r/us bepovdeda/eache dof hepowe s(ppy
cabe (a Be app asce asd a _he ucon box} When _nak ]g Be eec ca osse</o],cu_ a I 1/4 _
hoe _hewa _ Ahoecu h/oughwood nus besa dedus snooh Ahoe h/ough neta nus
haveagonnet
PLANNING/INSTALLATION iNSTRUCTiONS
WARNING:
To reduce the risk of fire or electric shock, DO NOT use this fan with any solid
state speed control device.
CAUTION:
For General Ventilating Use Only. Do Not Use To Exhaust Hazardous or
Explosive Materials and Vapors.
TOOLS NEEDED FOR INSTALLATION
_ 5abe/ Sawo g Saw
_ D
_ ]/4 WoodD 8
_Ph ps Scewd ve
_aFa BadeS<ewd ve_
_WeS ppe o U y K k_
_ Mesa Snps
_Measu g-%peo_Rue_
_sLeve
_.'_Cauk 9 (:,u
_ Duc--ape
PARTS SUPPLIED FOR INSTALLATION
_ 'l Ha dw,_ e Package
_ "l Li em u e Packac_e
PARTS NEEDED FOR INSTALLATION
_ Co du_ Co necos
_ Powe %upp (abe
_sI Wa o R(o Cap
_A Mea Du( wok
OPTIONS/ACCESSORIES
_TNex:opcCh n ey (node i_fiCI) SS}
_Duc ess (ih _/ ey (r'/odel#[!(ND2SS}(Fch03)
_Cha/coa F eF, (node #ECF)(F%04)
Tfis Esro Hood <at be ir slalled with (Fig, 05} cr witfout (Fig, ()6) an
op osa _eescopc ch "_ ey k_ (mode #ECD_2_S} a duc ed
app_:a o ,/hsEuoHoodca bevened_hough/hewa o ce g_R>
ver/_hou_?hawa a900ebow sused_W en ssa n_du_:/essw_ha
cb s (y k he Euo Hood v(n/s ou o/gaes o /be sdes o/_be
duc/esscbr/seyk_(mode #ECND-2SS} bsduc/ess ssa a_onas<:>
/equ es a chacoa e_ k_ {mode #ECF} Wse s_a 9 duc ess
w_hou _he opoa ch ss ey k sohe ducwok nus be sa(d o
dve_q _ ea/ou_o e abner -- s ]sa a_on equ es hacoa _ _e_"
k/ (rsode #ECF) See page 10 fo no/e dea sos a duc ess ssa
aoss
WARNING:
Before making any cuts or holes for instaHation,
determine which venting method will be used
and carefully calculate all measurements.
FIG. 03
0
CHARCOAL FILTER
FIG.04
Stardard rsta a/onfortheEuroH_:odrequresthecanopyt_: ber'_ou ted 30' above the counte top
(F_t 07)_ --heop_o aeescop( ch ney k ca beadjused fo ce gs between 8 2 3/6"a d
5}8 5/6' (Fg 0/}
INSTALLATION INSTRUCTIONS
CABINETRY
FIG,05 Euro Hood with optional chimney FIG,06 Euro Hood without optional chimney
Ff!ONTVIEW with optional chimney kit SiDE ViEW with optional chimney kit
min 21-7/8"
max 40"
30" or 36"
Upper Chimney
Cover
Lower Chimney
Cover
_191/2"_1
Max. = 9' 8-5/16" (116-5/16")
Min, = 8' 2-3/16" (98-3/16")
30"
cabinet
base
FIG,07 Standard installation dimensions and ceiling heigh t variances
INSTALLATION INSTRUCTIONS
CALCULATE THE DUCT RUN LENGTH
/-Be duc_ u sh<uc o/exceed 3_}fee fo dueled ch (f_} ond duc/wo k_Cacua e_e egh
ot / e duc/wc k by addng Beeq w_e / fee Fg. 08 _:, each peceo duc _H<,sys< ° Ar
exa'_pe sgve_ FgO9 Fo bes esu_s, use o n< e_han_heeg<( db<ws, Makesue Ha Bee
sa <F24"o st/agh du< bewee ebows [ hoe Ha o e sused Do not ns_all wo
elbows toge@_e_o
45_EIb<:>w 50 _:_
90° Ebow 70 _eet
9(Y>Fa Elbow ] _0 k-,e_
9FeetStag tDuct 9Ok,e/
2 _90<EIb<ws 140fi,et
Wa Cap OOk,et
FIG.08 FIG.09
WARNING:
Due to personal injury hazard because of the weight and size of the Euro Hood
canopy, two or more people are needed to move and safely install the Euro
Hood canopy. Failure to properly rift Euro Hood could result in damage to the
product or personal injury.
WALL PREPARATION
WARNING:
The screws provided for mounting this Euro Hood must be inserted into solid
wood. These must not be inserted into sheet rock.
s)
s)
4)
Dsco ]ect a d _nove freesta dng ra]ge fron cabnel open g to provde ease acce_s to
uppe cabnet a d ea wa Put a trick, potectve c<)ver g ove_co<kto_,set /age of
c<:>urtet<>pt< potectflx)mdamageo d t
)ere _nne asd ceay _r/ak wth a per<: the ;ere e o the wa where the Fu/o Hood w
be sta ed_
--Be Euro Hood attacHes to t ewa by s_ou tngscrews For he30 a d36 nodes hereare
wo nosgs<ews s/a Bescews/o Hewa Thesc/ewsshoudbe se_ed o He
wa u / IH( s{ ewHead sfusHw HBewa
Be optora chantey kt s ad]ustabeard ::bsgned to _n(et varyrg ce rg heghts The
ch s (ymaches o_hewa by/woadd o a backers TB( _:cp backe shcud be sa ed
abou/1/8' awayfom_he(e ]g --Be _ ddebacke sis/be nsa eda/_hebouompo of
Be uppe_ ch _ sey seeve_ De_e_ss se _he pope o<aios fl:} ea( b/acke_ and sa _he
backetso Hewa A acH Hebo o_no He owe_ H n ey o He a opy us g Hes(/ews
CAUTION:
Make sure that the screws and brackets are securely fastened to the wall
INSTALLATION INSTRUCTIONS
5) Detemreard T_akea ecessaycuts r h<,wa fo heducwoLEachEuoHo<d sshpped
floT_/he fac/o yvened/h ouoh he _op ode o yen/k:)/he ea< dJc_wo k ss fls_
ve_<a _henebow_o heba(k-hed ssersossfo hedu< open s_tsae_tven ]F:%O2aasd
FgO2b ss_a a duc/wo/kbetoe ss_a sg_heEuoHood.
6} De el n ]e he pope oca_os _o _he powel s(ppy cabe as ]d<a ed Fg 02a & 02b DO
N@I u/ o] hepowe u sa a o] sconpee
INSTALLING THE EURO HOOD
1)I_e -_ove/heu_fon heca b::,_a dpaceo a
fa/ su ace a;_'enby_ Cove hesuface <
peve accde a danaf{_e Renove a pa /s
scud g /he noun ]g hadwae belole
dscac gibe ca o
2)[_>emove filter;
Pu knobh>vva d(tovva d'{you) ad u/ o he
efta sane_ se
3) Re sove _he cove_ _on Be fed w ]g
onpa_ner/ _:_enove _he w]g eec ca
k ocko t us g a fatbade scewd ,,/el. Feed
he powe suppycabe hough heee< ca
knox kou
VI
\\\ T
FIG. 10
4)--he canopy attaches to th( wa by wo stews d scussed ea e r the sta at(: rst uctons
/-heca opyhargs on_hesesc ewsbyba{k<:qs sde_heEuoHoodshow Fg_IO Befoe
a/em>_ g_o ha g_he ca o>y}yo_, sho<c/oae/head_.s net s( ew na/kedV] F%10
coun/e cockwse oex_e d hebacke/sfoT/he canopy s ]ga Ph psheadsc/ewd/ve/,
one hss< ew cou ecockws(/o(x/esd h( backe
5) sta thedampe be/oeharg gtheEuoHood --hedampe attaches to theEuoHo<dby
wosna scewspovded _hehadwa( package_
d}Ha g he Eu o Hood ca opy ix>ashescews I)u_ o_hewegh/o/hecarob_,/heses<:(ws
nus/be sin ed osod T/a/e/a 0 ce hecasopy >hung/one hesc/ew na/kedV] o
secu/e the [:u/o Hood b: the wa
NOTF: ?_@k_sure thr_t the Eu_v:_Hood ;sse{;ure#yr_tt#_chedto the w_£] F}£#u_'eto property ]nst#_N
couJdr_'suJt_£h_ju_'yor d<_m_geto p_ope_y_
7) T ebacketsshowr Fg SOaeas<>usedtoadjustth< eve of theca opy s ga Ph ps
s<ewd vet, o/me/hes{ ewV2 oadjus he <ve of h(ca opy_
8) Co e< /hePowe/SuppyCabe o_heEuoHood At/a(h_heWhite eado epowe suppy
o/heWhite eado _h(,Eu/oHoodw ha ws o /ypew e co ec/c A/ach h( Black end
o/hepcwe suppylo/heBlack eadof eEuoHoodw ha _ws c _yp( w econnecof
(o _(/he@een(@eena dY_tHow) gou dw/e u de /heG_eengou d gs<ew
9}/_epace (, edw g coT/pal se s/ cove/ and hegease _es_
°1'1:_install fy÷ase filter: Pu he e_d o g ease e w/ ou_ _ e kob n/o he cha e n _he
fort > cod.--u ]k]obtothe eft so the e,,/e_d<es <tpo_udefomf te set knobeld
ofgeasef tel tothe :ha el the ba<:kot the hood --u/ knob to the / ght, o<k 9f te
INSTALLATION INSTRUCTIONS
10) Tur thepowe suppyor Tur o bowerard gh_-- eE oHooc conwosae ocated
he Oh hardsde s de heca opy EuoHooddoes o/opea/ech((k a _he
c cu b/eake_ s o/_ ppedo hehousefdsebowr _heun s doesno_ope/a/e,
dscossect he powersuppya d check ha hew/ g cos ecto shavebeer ade
OPTIONAL DUCTLESS INSTALLATION KITS
TheFiuo_looc ca be -;/a ec duc:_ess boh_:h_nneya d
< ch "_ ey (_ de cab et) duc/<% a
h _/sey nsa a_os, you _/ust have heduc/ess h _/ney k_
(nodel #ECND-2SS Fg 11) a d _he rha/coa fi_e k/ (mode
#ECF Fg 13)_% ssa duchess s a noch_nney ss/a a on
(u de cab e0(seeF<, 712), you nus have hecha/coa f el
k (seeFg 13)
Th< duct_ss ch s'_ ey kt corssts ofa uppe c_mrey ( ot
p(u/ed) a (:>we _,h n ey(A) w h_wohcesX:> _hee haus/
at, a du< / ess d vet e_ (B) wh_:h s_s os _he ca sopy o _he hood
and dve/qs hea o/he s des o/ he ,::h _ ey a d woves/
gaes(C) o(ovel hehoes ] he owe/ch nsey(seeF%]]}
]hecharcca f terktcortanstwocharx:>a fiterswhchtwst
o toethe sdeo thebowe sdetheFuoHood
Whe sta g ductess wthout the opt( a ch n ey kt
somed ctw< kmust be sta ed b:: dvetthea ethe_(utof
the tc p of the cab ne ctoth< fi_ce(/thesc>f LTheductwo_k
ca_ _ot te_mi_"_ate insde @_e cab net o_ hto a_"_ydead ai_
_@ace
FIG. 11
FIG. 72
CHARCOALFILTER
FIG. 13
10
WIRING DIAGRAM 30"& 36" HOODS
Slide Switches
i oZ i 2 i SPEED
WURE NUTS
U4
3,£
BLK
WHT
LAMPS
20 W MAX.
UND,
UGHT
[ BLU
PLUG
(HARNESS
Z
MOTOR
120 V 60 HZ
11
HOW TO OBTAIN SERVICE:
F( w_-_ a ysevc_,' (< /_-_:_[i(_f>QJ'>one/Setvcea (8S8) 281-_}698 F_efo/x_youo-_ pea'>_haw;! he
fo owrg _fo _na or ready:
_sMode Nu_nbe_
_s5e_a Nu_nbe_
_sDaeo sa a o
_sAb e desc p_o o hepobe_n
You sa sfac_o so/_heu_; s<:ss _po/asce ous ap/obencasso be/esoved oyou/"
sa sfac_o,pease w eo_f, xus,_:
W_e:
DCS
A_/entio :Cusone_Sevce
Hut rgor Beach CA 92647
Fax us a:(714) 3727004
BEFORE YOU CALL FOR SERVICE:
1s he crcu breaker rpped or he u:_e bown?
2 s here,_ powero_ ,_ge he,_rea7
12
LENGTH OF WARRANTY
One 1 }Y_a_ Fu pats and Labor cove g the erte p oduct
Five{g)Yea_Li_ntedwa anty cover gtheswtches a d _noto_
DCS WILL PAY FOR
A epa ab( a d p b; found b:_be defec/ ve due nalelaso wok_r/ar hpfl:_ o]efu yea "IN
HOME wa any du ng/he _ s yea c/ow (shp Thsdoes o_appy heu /was sube_: ed_o
o/he Ban so _r/a ou'ehod use !erv_:e _r/us/ be povded by/uho ed F:actoyAqe / du ]g
so _na wok g hous_ Nochaqesw b( nadefiu (pa o epace set a _he o(a/on o n a
sin a ono fl_c/oyk) pa s etu sedpepad h/ou:_th hedeae/asd(la ned w h hewa//asy
pe_oda d fi>u dbyDCS_ob< de[ec ve_
Repaceme]tw beFC) B_DCS,and DCSw not be abe fo amy tasp( tatoncxsts abo costs,
ep_ t<:tutes --hswa a tysha sotappy no ca s we assume esponsb tyro da_nagethat _ng t
/esutfos ° fl_ uetc fl} (w s'/a ufactues stucto so oca ccdes, whe_< theapp a cehas bee
ta/spe_ed wth o a te/ed anyway o whch, o._ }udge_/el t, has bee sub}e<ted to _/suse,
eg ge ce o acc@:nt r'/p ed waa ty s_a ct e reid beyo d the duato ot thsw tte
wa anty --hswa a ty s euo a wa antes e p_essedo mped a da othe_ob gato so_
ab ty c< ect( wththesaeofthsapp ace
DCS WILL NOT PAY FOR
_ a a o o ':,ta up
_ Sh:_> gdar_aqe_
_ Se_vce by a unau ho_zed aqecy
_ Da _nage o <p_s due o sevce by ar urau ho zed agercy o he use of u au ho zed pars
_ Sevcedu g _: he tha o na w< k gb:u_
_s np opel Isa aton, uch a p ope_ b:< bup,<¢c,
_ fe_vce vs_ b:} each you h<w to use the app a ce;co/ect the a ato" /ese c/:ut
beakers o_ epace Bone fdses
_ Aepa sdue/oo_he/_has so na househoduse,
_ Dassagecausec onaccden/abuse, a e_a o% nsuse, ]co//ec saa o] o saa o o
accoda cewth oca codes
_ t ts sta ed nor esdenta app catcr s_ch as day ca< ce'te/% bed a d b/eakfl_st
cenes, chu_ches, u_s c}hones _esau_a s, hods, schoos ec_
--hs wa a ty appes t< app a ces us¢c esde ta app cators; t does ot cove the use r
co "/me ca s/ua ons --hs wa _ y s fop oduc/s p._ chased ad e/a ed /he SOsla/es of h<:
/. SA./Be L s_ c ofCou_nbaand( rada_--hs wa_v_ /yappesever fyoushoud __c,vedu _g_he
wa an/yperod Sso d heappancebesodby_he puchase_du ng hewa a ype_cd,
he ewowre con ues_obepo/ec_edun/ heexp a_o daeof heo g a puchase'swa a y
pe/oG--hswa_xa ygvesyouspe<fc ega _ghsYuu nayasohaveohe__ghswhchw_yflo_
sae o s e
13
14
PERFECT _EAT_
5800 Skylab Road, Huntington Beach, CA 92647
Tel: 714,372-7000 , Fax: 714,372.700"1
Customer Service: 888281.5698
www.dcsappliances.com
As product improvement is an ongoing process at
DCS, we reserve the right to change specifications
or design without notice.
DCS am#liore constamment ses produits et se
r#serve le droit de modifier les specifications ou
la conception de ses produits sans aucun pr#avis.
Part No. [ 7488 Rev A
Litho in USA 05/2002

Other manuals for EH-30SS

3

This manual suits for next models

1

Other DCS Ventilation Hood manuals

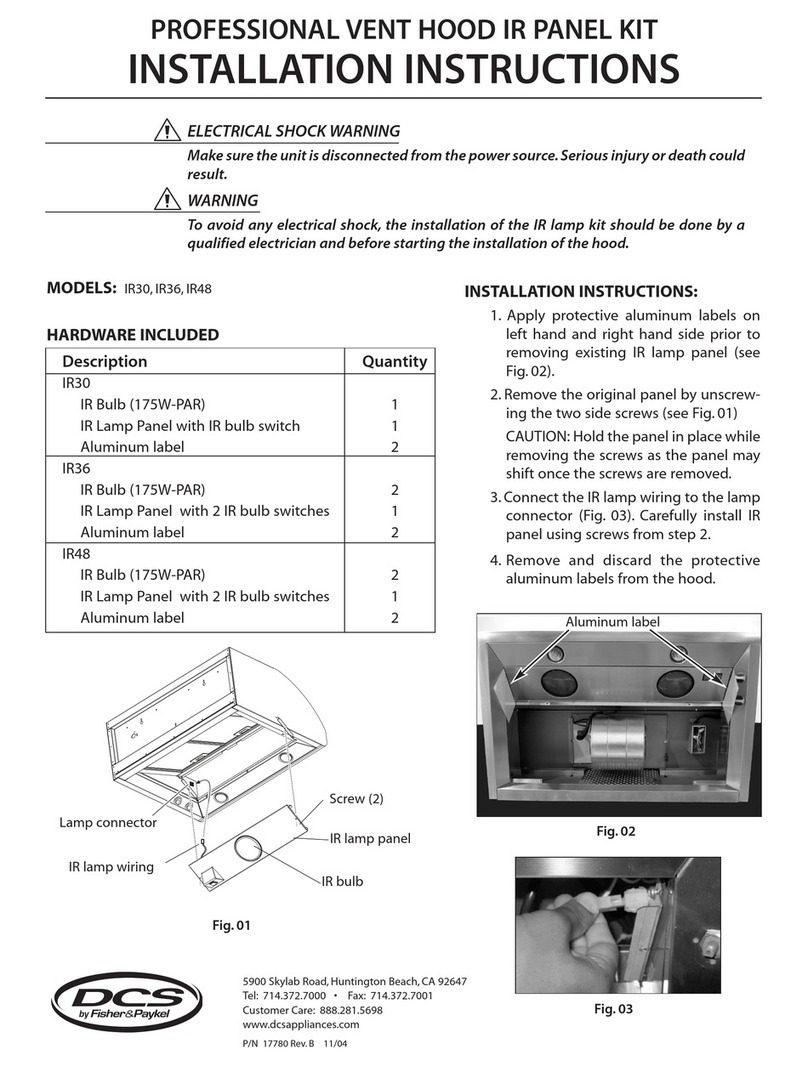
DCS IR30 User manual

DCS

DCS IR30 User manual

DCS DCS-VH-30HS Technical manual

DCS

DCS DCS-VH-30HS Technical manual

DCS DCS-IVH-48 Operating and maintenance manual

DCS

DCS DCS-IVH-48 Operating and maintenance manual

DCS Professional Island Vent Hood IVS40 User manual

DCS

DCS Professional Island Vent Hood IVS40 User manual

DCS Vent Hood VS30 User manual

DCS

DCS Vent Hood VS30 User manual

DCS DD-30SS User manual

DCS

DCS DD-30SS User manual

DCS Professional Island Vent Hood IVS40 User manual

DCS

DCS Professional Island Vent Hood IVS40 User manual

DCS DCS-IVH-48 Guide

DCS

DCS DCS-IVH-48 Guide

DCS Vent Hood VS48 User manual

DCS

DCS Vent Hood VS48 User manual

DCS CT-365SS User manual

DCS

DCS CT-365SS User manual

DCS Professional Island Vent Hood IVS40 User manual

DCS

DCS Professional Island Vent Hood IVS40 User manual

DCS EH-36SS Technical manual

DCS

DCS EH-36SS Technical manual

DCS CT-365SS User manual

DCS

DCS CT-365SS User manual

DCS Vent Hood VS30 User manual

DCS

DCS Vent Hood VS30 User manual

DCS Professional Island Vent Hood IVS40 User manual

DCS

DCS Professional Island Vent Hood IVS40 User manual

DCS EH-30SS User manual

DCS

DCS EH-30SS User manual

DCS DD-36-SS User manual

DCS

DCS DD-36-SS User manual

DCS Vent Hood VS30 User manual

DCS

DCS Vent Hood VS30 User manual

DCS Vent Hood ES30 User manual

DCS

DCS Vent Hood ES30 User manual

DCS Professional Island Vent Hood IVS52 User manual

DCS

DCS Professional Island Vent Hood IVS52 User manual

DCS Vent Hood ES36 User manual

DCS

DCS Vent Hood ES36 User manual

DCS EH-30SS User manual

DCS

DCS EH-30SS User manual

DCS Professional Island Vent Hood IVS40 User manual

DCS

DCS Professional Island Vent Hood IVS40 User manual

DCS DD-30SS User manual

DCS

DCS DD-30SS User manual

Popular Ventilation Hood manuals by other brands

Thermador PROFESSIONAL VCIB36JP Use and care guide

Thermador

Thermador PROFESSIONAL VCIB36JP Use and care guide

Sirius Satellite Radio SL920 FRESCO Series installation instructions

Sirius Satellite Radio

Sirius Satellite Radio SL920 FRESCO Series installation instructions

FALMEC LUMEN 60 Instruction booklet

FALMEC

FALMEC LUMEN 60 Instruction booklet

Hansa OKC951SH instruction manual

Hansa

Hansa OKC951SH instruction manual

Baumatic GEH6021W user manual

Baumatic

Baumatic GEH6021W user manual

Viking VIPR182R instruction manual

Viking

Viking VIPR182R instruction manual

Electrolux EFC635SAR user manual

Electrolux

Electrolux EFC635SAR user manual

Chef RFD602W installation guide

Chef

Chef RFD602W installation guide

Euromaid IRI9WE3 manual&nbsp;

Euromaid

Euromaid IRI9WE3 manual&nbsp;

NAUTIKA Mural PP30382 Installation guide and user's manual

NAUTIKA

NAUTIKA Mural PP30382 Installation guide and user's manual

Franke TALE 905 I user manual

Franke

Franke TALE 905 I user manual

NuTone RL6200 Series Architectural & engineering specifications

NuTone

NuTone RL6200 Series Architectural & engineering specifications

Ancona IRB636 User's manual & installation instructions

Ancona

Ancona IRB636 User's manual & installation instructions

Ariston AH 90 CM IX Instructions for use

Ariston

Ariston AH 90 CM IX Instructions for use

Bosch DWW07D650B Installation Instructions Instructions for installation and use

Bosch

Bosch DWW07D650B Installation Instructions Instructions for installation and use

Cooke & Lewis PCG60 manual

Cooke & Lewis

Cooke & Lewis PCG60 manual

Franke FDW 908 RB XS Instructions for use and installation

Franke

Franke FDW 908 RB XS Instructions for use and installation

ILVE CAL Series instruction manual

ILVE

ILVE CAL Series instruction manual

manuals.online logo
manuals.online logoBrands
  • About & Mission
  • Contact us
  • Privacy Policy
  • Terms and Conditions

Copyright 2025 Manuals.Online. All Rights Reserved.