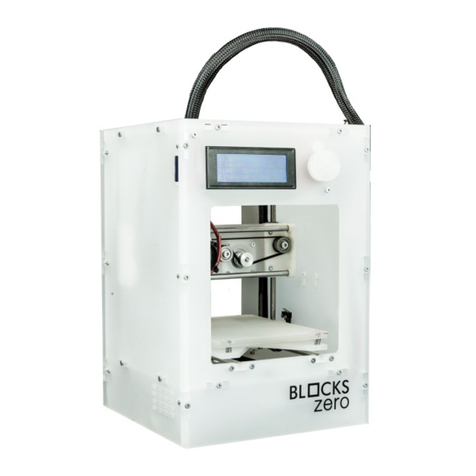
DediBot MOIRA DF3 User manual

MOIRA DF3 Manual
Thank you for choosing our product, we highly appreciate your recognition.
HANGZHOU DEDIBOT INTELLIGENT TECHNOLOGY CO.,LTD
0571-81958595
www.dedibot.com
www.3dmoira.com
16F,Unit A,Winfun Center,No.228 Binkang
Road,Binjiang District,Hangzhou
Before starting the printer, please read this manual

01
Printer Components
Filament Socket
Power Switch
SD Card Plug
Wi-Fi Reset Hole
USB Wire Connector
Power Connector
Extruder
Nozzle
One Click Printing Button
Print/Standby Indicator Light
Load /Unload Filament Indicator Light
Nozzle Heating Indicator Light
Error Indicator Light
Wi-Fi Connecting Indicator Light

Printer Installation
Press the spring and insert the material from
the hole on the top of the extruder to the top
of the feed tube.
Remove the materials socket cover by an
anticlockwise rotation. Open the package of
materials, take the head-end of the materials
and cut the deformed part. Put the materials
head-end through the hole on the side of
feed bin. Put materials into the feed bin,
close the materials socket cover by a
clockwise rotation.
Connect power .
* Please take out the foam before installation.
* Please wait until software is complete, the filament
goes auto-loading.
Accessory List
1.Filament X1 2.Power Cable and Adapter X1 3.SD Card Reader
8GB
sadk
4.USB Wire X1 5.Scoop X1 7.Wi-Fi Resetting Pin X16.Hexagon Wrench X1
03
02
1 2
3

Software Installation
0504
Installation Pacakage in SD Card, or download the MoiraSoft installation pack (Windows/-
Mac version) through official website http://www.dedibot.com/service.
1Double click to open the exe file, follow the instruction to select display language.
* In case there is error message after installation, please check your computer setup.
System requirement: win7+
Display card requirement: support openGL3.0 or above
Follow the instruction to set the installation path and click “Install” to continue.
2
Click “Finish” to complete the MoiraSoft installation.
3

More printing courses please find below.
6
If you can’t wait to print your first 3d-printed
item, you could click at “One Click printing
button” and print the model saved at the SD
card, get in printing mode efficiently.
5
0706
Print Preparation
Connect power,switch on the printer.
1Connect the printer to computer with USB
wire, and run MoiraSoft. Make sure the Status
Bar at the bottom of the home page display
“Connected”.
2
3Open the “Setting” menu of MoiraSoft, and select “Change Materials”.
Push the “Feed” button, and wait for the completion of feeding.
Please use default parameter for auto-leveling, the parameter is the space between printing
platform and 3d model base, if model is hard to remove, then increase the parameter, if model is too
loose, then decrease the parameter, suggesting the range between +/- 2mm.
While machine is produced at the factory, the auto-leveling has been done, the default parameter is
marked at platform sticker.
4

Print with PC
Connect the printer by USB wire, and open the Moira
main interface.
Click the “Open” button to import model file.
0908
1
2
Click the “Slice Printing” button at the lower right corner of
main interface to start the model slicing and file transferring.
3
Once the file transfer complete, the printer will commence printing.
4
【Notice】:
If you use USD cable to print, please make sure SD card is inserted in the printer, once
the document is transmitted completely, could unplug the cable and let 3d printer
works on its own.
* More models, please find “Other Info”.

1110
1Double click Ultimaker Cura 3.2.1-win64.exe, follow the
instruction guide for software installation.
2Add Moira DF3 Printer.
Print with PC
Setup Moira DF3 printing parameter settings.
3
4Click “Save Document” at the lower right, export gCode document to SD
Card, insert SD Card to the printer, and click “One Click Printing” button for
printing directly.
175
*More setting method, please read” Manual e-file”.

1312
Go to Android market (Google play or HuaweI) or Apple Store, search for “MOIRA” to
download mobile app or scan below QR Code for finishing up download.
Android IOS
Print with Mobile APP
Once the mobile connected to Wi-Fi, open Moira App, enter the
one-key configuration page, and enter the Wi-Fi password. Select the
model for setting, press the “Configuration” button, and check the
printer list after the configuration.
1When using the printer for the first time or changed Wi-Fi network, press and hold the
reset with resetting pin for 3 seconds till the Wi-Fi indicator light flashes.
*The success rate of allocation will be affected by your router.

1514
3Click to connect the printer. Please confirm you have unplugged the cable
before searching for 3d printer.
* Displayed name: Moira + Printer Mac Code.
Mac address is at the bottom of the printer.
Choose the model on Model Page, open the detail page, select
the model to print, and click “Print” button.
Choose print quality, and click the “Print” button. Then,
start the cloud slicing, downloading, and file transferring.
5
* Due to the internet environment, the document transmission might
take some time, in case of transmit failure, please transmit again
Once the file transfer complete, the printer will commence
printing.
6

1716
Change Materials
Open the cover anticlockwise, cut off the material and take out the
material tray.
1
*Refer to 【Printer Installation】
Pull out and replace with a new materials.
3
Un the PC Moira software, select ”Change Materials” in the
“Setting”, click “Feed Material” and wait to finish.
4
Select”Change Materials” in the “Setting”, click “Rejected material” and
wait to finish.
2

Instruction light status
1918
3d Model Library:
One click printing in two ways:
Pick up the printed model:
Other Info
Moira model library: www.3dmoira.com
Cloud model library: www.yumoxing.com
Thingiverse: www.thingiverse.com
① Connect Moira software, click the one click printing button in the software;
② Push down the “One click printing button” directly.
One click printing only loads the gCode or Dedi slicing documents in the SD card, and automatically loads
the latest model saved.
Once the platform performs the printing, in case the model is not too big, you could use the shovel to take
down the model, or else, you could take the whole platform out, and take down the model. Once you put
back the printing platform again, you could print directly, but auto-leveling might need to be performed
again.
*Please refer the respective website for model's intellectual property。
Once the printer is turned on, light, flashing while printing.
flash while nozzle is heating up.
continue to light once error is occurred.
Error instruction light *Please connect to Moira software to check the reason of error,
once you couldn’t handle by own-self, please connect
customer service.
Load/unload filament
instruction light
Nozzle heating
instruction light
Wifi connection
instruction light
Printing/standby
instruction light
flash while load or unload the filament .
quick flash while allocating, slow flash while connecting
to Wifi, keep lighting once it’s connected .

20
Q:How to install the machine and how to start printing ?
A : More information please refer to www.dedibot.com/en/service to download the operating video.
Q:How to select the needed printer from the previous configured printer list on the App?
A:The printer list shows the printer Mac code, which is unique and affixed to the rear of the printer.
Q:How to deal with the temperature abnormity?
A:Please switch off the printer for at least 30 minutes. If the error indicator light keeps flashing, please
contact the after-sales service staff.
Q:How to deal with the continuous flashing of the error indicator light?
A:Please check the details by connecting to MoiraSoft, and follow the indicator to take the next step.
Problems & Solutions
This manual is the indicator for installation, operation and maintenance, not the warranty booklet.
DediBot Intelligent Technology Co., Ltd. endeavors to ensure the accuracy and completeness of the
manual, and will not be responsible for the error or mistakes in the document. Meanwhile, DediBot
reserves the rights to interpret and modify the layouts and errors of this manual. The documents are
subject to change without notice. For more information about changes, please contact after-sales service
or visit the official website to download the latest version.
Disclaimer
Table of contents
