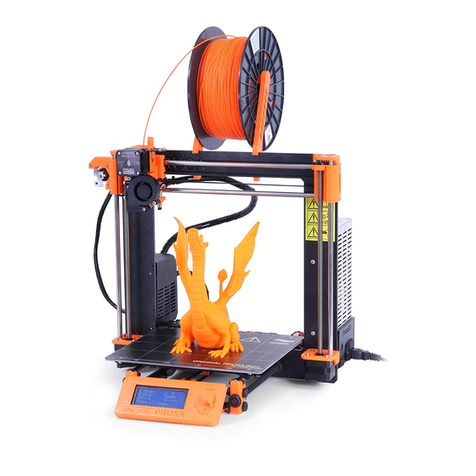
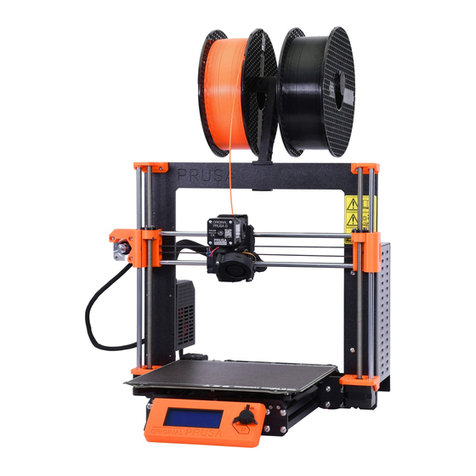
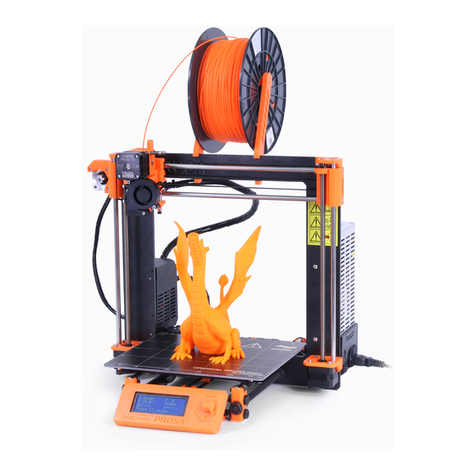
Prusa Original Prusa i3 MK2 User manual


Pleasealwaysrefertothehttp://www.prusa3d.com/drivers/
foranupdatedversionofthis3Dprintinghandbook(PDFdownload).
QUICK GUIDE TO THE FIRST PRINT
1.Placetheprinteronaflatandstablesurface(page11)
2.Readthesafetyinstructionscarefully(page7)
3.Downloadandinstallthedrivers(page27)
4.Preparetheprintsurface(page11),runselftest(page13)andcalibratethe
printer(page14)
5.InsertSDintotheprinterandprintyourfirstmodel(page20,page29)
Handbookversion1.03fromJune19th,2016.©PrusaResearchs.r.o.
2

About the author
JosefPrusa(bornFeb23
rd
,1990)becameinterestedinthe3Dprintingphenomenonbefore
joiningthePrague’sUniversityofEconomicsin2009atfirstitwasahobby,anew
technologyopentochangesandimprovements.Thehobbysoonbecameapassionand
JosefgrewintooneoftheleadingdevelopersofAdrienBowyer’sinternational,opensource,
RepRapproject.Today,youcanseethePrusadesignindifferentversionsallaroundthe
world,itisoneofthemostpopularprintersandthankstoit,knowledgeaboutthe3Dprinting
technologysignificantlyincreasedamongpublic.
Jo’sworkonselfreplicatingprinters(youcanprinttheotherprinterpartswithyourprinter)
arestillongoingandcurrentlythereisPrusai3thethirditerationoftheoriginal3Dprinter.It
isconstantlyupdatedwiththelatestinnovationsandyou'vejustpurchaseditslatestversion.
Inadditiontoprinterhardwareupgrades,themaingoalistomakethetechnologymore
accessibleandunderstandableforallusers.
JosefPrusaalsoorganizesworkshopsforthepublic,participatesinprofessional
conferencesdedicatedtothepopularizationof3Dprinting.Forexample,helecturedatthe
TEDxconferenceinPragueandVienna,atWorldMakerFaireinNewYork,MakerFairein
RomeorattheOpenHardwareSummithostedbyMIT.JosefalsoteachesArduinoat
CharlesUniversityandwasalsoalecturerattheAcademyofArtsinPrague.
Inhisownwords,heimagines3Dprinterswillbeavailableineveryhomeinanottoodistant
future.Ifanythingisneeded,youcansimplyprintit.Inthisfield,youjustpushthe
boundarieseveryday...We'regladyou'repartofitwithus!
3

Table of contents
Abouttheauthor 3
Tableofcontents 4
2Productdetails 6
3Introduction 6
3.1Glossary 6
3.2Disclaimer 7
3.3Safetyinstructions 7
3.4Licenses 7
4OriginalPrusai3MK2printer 8
5OriginalPrusai3MK2printerkit 9
6Firststeps 10
6.1Printerunpackingandproperhandling 10
6.2Printerassembly 11
6.3Setupbeforeprinting 11
6.3.1PEIprintsurfacepreparation 11
6.3.2Increasingtheadhesion 12
6.3.3PluggingtheACpower 13
6.3.4Selftest 13
6.3.5PreparingtheZCalibration 14
6.3.5.1CheckingtheYAxis(kitonly) 14
6.3.5.2Probealignment(kitonly) 14
6.3.5.3CheckingtheZaxis 16
6.3.6Loadingthefilamentintotheextruder 17
6.3.7ZCalibration 18
6.3.7.1FinetuningtheZadjustment 19
6.3.7.2Securingoftheprobe(kitonly) 19
7Printing 20
7.1PrinterControl 21
7.1.1LCDscreen 21
7.1.2Printstatistics 21
7.1.2Silentvs.Hipowermode 22
7.1.3Factoryreset 22
7.1.4LCDlayout 22
7.1.5Printspeedversusprintquality 24
7.1.6USBcableandPronterface 24
7.2Printeraddons 26
7.2.1Differentnozzles 26
7.2.1.1Hardenedsteelnozzle 27
7.2.1.20.25mmnozzle 27
8Printerdrivers 27
9Printingyourownmodels 27
9.1Whereyoucangetthe3Dmodels? 27
9.2Inwhatprogramyoucancreateyourownmodels? 28
4

9.3Slic3r 28
9.4Bundled3Dmodels 29
9.5PrintincolorwithColorPrint 30
9.6Printingofnonstandardmodels 32
9.6.1Printingwithsupportmaterial 32
9.6.2Largeobjectprinting 33
10Materials 34
10.1ABS 34
10.2PLA 34
10.3PET 34
10.4HIPS 34
10.5PP 34
10.6Nylon(TaulmanBridge) 34
10.7Flex 35
11FAQPrintermaintenanceandprintissues 36
11.1Printsurfacepreparation 36
11.2Clogged/jammedextruder 36
11.3Nozzlecleaning 37
11.4Replacing/changingthenozzle 37
11.5Axisfluency 38
11.5Printingproblems 39
11.5.1LayersbreakandsplitwhenprintingfromABSmaterial 39
11.5.2Modelscontaineithertoomuchornotenoughofthefilament 39
11.6Problemswithfinishedmodels 39
11.6.1Modelbreaksand/oriseasilydamaged 39
12FAQcommonissueswhenassemblingtheprinterkit 40
12.1Nozzle/printsurfacegapisgreaterinthemiddlethanatthecorners 40
12.2Printerstopsprintingsoonafterstart 41
12.3Printercan’treadSDcard 41
12.4LooseXand/orYaxisbelts 42
12.5Detachedcablestotheheatbed 43
12.6Looseheatbedzipties 43
Importantnotice,tip,hintorinformationthathelpsyouprintwithease.
Readcarefully!Thispartoftexthasuppermostimportanceeitherforusersafetyof
foraproperprinterservice.
Thissymbolindicatestextrelatedtoprinterkitonly.
5

2 Product details
Title:OriginalPrusai3MK2/OriginalPrusai3MK2(kit),Filament:1.75mm
Manufacturer:PrusaResearchs.r.o.,621/8aPrvnihopluku,Prague,18600,CzechRepublic
Contacts:phone+420222263718,email:[email protected]
EEEgroup:3(ITand/ortelecommunicationequipment),Deviceuse:indooronly
Powersupply:90135VAC,2A/180264VAC,1A(5060Hz)
Workingtemperaturerange:18°C(PLA)38°C,indooruseonly
Workinghumidity:85%orless
Kitweight(brutto/netto):9.8kg/6.3kg,assembledprinterweight(brutto/netto):12kg/
6.3kg.Serialnumberislocatedontheprintercontrolunitandalsoonthepackaging.
3 Introduction
Thankyouforpurchasingouroriginal3DprinterOriginalPrusai3MK2fromJosefPrusa
eitherasanassembledprinteroraprinterkitasyourpurchasesupportsuswithitsfurther
development.Readthehandbookcarefully,please,allchapterscontainvaluableinfoforthe
correctserviceoftheprinter.
Pleasecheckthehttp://prusa3d.com/driverspageforupdatedversionofthis3D
printinghanbook(PDFdownload).
Incaseofanyprinterrelatedproblemdonothesitatetocontactusat[email protected]
.We
aregladtoreceiveallyourvaluablecommentsandtips.Westronglysuggestyoutovisitour
officialforumatforum.prusa3d.com,whereyoucanfindsolutionstocommonissues,tips,
adviceandhintsinadditiontoactualinformationabouttheOriginalPrusai3printer’s
development.
3.1 Glossary
Bed,Heatbed,PrintbedCommonlyusedtermforprintingpadaheatedareaof3D
printerwhere3Dobjectsareprinted.
ExtruderPrintingheadorextruderisapartofaprinterconsistingofanozzle,hobbed
pulley,idlerandanozzlefan.
FilamentTermforplasticprovidedonspooliscalled“filament”,it’susedthroughoutthis
handbookaswellasintheLCDmenuontheprinter.
Heater,Hotendothernameforaprintingnozzle.
1.753Dprintersusetwodifferentdiameters(thickness)ofafilament(thickness):2.85mm
(commonlycalledas3mm)and1.75mm.1.75mmversionismoreusedworldwidethough
thereisnodifferenceinprintingquality.
6

3.2 Disclaimer
FailuretoreadtheManualmayleadtopersonalinjury,inferiorresultsordamagetothe3D
printer.Alwaysensurethatanyonewhooperatesthe3Dprinterknowsandunderstandsthe
contentsoftheManual.Wecannotcontroltheconditionsinwhichyouassemblethe
OriginalPrusai3.Forthisandotherreasonswedonotassumeresponsibilityandexpressly
disclaimliabilityforloss,injuries,damage,orexpensearisingoutoforinanywayconnected
withtheassembly,handling,storage,useordisposaloftheproduct.Theinformationinthis
Manualisprovidedwithoutanywarranty,expressorimplied,regardingitscorrectness.
3.3 Safety instructions
Pleasebeverycautiousduringanyinteractionwiththeprinter.Thisprinterisan
electricaldevicewithmovingpartsandhottemperatureareas.
1.Deviceisforindooruseonly.Donotexposetheprintertorainorsnow.Alwayskeepthe
printerinadryenvironmentataminimumdistanceof30cmfromotherobjects.
2.Alwaysplacetheprinteronastableplace,whereitcannotfallortipover.
3.Theprintersupplyishouseholdpoweroutlet230VAC,50Hzor110VAC/60Hz;Never
connecttheprintertoadifferentpowersupply,itmaycausemalfunctionordamagetothe
printer.
4.Placethepowercordsoyoucan’tstumbleonit,orsteponitorotherwiseexposetoany
damage.Makesurethatthepowercordisnotmechanicallyorotherwisedamaged.Stop
usingdamagedcableimmediatelyandreplaceit.
5.Whenyoudisconnectthepowercordfromthesocket,pulltheplugratherthanthecordto
reducetheriskofdamagetoplugorACoutlet.
6.Neverdisassembletheprinterpowersupply,itdoesnotcontainanypartsthatcouldbe
repairedbyanunskilledworker.Allrepairsmustbeprovidedbyaqualifiedtechnician.
7.Donottouchthenozzleorheatbedwhentheprinterisprintingoriswarmingup.Note
thatthetemperatureofthenozzleis210300°C(410572°F);heatbedtemperaturecan
reachover100°C(212°F).Temperaturesabove40°C(104°F)cancauseharmtohuman
body.
8.Donotreachinsidetheprinterwhileitisstillinoperation.Aninjurymaybecausedbyits
movingparts.
9.Preventchildrenfromunsupervisedaccesstotheprinterevenwhentheprinterisnot
printing.
10.Donotleavetheprinterunattendedwhileit'sstillon!
11.Plasticisbeingmeltedduringprintingwhichproducesodors.Setuptheprintersome
placewellventilated.
3.4 Licenses
OriginalPrusai3MK2printerisapartoftheRepRapproject,thefirstopensource3Dprinter
projectfreetouseunderaGNUGPLv3license(www.gnu.org/licenses/gpl3.0.en.html).If
youimproveoralteranypartofaprinterandyouarewillingtosell,thenyouhavetopublish
thesourcecodesunderthesamelicense.All3Dprintedelementsoftheprinterthatcanbe
improveduponcanbefoundathttp://www.prusa3d.com/prusai3printableparts/.
7

4 Original Prusa i3 MK2 printer
Unliketheprinterkit,it’scompletelyassembledandalmostreadytoprint.Afterpluggingin
andrunningthenecessarycalibrationyou,canprinta3Dobjectinthematterofminutes
afterunpackingtheprinter.Keepinmindyoucanuseoursupportemailwhenyou
purchasedtheassembledprinter.Donothesitatetowriteusifyouneedanyadviceorhelp.
Wewillgladlyhelpwithanyspecificprints.
3Dprintersusetwodifferentdiametersofafilament(youcanfindmoreinchapter
Materials
):2.85mmand1.75mm.1.75mmversionisusedmoreworldwide,though
thereisnodifferenceinprintingquality.Filamentisprovidedonaspoolwhereyou
canfindthebasicinformationfilamentmaker,material(ABS,PLA,etc.)andfilament
diameter.2.85mmfilamentiscommonlycalledas3mm.
Thisprintersupportsonlya1.75mmfilament.Pleasecheckthefilamentdiametertobe
1.75mmbeforeinsertingintotheextruder.Donottrytoinsertwiderfilamentitcoulddamage
theextruder.
Pict.1OriginalPrusai3MK2
printer
description
8

5 Original Prusa i3 MK2 printer kit
OriginalPrusai3MK2kitispicturedinpict.2.Detailedinformationandassembly
descriptioncanbefoundinchapter6.2Printerassembly.Weofferthesupportfor
userswhopurchasedtheprinterkitthroughourofficialforum.Ifyouneedhelpdo
nothesitatetovisitourforumatforum.prusa3d.com.Youcanfindtheanswersfor
yourproblemthere.Ifnot,pleasejustpostyourquestiondirectlythere.
Pict.2OriginalPrusai3MK2
printer
kitunboxed
9

6 First steps
6.1 Printer unpacking and proper handling
Holdingtheupperframe,taketheprinterandpullitoutfromthebox.Becarefulwhen
handlingtheprinternottodamagetheelectronicsandthustheproperprinterfunctionality.
Anytimeyoumovetheprinter,alwaysholdtheupperframewithhotbeduprightpointing
awayfromyouaspicturedinpict.3.
Pict.3
Proper
handlingofa
printer
10

6.2 Printer assembly
WithOriginalPrusai3MK2printerkitwesuggesttofollowtheguidelinesand
assemblethekitaccordingtothetheonlinemanualatmanual.prusa3d.com.(Online
manualisavailableinseverallanguagesonthewebsite).Theconstructionofthe
printershouldnottakemorethanoneworkingday.Afterasuccessfulcompletion
continuetothechapter6.3Setupbeforeprinting.
6.3 Setup before printing
● Placetheprintertoahorizontallystableposition,bestplaceisaworkbenchwhere
thereisnoriskofdraft.
● Attachthefilamentholderstotheupperframe.
● AttachFilamenttotheholders.Makesurethefilamentspooldoesn’tjamandcan
movefreely.
Filamentisacommontermfortheplasticrodmaterialprovidedonaspoolfrom
which3Dobjectsareprinted.
6.3.1 PEI print surface preparation
Toachievethebestadhesiononthenewsurface,itisimportanttokeepthesurfaceclean.
Cleaningofthesurfaceisveryeasy.ThebestoptionisIsopropylalcoholavailablein
drugstoreswhichisthebestforABS,PLAandothers,expectforPETGwheretheadhesion
maybetoostrong.Secondoptionistouseagentlesprayofawindowcleaner(Windexor
similar)onapapertowelandwipethesurface.Thebedcanbecleanedevenwhilehot,just
becarefulnottotouchthesurfaceorthenozzle.Alternatively,youcancleanthebedwith
warmwaterandafewdropsofadishsoaponapapertowel.Denaturedalcoholisyet
anotheroption.
Thesurfacedoesnothavetobecleanedbeforeeveryprint!Itisjustimportanttonot
touchtheprintbedwithyourhandsordirtytools.Cleanyourtoolswiththesame
solutionasyouwouldthebedandyouwillbeabletostartyournextprintrightaway.
Youcanleavesmallmarksontheprintsurfacewithyournozzleortools,theywilltypically
beshinierthantherest.Itdoesnotaffectthefunctionalityoradhesion.However,ifyouwant
tohavesamesurfacelookonthewholeprintbedyoucanresurfaceit.Theeasiestwayisto
takeahardsideofdrykitchenspongeandwipetheaffectedareawithcircularmotiongently
fewtimes.
11

6.3.2 Increasing the adhesion
Insomespecialoccasions,likeatallobjectwithaverysmallcontactareawiththeprint
surface,youmightneedtoincreasetheadhesion.FortunatelyPEIisaverychemically
resistantpolymerandyoucantemporaryapplyotheradhesionsolutionswithoutdamaging
it.
ThisalsoappliestomaterialswhichwouldnotsticktoPEIotherwise,likeNylonetc.
Beforeapplyinganythingtothebed,considerusingBrimoptioninSlic3rwhichincreases
thesurfaceareaofthefirstlayer.
ForPLAandNylonblendsasimplegluestickdoesthetrick.Gluecanbelatereasily
removedbywindowcleanerordishsoapwater.
ForABSprints,ABSjuicecanbeusedandlatercleanedwithpureacetone.Beverygentle
whenapplyingthejuiceanddosowhilethebediscold.Printswillattachverystrongly.
Preparedjuicecanbealsopurchasedinoureshop.Unfortunately,UPSservice
doesnotallowtodeliveranyacetonebasedproductsduetoshippingconstraints.In
thatcaseyougetonlythebottleandABSfromoureshopandyouhavetosource
theacetonelocally.
Pic.4
ABSJuicecanbeusedto
increasetheadhesion
12

6.3.3 Plugging the AC power
● PlugintheACpowercord,checktomakesurethepropersettingforACvoltageis
selected(110V/220V)andturnontheswitch.
6.3.4 Selftest
Thepurposeoftheselftestroutineistocheckmostcommonerrorswhenassemblingand
connectingelectronicsandtohelpindicateanypossibleerrorsafterassembly.Youcanrun
theSelftestfromSettingsmenuonLCDpanel.Thisshouldnotbenecessaryonthe
assembledprintersasthosearepretested.
Initiatingthisroutineperformsaseriesoftests.Theprogressandresultsofeachstepare
displayedontheLCD.Incaseoferrorsfound,theselftestisinterruptedandthereasonfor
errorisshowntoguideusersintroubleshooting.
Testconsistsof
Heatbedandhotendproperwiring
XYZmotorsproperwiringandfunctionality
XYZendstopmechanicalsettingsandproperwiring.
Errormessagesandresolution:
Heater/ThermistorNotconnected:
Checkproperwiringofhotendpowercablesandthermistorcables.Ensurethatboth
areproperlyconnectedtotheRamboelectronics,andthattheyarenotswapped.
Bed/HeaterWiringerror:
Checkthatheatbedandhotendpowercablesarenotswappedorthermistorcables
frombothhotendandheatbedarenotswappedintheRamboelectronics.
EndstopsWiringerror{XYZ
}:
Checkthepropercablingofendstops.Routineindicatesaxisonwhichendstop
reportedmalfunctionorisnotproperlyresponding.Checktheproperconnectionin
theRamboelectronics.
Motor{XYZ
}Endstop{XYZ
}:
Checkthatmotorandendstoponindicatedaxisareproperlyconnectedtothe
Ramboelectronicsandnotswappedwithmotororendstopofdifferentaxis.Axis
causingtheproblemsisindicatedontheLCDpanel.
EndstopnothitMotor{XZY
}:
Checkmechanicalsettingsthatendstopcanbereachedwhenaxisisinmaximal
position.
13

6.3.5 Preparing the Z Calibration
TheOriginalPrusai3MK2comeswithafullmeshbedlevelingfeature,howeverforthisto
workweneedtofirstcalibratethedistancebetweentipofthenozzleandP.I.N.D.A(Prusa
INDuctionAutoleveling)probe.
Theprocessisfairlystraightforward,solet’sgettoit.
6.3.5.1 Checking the Y‐Axis (kit only)
Forautocalibrationtoworkproperly,itisextremelyimportantfortheYaxistobe
perpendiculartotheXaxis.Thiscanbeeasilycheckedbylookingattheprinter
fromthetopandvisuallyaligningtheXaxisrodswithlinesontheheatbed.You
canseeitonthenextpicture.IftheYaxisismisaligned,youcaneasilyadjustthe
positionoftheYaxisinsidetheframebylooseningtheM10nutsontheYaxisandsecuring
thematthenewlyadjustedposition.
Pic.5Xaxisrodsmustbevisuallyalignedwithlinesontheheatbed.
6.3.5.2 Probe alignment (kit only)
Thefirststepistomechanicallysetthepositionoftheprobe.Thetopoftheprobe
shouldbealignedwiththebottomofaprintedpartasyoucanseeinthepicture
number6.Thepositioncanbeeasilychangedevenonanassembledprinterby
looseningthebottomnutfewturns,movingthewholeprobeandadjustingthetop
nutaccordingly.
Securethebottomnutafterwardsoritcangetlooseduringprintinglater!
Alsotheprobeshouldbeperpendiculartotheprintbed.
14

Pic.6Thetopoftheprobeshouldbealignedwiththebottomofaprintedpart
WhenyouruntheCalibrateZfeaturefromtheSettingsmenuontheLCDpanel,theprinter
willrunthecalibrationroutine.Closelywatchhowtheprobeapproachesthe9calibration
points.1standthelastpointsaremarkedwithwhitedashedcirclesforeasyrecognition.The
probemustbeinsidethosecirclestosuccessfullycalibrate.
Thenozzlemustnottouchtheprintsurfaceduringthiscold
calibration.IfitbendstheprintsurfaceORtheprobeisnot
insidethecircles,itiswrongandyouhavetoreadjustthe
P.I.N.D.Aprobe!Onlythenyoushouldcontinuewiththecalibration
process.Ifyou’rehavingtrouble,feelfreetoaskusforhelp.Ifthe
problemisnottakencareofduringthecoldcalibration,thenozzle
willpermanentlydamagetheprintsurfacewhenhot.
Pic.7Theprobemustbeinsidethecirclestosuccessfullycalibrate
.
Iftheprobeismisaligned,youcaneasilyadjustthepositionoftheYaxisinsidetheframeby
looseningtheM10nutsontheYaxisandsecuringthematthenewlyadjustedposition.
15

6.3.5.3 Checking the Z‐axis
ItisextremelyimportantforbothXENDpartstobeatthesameheight.Thiscanbe
achievedbyraisingtheZaxisuntilithitsthetopfromtheLCDmenu.GotoSettings>
Moveaxis>MoveZandrotatetheknobuntiltheaxisreachesthetop.Don’tworry,the
motorsdonothaveenoughpowertodamageanything,butitwillmaketheZaxisniceand
straight.
Pic.8ItisextremelyimportantforbothXENDpartstobeatthesameheight
Ifthereisanymisalignment,itwillcausetheprintertotouchtheprintsurfacewiththenozzle
typicallyonthe3calibrationpointsontherightside.
16

6.3.6 Loading the filament into the extruder
● PresstheLCDknobtoenterthemainmenuontheLCD.Rotatethebuttontochoose
PreheatoptionandconfirmbypressingtheLCDknob.Nextyouchoosethematerial
youwillprintfrom.ChooseamaterialthenconfirmwithLCDknob.Thenozzleand
heatbedwillheattotherequestedtemperature.
● Youneedtopreheatthenozzlebeforeinsertingthefilament(andthebedtooifyou
liketoprintrightaway).Thetemperaturedependsonthematerialused.Detailed
informationaboutnozzleandbedtemperaturesaredescribedatchapter10
Materials.
●PresstheLCDknobontheLCDpaneltoenterthemainmenu.Insertthefilamentto
theextruder,choosetheLoadfilamentoptioninthemenuandpressthebuttonto
confirm.Filamentisthenloadedtotheextruderbytheextruderstepper
automatically.Youshouldcutthetopofthefilamentasshowninthepicturebelow
(pict.9detail).
Pict.9
Loading
the
filament
totheextruder
● Checkifthefilamentisflowingfromthenozzle.
● Ifyouchangethefilamentforanewonedonotforgettocompletelyremovetheold
filamentbeforetheprinting.
17

6.3.7 Z Calibration
NOTE:ThecalibrationprocesshasbeenmadeeasierandisnowcalledV2Calibration.If
the
V2Calibration.gcode
isnotpresentonyourSDcardyoucaneasilyobtainitfromour
supportoronour
http://www.prusa3d.com/drivers/
page.
Checkifyourprintsurfaceisclean!Youcanfindinstructionshowtocleanitin
thechapter6.3.1PEIprintsurfacepreparation.Don'tforgettocomplete6.3.5
PreparingtheZCalibrationchapteroryoucanpermanentlydamagetheprint
surface!
Nowwewillfinallycalibratethedistancebetweentipofthenozzleandtheprobe.Preheat
thenozzleforPLA.OntheLCDmenu,gotoPrintfromSDandrunV2calibration.gcode
filefromthebundledSDcard.
Theprinterwillprobethebedandstartprintingzigzagpatternontheprintsurface.The
nozzlewillbeattheheightbasedontheP.I.N.D.Aprobesetting,itmustnotbyanymeans
touchtheprintsurface.
Pict.10Howtotunethenozzleheightliveduringthetestprint
Observethelinewhichisbeingextrudedontheprintsurface.GototheLCDmenuand
choosetheLiveadjustZoption.Anewmenuwillshowupwhereyoucantunethenozzle
heightliveduringthetestprint.Thepointistolowerthenozzleuntiltheextrudedplastic
sticksnicelytothebedandyoucanseeitisbeingslightlysquished.
18

6.3.7.1 Finetuning the Z adjustment
Afterfinishingthecalibrationgcode,itisagoodideatoprintasimpleobject.ThePrusa
gcodefromthesuppliedSDcardisagreatexample.TheLiveadjustZfunctionworks
duringeveryprint,soyoucanfinetuneatanypoint.Youcanseetheproperlytunedfirst
layerontheimagesbelow.
Pict.11Theproperlytunedfirstlayer
Nowyouaredone!
6.3.7.2 Securing of the probe (kit only)
Aftercoupleofprintsideallysecurethebottomnutontheprobewithadropof
Loctite243(BlueThreadlocker)topreventlooseningovertime.
Pict.12securethebottomnutontheprobewithadropofLoctite243
19

7 Printing
● Makesurethatthenozzleandthebedareheatedtothedesiredtemperature.Ifyou
forgettopreheattheprintingnozzleandthebedbeforeprinting,theprinterwill
automaticallycheckthetemperaturesofthenozzleandthebed;printingwillstart
whendesiredtemperatureisreacheditcantakeseveralminutes.However,we
recommendpreheatingtheprinterbeforehandasdescribedinthechapter6.3.6
Loadingthefilamentintotheextruder.
Donotletthepreheatedprinteridle.Whenaprinterispreheatedandnonprinting
materialinanextruderdegradesovertimeitmaycausethenozzletojamup.
● Watchthefirstfewprintedlayerstobesurefilamenthasattachedtothebed
properly(5to10minutes).
● PresstheLCDknobandchoosethePrintfromSDoptionfrommenu,pressto
confirmandpickthedesiredmodelmodel_name.gcode.Printerwillstartprintingthe
object.
Thefilename(.gcode)mustnotcontainanyspecialcharactersotherwisethe
printerisnotabletodisplaythefileontheLCD.IfyouremovetheSDwhileprinting,
printerwillpauseautomatically.WhenyoureinserttheSD,presstheLCDknoband
choose“Continue”option.Confirmandprintingwillresume.
● Whenprintingisfinishedletthenozzleandheatbedcooldownbeforeremovingthe
printedobject.Alwayshandletheprintedobjectswhentemperatureofthebedand
nozzledroptotheroomtemperature,whenthebedishotobjectsareveryhardto
remove.Pullthebedtowardsyouandremovetheobjectgently.
● Ifyouexperienceanytroublesremovingtheobject(especiallythesmallones)you
canuseaflattoollikeaspatulaorStanleyblade.
Pict.13
Removing
the
model
fromPEIprintsurfacewithspatula
20
This manual suits for next models
1
Table of contents
Other Prusa 3D Printer manuals
