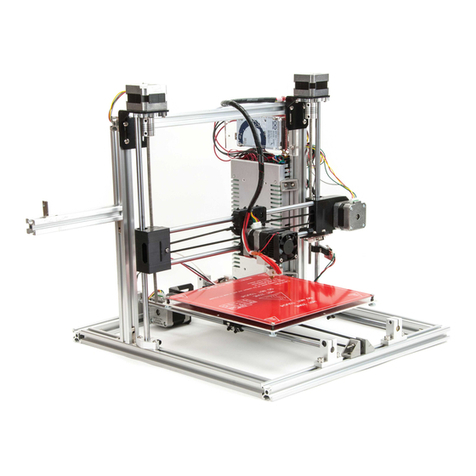
Folger Technologies FT-6 User manual

FT-6
Assembly Guide v0.05 Alpha

Table of Contents
ALPHA WARNING..........................................................................................................................1
Introduction.....................................................................................................................................2
Contacting Folger Tech..................................................................................................................3
Preparation and Tip ......................................................................................................................4
ACM Part Li t...............................................................................................................................5
T-Nut U age...................................................................................................................................8
A embly
Z A embly.................................................................................................................................9
Frame A embly.......................................................................................................................13
X A embly...............................................................................................................................18
Y A embly...............................................................................................................................20
Bed A embly...........................................................................................................................26
None/Single Extruder...............................................................................................................31
Carriage................................................................................................................................32
Dual Extruder...........................................................................................................................36
Carriage................................................................................................................................37
Z Belt A embly........................................................................................................................38
Configuration................................................................................................................................40
Community ran re ource (unofficial)..........................................................................................40

ALPHA WARNING
Thi i an Alpha ver ion of the a embly guide. It ha only been
relea ed a a preview of the completed guide.
Thi guide i not meant to be u ed to a emble the kit. Do not
following anything within thi guide a it may be wrong.
U e a beta or better guide ver ion for a embly of the kit.
© Folger Technologies 2018 FT-6 Assembly Guide v0.05 Alpha Page 1 of 40

Introduction
Congratulation ! If you are looking over thi guide it mean that you are the proud owner of a Folger Tech
FT-6 3D printer.
Our goal a a company i to provide affordable 3D printer to con umer worldwide. On top of thi , we want
everyone’ fir t printing experience to be a great one. So thi guide wa a embled to provide guidance in
a embling and under tanding common procedure while u ing thi printer. It cover everything from
a embly to the maintenance required to keep the printer performing like new.
© Folger Technologies 2018 FT-6 Assembly Guide v0.05 Alpha Page 2 of 40

Contacting Folger Tech
We under tand that thi guide only cover the ba ic of your Folger Tech kit. If at any time you need more
a i tance, vi it our upport page at Folger Tech Support to end u a me age or give u a call at (888)
397–8160 and we will be happy to addre your que tion or concern.
DISCLAIMER OF LIABILITY: FOLGER TECHNOLOGIES LLC pecifically DISCLAIMS LIABILITY FOR
INCIDENTAL OR CONSEQUENTIAL DAMAGES and a ume no re pon ibility or liability for any lo or
damage uffered by any per on a a re ult of the u e or mi u e of any of the provided information or product.
FOLGER TECHNOLOGIES LLC a ume or undertake NO LIABILITY for any lo or damage uffered a a
re ult of the u e, mi u e or reliance on the information and or product. USE AT YOUR OWN RISK: Never
leave your printer unattended.
© Folger Technologies 2018 FT-6 Assembly Guide v0.05 Alpha Page 3 of 40

Preparation and Tips
•Unwrap and lay out all of the part in the box.
•Pull off all of the protective film on the ACM part and verify with the li t on the next page.
•Verify that all of the hardware li ted on the hardware bag are included (there will be extra ).
• We recommend orting the hardware into container to make identification fa ter during the build.
(egg carton can be u eful for thi )
•Pull off the film and remove all of the cutting particle from the 2020 and 2040 beam .
•Make ure you have a large, clear, and flat urface to build on.
•Go low and check your work, ru hing could cau e i ue in print quality and operation.
•Make ure there i no damage on any part and report any i ue to u right away.
•Be careful when handling the ACM part , the edge are harp.
•A deburring tool work great for knocking down the harp edge of the ACM.
•Gather the part called out in each tep and read through all of the text before performing the tep.
•Pay clo e attention to the image in each tep, orientation i very important.
•Printing out the ACM part li t make it quick and ea y to reference during a embly.
•To help with orientation: X i ide to ide, Y i front to back, and Z i up and down.
© Folger Technologies 2018 FT-6 Assembly Guide v0.05 Alpha Page 4 of 40

ACM Parts List
(8) BFP-01 (4) BFP-02 BFP-03 BFP-04
BFP-05 BFP-06 BFP-07 BFP-08
BFP-09 BFP-10 (2) BFP-11 BFP-12
© Folger Technologies 2018 FT-6 Assembly Guide v0.05 Alpha Page 5 of 40

ACM Parts List continued)
BFP-13 BFP-14 BFP-15 BFP-16
(2) BFP-17 BFP-18 BFP-19 BFP-20
LCD, Hotend, and extruder ACM parts
are listed in their separate sections.
© Folger Technologies 2018 FT-6 Assembly Guide v0.05 Alpha Page 6 of 40

Please go through the ACM parts list above and the labels
on the hardware packages to check your kit s contents.
If anything is missing or damaged, contact Folger Tech
within (14) days of delivery for replacements.
Now let s get this kit built!
© Folger Technologies 2018 FT-6 Assembly Guide v0.05 Alpha Page 7 of 40

T-Nut Usage
1) nsert the bolt through the hole in the panel then turn the t-nut on a few turns.
2) nsert the t-nut into the slot of the extrusion making sure it is centered.
3) Tighten down the bolt making sure the t-nut turns to lock into the slot.
© Folger Technologies 2018 FT-6 Assembly Guide v0.05 Alpha Page 8 of 40
Bolt T-Nut

Z Assembly
Step 1
Mount the (4) SHF8s to BFP-05 and BFP-07. The bolts go on the bottom with the nut on top.
© Folger Technologies 2018 FT-6 Assembly Guide v0.05 Alpha Page 9 of 40
(8) M4 x
20mm
(8) M4
Nylock
(4) SHF8

Z Assembly
Step 2
Flip the panels over and mount the (2) KFL8s. The bolts go on the top. Make sure the center of the
KFL8s swivel in the socket. You may need to add some oil and work them a bit.
© Folger Technologies 2018 FT-6 Assembly Guide v0.05 Alpha Page 10 of 40
(4) M4 x
16mm
(4) M4
Nylock
(2) KFL8

Z Assembly
Step 3
Mount the (4) KFL8s to BFP-08 and BFP-09 using the M4 hardware. Mount a pulley upside-down to
each stepper, flush with the end. Mount the steppers using the M3 hardware. All of the bolts go on the
bottom. Make sure you face the stepper plugs the correct direction.
© Folger Technologies 2018 FT-6 Assembly Guide v0.05 Alpha Page 11 of 40
(4) M3 x
10mm
(4) M3
Washer
(8) M4 x
20mm
(8) M4
Nylock
(4) SHF8 (2) 20T 5mm
Pulley

Z Assembly
Step 4
Mount the stepper to BFP-06 using the M3 hardware. Assemble and mount the (2) idlers as shown using
the M5 hardware. Make sure the idlers spin free.
© Folger Technologies 2018 FT-6 Assembly Guide v0.05 Alpha Page 12 of 40
(4) M3 x
10mm
(4) M3
Washer
M5 x 25mm M5 x 30mm (5) M5
Nylock
(2) M5 dler

Frame Assembly
Step 1
Assemble the lower frame with (2) 1000mm 2020 and (2) 540mm 2040 using the internal L brackets and
grub screws. Mount (4) rubber feet using the M5 hardware. Make su e the joins a e squa e and flush.
© Folger Technologies 2018 FT-6 Assembly Guide v0.05 Alpha Page 13 of 40
(4) M5 x
10mm
(4) M5 T-Nut (4) Rubber
Foot
(4) nternal L
Bracket

Frame Assembly
Step 2
Mount the (3) lower panels using the M5 hardware. Make sure the orientation is correct.
The side facing towa d you in this image is the f ont.
© Folger Technologies 2018 FT-6 Assembly Guide v0.05 Alpha Page 14 of 40
(28) M5 x
10mm
(28) M5
T-Nut

Frame Assembly
Step 3
Mount (2) 700mm 2020s on the left with BFP-01s. Mount (2) 700mm 2020s on the right with BFP-03,
BFP-04, and BFP-12. Make su e the joins a e squa e and flush against the lowe f ame.
© Folger Technologies 2018 FT-6 Assembly Guide v0.05 Alpha Page 15 of 40
(28) M5 x
10mm
(28) M5
T-Nut

Frame Assembly
Step 4
Assemble the top frame with (2) 1000mm 2020 and (2) 500mm 2020 using (4) 3-way corners. Mount the
top frame to the uprights using BFP-02s and M5 hardware. Make su e the joins a e squa e and flush.
© Folger Technologies 2018 FT-6 Assembly Guide v0.05 Alpha Page 16 of 40
(24) M5 x
10mm
(24) M5
T-Nut
(4) 3-Way
Corner

Frame Assembly
Step 5
Mount (2) 1000mm 2020 and (2) 500mm 2020 using BFP-02s and M5 hardware. Ve ify the top 2020 to
middle 2020 spacing is 170mm all the way a ound.
© Folger Technologies 2018 FT-6 Assembly Guide v0.05 Alpha Page 17 of 40
(24) M5 x
10mm
(24) M5
T-Nut

X Assembly
Step 1
Mount the assembled BFP-08 and BFP-09 to the underside of the middle 2020 using the M5 hardware.
© Folger Technologies 2018 FT-6 Assembly Guide v0.05 Alpha Page 18 of 40
(18) M5 x
10mm
(18) M5
T-Nut
Other manuals for FT-6
1
Table of contents
Other Folger Technologies 3D Printer manuals

