DeFelsko PosiTector IRT Service manual


Introduction
This Reference is a compilation of the On-Gage Help that is available on your
PosiTector gage. To view these help items on the gage, enter the gage menu and touch
the icon or press the button with the desired menu item selected.
For an overview of the use and operation of your instrument, refer to its included
Instruction Manual or download a digital PDF at www.defelsko.com/manuals.
Update your gage to ensure your PosiTector includes these latest help references.
Instructions are available at www.defelsko.com/updates.

Page 1
Contents
Memory ........................................................................................................................
Open ......................................................................................................................
View .......................................................................................................................
Display ...................................................................................................................
Annotate ................................................................................................................
Print .......................................................................................................................
New Batch .............................................................................................................
Close ......................................................................................................................
Delete ....................................................................................................................
Batch Summary .....................................................................................................
Statistics ......................................................................................................................
Statistics ................................................................................................................
Clear ......................................................................................................................
HiLo Alarm .............................................................................................................
Setup ...........................................................................................................................
Set Clock ...............................................................................................................
Reset .....................................................................................................................
Units .......................................................................................................................
Battery Type ..........................................................................................................
Sound ....................................................................................................................
Trend Chart ............................................................................................................
Touch .....................................................................................................................
Emissivity ...............................................................................................................
Backlight ................................................................................................................
Flip Lock ................................................................................................................
Language ...............................................................................................................
Gage Info ...............................................................................................................
Laser Pointer .........................................................................................................
Connect .......................................................................................................................
Bluetooth ................................................................................................................
Enabled ............................................................................................................
Stream .............................................................................................................
Pairing ..............................................................................................................
Info ...................................................................................................................
USB .......................................................................................................................
Sync.net Now ...................................................................................................
USB Drive ........................................................................................................
JSON Files .................................................................................................
HTML Report .............................................................................................
Stream .............................................................................................................
Auto Sync .net .................................................................................................
USB Keyboard .................................................................................................
3
3
3
3
3
4
4
4
4
5
6
6
6
6
7
7
7
8
8
9
9
9
9
10
10
10
10
10
11
11
11
11
11
11
11
12
12
12
13
13
13
13

Page 2
WiFi ........................................................................................................................
Setup Options ..................................................................................................
AP Channel ................................................................................................
Gage Name ...............................................................................................
Server Enable ............................................................................................
IP Settings .................................................................................................
AP Passphrase ..........................................................................................
WiFi Reset .................................................................................................
WiFi Stream .....................................................................................................
Auto Sync .net .................................................................................................
Access Point ....................................................................................................
Enabled ............................................................................................................
Networks ..........................................................................................................
WiFi Information ...............................................................................................
Sync .net Now ..................................................................................................
Bluetooth Smart .....................................................................................................
Send Batches ..................................................................................................
BLE Keyboard ..................................................................................................
Smart Probes ...................................................................................................
Power Off Time ................................................................................................
Enabled ............................................................................................................
Sync Batches ...................................................................................................
Updates .................................................................................................................
Help .............................................................................................................................
Power Off .....................................................................................................................
14
14
14
14
14
14
15
15
15
15
15
16
16
16
16
17
17
17
17
17
18
18
18
19
20

Page 3
Memory
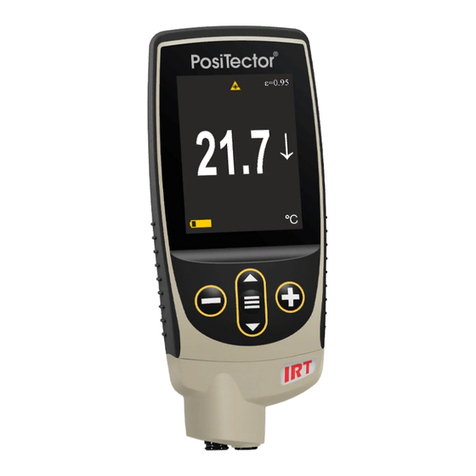
The PosiTector IRT Advanced has internal memory storage for recording measurement
data. Stored measurements can be reviewed on-screen or accessed via computers,
tablets and smart phones. Measurements are date and time-stamped. Store up to
250,000 readings in up to 1,000 batches.
The memory icon appears and basic statistics are displayed when the Gage is set to
store measurement data.
NOTE:
Remove the last reading by pressing (-).
Open
Select a previously created batch or sub-batch to open and make it the active batch. If it
contains measurements, on-screen statistics will immediately reflect values calculated
from this batch. The calibration setting (i.e. Cal 1) associated with this batch is also
opened.
View
Use the Up or Down buttons to scroll through information, statistical summary, and a list
of each reading in the currently opened batch. Press the center navigation button to
exit.
Display
Choose between display options in the upper portion of the screen while taking
measurements.
Shortcut:
Press the Up button to scroll through the display options.
NOTE:
The Display option appears only if a batch is currently open.
Annotate
Create meaningful batch names and enter notes directly on the Gage using a familiar
onscreen QWERTY keyboard.

Page 4
Either the touch screen or navigation buttons can be used to enter annotations.
Annotations can be synchronized with PosiSoft.net and the PosiTector App. They are
included in PosiSoft USB Drive reports.
Print
Sends a statistical summary and individual measurements to the optional Bluetooth
wireless printer.
NOTE:
To cancel printing, simultaneously press and hold the (-) and (+) buttons.
New Batch
Closes any currently opened batch and creates a new batch name using the lowest
available number. For example, if only B1 and B3 exist, then B2 would be created and
made the current batch. Each measurement will be displayed and stored into this new
batch.
On screen statistics are immediately updated with each measurement. New batches are
date and time stamped when they are created.
Shortcut: When a batch is open, press (+) to create a new batch
NOTE:
Remove the last reading from the current open batch by pressing (-).
Close
Stops the recording process, closes the current batch, and removes batch information
from the display.
Delete
Removes a batch or sub-batch completely from memory. The name is deleted and all
measurements are erased. Sub-batches can be deleted individually. To delete all
related sub-batches, simply delete the top-level batch.

Page 5
Batch Summary
Displays a summary of all stored batches with the Batch Name, Probe Type and
Number of Readings listed for each batch.

Page 6
Statistics
Menu option for configuring Statistics and HiLo Alarm modes.
Statistics
Statistics mode continually displays/updates average, standard deviation, min/max
thickness and number of readings while measuring.
When selected, the statistics icon and statistical summary will appear on the display.
Ignore the last measurement by pressing the (-) button. Press (+) to clear statistics.
Clear
Clears all on-screen Statistics and HiLo tabulations.
HiLo Alarm
Allows the Gage to visibly and audibly alert the user when measurements exceed
user-specified limits.
When HiLo Alarm is selected, the current Lo setting is displayed. Adjust using the (-) or
(+) buttons. Select Next to accept this value. The current Hi setting is now displayed.
Repeat to adjust the Hi setting.
Each measurement will be compared to the defined Hi and Lo limits. The Gage beeps if
results are within those limits. A single low tone will sound if the reading is below the Lo
limit, and a high tone if it is above the Hi limit. Press (+) to clear HiLo readings.
The Statistics icon will appear on the display.

Page 7
Setup
Set configuration options for the Gage.
Set Clock
All measurements are date and time stamped (24 hour format) when stored into
memory. It is therefore important to keep both the date and time current using this menu
option. Use the Up and Down buttons to scroll, and the (-) and (+) buttons to adjust
value. The Gage’s date and time can also be viewed in Gage Info and on top of the
main menu.
NTP
Enables automatic time synchronization with a remote server over WiFi using the NTP
(Network Time Protocol).
Enter a NTP Server address and TZ (Time Zone) details. The PosiTector uses POSIX
format to set the time zone.
Eastern Time in the USA is input as the following:
EST5EDT4,M3.2.0,M11.1.0
From left to right:
- EST5 is the time zone name and offset from UTC
- EDT4 is the daylight savings time zone name and offset from UTC
- M3.2.0 is the start of EDT. ‘M’ specifies that the date will follow a ‘Month.Week.Day’
format. 3.2.0 is the third month, second week, first day (Sunday)
- M11.1.0 is the end of EDT. ‘M’ specifies that the date will follow a ‘Month.Week.Day’
format. 11.1.0 is the eleventh month, first week, first day (Sunday)
Detailed NTP instructions available at: www.defelsko.com/NTP
Reset
Restores factory settings and returns the Gage to a known condition. The following
occurs:
All batches, stored datasets, batch names and screen captures are erased.

Page 8
Menu settings are returned to the following:
Memory = OFF
Statistics Mode = OFF
HiLo Alarm = OFF
Min Scan = OFF
Trend Chart = None
Auto Dim = ON
Bluetooth & Stream = OFF
BLE Keyboard = OFF
WiFi & Access Point = OFF
Display = None
Laser Pointer = OFF
Perform a more thorough Hard Reset by powering down the Gage, waiting several
seconds, then simultaneously holding both the center navigation and (+) buttons until
the Reset symbol appears. This returns the instrument to a known, out-of-the-box
condition. It performs the same function as a menu Reset with the addition of:
Bluetooth Pairing info is cleared. Menu settings are returned to the following status:
Units = Celsius
Touch = ON
Flip Lock = OFF
Auto Sync .net = ON
Sound = Medium
Language = English
Emissivity = 0.95
Battery Type = Alkaline
Backlight = Normal
Bluetooth Smart = OFF
USB Drive = ON
NOTE:
Date, Time and WiFi are not affected by either Reset.
Units
Converts the display from Celsius (˚C) to Fahrenheit (˚F) and vice versa.
Battery Type
Selects the type of batteries used in the Gage from a choice of Alkaline, Lithium or
NiMH (nickel-metal hydride rechargeable). The battery state indicator symbol is
calibrated for the selected battery type. No damage will occur if the battery type used in

Page 9
the Gage does not match the selected battery type.
Sound
Adjusts the volume of built-in speaker (Off, Low, Medium, High).
Trend Chart
Turns the trend chart on. The trend chart can also be turned on by pressing the Up
button from the main screen.
Touch
Allows the touch screen functionality to be disabled. All gage functions can also be
controlled using the navigation buttons.
Emissivity
Sets the emissivity ratio for the PosiTector IRT infrared temperature sensor.
Emissivity refers to a material’s ability to emit infrared energy, compared to an ideal
black surface at the same temperature. The ratio varies from 0 to 1, and each material
has a specific emissivity associated with it. The PosiTector IRT has built in emissivity
settings for certain materials as well as a user-adjustable emissivity option.
Most organic and painted surfaces have an emissivity of around 0.95, and are ideal
surfaces for accurate infrared temperature readings. Shiny or reflective surfaces can be
difficult to measure with an infrared thermometer, as they tend to reflect ambient
infrared energy instead of their own. To compensate for this, cover such surfaces with
flat paint or a piece of electrical tape. Allow the paint or tape to acclimate to the
surface’s temperature, and take a measurement over the paint or tape.
Select Custom to manually adjust the emissivity value or to adjust to a known
temperature. Emissivity is automatically calculated when adjusting to a temperature.
See NOTE below.
Alternatively, use one of the following preset options:
Aluminum (rough) = 0.07
Plastics = 0.94

Page 10
Zinc (Galvanized) = 0.25
Steel (Oxidized) = 0.95
Concrete = 0.54
Wood = 0.95
Paint = 0.96
NOTE:
Depending on surface treatment, metals such as blasted steel can have a broad range
of emissivity values. Adjusting to a known temperature (measured by a direct contact
surface temperature probe) on a representative sample will assist in obtaining an
accurate emissivity value.
Backlight
Selects display brightness (Sun, Normal or Night).
Flip Lock
Disables the Auto Rotate feature by locking the display in its current orientation.
Language
Converts displayed and printed words to the selected language.
Gage Info
Displays the model number and serial number, probe type and serial number,
PosiSoft.net registration key, the amount of remaining memory for storage of readings,
date and time, and software packages.
For security purposes, the registration key is required to add the Gage to your free
PosiSoft.net account.
Laser Pointer
Select to activate the laser pointer. The laser helps aim the infrared temperature sensor.
The laser pointer symbol is displayed on the screen when the laser is active.
Shortcut
Press the Down button to toggle the Laser Pointer On/Off.

Page 11
Connect
Configure communication and connection options for the Gage.
Bluetooth
Allows readings to be sent to a computer, optional printer or compatible device using
Bluetooth wireless technology. Pairing required.
See www.defelsko.com/bluetooth
Enabled
Allows readings to be sent to a computer, optional printer or compatible device using
Bluetooth wireless technology. Pairing required.
Stream
Stream individual readings to a USB connected computer via a serial protocol. Ideal for
use with serial compatible SPC data collection software.
See www.defelsko.com/update
Pairing
The instrument and receiving device must be paired before readings can be transmitted.
For pairing instructions, see www.defelsko.com/bluetooth
Info
Lists information about your current Bluetooth connection, including the currently paired
device and MAC address.
USB
Connect the Gage to a PC/Mac using the supplied USB-C cable. View and print
readings and graphs with universal web browsers/file explorers or using PosiSoft
Desktop.

Page 12
NOTE:
While connected, power is supplied through the included USB-C cable. The batteries
are not used and the body will not automatically power down.
Sync.net Now
When selected, the Gage immediately synchronizes stored measurement data to
PosiSoft.net (USB connection required to a computer running PosiSoft Desktop).
Alternatively, select Auto Sync.net from within the USB connect menu to automatically
synchronize upon connection to a PC. Additional measurements added to memory
while connected are synchronized only when the USB cable is disconnected and
reconnected, or when the Sync.net Now option is selected.
NOTE:
PosiSoft Desktop is required when using USB connections to synchronize
measurements with PosiSoft.net.
USB Drive
When USB Drive is enabled, the PosiTector is recognized as a USB mass storage
device which provides a simple interface to retrieve stored data in a manner similar to
USB flash drives and digital cameras. USB Drive is also required to import stored
measurements into PosiSoft Desktop. Once connected, any computer can view
measurements stored in memory by navigating a virtual drive labeled PosiTector using
the supplied USB-C cable.
NOTE:
While connected, power is supplied through the included USB-C cable. The batteries
are not used and the body will not automatically power down.
JSON Files
When enabled (default), JSON schema files will be available in PosiSoft USB drive.
Files can be parsed in to databases and custom software applications.
NOTE:
Disabling this option may reduce the time required for the computer to recognize the
PosiTector when first connected via USB.

Page 13
HTML Report
When enabled (default), a formatted HTML report is viewed by selecting the index.html
or START_HERE.html file found in the root directory. Optionally, text (.txt) files located
in each batch folder provide access to measurement values. Stored readings and
graphs can be viewed or copied using universal web browsers or file explorers.
NOTE:
Disabling this option may reduce the time required for the computer to recognize the
PosiTector when first connected via USB.
Stream
Stream individual readings to a USB connected computer via a serial protocol. Ideal for
use with serial compatible SPC data collection software.
For more information on USB Keyboard and Streaming visit:
www.defelsko.com/usb/stream
Auto Sync .net
When enabled, measurements will automatically synchronize with PosiSoft.net when
connected to a computer running PosiSoft Desktop. Additional measurements added to
memory while connected are synchronized only when the USB cable is disconnected
and reconnected, or when the Sync.net Now option is selected.
NOTE:
PosiSoft Desktop is required when using USB connections to synchronize
measurements with PosiSoft.net.
USB Keyboard
USB Keyboard mode enables PosiTector Advanced instruments to emulate a USB
keyboard when connected to a computer.
USB Keyboard mode communicates with your computer by emulating keyboard
keystrokes. When connected in this mode, PosiTector Advanced instruments will be
recognized as a simple USB keyboard. Each reading is typed, followed by a carriage
return (enter). This provides a simple way to capture readings as they are taken without
any special software, drivers or complex setup.
For more information on USB Keyboard mode visit: www.defelsko.com/connect

Page 14
WiFi
Allows connection to your local wireless network or mobile hot spot. Ideal for using your
network’s internet connection for synchronizing stored measurements with PosiSoft.net.
See www.defelsko.com/wifi
Setup Options
Setup WiFi configuration options for the Gage.
AP Channel
The access point channel corresponding to a frequency range. (Default Channel: 6)
For most users the default channel will not have to be altered. If you are experiencing
poor connection or are unable to connect, try another channel.
Press the Up button to highlight the channel. Use the (-) or (+) buttons to change the
channel. Press the Down button and select OK.
Gage Name
Enter a unique name for the Gage (up to 14 Characters). This helps identify the gage on
your local network.
Server Enable
The gage contains a WebServer that can be accessed by network connected devices.
This option enables (default) a connection between the network and the Gage. To
access the gage server, browse to the gages IP Address:8080 using an internet
browser.
IP Settings
Manually enter network IP information as follows...
IP Type (DHCP or Static), IP Address, Gateway, Netmask, DNS1, DNS2
See your network administrator or IT department for assistance.

Page 15
AP Passphrase
A series of characters, numbers or symbols used to log on to a WiFi network. Default
Passphrase: password
Press the center navigation button to display on-screen keyboard. Enter a Passphrase
for the Access Point. The Passphrase will be required for all devices connecting to the
PosiTectors Access Point.
The PosiTector is now visible to all WiFi enabled devices. Simply connect your devices
WiFi to the new PosiTector Access point. All PosiTectors are uniquely identified by their
respective gage body serial numbers or user selected Gage Name.
WiFi Reset
Removes all previously configured networks and restores default WiFi settings.
WiFi Stream
Wirelessly stream readings to a device or computer over WiFi.
When enabled, the gage will send a GET request to specified URL for each reading.
The URL can contain tags which are replaced by the PosiTector with values
corresponding to the reading. This solution turns the PosiTector gage body into an
Internet of Things device and is ideal for users with an existing WiFi network and a
desire to stream live readings to a central application or database.
For more information on WiFi Streaming visit: www.defelsko.com/connect
Auto Sync .net
When enabled, the Gage automatically attempts to synchronize stored measurement
data with PosiSoft.net upon power-up (internet connected WiFi network required).
Alternatively, select Sync .net Now to immediately synchronize stored measurement
data.
Access Point
Creates a wireless network to allow your smart device or computer to connect directly to
the PosiTector. Ideal when a WiFi network is not available.
To enable, select Access Point from the Connect > WiFi menu. The Access Point
icon will display in the upper left of the PosiTector display.

Page 16
Securing your Access Point
To ensure the PosiTector is only accessible to authorized devices, it is important that
you enter a passphrase (password) for the Access Point. The default Passphrase is
password.
In the Connect > WiFi > Setup menu, select AP Passphrase to modify the default
passphrase.
Enabled
Select to allow connection with your local WiFi network. The WiFi icon will appear on
the display and the Gage will attempt to connect to any previously configured network.
Connect to a new network from the Networks menu option.
Networks
Searches and displays all available WiFi networks within range. Select a network, then
enter the password, if required. The WiFi icon will appear on the display.
NOTE:Some networks may not be visible and will require manual configuration using
the Add Network option. See your network administrator or IT department for
assistance.
WiFi Information
Displays information about the local WiFi network connection including:
SSID:
the network’s name
State:
the network connection status
IP Address:
the assigned IP Address for the Gage on the network
Sync .net Now
When selected, the Gage immediately synchronizes stored measurement data to
PosiSoft.net (WiFI internet connection required).

Page 17
Bluetooth Smart
When Enabled, allows communication with a computer or smart device running the
PosiTector App via auto-pairing Bluetooth Smart (BLE) wireless technology.
Send Batches
Transfers selected batches to the PosiTector App. Send Batches is useful when
switching between devices, as only readings and batches that have yet to be
synchronized with any smart device are synchronized automatically.
The Send Batches option is visible in the menu when the Gage is connected to a smart
device running the PosiTector App.
BLE Keyboard
BLE Keyboard mode communicates wirelessly with your computer by emulating
keyboard keystrokes. When connected in this mode, PosiTector Advanced instruments
will be recognized as a simple BLE keyboard. Each reading is typed, followed by a
carriage return (enter). This provides a simple way to capture readings as they are
taken without any special software, drivers or complex setup.
For more information on BLE Keyboard mode visit: www.defelsko.com/connect
Smart Probes
Displays available PosiTector DPM-L and PosiTector CMM-IS Smart Probes within
range of the PosiTector gage. Smart Probes must be powered ON to be visible.
Shortcut:
Check the Shortcut box to add the Smart Probes menu option to the gage’s main menu.
Power Off Time
By default, the PosiTector Advanced powers off after 5 minutes of inactivity. This power
off time interval can be adjusted when connected wirelessly via Bluetooth Smart to help
maintain connectivity while measuring. The interval is user selectable in 5-minute
increments up to a maximum of 60 minutes. Use the (-) and (+) buttons to adjust the
interval time, then select Ok.

Page 18
Enabled
When Enabled, allows communication with a computer or smart device running the
PosiTector App via auto-pairing Bluetooth Smart (BLE) wireless technology.
Sync Batches
Select batches to flag them for synchronization to the PosiTector App. Sync Batches is
useful when connecting a new device to a gage with pre-existing batches, since only
batches created while Bluetooth Smart is enabled are automatically selected.
Selected batches are synchronized when the next reading is taken in a batch flagged
for synchronization, or when the Sync Batches option is selected at the bottom of the list
of selected batches.
NOTE:
If Bluetooth Smart is disabled, data from batches selected in the Sync Batches menu
are held in a queue until communication with the PosiTector App is re-established.
Updates
Determines if a software update is available for your Gage.
To perform an update the Gage must be connected to an internet connected computer
running PosiSoft Desktop, or a WiFi network.
See www.defelsko.com/update
WARNING:
The Gage will perform a Hard Reset after an update. All stored measurements will be
erased from memory.
Other manuals for PosiTector IRT
4
Table of contents
Other DeFelsko Thermometer manuals
Popular Thermometer manuals by other brands
Control Company
Control Company TRACEABLE MEMORY-LOC instructions
VISIOMED
VISIOMED THERMOFLASH LX-260T EVOLUTION user manual

Technoline
Technoline WS 7012 instruction manual
FOR-A
FOR-A IR21 owner's manual
Hanna Instruments
Hanna Instruments HI 98121 manual
Silvercrest
Silvercrest SSOT 6 B2 operating instructions

