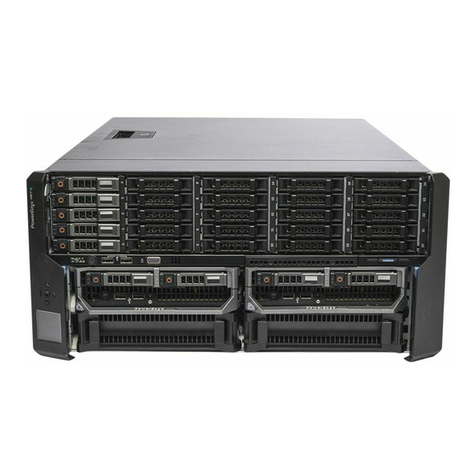
Dell PowerEdge VRTX Quick start guide

Upgrading PowerEdge VRTX to Support
Shared Storage Expansion
Dell Engineering
December 2015
A Dell Technical White Paper

Revisions
Date
Description
December 2015
Initial release
Copyright © 2015 Dell Inc. All rights reserved. Dell and the Dell logo are trademarks of Dell Inc. in the United States and/or other jurisdictions. All
other marks and names mentioned herein may be trademarks of their respective companies.
2 Upgrading PowerEdge VRTX to Support Shared Storage Expansion

Table of contents
Revisions ..................................................................................................................................................................................................2
1Introduction.................................................................................................................................................................................... 4
2Overview of PowerEdge VRTX shared storage expansion configurations........................................................................5
3Prerequisites for upgrading PowerEdge VRTX to support shared storage....................................................................... 6
3.1 Upgrading PowerEdge VRTX to support shared storage expansion ...................................................................... 8
4Troubleshooting .......................................................................................................................................................................... 25
4.1 Shared PERC 8 External cards fail to function ........................................................................................................... 25
4.2 EMM failure message seen after EMM firmware update ......................................................................................... 25
4.3 Incorrect number of virtual disks displayed in Windows Disk Manager............................................................... 25
4.4 Multiple Disks Become Inaccessible ............................................................................................................................ 25
4.5 Shared PERC 8 card boots into safe mode ................................................................................................................ 26
4.6 Troubleshooting a controller......................................................................................................................................... 27
4.7 Troubleshooting Enclosure Management Modules (EMM)..................................................................................... 28
4.8 Enclosure Connections Problem.................................................................................................................................. 28
5Getting Help ................................................................................................................................................................................. 29
5.1 Contacting Dell................................................................................................................................................................. 29
5.2 Locating your system Service Tag................................................................................................................................ 29
AAdditional resources ................................................................................................................................................................... 30
3 Upgrading PowerEdge VRTX to Support Shared Storage Expansion

1Introduction
This document provides instructions on upgrading VRTX chassis to support shared storage expansion.
Shared storage expansion is a new feature of PowerEdge VRTX that allows customers to add additional
shared storage infrastructure to the chassis. This feature has one or two Shared PowerEdge RAID
Controller (PERC) 8 External cards installed in the VRTX chassis, connecting to Dell PowerVault MD1200 or
MD1220 direct attached storage enclosures.
The Shared PERC 8 External card enables PCIe Input Output (IO) virtualization, which allows multiple
systems to share the available hardware resources. The controller allows four server modules to access
attached JBOD (Just a Bunch Of Disks) storage. Each server module's operating system (OS) loads a
Virtual Function (VF) driver that allows the server module to communicate with the Shared PERC 8
firmware. Shared PERC 8 External card also supports fault tolerance between clustered controllers
providing multipath I/O and failover support.
4 Upgrading PowerEdge VRTX to Support Shared Storage Expansion

2Overview of PowerEdge VRTX shared storage expansion
configurations
The Dell PowerEdge VRTX system supports the following three storage expansion configurations:
1. Single Shared PowerEdge RAID Controller (PERC) 8 External card configuration
-This configuration consists of single Shared PERC External card in the VRTX chassis
connecting to one of two MD1200 or MD1220 storage enclosures.
-It does not provide fault tolerance to SAS domain.
-The cable topology recommended in this configuration enables you to easily upgrade to Fault
Tolerant configuration.
2. Non-Fault Tolerant Dual Shared PERC 8 External card configuration
-This configuration consists of two Shared PERC External cards in the VRTX chassis, each
connecting to one of two MD1200 or MD1220 storage enclosures.
-It does not provide fault tolerance to the storage subsystems.
-Each Shared PERC 8 External card controls separate and independent storage subsystem.
3. Fault Tolerant Dual Shared PERC 8 External card configuration
-This configuration consists of two Shared PERC 8 External cards in the VRTX chassis with
cabling topology that supports up to two MD1200 or MD1220 storage enclosures in a Fault
Tolerant mode.
-The shared PERC cards are configured in an active-passive mode. Both the cards can access
the storage subsystem. However, only the active controller will provide data access. If the
active Shared PERC 8 card fails, the passive Shared PERC 8 card takes control in a seamless
transition.
5 Upgrading PowerEdge VRTX to Support Shared Storage Expansion

3Prerequisites for upgrading PowerEdge VRTX to support
shared storage
The following requirements must be met before upgrading PowerEdge VRTX to support shared storage
expansion:
Hardware requirements
1. Ensure that you have met the following hardware requirements before upgrading PowerEdge
VRTX to support shared storage expansion:
a. Shared PowerEdge RAID Controller (PERC) 8 External cards – Supports up to two controllers
per chassis
Figure 1 Shared PERC External card
1. External cable connectors
2. Shared PERC External card
3. Heat sink
4. Battery cable
5. Battery
b. Dell PowerVault MD1200 or MD1220 direct attached storage enclosures – Supports up to two
enclosures per SAS domain.
c. Mini SAS 6 Gb (SAS 2.0) cables.
For more information about the supported cabling technologies, see Table 1.
Note: Note that any other cable topologies are not supported.
6 Upgrading PowerEdge VRTX to Support Shared Storage Expansion

The following table describes the cables supported on PowerVault MD1200 or MD1220 storage
enclosures:
Table 1 Cables supported on PowerVault MD1200 or MD1220
Length
Dell Part Number
Usage
0.6 meter
W508F
Daisy Chain only to another MD1200 or MD1220
1.0 meter 171C5 Connect to Shared PERC 8 External card or Daisy Chain to
another MD1200 or MD1220
2.0 meters W390D Connect to Shared PERC 8 External card or Daisy Chain to
another MD1200 or MD1220
4.0 meters U651D Connect to Shared PERC 8 External card or Daisy Chain to
another MD1200 or MD1220
Figure 2 Mini SAS 6 Gbs cable
Firmware and driver requirements
1. Ensure that you have the minimum baseline firmware and driver versions required to support
shared storage expansion, as listed in the following table:
Note: This table might not include the latest versions. For the latest firmware and driver baseline, see
Dell
PowerEdge VRTX Storage Subsystem Compatibility Matrix
at Dell.com/poweredgemanuals.
Table 2 Minimum baseline firmware and driver versions required
Component
Version
Chassis Management Controller (CMC) firmware
2.1
Chassis infrastructure firmware
2.21
7 Upgrading PowerEdge VRTX to Support Shared Storage Expansion

SAS expander firmware
2.0
Shared PERC 8 firmware
23.13.16-0013
Shared PERC driver - Linux
6.903.05.00
Shared PERC driver - Windows
6.805.01.00
Shared PERC driver - VMware
6.805.56.00
MD1200 or MD1220 firmware
1.06
2. Download the latest firmware and driver version from Dell.com/support/home.
3.1 Upgrading PowerEdge VRTX to support shared storage expansion
Follow the steps in this section to upgrade PowerEdge VRTX to support storage expansion.
Note: Ensure DUPs (Dell Update Packages) for the required storage components are downloaded.
1. Follow the operating system (OS) procedure to back up all data from the shared storage drives.
2. Document your virtual drive configuration and mapping information by performing the following
steps:
a. Open CLI terminal and run the command racadm raid get vdisks –o to get the virtual disk
configuration and server node mapping.
Take a screenshot of the results page and save the captured screenshot to a location of
choice, or write down the information and store it in a safe, secure location.
b. Click Chassis Overview →Storage →Virtual Disks →Assign to view the virtual disk mapping
by the CMC GUI.
Take a screenshot of the results page and save the captured screenshot to a location of
choice, or write down the information and store it in a safe, secure location.
c. Click Chassis Overview →Storage →Virtual Disks to get the virtual disk configuration
information by the CMC GUI.
Take a screenshot of the results page and save the captured screenshot to a location of
choice, or write down the information and store it in a safe, secure location.
3. Update the OS specific Shared PERC 8 driver to the required minimum baseline by performing the
following steps:
Note: For the correct driver version, see
Dell PowerEdge VRTX Storage Subsystem Compatibility Matrix
at
Dell.com/poweredgemanuals and Table 2 in this document.
a. Download the drivers from Dell.com/drivers.
b. Install or update Shared PERC 8 driver on all server blades in the VRTX chassis. For instructions
on installing and updating Shared PERC 8 driver, see
Dell Shared PowerEdge RAID Controller 8
Cards for Dell PowerEdge VRTX Systems User’s Guide
at Dell.com/poweredgemanuals.
Note: Only one software driver per OS is required for both Internal and External Shared PERC 8 cards.
8 Upgrading PowerEdge VRTX to Support Shared Storage Expansion

Note: PERC H310/H710/H710P/H810 controllers use the same driver as Shared PERC 8 and do not
require separate driver installations.
4. Turn off all the server modules.
5. To update the CMC firmware to the required minimum baseline by using the CMC web interface,
perform the following steps:
Note: If you have redundant CMCs installed in the chassis, it is recommended to update both the CMCs
to the same firmware version simultaneously with a single operation. If CMCs have different firmware
and a failover occurs, unexpected results may occur.
Note: Before you update the CMC firmware, ensure that you turn on the chassis, but turn off all the
servers in the chassis.
a. In the left pane, go to any of the following pages:
-Chassis Overview →Update
-Chassis Overview →Chassis Controller →Update
b. On the Firmware Update page, in the CMC Firmware section, select the required components
under the Update Targets column for the CMC or CMCs (if standby CMC is present) you want
to update, and then click Apply CMC Update.
c. In the Firmware Image field, click Browse (Internet Explorer or Firefox) or Choose File (Google
Chrome) to browse through the file location. The default name of the CMC firmware image
file is vrtx_cmc.bin.
d. Click Begin Firmware Update. The Firmware Update Progress section provides firmware
update status information.
A status indicator is displayed on the page while the image file is uploaded. File transfer time
varies based on the connection speed. When the internal update process begins, the page
automatically refreshes and the Firmware update timer is displayed.
e. For a standby CMC, when the update is complete, the Update State field displays Done. For an
active CMC, during the final phases of the firmware update process, the browser session and
connection with CMC is lost temporarily because the active CMC is not connected to the
network. You must log in after a few minutes when the active CMC has restarted. After CMC
resets, the new firmware is displayed on the Firmware Update page.
Note: After the firmware update, delete the files from the web browser cache. For instructions about
clearing the browser cache, see the web browser's online help.
6. To update the chassis infrastructure firmware to the required minimum baseline by using the CMC
web interface, perform the following steps:
a. Go to any of the following pages:
-Chassis Overview →Update
-Chassis Overview →Chassis Controller →Update
b. In the Firmware Update page, in the Chassis Infrastructure Firmware section, in the Update
Targets column, select the option, and click Apply Chassis Infrastructure Firmware.
9 Upgrading PowerEdge VRTX to Support Shared Storage Expansion

c. On the Firmware Update field, click Browse and then select the appropriate Chassis
Infrastructure Firmware.
d. Click Begin Firmware Update, and then click Yes.
The Firmware Update Progress section provides firmware update status information. A status
indicator is displayed on the page while the image file is uploaded. File transfer time varies
based on the connection speed. When the internal update process begins, the page
automatically refreshes and the Firmware update timer is displayed.
Additional instructions to follow:
-Do not click the Refresh icon or navigate to another page during the files transfer.
-The Update State field displays the firmware update status.
-When the update is complete, there is brief loss of connectivity to the main board, because it
resets and the new firmware is displayed on the Firmware Update page.
7. Update the internal backplane expander firmware version by performing the following steps:
a. Click Chassis Overview →Storage →Update and see if the internal backplane expander
firmware version meets the required minimum baseline.
b. Download Dell 12G PowerEdge Server Backplane Expander Firmware for PowerEdge VRTX
from Dell.com/support/home.
c. In the left pane, click Chassis Overview →Storage →Update.
d. On the Storage Component Update page, click Choose File.
The Choose to Upload file dialog box is displayed.
e. Browse to the location where you downloaded the required DUP file.
f. Select the DUP file, and click Open.
The DUP file name and path are displayed in the Browse field.
g. Click Upload.
The DUP is uploaded to CMC. The Storage Component Update section displays only the
components that are supported by the downloaded DUP file. The current version, latest
available version and the Update check box for the components are displayed.
h. Select the appropriate Update check boxes for the required components.
i. Click Update.
The firmware update action is initiated for the selected components. The progress is displayed
in the Update column.
After the action is complete, an appropriate message is displayed to indicate the completion or
failure of the firmware update.
8. Update the Shared PERC 8 Internal controller firmware to the required minimum baseline by
performing the following steps:
Note: Separate image files are used for updating Shared PERC 8 Internal controller firmware compared
to Shared PERC 8 External controller firmware.
Note: If the chassis contains two Shared PERC 8 Internal controllers, ensure that both are updated to the
same firmware version.
a. Download the Windows update package of the Shared PERC 8 firmware for Dell PowerEdge
VRTX
from Dell.com/support/home.
10 Upgrading PowerEdge VRTX to Support Shared Storage Expansion
b. Log in to VRTX CMC.
c. Ensure that you turn off all the server blades.
d. In the left pane, click Chassis Overview →Storage →Update.
e. On the Storage Component Update page, click Choose File.
The Choose to Upload file dialog box is displayed.
f. Browse to the location where you downloaded the Shared PERC 8 firmware file.
g. Select the file, and click Open.
The DUP file name and path are displayed in the Browse field.
h. Click Upload.
i. The DUP is uploaded to CMC. The Storage Component Update section displays only the
components that are supported by the downloaded DUP file. The current version, latest
available version and the Update check box are displayed for the components.
j. Select the appropriate Update check boxes for the required components.
k. Click Update.
The firmware update action is initiated for the selected components. The progress is displayed
in the Update column.
9. Turn off the PowerEdge VRTX chassis by performing the following steps:
a. Turn off all the server modules using CMC.
b. Turn off the chassis.
c. Disconnect the chassis from the electrical outlets.
10. Install Shared PERC 8 External cards into the VRTX chassis by performing the following steps:
Warning: Whenever you need to lift the system, get others to assist you. To avoid injury, do not attempt
to lift the system by yourself.
Warning: Opening or removing the system cover while the system is powered on may expose you to a
risk of electric shock.
Caution: Do not operate the system without the cover for a duration exceeding five minutes.
Caution: Many repairs may only be done by a certified service technician. You should only perform
troubleshooting and simple repairs as authorized in your product documentation, or as directed by the
online or telephone service and support team. Damage due to servicing that is not authorized by Dell is
not covered by your warranty. Read and follow the safety instructions that came with the product.
Note: Dell recommends that you always use a static mat and static strap while working on components
inside the system.
Note: To ensure proper operation and cooling, all bays in the system must be populated always with
either a component or with a blank.
Caution: Do not remove Shared PERC 8 External cards from the system board while the PowerEdge
VRTX system is turned on.
Note: In the single Shared PERC 8 External configuration, the card can be installed in either PCI slot 5 or
6. In the dual Shared PERC 8 External configuration, the cards must be installed in PCI slots 5 and 6.
a. Open the system cover.
b. Lift the expansion card latch out of the chassis slot.
c. Remove the filler bracket.
11 Upgrading PowerEdge VRTX to Support Shared Storage Expansion

d. Hold the card by its edges, and align the card edge connector with the card connector on the
system board.
e. Insert the card edge connector into the card connector until the card is fully seated.
f. Close the expansion card latch.
g. Close the system cover.
For additional information about installing or removing the PCIe adapter card in VRTX chassis, see
Dell
PowerEdge VRTX Enclosure Owner's Manual
at Dell.com/poweredgemanuals.
Figure 3 Removing and installing Shared PERC 8 External card
1. Shared PERC 8 External card
2. Card connector on the system board
3. Expansion card latch
4. Metal standoff
5. Release tab
6. Divider unit
12 Upgrading PowerEdge VRTX to Support Shared Storage Expansion
11. Turn on the PowerEdge VRTX chassis by performing the following steps:
a. Reconnect the chassis power supply units (PSUs) to the electrical outlets.
Note: Note that CMC will automatically turn on.
b. When CMC is ready, log in to the CMC GUI and turn on the chassis.
Note: Do not power on the blade servers in the chassis.
12. Update the Shared PERC 8 External card firmware to the required minimum baseline by
performing the following steps:
Note: For dual Shared PERC 8 External configuration, ensure that both the cards are updated to the same
firmware version.
Note: Separate image files are used for updating Shared PERC 8 Internal firmware compared to Shared
PERC 8 External firmware.
a. Download the Windows update package of the Shared PERC 8 External controller firmware for
Dell PowerEdge VRTX from Dell.com/support/home.
b. Log in to VRTX CMC.
c. Ensure that you turn off all the server blades.
d. In the left pane, click Chassis Overview →Storage →Update.
e. On the Storage Component Update page, click Choose File.
The Choose to Upload file dialog box is displayed.
f. Browse to the location where you downloaded the Shared PERC 8 External card firmware file.
g. Select the file, and click Open.
The DUP file name and path are displayed in the Browse field.
h. Click Upload.
The DUP is uploaded to CMC. The Storage Component Update section displays only the
components that are supported by the downloaded DUP file. The current version, latest
available version and the Update check box for the components are displayed.
i. Select the appropriate Update check boxes for the required components.
j. Click Update.
The firmware update action is initiated for the selected components. The progress is displayed
in the Update column.
13. Set the operating mode for Shared PERC 8 External controller.
By default, the newly installed Shared PERC 8 External cards operate in single controller, non-fault
tolerant mode.
-To change to Dual Shared PERC 8 External Fault Tolerant mode, click Chassis Overview →
Storage →Controllers →Troubleshooting →Actions →Enable Fault Tolerance for both
controllers.
-To set Shared PERC 8 External cards back to single controller, non-fault tolerant mode, click
Chassis Overview →Storage →Controllers →Troubleshooting →Actions →Disable Fault
Tolerance.
13 Upgrading PowerEdge VRTX to Support Shared Storage Expansion
-To disable Shared PERC 8 External cards, click Chassis Overview →Storage →Controllers →
Troubleshooting →Actions →Disable RAID Controller.
-To enable Shared PERC 8 External cards, click Chassis Overview →Storage →Controllers →
Troubleshooting →Actions →Enable RAID Controller.
14. Turn off the PowerEdge VRTX chassis by performing the following steps:
a. Turn off the chassis by using the CMC GUI.
b. Disconnect the chassis from the electrical outlets.
15. Set up PowerVault MD1200 or MD1220 storage enclosures.
The following requirements must be met before setting up PowerVault MD1200 or MD1220
storage enclosures:
-A maximum of two PowerVault MD1200 or MD1220 enclosures can be daisy chained on each
Shared PERC 8 External domain.
-Mixing of PowerVault MD1200 with MD1220 is supported.
-The enclosure mode switch must be set to unified mode before the enclosure is turned on.
Note: Enclosure split-mode is not supported in VRTX.
For additional information about setting up PowerVault MD1200 or MD1220 storage enclosures,
see
Dell PowerVault MD1200 & MD1220 Hardware Owner’s Manual
at
Dell.com/powervaultmanuals.
16. Cable PowerVault MD1200 or MD1220 storage enclosures.
Note: The specified cabling topology must be followed for fault tolerance to function.
Ensure that both the VRTX chassis and storage enclosures are disconnected from the electrical
outlets.
For information about cables that are supported on Dell PowerVault MD1200 and MD1220, see
Table 1 in the document.
14 Upgrading PowerEdge VRTX to Support Shared Storage Expansion
a. Connecting Single Shared PERC 8 External card configuration (non-fault tolerant) to one
enclosure.
Figure 4 Single Shared PERC 8 External card configuration (non-fault tolerant) to one enclosure
15 Upgrading PowerEdge VRTX to Support Shared Storage Expansion
b. Connecting Single Shared PERC 8 External card configuration (non-fault tolerant) to two
enclosures.
Figure 5 Single Shared PERC 8 External card configuration (non-fault tolerant) to two enclosures
16 Upgrading PowerEdge VRTX to Support Shared Storage Expansion
c. Connecting non-fault tolerant dual Shared PERC External configuration to enclosures
Figure 6 Dual Shared PERC 8 External non-fault tolerance mode
Note: In dual Shared PERC 8 External non-fault tolerance mode, the two Shared PERC 8 External
controllers are independent and cannot communicate with each other.
17 Upgrading PowerEdge VRTX to Support Shared Storage Expansion

d. Connecting fault tolerant dual Shared PERC External card configuration to one enclosure.
Figure 7 Fault tolerant dual Shared PERC External card configuration to one enclosure
18 Upgrading PowerEdge VRTX to Support Shared Storage Expansion

e. Connecting fault tolerant dual Shared PERC External card configuration to two enclosures.
Figure 8 Fault tolerant dual Shared PERC External card configuration to two enclosures
19 Upgrading PowerEdge VRTX to Support Shared Storage Expansion

17. Turn on the PowerVault MD1200 or MD1220 storage enclosures by performing the following
steps:
a. Connect the PSUs to the power source.
Note: Before connecting the PSUs, ensure that the power switch on both PSUs is in the OFF position.
b. Turn on the power switches on all PSUs and cooling fan modules.
Before tuning on PowerVault MD1200 and MD1220 storage enclosures, Dell recommends that
you turn on the VRTX chassis. For additional information about setting up PowerVault MD1200
and MD1220 storage enclosures, see
Dell PowerVault MD1200 & MD1220 Hardware Owner’s
Manual
at Dell.com/powervaultmanuals.
18. Turn on the PowerEdge VRTX chassis by performing the following steps:
a. Reconnect the chassis PSUs to the electrical outlets.
Note: Note that CMC will automatically turn on.
b. Log in to the CMC GUI and turn on the chassis.
Note: Do not turn on the server blades.
19. Update the PowerVault MD1200 or MD1220 storage enclosures firmware to the required minimum
baseline by performing the following steps:
Note: You can download the firmware updates for your storage enclosure using Dell Update Package
available at Dell.com/support/home.
a. In the left pane, click Chassis Overview →Storage →Update.
b. On the Storage Component Update page, click Choose File.
The Choose to Upload file dialog box is displayed.
c. Browse to the location where you downloaded the required DUP file.
d. Select the DUP file, and click Open.
The DUP file name and path are displayed in the Browse field.
e. Click Upload.
The DUP is uploaded to CMC. The Storage Component Update section displays only the
components that are supported by the downloaded DUP file. The current version, latest
available version and the Update check box are displayed for the components.
f. Select the appropriate Update check boxes for the required components.
g. Click Update.
The firmware update action is initiated for the selected components. The progress is displayed
in the Update column.
After the action is complete, an appropriate message is displayed to indicate the completion or
failure of the firmware update.
20. View Storage Capacity and Status of the storage components by performing the following steps:
20 Upgrading PowerEdge VRTX to Support Shared Storage Expansion
Table of contents
Other Dell Chassis manuals

Dell
Dell PowerEdge M1000e User manual

Dell
Dell PowerEdge M420 Technical manual

Dell
Dell Force10 E300 Assembly Instructions

Dell
Dell PowerEdge C410X User manual

Dell
Dell PowerEdge C5000 User manual

Dell
Dell PowerConnect B-DCX-4S Backbone Use and care manual

Dell
Dell poweredge VRTX User manual

Dell
Dell PowerEdge M1000e User manual

Dell
Dell EMC PowerEdge MX7000 User manual