Dell poweredge VRTX User manual

Dell PowerEdge VRTX Enclosure
Owner's Manual
Regulatory Model: E22S
Regulatory Type: E22S001

Notes, Cautions, and Warnings
NOTE: A NOTE indicates important information that helps you make better use of your computer.
CAUTION: A CAUTION indicates either potential damage to hardware or loss of data and tells you how to avoid the
problem.
WARNING: A WARNING indicates a potential for property damage, personal injury, or death.
©2013 Dell Inc.
Trademarks used in this text: Dell™, the Dell logo, Dell Boomi™, Dell Precision™, OptiPlex™, Latitude™, PowerEdge™, PowerVault™,
PowerConnect™, OpenManage™, EqualLogic™, Compellent™, KACE™, FlexAddress™, Force10™and Vostro™are trademarks of Dell
Inc. Intel®, Pentium®, Xeon®, Core®and Celeron®are registered trademarks of Intel Corporation in the U.S. and other countries. AMD®
is a registered trademark and AMD Opteron™, AMD Phenom™and AMD Sempron™are trademarks of Advanced Micro Devices, Inc.
Microsoft®, Windows®, Windows Server®, Internet Explorer®, MS-DOS®, Windows Vista®and Active Directory®are either trademarks
or registered trademarks of Microsoft Corporation in the United States and/or other countries. Red Hat®and Red Hat®
Enterprise Linux®are registered trademarks of Red Hat, Inc. in the United States and/or other countries. Novell®and SUSE®are
registered trademarks of Novell Inc. in the United States and other countries. Oracle®is a registered trademark of Oracle Corporation
and/or its affiliates. Citrix®, Xen®, XenServer®and XenMotion®are either registered trademarks or trademarks of Citrix Systems, Inc. in
the United States and/or other countries. VMware®, vMotion®, vCenter®, vCenter SRM™and vSphere®are registered trademarks or
trademarks of VMware, Inc. in the United States or other countries. IBM®is a registered trademark of International Business Machines
Corporation.
2013 - 05
Rev. A00

Contents
Notes, Cautions, and Warnings...................................................................................................2
1 About Your System......................................................................................................................9
Introduction.............................................................................................................................................................. 9
Terms Used In The Document............................................................................................................................9
System Overview....................................................................................................................................................10
Front-Panel Features And Indicators..................................................................................................................... 12
KVM Features...................................................................................................................................................14
Hard-Drive Indicator Patterns..........................................................................................................................14
LCD Module......................................................................................................................................................15
Back-Panel Features And Indicators..................................................................................................................... 18
Power Supply Indicators..................................................................................................................................19
Blower Module Indicators............................................................................................................................... 20
I/O Module Indicators...................................................................................................................................... 21
CMC Indicators.................................................................................................................................................22
CMC Features...................................................................................................................................................22
CMC Fail-Safe Mode........................................................................................................................................ 23
Configuration Wizard..............................................................................................................................................24
System Messages...................................................................................................................................................24
LCD Messages........................................................................................................................................................24
Other Information You May Need...........................................................................................................................25
2 Initial System Configuration.................................................................................................... 27
Before You Begin....................................................................................................................................................27
Initial Setup Sequence............................................................................................................................................27
Logging In To The CMC...........................................................................................................................................28
3 Configuring Enclosure Components.......................................................................................29
Fabric A...................................................................................................................................................................29
Fabrics B And C...................................................................................................................................................... 29
I/O Module And PCIe Mezzanine Card Configuration Guidelines.......................................................................... 29
Supported I/O Modules...........................................................................................................................................30
Configuring Network Settings For The I/O Module.................................................................................................30
Mapping PCIe Expansion Slots...............................................................................................................................30
Managing PCIe Slots.............................................................................................................................................. 31
Managing Chassis Storage.....................................................................................................................................31

4 Installing Enclosure Components...........................................................................................33
Recommended Tools.............................................................................................................................................. 33
Front Bezel (Optional)............................................................................................................................................. 33
Installing The Front Bezel.................................................................................................................................33
Removing The Front Bezel................................................................................................................................34
System Feet—Tower Mode....................................................................................................................................34
Removing The System Feet..............................................................................................................................34
Installing The System Feet............................................................................................................................... 35
Wheel Assembly (Optional)—Tower Mode............................................................................................................35
Installing The Wheel Assembly........................................................................................................................35
Removing The Wheel Assembly.......................................................................................................................38
Opening And Closing The System...........................................................................................................................39
Opening The System........................................................................................................................................ 39
Closing The System..........................................................................................................................................40
Inside The System...................................................................................................................................................40
Hard Drives.............................................................................................................................................................41
Removing A 2.5 Inch Hard-Drive Blank............................................................................................................42
Installing A 2.5 Inch Hard-Drive Blank............................................................................................................. 42
Removing A 3.5 Inch Hard-Drive Blank............................................................................................................42
Installing A 3.5 Inch Hard-Drive Blank............................................................................................................. 43
Removing A Hot-Swap Hard Drive...................................................................................................................43
Installing A Hot-Swap Hard Drive.................................................................................................................... 44
Removing A Hard Drive From A Hard-Drive Carrier.........................................................................................45
Installing A Hard Drive Into A Hard-Drive Carrier............................................................................................46
Server Modules...................................................................................................................................................... 46
Removing A Server Module............................................................................................................................. 47
Configuring A Server Module...........................................................................................................................48
Installing A Server Module...............................................................................................................................49
Power Supplies.......................................................................................................................................................49
Power Supply Blanks....................................................................................................................................... 49
Removing A Power Supply...............................................................................................................................50
Installing A Power Supply................................................................................................................................52
Cooling Shroud....................................................................................................................................................... 53
Removing The Cooling Shroud.........................................................................................................................53
Installing The Cooling Shroud.......................................................................................................................... 54
Cooling Fans............................................................................................................................................................55
Removing A Cooling Fan...................................................................................................................................55
Installing A Cooling Fan....................................................................................................................................56
Cooling-Fan Assembly............................................................................................................................................ 56
Removing The Cooling-Fan Assembly..............................................................................................................56
Installing The Cooling-Fan Assembly...............................................................................................................58

Blower Modules..................................................................................................................................................... 58
Removing A Blower Module.............................................................................................................................58
Installing A Blower Module..............................................................................................................................59
Removing The Blower Module Bay..................................................................................................................60
Installing The Blower Module Bay...................................................................................................................60
I/O Module.............................................................................................................................................................. 61
Removing The I/O Module................................................................................................................................61
Installing The I/O Module.................................................................................................................................62
Optical Drive (Optional)...........................................................................................................................................62
Removing The Optical Drive.............................................................................................................................62
Installing The Optical Drive..............................................................................................................................64
CMC Cards..............................................................................................................................................................64
CMC Card Indicators........................................................................................................................................65
Removing A CMC Card.....................................................................................................................................66
Installing A CMC Card...................................................................................................................................... 67
PCIe Cage............................................................................................................................................................... 67
Removing The PCIe Cage Door........................................................................................................................ 67
Installing The PCIe Cage Door......................................................................................................................... 68
Removing The PCIe Cage.................................................................................................................................68
Installing The PCIe Cage..................................................................................................................................71
Expansion Cards..................................................................................................................................................... 71
Expansion Card Installation Guidelines............................................................................................................71
Expansion Card Operational Power Status......................................................................................................72
PCIe Slot Indicators..........................................................................................................................................73
Removing A Low Profile Expansion Card.........................................................................................................74
Installing A Low Profile Expansion Card.......................................................................................................... 75
Removing The Low Profile Expansion Card Divider Unit..................................................................................76
Installing The Low Profile Expansion Card Divider Unit...................................................................................77
Removing A Full Height Expansion Card.......................................................................................................... 78
Installing A Full Height Expansion Card........................................................................................................... 79
Removing The Full-Height Expansion-Card Divider Unit..................................................................................80
Installing The Full Height Expansion Card Divider Unit....................................................................................81
Removing The Expansion Card Riser............................................................................................................... 82
Installing The Expansion Card Riser.................................................................................................................83
Integrated Storage Controller Card........................................................................................................................ 83
Storage Controller Operational Power Status................................................................................................. 84
Storage Controller Indicators...........................................................................................................................85
Removing An Integrated Storage Controller Card........................................................................................... 86
Installing An Integrated Storage Controller Card.............................................................................................87
System Battery....................................................................................................................................................... 88
Replacing The System Battery.........................................................................................................................88
System Top And Base Covers.................................................................................................................................89
Removing The System Top And Base Covers..................................................................................................89
Installing The System Top And Base Covers................................................................................................... 90
Mounting Ears.........................................................................................................................................................91
Removing The Mounting Ears.......................................................................................................................... 91
Installing The Mounting Ears........................................................................................................................... 92
Replacing The LCD Module..............................................................................................................................93
Control Panel Assembly..........................................................................................................................................93
Removing The Control Panel............................................................................................................................93
Installing The Control Panel............................................................................................................................. 94
Removing The Control Panel Board................................................................................................................. 95
Installing The Control Panel Board.................................................................................................................. 96
Backplane Expander Boards..................................................................................................................................97
Removing A Backplane Expander Board.........................................................................................................97
Installing A Backplane Expander Board.......................................................................................................... 98
Hard-Drive Backplane............................................................................................................................................ 99
Removing The Hard-Drive Backplane..............................................................................................................99
Installing The Hard-Drive Backplane.............................................................................................................102
Power Distribution Board..................................................................................................................................... 102
Removing The Power Distribution Board.......................................................................................................102
Installing The Power Distribution Board........................................................................................................104
System Board........................................................................................................................................................104
Removing The System Board.........................................................................................................................104
Installing The System Board.......................................................................................................................... 107
Power Pass-Through Board................................................................................................................................. 107
Removing The Power Pass-Through Board...................................................................................................108
Installing The Power Pass-Through Board....................................................................................................109
Midplane...............................................................................................................................................................110
Removing The Midplane.................................................................................................................................110
Installing The Midplane..................................................................................................................................112
5 Converting The System From Tower Mode To Rack Mode............................................. 115
Safety Instructions................................................................................................................................................115
Preparing A System For Conversion From Tower Mode To Rack Mode..............................................................115
Installing The Enclosure In A Rack.......................................................................................................................119
6 Troubleshooting Your System...............................................................................................121
Safety First—For You And Your System............................................................................................................... 121
Responding To A Systems Management Alert Message.....................................................................................121
Troubleshooting External Connections.................................................................................................................121
Troubleshooting A Damaged Enclosure...............................................................................................................121
Troubleshooting Enclosure Components..............................................................................................................122
Troubleshooting A Wet Enclosure................................................................................................................. 122

Troubleshooting Power Supplies...................................................................................................................123
Troubleshooting Blower Modules..................................................................................................................123
Troubleshooting The System Battery.............................................................................................................123
Troubleshooting Cooling Problems................................................................................................................124
Troubleshooting Cooling Fans........................................................................................................................124
Troubleshooting An Optical Drive.................................................................................................................. 124
Troubleshooting A Storage Controller........................................................................................................... 125
Troubleshooting Hard Drives......................................................................................................................... 125
Troubleshooting Expansion Cards..................................................................................................................126
Troubleshooting The I/O Module....................................................................................................................127
7 System Board Connectors.....................................................................................................129
8 Technical Specifications....................................................................................................... 133
Enclosure Specifications......................................................................................................................................133
I/O Module Specifications....................................................................................................................................134
Environmental Specifications...............................................................................................................................134
9 Getting Help..............................................................................................................................139
Contacting Dell..................................................................................................................................................... 139
Documentation Feedback.....................................................................................................................................139

8

1
About Your System
Introduction
This document provides information on the Dell PowerEdge VRTX enclosure.
Terms Used In The Document
The following table describes the terms used in this document.
Term Description
Enclosure or chassis Refers to the VRTX enclosure.
Server module(s) Refers to Dell PowerEdge M520 or M620 server module(s)
that are specifically configured for the enclosure. For
information about the server modules, see the module's
Owner's Manual at dell.com/poweredgemanuals.
I/O module Refers to an Ethernet pass-through module or a switch
module installed in the chassis.
PCIe mezzanine card(s) Server modules configured for the VRTX enclosure have
PCIe mezzanine cards installed in Fabrics B and C to
provide I/O expansion.
NOTE: Ethernet, Fibre Channel, or InfiniBand
mezzanine cards are not supported on the VRTX
enclosure.
PCIe expansion card(s) PCIe cards installed in the enclosure provide I/O
expansion to the chassis.
Warm plug A slot is considered warm plug if the server module
associated with a component in that slot must be turned
off before adding or replacing the component. However,
the chassis and the rest of the server modules remain
powered on.
Hot swap A slot in the chassis is considered as hot swap if a
component can be replaced or installed in it while the
chassis and server modules are powered on.
9

System Overview
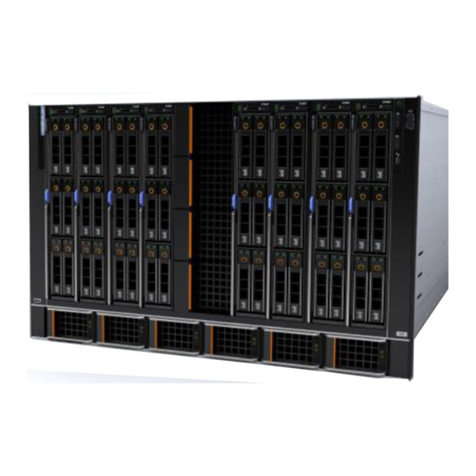
Your system includes up to four Dell PowerEdge M520 or M620 server modules installed in the Dell PowerEdge VRTX
enclosure (chassis) that are specifically configured for the enclosure, and can be identified by a label marked PCIe on
the server module.
Figure 1. Identifying a Server Module Configured for the VRTX Enclosure
1. PCIe label on the server module
2. server module
3. VRTX enclosure
If you install server modules that are not configured for the enclosure, an error message is displayed.
The enclosure supports power supplies, hard drives, Chassis Management Controllers (CMC), blower modules, and an
I/O module. These are shared resources for the server modules.
NOTE: To ensure proper operation and cooling, all bays in the enclosure must be populated at all times with either
a server module or with a blank. Similarly, all empty hard drive slots in the enclosure must be installed with hard-
drive blanks.
10

Figure 2. Server Module and Hard-Drive Numbering (2.5 inch Hard-Drive Chassis)
1. server module numbering
2. hard-drive numbering
Figure 3. Server Module and Hard-Drive Numbering (3.5 inch Hard-Drive Chassis)
1. server module numbering
11

2. hard-drive numbering
Front-Panel Features And Indicators
Figure 4. Front-Panel Features And Indicators—2.5 Inch Hard Drive Chassis
12

Figure 5. Front-Panel Features And Indicators—3.5 Inch Hard Drive Chassis
Item Indicator, Button, or
Connector Icon Description
1 USB connectors (2) Allows a keyboard and mouse to be connected to
the system.
2 LCD panel Provides system information and status and error
messages to indicate when the system is operating
correctly or when the system needs attention.
3 LCD menu scroll buttons
(4)
Moves the cursor in one-step increments.
4 Selection ("check") button Selects and saves an item on the LCD screen and
moves to the next screen.
5 Enclosure power-on
indicator, power button
The power-on indicator lights when the enclosure
power is on. The power button controls the power
supply output to the system.
6 Hard drives 2.5 inch hard
drive enclosure
Up to twenty five 2.5 inch
hot-swappable hard
drives.
13

Item Indicator, Button, or
Connector Icon Description
3.5 inch hard
drive enclosure
Up to twelve 3.5 inch hot-
swappable hard drives.
7 Information tag A slide-out label panel which allows you to record
system information such as Service Tag, NIC, MAC
address, the system's electrical rating, and
Worldwide Regulatory Agency marks.
8 Optical drive (optional) One optional SATA DVD-ROM drive or DVD+/-RW
drive.
9 Vents Vents for the temperature sensor.
NOTE: To ensure proper cooling, ensure that
the vents are not blocked.
10 Video connector Allows a monitor to be connected to the system.
11 Server modules Up to four PowerEdge M520 or M620 server
modules specifically configured for the enclosure.
KVM Features
• Local KVM access can be remotely disabled on a per server module basis, using the server module’s iDRAC
interface (access is enabled by default).
• One VGA connector—The KVM supports a video display resolution range from 640 × 480 at 60 Hz up to 1280 ×
1024 × 65,000 colors (non-interlaced) at 75 Hz.
• Two USB ports for keyboard and mouse.
• The KVM provides access to the server modules. You can access one server module at a time using the LCD
panel.
Hard-Drive Indicator Patterns
Figure 6. Hard-Drive Indicators
1. hard-drive activity indicator (green)
14

2. hard-drive status indicator (green and amber)
Drive-Status
Indicator Pattern
Condition
Blinks green two
times per second
Identifying drive or preparing for removal
Off Drive ready for insertion or removal
NOTE: The drive status indicator remains off until all hard drives are initialized after the
system is turned on. Drives are not ready for insertion or removal during this time.
Blinks green, amber,
and off
Predicted drive failure
Blinks amber four
times per second
Drive failed
Blinks green slowly Drive rebuilding
Steady green Drive online
Blinks green three
seconds, amber three
seconds, and off six
seconds
Rebuild aborted
LCD Module
You can use the LCD panel on the enclosure chassis to perform configuration and diagnostics, and to obtain status
information about the chassis and its contents.
Figure 7. LCD Display
1. LCD screen
2. selection ("check") button
3. scroll buttons (4)
LCD Module Features
The primary function of the LCD module is to provide real-time information on the health and status of the modules in the
enclosure.
LCD module features include:
15

• A deployment setup that allows you to configure the CMC’s network settings during initial system setup.
• Menus to configure the iDRAC in each server module.
• Status information screens for each server module.
• Status information screens for the modules installed in the back of the enclosure, including the I/O module,
blower modules, CMC, KVM, and power supplies.
• An IP Summary screen listing the IP addresses of all components in the system.
• Real time power consumption statistics, including high and low values, and average power consumption.
• Ambient temperature values.
• AC power information.
• Critical failure alerts and warnings.
Using The LCD Module Menus
The LCD Setup menu displays a menu of items that can be configured.
Use the up and down arrow buttons to highlight an item in the menu or highlight the Back icon if you want to return to
the Main menu.
Press the center button to activate your selection.
Key Action
Left and right arrows Move between screens
Up arrow or down
arrow
Move to the previous or next option on a screen
Center button Select and save an item and move to the next screen
Main Menu
From the Main menu, you can navigate to one of the following screens:
Screen Description
LCD Setup Contains the options such as Language Setup, LCD Orientation, and the Default Screen.
KVM Mapping Contains the options to map or unmap the KVM to the servers.
DVD Mapping Contains the option to map or unmap the DVD drive on the chassis to the servers.
Enclosure Displays status information for the chassis.
IP Summary Displays IPv4 and IPv6 information about CMC and iDRAC.
LCD Setup Menu
The LCD Setup Menu displays a menu of items that can be configured:
Language Setup Select the language you want to use for LCD screen text and messages.
LCD Orientation Select either Tower Mode or Rack Mode based on the installation orientation of the chassis.
Default Screen Select the screen (Main menu, Front Status, Rear Status, Side Status, or Custom) that is
displayed when there is no activity on the LCD panel.
Use the up and down arrow buttons to highlight an item in the menu or highlight the Back icon if you want to return to
the Main menu.
Press the center button to activate your selection.
16

DVD Mapping
From this screen, you can view the DVD to server mapping information, map another server to the DVD drive on the
chassis, or unmap the existing connection.
KVM Mapping Menu
From this screen, you can view the KVM to server mapping information, map another server to the KVM, or unmap the
existing connection.
Enclosure Menu
From this screen, you can navigate to the following screens:
• Front Status
• Rear
• Side
• Enclosure status
Use the navigation buttons to highlight the desired item (highlight the Back icon to return to the Main menu) and press
the center button. The selected screen is displayed.
IP Summary Menu
The IP Summary screen displays the IP information for CMC (IPv4 and IPv6) and iDRAC (IPv4 and IPv6) on each of the
installed servers.
Use the up and down arrow buttons to scroll through the list. Use the left and right arrow buttons to scroll selected
messages that are longer than the screen.
Use the up and down arrow buttons to select the Back icon and press the center button to return to the Enclosure menu.
17

Back-Panel Features And Indicators
Figure 8. Back-Panel Features and Indicators
Item Indicator, Button, or
Connector Icon Description
1 PCIe expansion card slots
low-profile (5)
Allows you to connect up to five low-profile PCI Express
expansion cards.
2 PCIe expansion card slots
full height (3)
Allows you to connect up to three full-height PCI Express
expansion cards.
3 CMC GbE port 2 Connects the network cable from the management system
to the secondary CMC.
4 CMC GbE port 1 Connects the network cable from the management system
to the primary CMC.
5 Serial connector DB-9 serial connector for CMC configuration.
6 Blower modules (4) Provide cooling for the server modules.
7 I/O module ports Network interface for I/O modules.
8 Power supply (PSU4) 1100 W AC
18

Item Indicator, Button, or
Connector Icon Description
9 Power supply (PSU3) 1100 W AC
10 Power supply (PSU1) 1100 W AC
11 Power supply (PSU2) 1100 W AC
Power Supply Indicators
Each AC power supply has an illuminated translucent handle that serves as an indicator to show whether power is
present or whether a power fault has occurred. The AC power supplies must be connected to a Power Distribution Unit
(PDU) or to an electrical outlet.
Figure 9. Power Supply Indicators
1. AC power supply status indicator/handle
The power supply indicators provide the following information:
Power Indicator
Pattern
Condition
Not lit Power is not connected.
Green In standby mode, the handle lights green indicating that a valid power source is connected to
the power supply and that the power supply is operational.
Flashing amber Indicates a problem with the power supply.
CAUTION: When correcting a power supply mismatch, replace only the power supply with
the flashing indicator. Swapping the opposite power supply to make a matched pair can
result in an error condition and unexpected system shutdown. To change from a High
Output configuration to a Low Output configuration or vice versa, you must power down
the system.
CAUTION: AC Power supplies support both 220 V and 110 V input voltages. When two
identical power supplies receive different input voltages, they can output different
wattages, and trigger a mismatch.
CAUTION: All power supplies used must be of the same type and have the same maximum
output power.
19

Blower Module Indicators
Figure 10. Blower Module Indicators
1. blower module fault indicator
2. blower module power indicator
The indicators provide the following information:
Indicator Description
Blower module
power indicator Steady Green The blower module is receiving power.
Off The blower module is not receiving power.
Blower module fault
indicator Blinking Amber The blower module is in a fault condition.
Off The blower module is operating normally.
20
Other manuals for poweredge VRTX
12
Table of contents
Other Dell Chassis manuals

Dell
Dell PowerEdge C410X User manual

Dell
Dell EMC PowerEdge MX7000 User manual

Dell
Dell Force10 E300 Assembly Instructions

Dell
Dell PowerEdge C5000 User manual

Dell
Dell PowerEdge M420 Technical manual

Dell
Dell PowerEdge M1000e User manual

Dell
Dell PowerEdge VRTX Quick start guide

Dell
Dell PowerEdge M1000e User manual

Dell
Dell PowerConnect B-DCX-4S Backbone Use and care manual