manuals.online logo
Brands
  1. Home
  2. •
  3. Brands
  4. •
  5. Dell
  6. •
  7. Desktop
  8. •
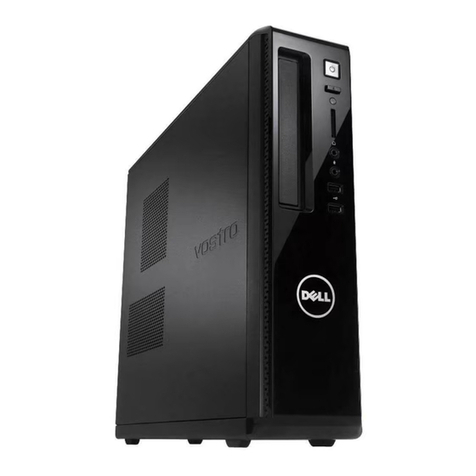
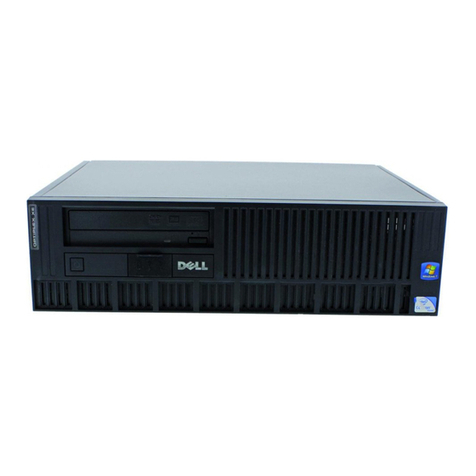
  9. Dell Vostro 410 Operator's manual

Dell Vostro 410 Operator's manual

ZZZGHOOFRP
™
'HOO3UHFLVLRQ:RUN6WDWLRQ
0LQL7RZHU6\VWHPV
'2&80(17$7,21
83'$7(
0655Cbk7.book Page 27 Monday, April 19, 1999 7:20 PM
1RWHV1RWLFHVDQG&DXWLRQV
Throughout this guide, blocks of text may be accompanied by an icon and printed in
bold type or in italic type. These blocks are notes, notices, and cautions, and they are
used as follows:
NOTE: A NOTE indicates important information that helps you make better use of
your computer system.
127,&($127,&(LQGLFDWHVHLWKHUSRWHQWLDOGDPDJHWRKDUGZDUHRUORVV
RIGDWDDQGWHOOV\RXKRZWRDYRLGWKHSUREOHP
&$87,21$&$87,21LQGLFDWHVDSRWHQWLDOO\KD]DUGRXVVLWXDWLRQZKLFKLI
QRWDYRLGHGPD\UHVXOWLQPLQRURUPRGHUDWHLQMXU\
____________________
Information in this document is subject to change without notice.
© 1999 Dell Computer Corporation. All rights reserved.
Reproduction in any manner whatsoever without the written permission of Dell Computer Cor-
poration is strictly forbidden.
Trademarks used in this text: Dell, the DELL logo, and Dell Precision are trademarks of Dell
Computer Corporation; Microsoft, Windows, and Windows NT are registered trademarks of
Microsoft Corporation; 3Com and EtherDisk are registered trademarks of 3Com Corporation;Intel
and Pentium are registered trademarks and MMX is a trademark of Intel Corporation.
Other trademarks and trade names may be used in this document to refer to either the entities
claiming the marks and names or their products. Dell Computer Corporation disclaims any propri-
etary interest in trademarks and trade names other than its own.
April 1999 P/N 0655C Rev. A07
0655Cbk7.book Page 28 Monday, April 19, 1999 7:20 PM
Dell Precision WorkStation 410 Mini Tower Systems Documentation Update 1
'HOO3UHFLVLRQ:RUN6WDWLRQ
0LQL7RZHU6\VWHPV
'RFXPHQWDWLRQ8SGDWH
This document updates information contained in the Dell Precision WorkStation 410
Mini Tower Systems Users Guide . It provides information about the following topics:
Small computer system interface (SCSI) drivers for the Microsoft ®Windows NT ®
operating system
3Com®Peripheral Component Interface (PCI) 3C905B network interface control-
ler (NIC)
Microsoft-updated Advanced Technology Attachment Packet Interface (ATAPI)
driver
Owner tag
New System Setup program features
Intel®Pentium ®II and Pentium III microprocessor availability
Basic input/output system (BIOS) reinstallation
Online documentation
,QVWDOOLQJ6&6,'ULYHUV'XULQJ
:LQGRZV 17 ,QVWDOODWLRQ
To install SCSI drivers for the Microsoft Windows NT 4.0 operating system, perform
the following steps:
1. Insert the bootable Windows NT CD into the CD-ROM drive, and turn on or
reboot the system, perform the following steps.
2. Press <F6> when the following message appears:
Setup is inspecting your computer’s hardware
configuration...
0655Cbk7.book Page 1 Monday, April 19, 1999 7:20 PM
2 Dell Precision WorkStation 410 Mini Tower Systems Documentation Update
The setup program copies files to your system and pauses at the Windows NT
Setup screen to allow you to specify additional devices.
3. Press <s> to specify additional SCSI devices.
Windows NT displays a list of supported host adapters.
4. Select Other (the default) and press <Enter>.
The following message appears:
Please insert the disk labeled Manufacturer-supplied
hardware support disk into Drive A:
5. Insert the diskette containing the Adaptec 7890 and 7880 device drivers and
press <Enter>.
You created this diskette using the Dell Program Diskette Maker when you
made program diskette sets of your Dell-installed software.
6. Follow the instructions on the screen to complete the Windows NT installation.
&RQILJXULQJD&RP3&,&%1,&IRU
:LQGRZV17
This section provides information on the following topics:
Manually setting the network frame type for an Internetwork Packet eXchange/
Sequenced Packet eXchange (IPX/SPX)-compatible network protocol
Using 3Com EtherDisk ®XL diskettes
Ensuring that the NIC functions properly when you are installing the Japanese
version of the Windows NT 4.0 operating system
6HWWLQJWKH1HWZRUN)UDPH7\SH
If your system is connected to an IPX/SPX-compatible network, perform the following
steps to set the network frame type:
1. On the Windows desktop, right-click the Network Neighborhood icon and click
Properties.
2. Click the Protocols tab in the Network window and select NWLink IPX/SPX-
Compatible Transport protocol if it is not already selected.
3. Click Properties to open the NWLink IPX/SPX-compatible Protocol Properties
window.
0655Cbk7.book Page 2 Monday, April 19, 1999 7:20 PM
Dell Precision WorkStation 410 Mini Tower Systems Documentation Update 3
4. Click the down arrow next to the Frame Type text box and select the appropriate
frame type (according to your network requirements) from the drop-down list.
Then click OK.
See your network administrator if you need more information on which frame
type to select.
8VLQJ&RP(WKHU'LVN;/9HUVLRQ'LVNHWWHV
The 3Com EtherDisk XL version 3.01 diskettes provided by Dell are compatible with
the 3C905 family of NICs. If you purchased a 3Com 3C905-based NIC separately, do
not attempt to use the 3Com EtherDisk XL diskettes that came with the NIC. Use
only the 3Com EtherDisk XL version 3.01 diskettes that were provided by Dell.
For more information on NIC drivers and utilities, see Chapter 5, Using the Network
Interface Controller, in your Dell Precision WorkStation 410 Mini Tower Systems
Users Guide.
,QVWDOOLQJ&RP(WKHU'LVN;/:LWK-DSDQHVH
:LQGRZV 17 
If you are installing Japanese Windows NT 4.0 for the first time, follow the steps in
First-Time Installation. If Dell installed the Japanese version of Windows NT 4.0
Service Pack 3 and you need to reinstall 3Com EtherDisk XL, follow the steps in
Reinstallation.
)LUVW7LPH,QVWDOODWLRQ
If Dell did not install Japanese Windows NT 4.0, or if you are installing Japanese
Windows NT 4.0 on a formatted or blank hard-disk drive, perform the following steps:
1. Install Japanese Windows NT 4.0.
For more information on installing Windows NT 4.0, see the Dell-Installed
Microsoft Windows NT Workstation 4.0 Setup Guide and your operating system
documentation.
2. Install the bus-mastering drivers for Windows NT 4.0.
For more information on installing bus-mastering enhanced integrated drive elec-
tronics (EIDE) drivers, see Chapter 2, Using the Software Support Utilities, in
your Users Guide.
For more information on installing the Microsoft-updated ATAPI driver, see
Microsoft-Updated ATAPI Driver for Windows NT 4.0 found later in this
document.
3. Use 3Com EtherDisk XL version 3.01 to install the 3Com 3C905B NIC drivers.
For more information on installing 3Com 3C905B NIC drivers, see Chapter 5,
Using the Network Interface Controller, in your Users Guide.
0655Cbk7.book Page 3 Monday, April 19, 1999 7:20 PM
4 Dell Precision WorkStation 410 Mini Tower Systems Documentation Update
4. Install Service Pack 3 for Japanese Windows NT 4.0.
Use the Windows NT 4.0 CD that came with your system. For more information
on installing Service Pack 3 for Windows NT 4.0, see your operating system
documentation.
5. Install video drivers and other system drivers.
For more information on installing video drivers and other system drivers and util-
ities, see your Users Guide and the documentation that accompanied your video
card.
5HLQVWDOODWLRQ
If Dell already installed the Japanese version of Windows NT 4.0 Service Pack 3 and
you need to reinstall 3Com EtherDisk XL version 3.01, perform the following steps:
1. Use the 3Com EtherDisk XL version 3.01 diskettes provided by Dell to reinstall
the 3Com 3C905B NIC drivers.
For more information on reinstalling 3Com 3C905B NIC drivers, see Chapter 5,
Using the Network Interface Controller, in your Users Guide.
2. Reinstall Service Pack 3 for Japanese Windows NT 4.0.
Use the Windows NT 4.0 CD that came with your system. For more information
on reinstalling Service Pack 3 for Windows NT 4.0, see your operating system
documentation.
3. Reinstall video drivers and other system drivers.
For more information on reinstalling video drivers and other system drivers and utili-
ties, see your Users Guide and the documentation that accompanied your video card.
0LFURVRIW8SGDWHG$7$3,'ULYHUIRU:LQ
GRZV17
If you are using the Windows NT 4.0 operating system, you should replace the exist-
ing Intel PIIX PCI bus-master IDE driver with the Microsoft-updated ATAPI driver. The
ATAPI driver provides a performance improvement by off-loading certain functions
from the microprocessor during multithreaded operations (when several application
programs are running simultaneously).
Dell has installed the Microsoft-updated ATAPI driver, and it is operative when you
receive your computer. No further installation or configuration is needed. However, if
Windows NT 4.0 is reinstalled, the Microsoft-updated ATAPI driver must also be
reinstalled.
NOTE: To complete the driver reinstallation, you must have a mouse connected to the
system and Windows NT 4.0 must already be installed on the hard-disk drive that is
connected to the primary EIDE channel.
0655Cbk7.book Page 4 Monday, April 19, 1999 7:20 PM
Dell Precision WorkStation 410 Mini Tower Systems Documentation Update 5
5HLQVWDOOLQJWKH0LFURVRIW8SGDWHG$7$3,'ULYHU
To reinstall the Microsoft-updated ATAPI driver, perform the following steps:
1. Start the Windows NT operating system. If you are already running Windows NT,
close any open documents or application programs.
2. If you have not already done so, make a diskette copy of the ATAPI driver using
the Program Diskette Maker (located in the Dell Accessories folder).
3. Insert the Microsoft-Updated ATAPI Driver for Windows NT 4.0 diskette into
drive A.
4. Click the Start button and click Run. Ty p e a:\setup.bat in the Run window,
and then click OK.
A black screen quickly appears and disappears, indicating that the driver file has
been loaded. The setup program automatically saves the existing atapi.sys driver
as atapi.000 and loads the new driver into the system32\drivers subdirectory in
the Windows NT directory.
5. Remove the diskette from drive A. Then restart the computer.
6. Click the Start button, point to Settings, and click Control Panel.
7. Double-click SCSI Adapters.
8. Click the Drivers tab.
9. Select Intel PIIX PCI Bus Master IDE Controller and then click Remove.
10. When asked if you are sure you want to remove the driver, click Ye s .
11. C l i ck Add and select IDE CD-ROM (ATAPI 1.2) Dual Channel PCI IDE
Controller; then click OK.
12. Restart the system.
127,&('RQRWHQDEOHGLUHFWPHPRU\DFFHVV'0$IRUWKH:LQGRZV17
$7$3,GULYHULI\RXUV\VWHPFRQWDLQVDQ,RPHJD=LSGULYHRUZKHQ\RXXVH
'HOO,QVSHFWRU[(QDEOLQJ'0$IRUWKH:LQGRZV17$7$3,GULYHURQ
'HOO3UHFLVLRQ:RUN6WDWLRQV\VWHPVWKDWKDYHDQ,RPHJD=LSGULYH
LQVWDOOHGRUZKHQ\RXUXQ'HOO,QVSHFWRU[FRXOGUHVXOWLQORVVRIGDWDRQ
\RXUV\VWHP
NOTE: To enable or disable DMA while using the Microsoft-updated ATAPI driver,
run dmacheck.exe from \support\utils\i386 on the Microsoft Windows NT Service
Pack 3 CD.
0655Cbk7.book Page 5 Monday, April 19, 1999 7:20 PM
6 Dell Precision WorkStation 410 Mini Tower Systems Documentation Update
5HPRYLQJWKH0LFURVRIW8SGDWHG$7$3,'ULYHU
To remove the Microsoft-updated ATAPI driver, perform the following steps:
1. Start the Windows NT operating system. If you are already running Windows NT,
close any open documents or application programs.
2. In Windows Explorer, open the system32\drivers subdirectory in the
Windows NT directory.
3. Rename the existing atapi.sys file to atapi.bak.
4. Rename the atapi.000 file to atapi.sys.
5. Restart the computer.
$VVLJQLQJDQ2ZQHU7DJ
You can use the Asset Tag utility to assign an owner tag that will be displayed on the
Dell logo screen whenever you boot your system.
An owner tag can be up to 80 characters; any combination of letters, numbers, and
spaces is valid. To assign an owner tag, type asset /o and a space followed by the
new owner tag; then press <Enter>. For example, type the following command line
and press <Enter>:
asset /o ABC Company
When prompted to verify the owner tag, type yand press <Enter>. The system then
displays the new owner tag.
To delete the owner tag without assigning a new one, type asset /o /d and press
<Enter>.
1HZ6\VWHP6HWXS)HDWXUHV
The following features have been added to the System Setup program (see Figure 1):
A CPU IDs field has been added to the system data area on both System Setup
program screens.
A new optionVideo DAC Snoophas been added on page 1 of the System
Setup program screens.
A new setting for NICOn (PXE Off) (the default)has been added to the con-
figuration options area on page 2 of the System Setup program screens.
0655Cbk7.book Page 6 Monday, April 19, 1999 7:20 PM
Dell Precision WorkStation 410 Mini Tower Systems Documentation Update 7
)LJXUH6DPSOH6\VWHP6HWXS6FUHHQV
&38,'V)LHOG
The CPU IDs field displays the ID number(s) of the microprocessor(s) in your work-
station. This information can help Dell technical assistance engineers identify which
version of microprocessor(s) is installed in the computer.
Reserved Memory:
CPU Speed:
Num Lock:
ACPI:
Chassis Intrusion:
Thermal Power-off:
Video DAC Snoop:
Drives:
Primary Type Cyls Hds Pre LZ Sec Size
Drive 0:Auto 1023 64 -1 1023 63 2111
Drive 1:None
Report
Not Enabled
Unlocked
Diskette First
Not Enabled
Disabled 00:00
Disabled
Off
On
On (PXE Off)
On
Auto
Off
378h
AT
Auto
Auto
On
Off
Sound:
NIC:
Mouse:
Serial Port 1:
Serial Port 2:
Parallel Port:
Parallel Mode:
IDE Hard Disk:
Diskette:
Speaker:
SCSI:
Keyboard Errors:
System Password:
Password Status:
Boot Sequence:
Setup Password:
Auto Power On:
Power Management:
Wakeup On LAN:
Integrated Devices
BIOS Version:
XXX
This category determines whether
keyboard-related error messages
are reported at system startup.
CPU IDs:
Level 2 Cache:
System Memory:
Service Tag:
Asset Tag:
651, 651
512 KB Integrated
64 MB ECC SDRAM
XXXXX
XXXXX
Pentium®II Processors 350 MHz
Dell Computer Corporation (www.dell.com)
Page 2 of 2 Precision WorkStation 410 MT Setup
To change the value in a field,
enter a number or use the left- or
right-arrow key.
Changes take effect immediately.
change values Esc exit
CPU IDs:
Level 2 Cache:
System Memory:
Service Tag:
Asset Tag:
Diskette Drive B:
Dell Computer Corporation (www.dell.com)
Page 1 of 2
Date: Mon Jan 5, 1998
Precision WorkStation 410 MT Setup
Diskette Drive A:
Tab,Shift-Tab change fields
Secondary
Drive 0:Auto CD-ROM Device
Drive 1:None
Not Installed
3.5 inch, 1.44 MB
This category sets the time in
24-hour format (hours:minutes:
seconds) for the internal clock/
calendar.
Time: 13:17:02
Alt-P next
None
350 MHz
On
Off
Not Detected
Disabled
Off
651, 651
512 KB Integrated
64 MB ECC SDRAM
XXXXX
XXXXX
Pentium®II Processors 350 MHz
,
BIOS Version:
XXX
Alt-B reboot
system data
configuration options
change values Esc exit
Tab,Shift-Tab change fields Alt-P next
,Alt-B reboot
0655Cbk7.book Page 7 Monday, April 19, 1999 7:20 PM
8 Dell Precision WorkStation 410 Mini Tower Systems Documentation Update
9LGHR'$&6QRRS
Video DAC Snoop lets you correct video problems that may occur when certain
video expansion cards are used. Choosing Offthe defaultimproves system com-
patibility, but may prevent some video expansion cards from working properly.
If you are using a video expansion card and problems such as incorrect colors or blank
windows occur, set Video DAC Snoop to On.
1,&6HWWLQJV
The following user-selectable settings for the NIC option determine the state of the
integrated NIC:
On (PXE Off)  NIC is enabled but not set to boot the system remotely from the
Preboot eXecution Environment (PXE) on a network server.
On  NIC is enabled and PXE is set to allow the network administrator to update
the system remotely.
Off  NIC is disabled.
,QWHO3HQWLXP3URFHVVRUV
Dell Precision WorkStation 410 systems now feature Intel Pentium II or Pentium III
microprocessors.
3HQWLXP,,)HDWXUHV
The Pentium II microprocessors include MM X technology, a 32-kilobyte (KB) level 1
(L1) cache, a 512-KB level 2 (L2) cache, and an integrated math coprocessor.
3HQWLXP,,,)HDWXUHV
The Pentium III processors use a new instruction set known as streaming single
instruction, multiple data (SIMD) extensions and a new feature called the processor
serial number. The SIMD extensions instruction set is made up of more than 70 new
instructions and includes floating-point SIMD to enhance 3D display performance and
other multimedia capabilities. The processor serial number uniquely identifies each
Pentium III processor.
The Pentium III processors also include MMX technology and an L2 cache.
2SHUDWLQJ6\VWHPVDQG3HQWLXP,,,)HDWXUHV
Pentium III processors require specific drivers and Service Packs for each Microsoft
operating system. Without the correct driver or Service Pack, the new features of
your Pentium III processor may not be available.
0655Cbk7.book Page 8 Monday, April 19, 1999 7:20 PM
Dell Precision WorkStation 410 Mini Tower Systems Documentation Update 9
:LQGRZV17[
If you ordered your Dell Precision WorkStation with a Pentium III processor, the
Microsoft Windows NT 4. xoperating system, and Service Pack 3, your system functions
normally and benefits from the higher clock speed and the cache/memory management
improvements offered by the Pentium III processor. However, your system cannot take
advantage of the new SIMD extensions instruction set. To use the SIMD extensions
instruction set, you must install Windows NT 4. xService Pack 4 and the Intel streaming
SIMD extensions (SSE) instruction set driver. You can download Windows NT Service
Pack 4 from the Microsoft Web site at http://www.microsoft.com and the Intel SSE
driver from http://www.dell.com.
If you ordered your Dell Precision WorkStation with a Pentium III processor,
Windows NT 4.x, and Service Pack 4, the Intel SSE driver required to take advantage
of the SIMD extensions instruction set was also factory installed. A Windows NT Ser-
vice Pack 4 CD is included with your system should you need to reinstall Windows NT.
The Intel SSE driver is one of the drivers copied when you run the Dell Program Dis-
kette Maker program included with the system. You must make backup driver
diskettes. You need these diskettes to reinstall the drivers if you reinstall the
Windows NT 4.xoperating system.
:LQGRZV
If you ordered your Dell Precision WorkStation with the Microsoft Windows 98 oper-
ating system, your system has all the components required to take full advantage of
the new Pentium III features. If you reinstall Windows 98, the components required to
use the Pentium III features are also reinstalled. The Windows 98 reinstallation CD is
included with your system.
:LQGRZV
If you ordered your Dell Precision WorkStation with the Microsoft Windows 95 oper-
ating system, it runs normally with the new Pentium III processors but it does not
support the new SIMD extensions instruction set. Windows 95 does not support the
Pentium III features.
3URFHVVRU6HULDO1XPEHU
If you ordered your Dell Precision WorkStation with a Pentium III processor, the pro-
cessor serial number feature is disabled in the BIOS by default. If you want to enable
the processor serial number feature, you must use the Dell utility SN_ONOFF.exe.
You can download SN_ONOFF.exe from http://www.dell.com .
If you want to read the processor serial number, you must use the Processor
Number Control Utility (PNCU) from Intel. You can download the PNCU from
http://www.dell.com. The PNCU reads the processor serial number and reports
whether the processor serial number feature is enabled or disabled by the system
BIOS.
0655Cbk7.book Page 9 Monday, April 19, 1999 7:20 PM

10 Dell Precision WorkStation 410 Mini Tower Systems Documentation Update
%,269HUVLRQV
To take full advantage of the benefits offered by the Pentium II and Pentium III proces-
sors, your Dell Precision WorkStation 410 must use an appropriate BIOS version.
If your system has a factory-installed Pentium II or Pentium III processor, an appropri-
ate BIOS version was also factory installed.
If you need to restore or upgrade your system BIOS, download the most recent ver-
sion from the Dell Web site at http://www.dell.com.
2QOLQH+HOS
For your convenience, the documentation that accompanied your Dell Precision Work-
Station is available online. The Dell Precision WorkStation 410 Mini Tower Systems
Help can be a handy reference tool as you work on your desktop. It allows you to
search for information in multiple ways and to link quickly to related topics.
To open the Help, click the Start button, point to Programs> Dell Documents, and
click Dell Precision WorkStation 410 Mini Tower Systems Help .
You may also double-click the Dell Documentation icon on the Windows desktop,
click System Information, and then click Dell Precision WorkStation 410 Mini
To w e r S y s t e m s H e l p .
0655Cbk7.book Page 10 Monday, April 19, 1999 7:20 PM
0655Cbk7.book Page 27 Monday, April 19, 1999 7:20 PM
™
ZZZGHOOFRP
3ULQWHGLQWKH86$
31&5HY$

0655Cbk7.book Page 28 Monday, April 19, 1999 7:20 PM
Other manuals for Vostro 410

5

Other Dell Desktop manuals

Dell Precision 6T337 User manual

Dell

Dell Precision 6T337 User manual

Dell Inspiron 24 5415 User manual

Dell

Dell Inspiron 24 5415 User manual

Dell Dimension 3100C User manual

Dell

Dell Dimension 3100C User manual

Dell XPS One 2710 User manual

Dell

Dell XPS One 2710 User manual

Dell PRECISION T1650 User manual

Dell

Dell PRECISION T1650 User manual

Dell OptiPlex 5040 Small Form Factor User manual

Dell

Dell OptiPlex 5040 Small Form Factor User manual

Dell OptiPlex N User manual

Dell

Dell OptiPlex N User manual

Dell Latitude 5175 User manual

Dell

Dell Latitude 5175 User manual

Dell OptiFlex 3000TC User manual

Dell

Dell OptiFlex 3000TC User manual

Dell OptiPlex FX170 User manual

Dell

Dell OptiPlex FX170 User manual

Dell Precision Tower 3620 User manual

Dell

Dell Precision Tower 3620 User manual

Dell OptiPlex XE Instruction Manual

Dell

Dell OptiPlex XE Instruction Manual

Dell Inspiron 5676 User manual

Dell

Dell Inspiron 5676 User manual

Dell INSPIRON DCSLE User manual

Dell

Dell INSPIRON DCSLE User manual

Dell Dimension 4500C User manual

Dell

Dell Dimension 4500C User manual

Dell Inspiron 24-3464 Operation and maintenance manual

Dell

Dell Inspiron 24-3464 Operation and maintenance manual

Dell OptiPlex FX160 User manual

Dell

Dell OptiPlex FX160 User manual

Dell Precision R3961 User manual

Dell

Dell Precision R3961 User manual

Dell Inspiron 20 User manual

Dell

Dell Inspiron 20 User manual

Dell Inspiron 3647 User manual

Dell

Dell Inspiron 3647 User manual

Dell Precision M6300 User manual

Dell

Dell Precision M6300 User manual

Dell PowerVault NX200 User manual

Dell

Dell PowerVault NX200 User manual

Dell OPTIPLEX XE Series User manual

Dell

Dell OPTIPLEX XE Series User manual

Dell Inspiron 5720 User manual

Dell

Dell Inspiron 5720 User manual

Popular Desktop manuals by other brands

HP Brio BA600 Handbook

HP

HP Brio BA600 Handbook

Lenovo ThinkCentre M71z Vodič za korisnike

Lenovo

Lenovo ThinkCentre M71z Vodič za korisnike

Winmate FM10 quick start guide

Winmate

Winmate FM10 quick start guide

Northern Micro Spirit P8Q87-AS user guide

Northern Micro

Northern Micro Spirit P8Q87-AS user guide

HP Pavilion a6410t Getting started

HP

HP Pavilion a6410t Getting started

Lenovo ThinkCentre M75e user guide

Lenovo

Lenovo ThinkCentre M75e user guide

Barco Argus user manual

Barco

Barco Argus user manual

Acer Altos 600E user guide

Acer

Acer Altos 600E user guide

Lenovo J100 Quick reference guide

Lenovo

Lenovo J100 Quick reference guide

Compaq Deskpro Workstation AP230 Technical reference guide

Compaq

Compaq Deskpro Workstation AP230 Technical reference guide

Lenovo ThinkCentre M70z Felhasználói kézikönyv

Lenovo

Lenovo ThinkCentre M70z Felhasználói kézikönyv

Symetrix 571 SPl user guide

Symetrix

Symetrix 571 SPl user guide

Sharkoon T28 manual

Sharkoon

Sharkoon T28 manual

Lenovo ThinkCentre M70e Hardware Maintenance Manual

Lenovo

Lenovo ThinkCentre M70e Hardware Maintenance Manual

Comco WS2200 Series Operation and service instructions

Comco

Comco WS2200 Series Operation and service instructions

AXIOMTEK tBOX400-510-FL Series user manual

AXIOMTEK

AXIOMTEK tBOX400-510-FL Series user manual

IBASE Technology AMI400 Series user manual

IBASE Technology

IBASE Technology AMI400 Series user manual

HARDKERNEL ODROID-A user manual

HARDKERNEL

HARDKERNEL ODROID-A user manual

manuals.online logo
manuals.online logoBrands
  • About & Mission
  • Contact us
  • Privacy Policy
  • Terms and Conditions

Copyright 2025 Manuals.Online. All Rights Reserved.