manuals.online logo
Brands
  1. Home
  2. •
  3. Brands
  4. •
  5. DeLonghi
  6. •
  7. Coffee Maker
  8. •
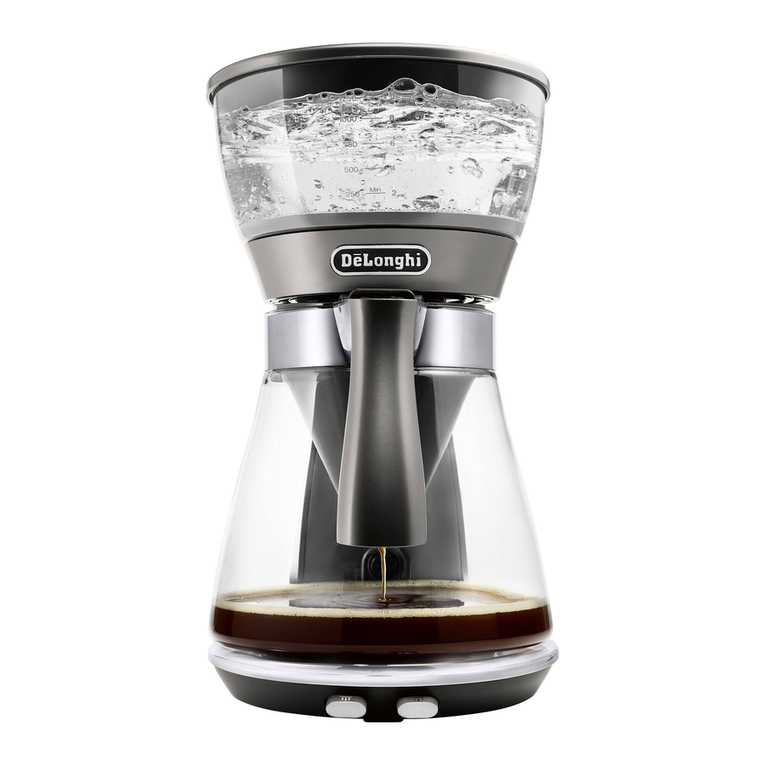
  9. DeLonghi La Specialista ARTE User manual

DeLonghi La Specialista ARTE User manual

- 사용자 가이드 -
- QUICK GUIDE
-
2
커피 머신을 전원 콘센트에
연결하고 전원 스위치를
켭니다.
기기 준비
드립 트레이를
컵 받침대와
함께 끼웁니다.
21
4
물통에 물을
채웁니다.
3
물 추출구 아래에 용기를
놓습니다.
포터필터를 끼웁니다.
OK를 눌러 세척합니다.
OK를 눌러 세척합니다.
필터 바스켓을 포터필터에
끼웁니다.
스팀 버튼을 누르고 몇 초간
스팀이 배출되도록 하고 다시
버튼을 눌러 이 동작을 반복합니다.
최적의 스팀 성능을 얻을 수
있도록 3~4번 반복하는 것을
권장합니다.
처음 사용을 위한 LA SPECIALISTA ARTE 설정
12 3
4 5 6
제품에 대한 자세한 내용은
드롱기코리아 채널을
참조하십시오.
물탱크 등 액세서리와
원두 컨테이너를
세척하고 말립니다.
3
호퍼에 원두를 넣습니다.
신선한 원두가 가장 좋습니다.
필요한 양만 넣으십시오.
나머지 원두는 따로 진공 용기에
보관합니다.
‘찰칵’ 소리가 날 때까지
포터필터를 밀어넣습니다.
분쇄가 자동으로 시작 및
종료 됩니다.
기본 설정은 5이나, 최적의
설정은 커피 원두 종류에
다릅니다. 이 설정은 개인 취향과
원두 종류에 따라 분쇄레벨을
조정합니다. (그라인더 작동중에만
조정해주십시오.)
1잔용 또는 2잔용 필터를
선택하고 포터필터에 넣습니다.
2잔용 필터를 사용하는 경우
버튼을 X2 불빛이 나타날
때까지 누릅니다.
참고: x2는 에스프레소 샷의
양도 2배가 됩니다.
도징&탬핑 가이드를 포터필터에
장착합니다. 1. 누르고
2. 잠길 때까지 돌립니다.
포터필터를 끼웁니다.
1
6
2 3 54
1단계 - 분쇄
‘분쇄량과 템핑’에 대한 설명은
다음 페이지를 참조하십시오.
1
누르기
2
돌리기
밀기
분쇄 설정 권장 사항 :
대부분 커피는 분쇄 레벨 3에서 6 사이를 권장합니다.
라이트 로스팅과 같은 특별한 커피에만 분쇄 레벨 1 혹은 2를
사용하여 매우 곱게 분쇄하세요.
커피 원두 로스팅 범위 분쇄 설정
라이트 3-4
미디엄/미디엄 다크 4-5
다크 5-6
도징&탬핑 가이드
도징&탬핑 가이드를
사용하면 커피가 분쇄 중에
쏟아지지 않으며, 주변을
더럽히지 않으면서 일정하게
도징할 수 있습니다.
4
5
분쇄량과 탬핑
분쇄량 조절
완벽한 에스프레소 만들기
커피 필터 안쪽에 탬핑시에 적정 분쇄량을 확인할 수 있는 표시가 있습니다.
적정량은 필터 안쪽의 선과 일치합니다.
바리스타 TIP:
탬핑 후 분쇄량이 필터 안쪽 선에 위치하지만, 커피가 과다 또는 과소 추출되는 경우
분쇄도를 조절하십시오.
적정 분쇄량
추가 분쇄 조절
과다 추출
(너무 느리게 추출)
되는 경우에는
더 굵게 분쇄해야
합니다.
과소 추출
(너무 빠르게 추출)
되는 경우에는
더 곱게 분쇄해야
합니다.
커피 원두는 종류마다 분쇄 동작이 다를 수 있으며,
원두가 변경되면 분쇄량을 다시 설정하여야 합니다.
이 그림을 보면 분쇄량을 조절하는 방법에 대한 Tip
을 얻을 수 있습니다.
로스팅 정도에 따른 권장 사항이며, 커피 원두의
구성에 따라 약간씩 다를 수 있습니다.
1. 다이얼을 Min 위치에서부터 돌리며 필터 바스켓 안쪽의 표시에 분쇄된 커피가
도달하도록 분쇄량을 설정합니다(오른쪽 적정 분쇄량에 대한 이미지 참조). 다이얼의
숫자는 분쇄량이 필터 바스켓 안쪽의 적정 분쇄량에 도달한 뒤 설정에 참고합니다.
다이얼의 숫자는 그라인더 설정, 계량 단위 (gr/oz) 혹은 분쇄 시간과 일치하지 않습니다.
2. 커피 로스팅 정도를 확인하십시오. 로스팅 정도에 따라 다이얼을 천천히 돌리며 적정
분쇄량을 찾으십시오.
엑
스
트
라
라
이
트
라
이
트
미
디
엄
미
디
엄
다
크
다
크
엑
스
트
라
다
크
5
포터필터를 분리합니다 포터필터를 탬핑 매트의 지정된
위치에 놓습니다.
도징&탬핑 가이드를 가볍게
두드려서 표면을 고르게
만드세요.
톡 톡
탬퍼로 커피를 탬핑하고
돌립니다.
1 32 4
도징&탬핑 가이드를 제거하고
커피양을 확인합니다.
5
포터필터를 커피 추출구에
끼웁니다.
6
탬핑 매트
균일한 추출을 위한
탬핑 시, 탬핑 매트를
사용하면 안정적입니다.
바리스타 TIP:
탬핑 후 분쇄량이 안쪽선에
위치 하였는지 확인하십시오.
분쇄량 다이얼을 몇 차례
조절해야 할 수 있습니다.
1
돌리기 2
위로
당기기
바리스타 TIP:
균일한 탬핑을 위해 탬퍼를
회전시키며 커피를 탬핑
하십시오.
바리스타 TIP:
커피 탬핑 후 필터 가장자리에
남은 잔여 커피는 추출된
커피의 맛과 경험을
저해시키지 않습니다.
2단계 - 탬핑
6
음료를 선택합니다.온도를 선택합니다. OK를 눌러 추출을 시작합니다.
21 3
에스프레소
약 약
35 ml
약
35 ml
약
35 ml
또는
약
70 ml
아메리카노
120 ml
1잔용
2잔용
1잔용
2잔용
(35 ml)
( 85ml)
(70 ml)
(170 ml)
240 ml
에스프레소
( 35 ml)
물 ( 85ml)
에스프레소
( 70 ml)
물( 170 ml)
커피 종류
온도 선택
•추출에 이상적인 온도가 전체 추출 과정에서 정밀하게 제어됩니다.
La Specialista Arte는 92~96 ℃범위에서 최대 3개의 추출 온도를
선택할 수 있습니다.
커피 원두 종류 및 로스팅 색상에 따라 최상의 추출을 위해 온도 설정이
필요합니다. 로부스타 커피 원두는 낮은 온도가 추천되고 아라비카 커피
원두는 높은 온도가 추천됩니다. 또한 원두의 로스팅 색상에 따른
온도 선택은 아래 표를 참고 하십시오.
•
온도 수준 낮음 중간 높음
해당 표시등
커피 원두
로스팅 범위 다크 미디엄 -
다크
라이트 -
미디엄
* 이 온도는 보일러 내부의 수온입니다. 컵 안의 음료 온도 또는
포터필터에서 음료가 추출된 후 측정한 온도가 아닙니다.
3단계 - 추출
약
7
스팀 추출 버튼을 누릅니다.
몇 초 뒤 스팀이 배출 됩니다.
스팀 노즐을 표면 바로 위로
유지하면서 공기가 너무 많이
들어가 큰 거품이 생기지 않도록
주의해야 합니다.
스팀피처에 신선한 약 5℃ 우유를
채웁니다. 우유는 부피가 3배까지
늘어납니다. 차가운 스팀피처
사용을 권장합니다.
우유 거품을 만들려면 노즐을
우유 표면에 놓습니다. 그러면
우유와 스팀이 혼합되면서
공기가 섞입니다.
스팀 노즐을 우유 바로 아래로
집어넣습니다. 그러면 소용돌이가
생깁니다. 원하는 온도에 도달하면
스팀 노브를 끄고 스팀이 완전히 멈출
때까지 기다렸다 스팀피처를 꺼냅니다.
1 2 3 54
바리스타 TIP:
신선할수록 좋습니다.
매번 신선한 찬 우유를
사용하십시오. 최상의 결과를
위해 저지방이 아닌 전유를
권장합니다. 거품의 모양과
질감은 사용하는 우유 또는
두유 등 음료에 따라
달라집니다.
바리스타 TIP:
우유 거품을 만든 후
스팀피처를 흔들거나
바닥에 쳐서 거품을 고르게
해줍니다.
청소 팁:
항상 깨끗한 젖은 헝겊을 사용하여
스팀 노즐을 청소하고 잠시 스팀을
배출하여 우유 잔류물을
제거하십시오.
La Specialista Arte 사용 방법을 소개하는 동영상 시리즈에서
더 자세한 내용을 알아보십시오.
4단계 - 우유 거품 만들기
커피 머신 관리
주기적인 유지관리 및 청소는 커피 머신을
보다 오랫동안 효율적으로 사용하는 데
도움이 됩니다.
정품 액세서리에 대한 자세한 내용은
고객센터에 문의하십시오.
더 자세한 내용은 ‘Delonghi.com’에서
확인하십시오.
8
Plug in machine
and switch on the
main power.
PREPARING YOUR MACHINE
Insert the drip tray
with cup tray.
2
Wash and dry ac-
cessories; including
water tank.
1
4
Fill water tank.
3
Place a container under the
water spout.
Attach the portafilter.
Press OK to rinse.
Press OK to rinse.
Insert filter basket into
portafilter.
Push the STEAM button and let
the steam flow out for a few
seconds. Then push the button
again. For optimal steam
performance we recommend
you repeat this action 3 or
4 times. This is to purge the
steam arm before frothing or
steaming your milk.
SETTING LA SPECIALISTA FOR FIRST USE
12 3
4 5 6
For more details on setting up your
La Specialista please check out the
De’Longhi How To Channel
9
Add beans to hopper.
Fresh is best; fill in just with
the quantity you need.
Store the remainder of
your beans in a vacuum
container.
Push the portafilter until you
hear a single “Click”, then
release: grinding starts and
stops automatically.
The ideal setting depends on
your coffee bean type. The
factory default is 5. If you are
not satisfied, adjust the level
according to your personal
taste and the type of coffee (do
it while grinding).
Select single or double
dose filter and place in the
portafilter. If you are using
the double filter, press the
button until the X2 light
comes on.
Please note: the x 2 selection
will double the volume of the
espresso shot as well.
Insert the Dosing&Tamping
Guide to the portafilter: 1 push
and 2 turn until it locks.
Insert the portafilter
1
6
2 3 54
Step 1 - grinding
Refer to “Focus on perfect dose”
on next page for suggestions.
1
push
2
turn
push
RECOMMENDED GRINDING SETTINGS:
A grinding level between 3 and 6 is recommended for most
coffees. A grinding level of 1 or 2 is very ne and should be
used with special coffees only (light roasted)
Coffee Beans Roasting Range Grinding setting
LIGHT 3-4
MEDIUM/MEDIUM DARK 4-5
DARK 5-6
The Dosing&Tamping
Guide is used to avoid
coffee from spilling while
grinding, ensuring mess
free operation and more
consistent dosing.
10
5
X
-
L
I
G
H
T
L
I
G
H
T
M
E
D
I
U
M
M
E
D
I
U
M
D
A
R
K
D
A
R
K
E
X
T
R
A
D
A
R
K
Focus on perfect dose
Adjust dose
Achieve Espresso perfection
The coffee filters have a mark inside to identify the level for perfect dose.
The perfect quantity corresponds to the line in relief.
BARISTA TIP:
If your coffee is over or under extracted and the dose corresponds to the
perfect dose line, adjust the grinder settings ner or coarser.
Each variety of coffee beans can behave differently
during grinding and this is the reason why setting
the dose at the beginning might require extra care.
With this illustration we give you some indications
on how to regulate the dose.
Please note these suggested setting ranges, based
Perfect dose
on the roasting level, are certainly a good starting point, but they might slightly vary
depending on specific composition of your coffee beans.
1. Set the dose (to reach the mark inside of the filter basket, see image for perfect dose)
starting from the minimum position. The numbers of the dial are a setting reference
once the perfect dose in the filter is reached. They do not correpond to grinder settings
or to measurement units (gr/oz) or to grinding time
2. Look at which roasting level your coffee is and based on that, turn the knob slowly,
referencing the ranges.
EXTRA
GRINDING
ADJUSTMENT
OVER EXTRACTED
COFFEE
(pouring too slowly)
needs coarser grind
UNDER EXTRACTED
COFFEE
(pouring too fast)
needs ner grind.
11
Extract the portafilter. Put the portafilter in the
dedicated seat on the
tamping mat
Tap gently the Dosing &
Tamping Guide to level the
grounded coffee inside.
Tamp the coffee and rotate.
1 32 4
Remove the Dosing &
Tamping Guide and check
the coffee dose level.
5
Attach the portafilter to the
brewing unit.
6
Tamping Mat
Using the tamping mat
provides ideal stability
while tamping ensuring a
more even extraction.
Step 2 - tamping
BARISTA TIP:
Ensure the coffee is at the
recommended dosage
level after tamping. You
may need to adjust the
dosage dial more times
before reaching the
perfect dose.
1
turn 2
pull
upwards
Tap Tap
BARISTA TIP:
For polished nish of
coffee, rotate the tamper
when tamping the coffee
dose.
BARISTA TIP:
Coffee left on the edges
of the lter after pressing
does not in any way
compromise the quality of
the brewing and therefore
the end result.
12
Select your beverage.Select the temperature Press OK to start brewing
(preinfusion and infusion).
21 3
Step 3 - brewing
Espresso
Approx.
35 ml
Approx.
35 ml
Approx.
35 ml
OR
Approx.
70 ml
Americano
Approx.
120 ml
Single dose
Double dose
Single dose
Double dose
120 ml
(≃35 ml)
(≃85ml)
(≃70 ml)
(≃170 ml)
Approx.
240 ml
Espresso (≃35 ml)
Water (≃85ml)
Espresso (≃70 ml)
Water (≃170 ml)
ESPRESSO BASED BEVERAGES MENU
INFUSION TEMPERATURE PROFILES
• The water temperature is precisely controlled throughout the entire brewing process to ensure the
ideal temperature stability for the extraction. La Specialista Arte offers up to 3 infusion temperature*
proles to select, correspondent to a range of temperatures between ≃92° and ≃96°C.
• Coffee bean varieties as well as roasting colours require their own specic temperature setting
for the best extraction: Robusta coffee beans prefer lower temperature; Arabica prefers higher
temperature. The same is applicable to beans with a darker roasting colour or to freshly-roasted
beans than those degassed over time.
Temperature level MIN MED MAX
Corresponding
light
Coee Beans
Roasting Range
DARK MEDIUM to
DARK
LIGHT to
MEDIUM
* This temperature refers to the water inside the thermoblock. This differs from the tempe-
rature of the beverage in the cup or the temperature measured when the beverage comes
out from the portalter spouts.
13
Step 4 - manual frothing
Push the steam button. After
few seconds steam will be
delivered.
Keep the steam nozzle just
on the surface, careful not to
make big bubbles by letting
too much air in.
Fill the milk jug with fresh
cold milk. Milk will up to
triple in volume.
Using a cold milk jug is
advisable.
To make the froth, put the
nozzle on the surface of
the milk and air will catch
by the mixing of milk and
steam.
Insert the steam nozzle just
under the milk: this create
a vortex. Once the desired
temperature is reached turn
the steam knob off and wait till
steam stops completely before
removing jug.
1 2 3 54
BARISTA TIP:
Fresh is best : Be sure
to use fresh cold milk
every time. Whole milk
is recommended for best
results. Dairy and Non
Dairy alternatives will
vary in ease of texturing
depending on type.
BARISTA TIP:
After foaming milk,
eliminate unwanted
bubbles by swirling the
milk jug.
CLEANING TIP:
Always clean the steam nozzle with a
clean damp cloth and release a short
burst of steam to remove milk residue.
Find out more in our dedicated video series
for how to use your La Specialista Arte
Take Care of your Coee Machine
Regular maintenance and cleaning helps
preserve the coffee machine, keeping it
running efciently for a longer period of
time.
Discover the full range of original
accessories.
Visit “Delonghi.com” for more information.
www.delonghi.com
57132C8062_00_0522

Other manuals for La Specialista ARTE

4

This manual suits for next models

1

Other DeLonghi Coffee Maker manuals

DeLonghi NESCAFE dolce gusto User manual

DeLonghi

DeLonghi NESCAFE dolce gusto User manual

DeLonghi MAGNIFICA EVO ECAM 290.61.SB User manual

DeLonghi

DeLonghi MAGNIFICA EVO ECAM 290.61.SB User manual

DeLonghi EC860.M User manual

DeLonghi

DeLonghi EC860.M User manual

DeLonghi MAGNIFICA S ECAM23460 User manual

DeLonghi

DeLonghi MAGNIFICA S ECAM23460 User manual

DeLonghi La Specialista Maestro User manual

DeLonghi

DeLonghi La Specialista Maestro User manual

DeLonghi NESPRESSO VERTUO User manual

DeLonghi

DeLonghi NESPRESSO VERTUO User manual

DeLonghi DINAMICA PLUS ECAM370.95.T User manual

DeLonghi

DeLonghi DINAMICA PLUS ECAM370.95.T User manual

DeLonghi ESAM26 Series User manual

DeLonghi

DeLonghi ESAM26 Series User manual

DeLonghi NESPRESSO CITIZ&MILK MY MACHINE EN267.WAE User manual

DeLonghi

DeLonghi NESPRESSO CITIZ&MILK MY MACHINE EN267.WAE User manual

DeLonghi BCO65 User manual

DeLonghi

DeLonghi BCO65 User manual

DeLonghi MAGNIFICA EVO ECAM29.6 Series User manual

DeLonghi

DeLonghi MAGNIFICA EVO ECAM29.6 Series User manual

DeLonghi PrimaDonna Elite ECAM65 55 Series User manual

DeLonghi

DeLonghi PrimaDonna Elite ECAM65 55 Series User manual

DeLonghi Coffee machine User manual

DeLonghi

DeLonghi Coffee machine User manual
DeLonghi EN720.M User manual

DeLonghi

DeLonghi EN720.M User manual

DeLonghi ICMO210 Manual

DeLonghi

DeLonghi ICMO210 Manual

DeLonghi ESAM3500.S User manual

DeLonghi

DeLonghi ESAM3500.S User manual

DeLonghi DC56 Series User manual

DeLonghi

DeLonghi DC56 Series User manual

DeLonghi Magnifica S ECAM23.420.SB User manual

DeLonghi

DeLonghi Magnifica S ECAM23.420.SB User manual

DeLonghi Magnifica EAM3200 Series User manual

DeLonghi

DeLonghi Magnifica EAM3200 Series User manual

DeLonghi ECKG6821.M User manual

DeLonghi

DeLonghi ECKG6821.M User manual

DeLonghi BCO246B User manual

DeLonghi

DeLonghi BCO246B User manual

DeLonghi ECAM23 13 Series User manual

DeLonghi

DeLonghi ECAM23 13 Series User manual

DeLonghi Coffee machine User manual

DeLonghi

DeLonghi Coffee machine User manual

DeLonghi DCF2210TTC Installation instructions manual

DeLonghi

DeLonghi DCF2210TTC Installation instructions manual

Popular Coffee Maker manuals by other brands

Hamilton Beach BrewStation 48463 user manual

Hamilton Beach

Hamilton Beach BrewStation 48463 user manual

Philips 740607308 operating instructions

Philips

Philips 740607308 operating instructions

Expobar BREWTUS IV Supplemental instructions

Expobar

Expobar BREWTUS IV Supplemental instructions

Chris Coffee Service Silvano owner's manual

Chris Coffee Service

Chris Coffee Service Silvano owner's manual

Miele CVA 7370 Operating and installation instructions

Miele

Miele CVA 7370 Operating and installation instructions

Adcraft UB-286 manual

Adcraft

Adcraft UB-286 manual

NUTRICHEF NCCOFF87 user guide

NUTRICHEF

NUTRICHEF NCCOFF87 user guide

Nespresso CITIZ C113 manual

Nespresso

Nespresso CITIZ C113 manual

Premier CM-4671 instruction manual

Premier

Premier CM-4671 instruction manual

Bellman CXE-25 instructions

Bellman

Bellman CXE-25 instructions

Bosch TIS3.1 Series instruction manual

Bosch

Bosch TIS3.1 Series instruction manual

Krups MOVENZA Get started

Krups

Krups MOVENZA Get started

Philips Saeco Intelia Evo HD8752 instructions

Philips Saeco

Philips Saeco Intelia Evo HD8752 instructions

FlyTek EXCELSA Operation and maintenance manual

FlyTek

FlyTek EXCELSA Operation and maintenance manual

Bosch Tassimo TAS 65xx instruction manual

Bosch

Bosch Tassimo TAS 65xx instruction manual

Pelgrim IKM640 manual

Pelgrim

Pelgrim IKM640 manual

Miele CM 5000 operating instructions

Miele

Miele CM 5000 operating instructions

Thermoplan Black&White3 123.929 CTM Technical manual

Thermoplan

Thermoplan Black&White3 123.929 CTM Technical manual

manuals.online logo
manuals.online logoBrands
  • About & Mission
  • Contact us
  • Privacy Policy
  • Terms and Conditions

Copyright 2025 Manuals.Online. All Rights Reserved.