manuals.online logo
Brands
  1. Home
  2. •
  3. Brands
  4. •
  5. DeLonghi
  6. •
  7. Fryer
  8. •
  9. DeLonghi F16313 User manual

DeLonghi F16313 User manual

Other manuals for F16313

1

Other DeLonghi Fryer manuals

DeLonghi F622 User manual

DeLonghi

DeLonghi F622 User manual

DeLonghi F28533.W1 User manual

DeLonghi

DeLonghi F28533.W1 User manual

DeLonghi D34528DZ User manual

DeLonghi

DeLonghi D34528DZ User manual

DeLonghi D14527 DZ User manual

DeLonghi

DeLonghi D14527 DZ User manual

DeLonghi FH1130 User manual

DeLonghi

DeLonghi FH1130 User manual

DeLonghi D24527DZ User manual

DeLonghi

DeLonghi D24527DZ User manual

DeLonghi Electric Deep Fryer User manual

DeLonghi

DeLonghi Electric Deep Fryer User manual

DeLonghi D14427 DZ User manual

DeLonghi

DeLonghi D14427 DZ User manual

DeLonghi F 28533 User manual

DeLonghi

DeLonghi F 28533 User manual

DeLonghi D28313UX User manual

DeLonghi

DeLonghi D28313UX User manual

DeLonghi Electric Deep Fryer User manual

DeLonghi

DeLonghi Electric Deep Fryer User manual

DeLonghi F32110CZ User manual

DeLonghi

DeLonghi F32110CZ User manual

DeLonghi ELECTRIC FRYER User manual

DeLonghi

DeLonghi ELECTRIC FRYER User manual

DeLonghi D677UX User manual

DeLonghi

DeLonghi D677UX User manual

DeLonghi D996UX User manual

DeLonghi

DeLonghi D996UX User manual

DeLonghi F455 CZ User manual

DeLonghi

DeLonghi F455 CZ User manual

DeLonghi F620 User manual

DeLonghi

DeLonghi F620 User manual

DeLonghi F600 User manual

DeLonghi

DeLonghi F600 User manual

DeLonghi Electric Deep Fryer User manual

DeLonghi

DeLonghi Electric Deep Fryer User manual

DeLonghi D677UX User manual

DeLonghi

DeLonghi D677UX User manual

DeLonghi D44528DZ User manual

DeLonghi

DeLonghi D44528DZ User manual

DeLonghi F14427CZ User manual

DeLonghi

DeLonghi F14427CZ User manual

DeLonghi D14522DZ User manual

DeLonghi

DeLonghi D14522DZ User manual

DeLonghi RAPID CRISP FH2133 User manual

DeLonghi

DeLonghi RAPID CRISP FH2133 User manual

Popular Fryer manuals by other brands

GILES EOF-BIB/FFLT/24/24 manual

GILES

GILES EOF-BIB/FFLT/24/24 manual

GE 168997 manual

GE

GE 168997 manual

Falcon G350/11 Installation and servicing instructions

Falcon

Falcon G350/11 Installation and servicing instructions

GoWISE USA GW22612 instruction manual

GoWISE USA

GoWISE USA GW22612 instruction manual

Wolf IF15/S Specification sheet

Wolf

Wolf IF15/S Specification sheet

Electrolux Thermetic 9CHG583284 Operating and safety instructions

Electrolux

Electrolux Thermetic 9CHG583284 Operating and safety instructions

SEVERIN DEEP FRYER - Dimensions

SEVERIN

SEVERIN DEEP FRYER - Dimensions

Toastmaster TMFG18-NAT Installation and operation instructions

Toastmaster

Toastmaster TMFG18-NAT Installation and operation instructions

Domo DO465FR Instruction booklet

Domo

Domo DO465FR Instruction booklet

Russell Hobbs RDF300 Instructions and warranty

Russell Hobbs

Russell Hobbs RDF300 Instructions and warranty

Henny Penny PFG-691 Technical manual

Henny Penny

Henny Penny PFG-691 Technical manual

Farberware FBW FT 43721 B manual

Farberware

Farberware FBW FT 43721 B manual

GERMANICA GEAF5L3LD instruction manual

GERMANICA

GERMANICA GEAF5L3LD instruction manual

Wells F-85 Features and specifications

Wells

Wells F-85 Features and specifications

Philips HD9211 user manual

Philips

Philips HD9211 user manual

Lakeland 31796 Instruction booklet

Lakeland

Lakeland 31796 Instruction booklet

Dash Tasti-Crisp DFAF755 user manual

Dash

Dash Tasti-Crisp DFAF755 user manual

Keating Of Chicago 18 BB GAS Specification sheet

Keating Of Chicago

Keating Of Chicago 18 BB GAS Specification sheet

manuals.online logo
manuals.online logoBrands
  • About & Mission
  • Contact us
  • Privacy Policy
  • Terms and Conditions

Copyright 2025 Manuals.Online. All Rights Reserved.

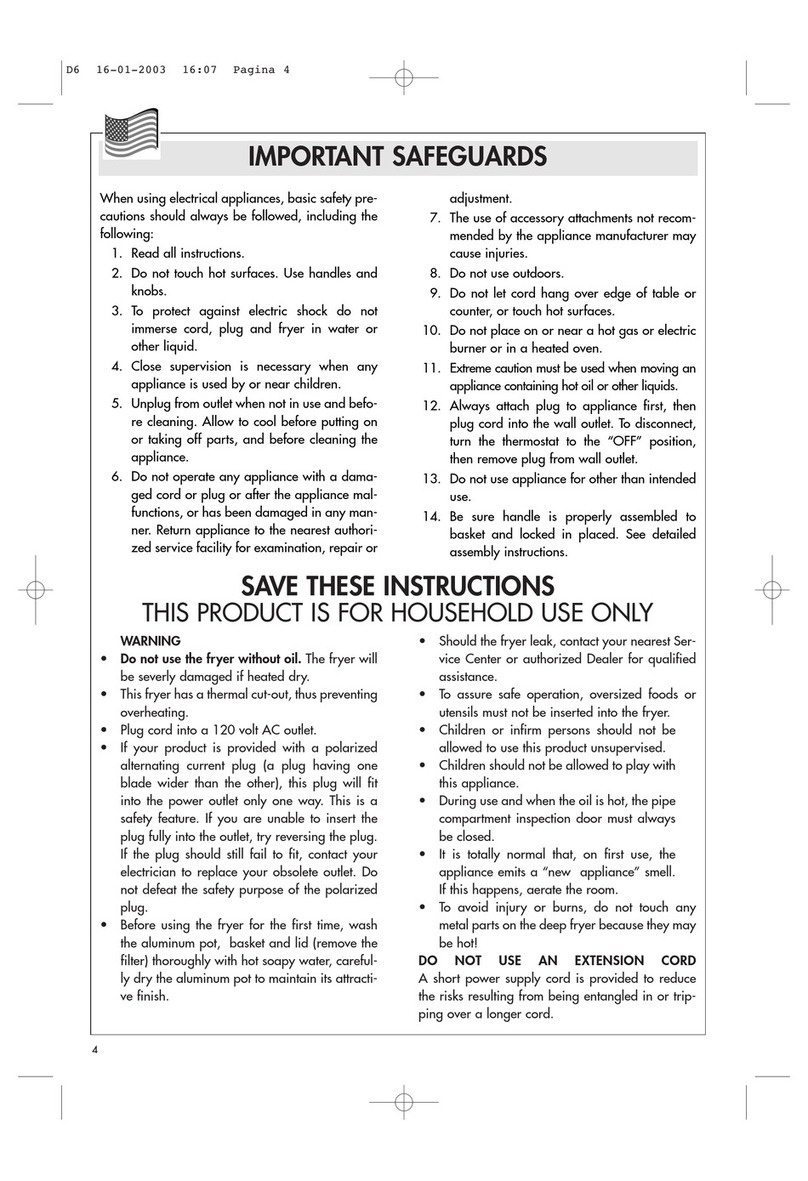
Read this manual thoroughly before installing and using the appliance. This is the only way to ensure best
results and maximum safety for the user.
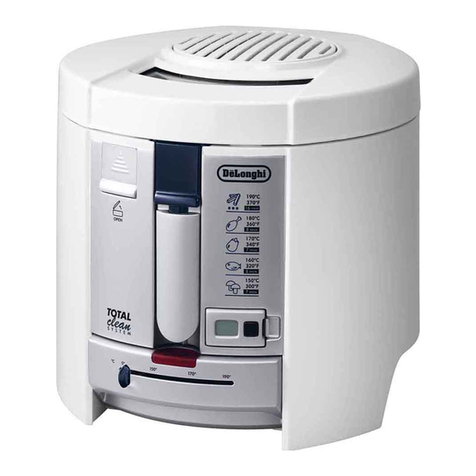
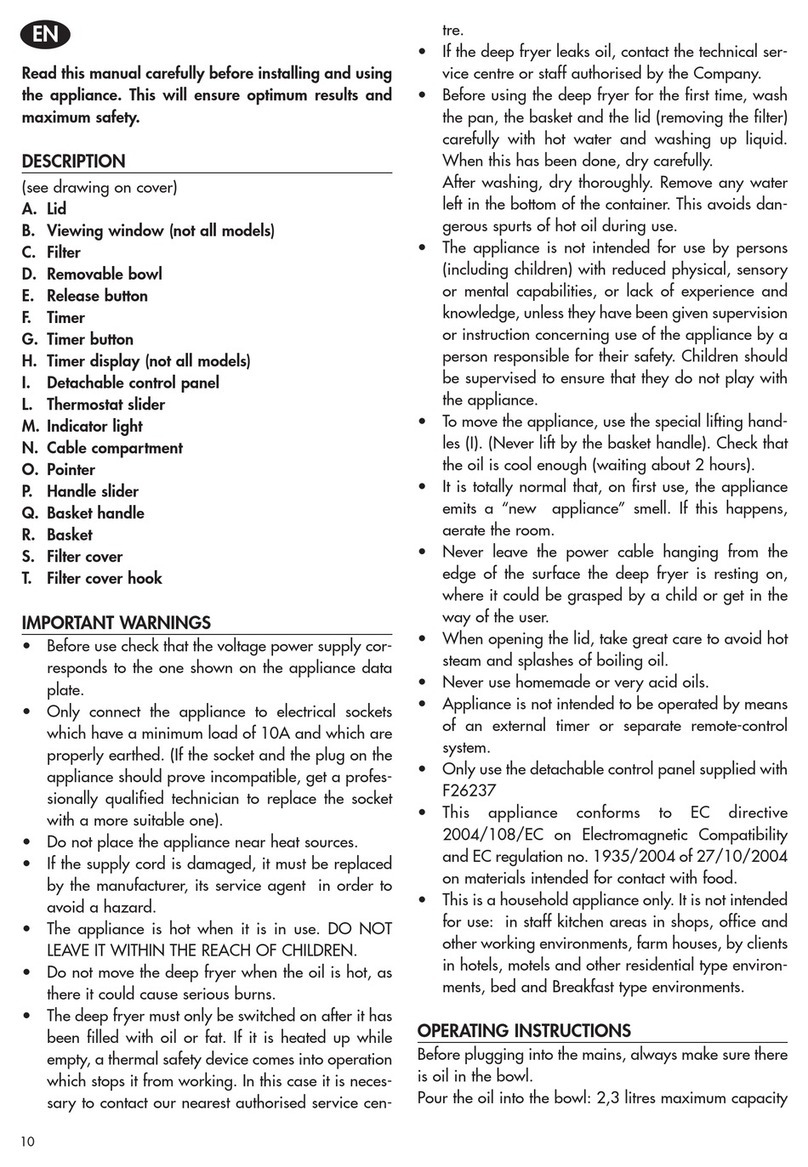
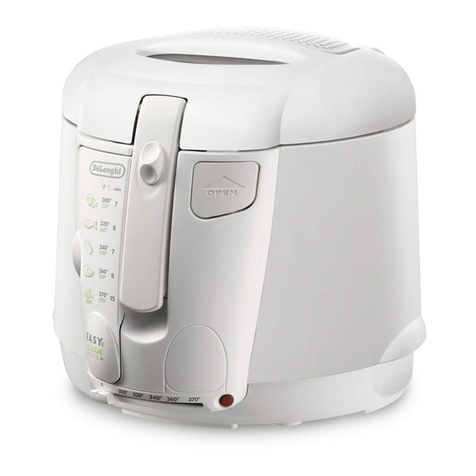
DESCRIPTION (see drawing on page 3)
AFilter
BLid
CBasket
DHandle slider
EBasket handle
FLid opening button
GHandle for lifting appliance
HMinute timer (if supplied)
RECOMMENDATIONS
•
This appliance has been designed to fry foods and is exclusively for domestic use. It must not be used for other
purposes and must not be modified in any way.
•Do not use the appliance if it is damaged (i.e. from a fall)
•
Before using the deep fryer for the first time, wash the bowl, basket and cover thoroughly with hot water and
washing up liquid. You should also run hot water and washing up liquid through the oil drainage tube (if pro-
vided). Dry thoroughly.
•The fryer must only be used (inserting the plug into the mains socket) after having been filled with oil or fat.
If it is turned on while empty, a safety mechanism will cause it to cut out. Should this occur, it is necessary to
contact an authorised Dealer for qualified assistance.
•Before use, check that power supply corresponds to power requirements of appliance (see specification
written on rating label).
•Connect appliance only to earthed power outlets with minimum of 10A current carrying capacity. (If the
socket and the plug on the appliance should prove incompatible, get a professionally qualified technician
to replace the socket with a more suitable one).
•Should it be necessary to replace the feeder cable, make sure that it is of the H05VVF 3x1 2mm type.
The replacement cable must conform to the current norms and be of the same diameter as the original cable.
•When in use, the appliance becomes very hot. THE APPLIANCE MUST BE INSTALLED OUT OF THE
REACH OF CHILDREN.
•When the appliance is in operation, the drainage tube (if fitted) must always be closed and positioned in
its compartment.
•Always allow the oil to cool before moving the fryer, as hot oil can cause severe burns.
•Should fryer leak, contact nearest Service Centre or authorized Dealer for qualified assistance.
•Do not unplug the appliance by pulling on the electric cable - always use the plug itself.
•Serious hot-oil burns may result from a deep fat fryer being pulled off of a countertop. Do not allow the cord
to hang over the edge of the counter where it may be grabbed by children or become entagled with the user.
Do not use with an extension cord.
•The appliance is not intended for use by young children or infirm persons without supervision.
•Young children should be supervised to ensure that they do not play with the appliance.
•To move the appliance, use the special lifting handles (G). (Never lift by the basket handle).
•It is totally normal that, on first use, the refrigerator emits a “new appliance” smell. If this happens, aera-
te the room.
•This appliance conforms to EC directives 89/336 and 92/31 on Electromagnetic Compatibility and EC
directive no. 1935/2004 of 27/10/2004 on materials intended for contact with food.
OPERATING INSTRUCTIONS
Pour the oil into the bowl - 2 litres maximum capacity (1.8 kg of fat) or 1.8 litres minimum capacity (1.6 kg
of fat).
IMPORTANT: The level of oil should always be between the maximum and minimum marks.
Never use the deep fryer with the oil below the "min" level as this could cause the thermal cutout to trip.
To replace it, contact an authorised service centre.
For best results, use good quality peanut oil. Never mix different oils together. If you are using solid fat, cut
8
I Minute timer key (if supplied)
LPilot lamp
MSliding thermostat control/OFF switch
NDrainage tube panel (if provided)
ODrainage tube “easy clean system” (if provided)
PCord holder
QViewing window (not on all models)
RHole for checking filter
into small pieces to avoid the deep fryer heating up without liquid for the first few minutes. The temperature
must be set to 150°C until the fat has melted completely. You can then set the required temperature.
STARTING FRYING
Turn the appliance on by placing the thermostat regulator on the temperature required (fig. 3). When the
thermostat light has gone out, place the basket (containing the food) in the bowl in the raised position (fig.
2) and close the lid. Lower the basket. Do not overfill (1 kg max. of fresh potatoes). Immediately after the
basket has been lowered, it is normal for a considerable quantity of very hot steam to be given off from the
filter and drops of condensation to form near the basket handgrip. At the end of the cooking time, raise the
basket and check the degree of cooking.
MODELS WITH ELECTRONIC TIMER
1. Set the cooking time by pressing the button (I). The minutes set appear on the display.
2. Immediately afterwards, the numbers begin to flash. This means the cooking time has begun.
The last minute is displayed in seconds.
3. If you make a mistake, you can set the new cooking time by holding the button down for more than two
seconds. When the display has reset, repeat the operation.
4. The timer indicates the end of cooking time with two series of “beeps” separated by a 20 second gap.To
turn off the signal, just press the timer button (I).
IMPORTANT: the timer does not turn the appliance off
FRYING NON-FROZEN FOOD
•The food being fried must not be immersed in the oil until the oil has reached the correct temperature
and the light has gone off.
•Make sure the food is sliced into thin, even pieces. If the slices are too thick, the food will not be well
cooked inside.
•When cooking food in batter, you should first immerse the basket empty. Then, when the set temperatu-
re has been reached, immerse the food directly in the hot oil.
•Dry the food thoroughly before immersing it in the oil or fat.
POTATO CHIPS Recommended quantity for best
500
190 8-10
results with 2 litres of oil
Maximum quantity with 2 litres of oil
1000 190 16-18
FISH Squid 500 160 12-13
Scallops 500 160 12-13
Scampi tails 500 160 10-11
Sardines 500 170 12-13
Cuttlefish 500 170 12-13
Sole (2) 400 160 8-9
MEAT Beef cutlets (2) 350 170 8-9
Chicken cutlets (2) 350 170 7-8
Meat balls (8 - 10) 400 160 7-8
VEGETABLES Artichokes 250 150 10-12
Cauliflower 400 160 9-10
Mushrooms 400 150 9-10
Aubergines 300 170 7-8
Courgettes 200 160 11-12
Food Max. quantity
(g) Temperature (°C) Time (minutes)
Cooking times and temperatures are approximate and must be adjusted according to quantity and personal tastes.
9
FILTERING THE OIL OR FAT
You should filter the oil or fat each time you fry, especially if you cook food in breadcrumbs or flour. As with
any deep fryer, the oil deteriorates after being heated a number of times! You should ideally change the oil
completely after frying for 5/8 times and always in the event of: unpleasant smells, smoke during frying, if
the oil becomes dark coloured. Make sure the oil is sufficiently cold (wait about two hours).
MODELS WITHOUT DRAIN HOSE (O)
1. Remove the lid (fig. 9) and empty the tank from one of its sides (left or right side edge of the tank).
2. Hook the basket to the edge of the bowl and place the filter supplied in the bottom of the basket (fig. 6).
Filters are available from your local dealer or one of our service centres.
3. Then pour the oil or fat back into the deep fryer very slowly to avoid it overflowing from the filter (fig. 7).
MODELS WITH DRAIN HOSE (O)
1. Open the panel (N) and remove the drainage tube (O) as shown in fig. 4.
2. Remove the cap (fig. 5). Take care to pinch the end of the tube with two fingers so that the oil does not
drain until the tube has been placed in a receptacle.
3. When you have finished, close the drain hose with the cap, replace in its housing and close the door.
Repeat operations 2-3 described in the above paragraph.
REPLACING THE ANTI-ODOUR FILTERS
A change of colour in the filter, visible through hole on the inside cover, show that the filter needs to be
changed. To replace it, remove plastic filter cover (fig.11).
N.B: The white filter must rest on the metal part and the coloured area must face upwards (towards the black
filter).
Reassemble the filter cover, being careful to insert the front hooks correctly (fig.12).
10
POTATO CHIPS Recommended quantity for 300 (*) 190 7-9
best results with 2 litres of oil
Maximum quantity with 2 litres of oil
1000 190 18-20
POTATO CROQUETTES 500 190 7-8
FISH Fish fingers 300 190 6-7
Shrimps 300 190 6-7
MEAT Chicken cutlets (3) 200 180 7-8
Food Max. quantity
(g) Temperature (°C) Time (minutes)
Cooking times and temperatures are approximate and must be adjusted according to quantity and personal
tastes.
IMPORTANT SAFEGUARD: Before immersing the basket, make sure the lid is tightly closed.
(*) Recommended quantity for best frying results.
FRYING FROZEN FOOD
Frozen foods are often covered with a layer of ice. This should be removed before cooking by shaking the
basket. Immerse the basket in the oil very slowly to prevent the oil from boiling over.
CLEANING
Before cleaning, always unplug from the mains socket.
Never immerse the deep fryer in water and never place it under running tap water.
To remove the lid, proceed as follows: push it backwards and at the same time pull it upwards (see arrows
“1” and "2", fig. 9).
To clean the bowl, proceed as follows:
•Wash the bowl in hot water and washing up liquid. To empty the water, always use the oil drain hose (if
present) as shown in fig. 8. Rinse and dry thoroughly. Remove any water left in the drain hose.
•Use the brush provided to clean the inside of the oil drainage hose.
•The basket and the lid can be washed in a dishwasher.
For models with non-stick bowl, never use abrasive objects or detergents to clean the bowl. Clean with a soft
cloth and neutral detergent only.
Important information for correct disposal of the product in accordance with EC Directive 2002/96/EC.
At the end of its working life, the product must not be disposed of as urban waste. It must be taken to
a special local authority differentiated waste collection centre or to a dealer providing this service.
Disposing of a household appliance separately avoids possible negative consequences for the envi-
ronment and health deriving from inappropriate disposal and enables the constituent materials to
be recovered to obtain significant savings in energy and resources.As a reminder of the need to
dispose of household appliances separately, the product is marked with a crossed-out wheeled
dustbin.
11
FAULT
Unpleasant smells
Oil overflows
The oil does not heat up
CAUSE
The anti-odour filter is saturated.
The oil has deteriorated.
The cooking liquid is unsuitable.
The oil has deteriorated and produces
too much foam.
You have immersed food which is not
sufficiently dry in the hot oil.
Basket immersed too rapidly.
The oil level in the deep fryer is over the
maximum limit.
The thermal cutout may have tripped.
SOLUTION
Replace the filter.
Replace the oil or fat.
Use good quality peanut oil.
Replace the oil or fat.
Dry the food well.
Immerse slowly.
Reduce the quantity of oil insi-
de the bowl.
Contact the Service Centre
(the device must be replaced).
TROUBLESHOOTING