manuals.online logo
Brands
  1. Home
  2. •
  3. Brands
  4. •
  5. Delta
  6. •
  7. Plumbing Product
  8. •
  9. Delta Classic Compel User manual

Delta Classic Compel User manual

1
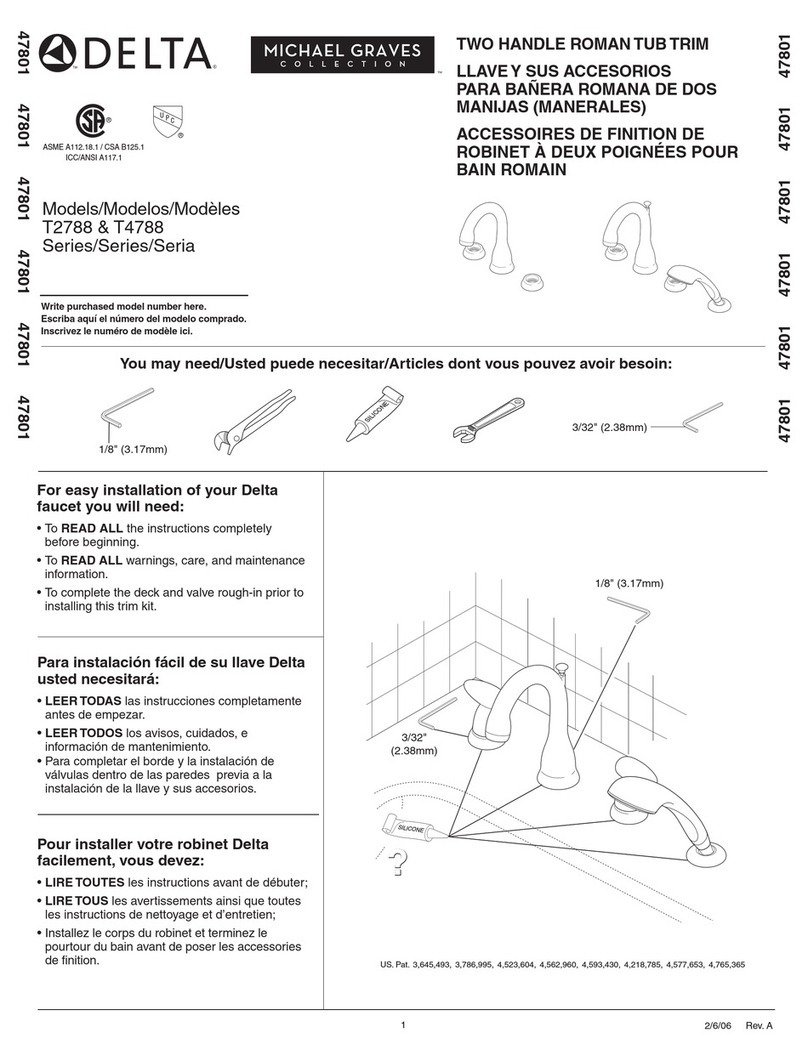
Models/Modelos/Modèles
R50001
Series/Series/Seria
Write purchased model number here.
Escriba aquí el número del modelo comprado.
Inscrivez le numéro de modèle ici.
2/1/12 Rev. B
BODY SPRAY ROUGH
ROCIADOR PARA EL CUERPO
JET DE DOUCHE
You may need/Usted puede necesitar/
Articles dont vous pouvez avoir besoin:
© 2012 Masco Corporation of Indiana
All parts and finishes of the Delta®faucet are warranted to the original consumer
purchaser to be free from defects in material & workmanship for as long as the original
consumer purchaser owns their home. Delta Faucet Company recommends using a
professional plumber for all installation & repair.
Delta will replace, FREE OF CHARGE, during the warranty period, any part or finish that
proves defective in material and/or workmanship under normal installation, use & service.
Replacement parts may be obtained by calling 1-800-345-DELTA (in the U.S. and Canada)
or by writing to:
In the United States: In Canada:
Delta Faucet Company Masco Canada Limited, Plumbing Group
Product Service 350 South Edgeware Road
55 E. 111th Street St. Thomas, Ontario, Canada N5P 4L1
Indianapolis, IN 46280
This warranty is extensive in that it covers replacement of all defective parts and even
finish, but these are the only two things that are covered. LABOR CHARGES AND/
OR DAMAGE INCURRED IN INSTALLATION, REPAIR, OR REPLACEMENT AS WELL
LIFETIME FAUCET AND FINISH LIMITED WARRANTY
AS ANY OTHER KIND OF LOSS OR DAMAGES ARE EXCLUDED. Proof of purchase
(original sales receipt) from the original consumer purchaser must be made available to
Delta for all warranty claims. THIS IS THE EXCLUSIVE WARRANTY BY DELTA FAUCET
COMPANY, WHICH DOES NOT MAKE ANY OTHER WARRANTY OF ANY KIND,
INCLUDING THE IMPLIED WARRANTY OF MERCHANTABILITY.
This warranty excludes all industrial, commercial & business usage, whose purchasers are
hereby extended a five year limited warranty from the date of purchase, with all other terms
of this warranty applying except the duration of the warranty. This warranty is applicable to
Delta®faucets manufactured after January 1, 1995.
Some states/provinces do not allow the exclusion or limitation of incidental or consequential
damages, so the above limitation or exclusion may not apply to you. Any damage to this
faucet as a result of misuse, abuse, or neglect, or any use of other than genuine Delta®
replacement parts WILL VOID THE WARRANTY.
This warranty gives you specific legal rights, and you may also have other rights which vary
from state/province to state/province. It applies only for Delta®faucets installed in the United
States of America, Canada, and Mexico.
© 2012 Masco Corporación de Indiana
Todas las piezas y acabados de la llave Delta®están garantizados al consumidor
comprador original, de estar libres de defectos de material y fabricación, por el tiempo
que el consumidor comprador original sea dueño de su casa. DeltaFaucet Company
recomienda que use un plomero profesional para todas las instalaciones y reparaciones.
Delta reemplazará, LIBRE DE CARGO, durante el período de garantía, cualquier pieza o
acabado que pruebe tener defectos de material y/o fabricación bajo instalación normal, uso
y servicio. Piezas de repuesto pueden ser obtenidas llamando al 1-800-345-DELTA (en los
Estados Unidos y Canada) o escribiendo a:
En los Estados Unidos: En Canada:
Delta Faucet Company Masco Canada Limited, Plumbing Group
Product Service 350 South Edgeware Road
55 E. 111th Street St. Thomas, Ontario, Canada N5P 4L1
Indianapolis, IN 46280
Esta garantía es extensiva en lo que cubre el reemplazamiento de todas las piezas
defectuosas y hasta el acabado, pero éstas son las únicas dos cosas que están cubiertas.
CARGOS DE LABOR Y/O DAÑOS INCURRIDOS EN LA INSTALACIÓN, REPARACIÓN,
O REEMPLAZAMIENTO COMO TAMBIÉN CUALQUIER OTRO TIPO DE PÉRDIDA O
DAÑOS ESTÁN EXCLUÍDOS. Prueba de compra (recibo original de venta) del comprador
consumidor original debe de ser disponible a Deltapara todos los reclamos. ESTA ES LA
GARANTÍA EXCLUSIVA DE DELTA FAUCET COMPANY, QUE NO HACE CUALQUIER
OTRA GARANTÍA DE CUALQUIER TIPO, INCLUYENDO LA GARANTÍA IMPLÍCITA DE
COMERCIALIZACIÓN.
Esta garantía excluye todo uso industrial, comercial y de negocio, a cuyos compradores
se les da una garantía limitada extendida de cinco años desde la fecha de compra, con
todos los otros términos de esta garantía aplicados, excepto el de duración de ésta. Esta
garantía es aplicable a las llaves de Delta®fabricadas después de Enero 1, 1995.
Algunos estados/provincias no permiten la exclusión o limitación de daños incidentales
o consecuentes, de manera que la limitación o exclusión arriba escrita puede no apli-
carle a usted. Cualquier daño a esta llave, resultado del mal uso, abuso, o descuido, o
cualquier otro uso de piezas de repuesto que no sean genuinas de Delta®ANULARÁN
LA GARANTÍA.
Esta garantía le da derechos legales específicos, y usted puede, también tener otros
derechos que varían de estado/provincia a estado/provincia. Es aplicable sólo a las llaves
Delta®instaladas en los Estados Unidos de America, Canada y Mexico.
GARANTÍA LIMITADA DE POR VIDA DE LA LLAVE Y SU ACABADO
Toutes les pièces et les finis du robinet Delta®sont protégés contre les défectuosités de
matériau et les vices de fabrication par une garantie qui est consentie au premier acheteur et
qui demeure valide tant que celui-ci demeure propriétaire de sa maison. Delta recommande
de faire appel à un plombier compétent pour l'installation et la réparation du robinet.
Pendant la période de garantie, Delta remplacera GRATUITEMENT toute pièce ou tout fini,
présentant une défectuosité de matériau ou un vice de fabrication pour autant que l'appareil
ait été installé, utilisé et entretenu correctement. Pour obtenir des pièces de rechange,
veuillez communiquer par téléphone au numéro 1-800-345-DELTA (aux États-Unis ou au
Canada) et par écrit à l'une des adresses suivantes :
Aux États-Unis Au Canada
Delta Faucet Company Masco Canada Limited, Plumbing Group
Product Service 350 South Edgeware Road
55 E. 111th Street St. Thomas, Ontario, Canada N5P 4L1
Indianapolis, IN 46280
La présente garantie s'applique au remplacement de toutes les pièces défectueuses, y com-
pris le fini, et elle ne couvre que ces éléments. LES FRAIS DE MAIN-D'OEUVRE ET (OU)
LES DOMMAGES PROVOQUÉS AU COURS DE L'INSTALLATION, DE LA RÉPARATION
OU DU REMPLACEMENT D'UN ÉLÉMENT AINSI QUE LES PERTES OU DOMMAGES
DE TOUTE AUTRE NATURE NE SONT PAS COUVERTS PAR LA GARANTIE. Toute
réclamation en vertu de la présente garantie doit être adressée à Delta, accompagnée
de la preuve d'achat (original de la facture) du premier acheteur. CETTE GARANTIE EST
LA SEULE OFFERTE PAR DELTA FAUCET COMPANY OU DELTA FAUCET CANADA,
SELON LE CAS. ELLE EXCLUT TOUTE AUTRE GARANTIE, Y COMPRIS LA GARANTIE
IMPLICITE DE QUALITÉ MARCHANDE.
Les robinets installés dans un établissement industriel ou commercial ou dans une place
d'affaires sont protégés par une grantie étandue de cinq ans qui prend effet à compter de
la date d'achat. Toutes les autres conditions de la garantie de cinq ans sont identiques à
celle de la présente garantie. La présente garantie s'applique à tous les robinets Delta®
fabriqués après le 1er janvier 1995.
Dans les États ou les provinces où il est interdit d'exclure ou de limiter les responsabilités
à l'égard des dommages indirects ou fortuits, les exclusions et les limites susmentionnées
ne s'appliquent pas. Les dommages résultant d'une mauvaise utilisation, d'une utilisation
abusive de la négligence ou de l'utilisation de pièces autres que des pièces d'origine Delta®
RENDENT LA GARANTIE NULLE ET SANS EFFET.
La présente garantie vous donne des droits précis qui peuvent varier selon votre lieu de
résidence. Elle ne s'applique qu'aux robinets Delta®installés aux États-Unis, au Canada
et au Mexique.
GARANTIE À VIE LIMITÉE DES ROBINETS ET DE LEURS FINIS
© 2012 Division de Masco Indiana
54762
54762
www.deltafaucet.com
1
A.
Rough In Dimensions
IMPORTANT: The body spray is designed to sit more flush to the wall than traditional
body sprays; therefore, it is extremely important that the rough plumbing be positioned
so there is enough room in the wall cavity to recess the body spray. As a guide, please
see illustrations above.
A. The body spray installs onto a pipe nipple (1). The end of the pipe nipple should be
recessed from the finished wall to a dimension of 1 3/8" (35 mm) (2). Rough plumbing
should be strapped to the frame away from the body spray. Do not use a back-up stringer.
Doing so will create a gap between the escutcheon and finished wall. Hole in finished
wall must be 3"(76 mm) minimum diameter, 3 1/8"(79 mm) maximum diameter.
B. Recommended balance loops for body spray systems.
2
1
2
54762 Rev. B
1/2" (12.7 mm)
Pipe
1/2" (12.7 mm)
Tubo
Tuyau
1/2 po
(12.7mm)
B. Body Sprays
Rociadores para el cuerpo
Buses de pulvérisation
Rough Body Installation
Shut off water supplies. Remove plasterguard (1). Apply
plumber tape to the pipe nipple (2). With the pipe nipple in the
proper location, install the rough body (3). Tighten securely, but
do not overtighten. Make sure test plug (4) is tight; then, check
the installation for leaks. Reinstall the plasterguard.
1
2
DIMENSIONES DE LA TUBERÍA PRELIMINAR
IMPORTANTE: El rociador de cuerpo está diseñado para instalarlo más al ras con la
pared que los rociadores de cuerpo tradicionales; por lo tanto, es extremadamente
importante que la tubería preliminar dentro de la pared esté colocada de manera que
exista suficiente espacio en la cavidad de la pared para que el rociador quede metido.
Como guía, por favor vea las ilustraciones arriba.
A. El rociador de cuerpo se instala en una entrerrosca de la tubería (1). El extremo de la
entrerrosca debe quedar metido con una dimensión de 1 3/8"(35 mm) (2) desde la pared
acabada. La plomería dentro de la pared debe sujetarse al armazón lejos del cuerpo del
rociador. No use la viga de soporte. Esto crearía un espacio entre la chapa y la pared
acabada. Agujero en acabado la pared debe ser 3"(76 mm) diámetro mínimos, 3 1/8"
diámetro máximo (79 mm).
B. Se recomiendan balancines para los sistemas de rociador de cuerpo.
DIMENSIONS DE LA PLOMBERIE BRUTE
IMPORTANT - Ce jet de douche est conçu pour être installé davantage au ras de la
paroi que les jets de douche classiques. Par conséquent, il est essentiel au moment de
l’installation de la plomberie brute de prévoir l’espace nécessaire au montage en retrait
du jet. Utilisez les figures ci-dessus pour vous guider.
A. Le jet de douche se monte sur un manchon fileté (1). L’extrémité du manchon fileté doit
présenter un retrait de 1 3/8 po (35 mm) (2) par rapport à la paroi finie. La plomberie brute
doit être retenue à l’ossature par un feuillard, à l’écart des gicleurs. N’installez pas une
traverse. Autrement, il y aura un jeu entre la plaque de finition et la surface du mur fini. Le
trou dans le mur terminé doit être le diamètre minimum de 3 po (76 mm), 3 1/8 po (79 mm)
diamètres maximum.
B. Configuration recommandée pour la tuyauterie des jets de douche.
RP42171
Rough Body
Tuberías Internas
Plomberie Brute
RP42206
Plasterguard
Enlucido
Cône de Protection
Replacement Parts
Piezas de Repuesto
Pièces de rechange
RP54911
Test Plug
Casquillo de Prueda
Bouchon d’essai
2
3
4
Instalación de las Tuberías dentro de la Pared
Cierre los suministros de agua. Quite el protector de yeso
(1). Aplique cinta plomero en la entrerrosca de la tubería (2).
Con la entrerrosca de la tubería en el sitio correcto, instale el
cuerpo de la instalación dentro de la pared (3). Apriete
fijamente, pero no demasiado. Asegúrese que la tapa de
prueba (4) esté ajustada; luego, examine la instalación para
ver si hay filtraciones. Reinstale el protector de yeso.
Installation du corps de robinet
Interrompez l’alimentation en eau. Enlevez le protecteur (1).
Appliquez du ruban de plomberie sur le manchon fileté (2).
Après avoir installé le manchon fileté au bon endroit, montez le
corps de robinet (3). Serrez solidement, mais prenez garde de
trop serrer. Assurez-vous que le bouchon d’essai (4) est bien
serré. Vérifiez ensuite l’étanchéité de l’installation. Remettez le
protecteur en place.
1 3/8"
35 mm
1 3/8 po
3"to 3 1/8"
Max. Hole Dia.
3-PORT,THREE AND SIX FUNCTION
DIVERTER TRIM
ACCESORIO PARA EL DESVIADOR DE TRES
Y SEIS FUNCIONES, DE 3 TOMAS
ÉLÉMENTS DE FINITION DE L’INVERSEUR À
3 ORIFICES, À TROIS ET SIX FONCTIONS
Write purchased model number here.
Escriba aquí el número del modelo comprado.
Inscrivez le numéro de modèle ici.
You may need/Usted puede necesitar/Articles dont vous pouvez avoir besoin:
www.deltafaucet.com 4/9/15 Rev. M
51833
1
Models/Modelos/Modèles
T11800,T11851,T11853,T11855,T11859,
T11861,T11864,T11867,T11885,T11886,
T11892,T11894,T11897-LHP,T11900,T11951,
T11953,T11955,T11959,T11961,T11964,T11967,
T11985,T11986,T11992,T11994,T11997-LHP,
T11852, T11952
Series/Series/Seria
AddisonTM Arzo®CassidyTM
Ashlyn®
Classic Compel®DrydenTM Grail®
LindenTM Trinsic®
TeslaTM Vero®Victorian®
AraTM
Rough-in R11000 required for installation
Rough-in R11000 necesario para la instalación
Rough-in R11000 requis pour l'installation
When the diverter is ready for trim remove plasterguard (1), bonnet
(2) and test cap (3) from the body.
51833 Rev. M
2
1
A.
2
A.
B.
A.
B.
Install cartridge assembly (1) into body (2) assuring that the locating
pin on the bottom of the cartridge aligns with mating hole in body.
Note: Right port (3) must be plugged if using a 3 function
diverter cartridge. Slide threaded sleeve (4) over cartridge stem
aligning tabs on sleeve with slots in body (2) and tighten securely
with bonnet (5).
B.
Cuando el desviador está listo el accesorio quite el protector de yeso
(1), en capuchón (2) y la tapa de prueba (3) del cuerpo.
Instale el ensamble del cartucho (1) en el cuerpo (2) asegurándose
que la clavija localizadora en la parte inferior del cartucho está
alineada con el agujero correspondiente en el cuerpo. Nota: La
toma de agua en la derecha (3) debe estar tapada si se utiliza un
cartucho desviador de 3 funciones. Deslice la manga enroscada (4)
sobre la espiga del cartucho alineando las lengüetas en la manga con
las ranuras en el cuer po (2) y apriete bien con el capuchón (5).
Lorsque l’inverseur est prêt à recevoir les éléments de finition, retirez
le protecteur (1), le chapeau (2) et le capuchon d’essai (3) du corps.
Installez la cartouche (1) dans le corps (2) en prenant soin de faire
correspondre l’axe de détrompage au bas de la cartouche avec le
trou dans le corps. Note: Vous devez obturer l’orifice droit (3) si
vous utilisez une cartouche d’inverseur à trois fonctions. Glissez
le manchon fileté (4) sur la tige de la cartouche en prenant soin de
faire corre spondre les pattes sur le manchon avec les rainures dans
le corps (2) et serrez-le solidement avec le chapeau (5).
A.
B.
A.
B.
A.Place and hold backplate (1) (T11855/T11955 Only) and escutcheon
(2) over diverter. Thread trim sleeve (3) onto threaded sleeve (4) until
escutcheon and backplate are secure against wall. Do not overtighten.
Place handle (1) onto stem (2) and tighten set screw (3).
B.
A.Coloque y sostenga la placa posterior (1) (T11855/ T11955 solamente)
y la chapa de cubierta (2) sobre el desviador. Enrosque la manga de
accesorio (3) en la manga enroscada (4) hasta que la chapa de cubierta
y la placa posterior queden fijas contra la pared. No apriete demasiado.
Coloque la manija (1) en la espiga (2) y apriete el tornillo de ajuste (3).
B.
Placez la plaque arrière (1) (T11855/T11955 seulement) et la plaque
de finition (2) sur l’inverseur et maintenez-les en place. Vissez le
manchon de finition (3) sur le manchon fileté (4) jusqu’à ce que la
plaque de finition et la plaque arrière soient immobilisées contre le
mur. Évitez de serrer excessivement.
A.
Placez la manette (1) sur la tige (2) et serrez la vis de calage (3).
B.
3
2
1
3
2
1
4
5
4
1
2
3
2
1
3
RP71717
2-Function, Non-Shared Diverter Cartridge
Cartucho desviador no-compartido de 2 funciones
Cartouche d’inverseur non partagé, 2 fonctions
RP71718
3-Function, Non-Shared Diverter Cartridge
Cartucho desviador no-compartido de 3 funciones
Cartouche d’inverseur non partagé, 3 fonctions
RP51918
3-Function Cartridge
Cartucho del desviador, 3 funciones
Cartouche d’inverseur, 3 fonctions
RP51919
6-Function Cartridge
Cartucho del desviador, 6 funciones
Cartouche d’inverseur, 6 fonctions
RP46078
Test Cap & O-rings
Casquillo de Prueda y Anillos “O”
Bouchon d’essai et Joints Torique
RP64851
Bonnet
Bonete
Chapeau
RP51916
Sleeve
Manga
Manchon
Body - 3 Port
Cuerpo - 3 Tomas
Corps - 3 Orifices
RP20032
Plug
Tapón
Bouchon
RP42414
Backplate
Chapa Posterior
Plaque arrière
RP42413▲
6-Function Escutcheon
Chapetón (6 funciones)
Rosace (6 fonctions)
▲Specify Finish
Especifíque el Acabado
Précisez le Fini
RP51924▲
3-Function Escutcheon
Chapetón 3 funciones)
Rosace (3 fonctions)
RP51917
Trim Sleeve
Manga del Accesorio
Manchon de Finition
RP42409▲
Handle w/Set Screw
Manija con Tornillo de Ajuste
Manette avec Vis de Calage
RP49264▲
Handle w/Set Screw
Manija con Tornillo de Ajuste
Manette avec Vis de Calage
RP73365▲
Handle w/Set Screw
Manija con Tornillo
de Ajuste
Manette avec Vis de
Calage
RP53444▲
Handle w/Set Screw
Manija con Tornillo de
Ajuste
Manette avec Vis de
Calage
RP70642▲
Handle w/Set Screw
Manija con Tornillo de
Ajuste
Manette avec Vis de
Calage
RP78703▲
Handle w/Set Screw
Manija con Tornillo de Ajuste
Manette avec Vis de Calage
RP73366▲
Handle w/Set Screw
Manija con Tornillo de Ajuste
Manette avec Vis de Calage
RP75137
Diverter Extension Kit (not
included)
(adds 1" depth)
Kit de extensión para desviador
(no incluido)
(se agrega 1 pulgada de
profundidad)
Trousse de rallonge pour
inverseur (non inclus)
(ajoute une profondeur de 1 po)
RP52594▲
6-Function Escutcheon
Chapetón (6 funciones)
Rosace (6 fonctions)
RP78704▲
6-Function Escutcheon
Chapetón (6 funciones)
Rosace (6 fonctions)
RP77065▲
6-Function Escutcheon
Chapetón (6 funciones)
Rosace (6 fonctions)
RP52592▲
3-Function Escutcheon
Chapetón (3 funciones)
Rosace (3 fonctions)
RP78705▲
3-Function Escutcheon
Chapetón (3 funciones)
Rosace (3 fonctions)
RP77064▲
3-Function Escutcheon
Chapetón (3 funciones)
Rosace (3 fonctions)
RP51917
Trim Sleeve
Manga del Accesorio
Manchon de Finition
RP52590▲
Handle w/Set Screw
Manija con Tornillo de Ajuste
Manette avec Vis de Calage
RP26865▲
Set Screw
Tornillo de Ajuste
Vis de Calage
51833 Rev. M
3
RP77063▲
Handle
Manija
Manette
RP53446▲
Arzo® 6-Function Escutcheon
Chapetón (6 funciones) - Arzo®
Rosace (6 fonctions)- Arzo®
Using New Trim With
Rough R11600
Para el uso de un accesorio nuevo
con tuberías internas R11600
Utilisation de la nouvelle finition
avec les soupapes R11600
RP53447▲
Arzo® 3-Function Escutcheon
Chapetón (3 funciones) - Arzo®
Rosace (3 fonctions)- Arzo®
RP51917
Trim Sleeve
Manga del Accesorio
Manchon de Finition
RP53445▲
Arzo® Handle w/Set
Screw
Manija con Tornillo
de Ajuste - Arzo®
Manette avec Vis de
Calage - Arzo®
RP51917
Trim Sleeve
Manga del Accesorio
Manchon de Finition
RP62962▲
Vero® Handle w/Set
Screw
Manija con Tornillo de
Ajuste - Vero®
Manette avec Vis de
Calage - Vero®
RP75443▲
AraTM Handle w/Set
Screw
Manija con Tornillo
de Ajuste - AraTM
Manette avec Vis de
Calage - AraMC
RP62381▲
Vero® / AraTM
6-Function Escutcheon
Chapetón (6 funciones) -
Vero® / AraTM
Rosace (6 fonctions)-
Vero® / AraMC
RP51917
Trim Sleeve
Manga del Accesorio
Manchon de Finition
RP61656▲
AddisonTM Handle w/Set
Screw
Manija con Tornillo de
Ajuste - AddisonTM
Manette avec Vis de
Calage - AddisonMC
RP61658▲
AddisonTM 6-Function Escutcheon
Chapetón (6 funciones) -
AddisonTM
Rosace (6 fonctions)- AddisonMC
RP72560▲
CassidyTM 6-Function Escutcheon
Chapetón (6 funciones) - CassidyTM
Rosace (6 fonctions)- CassidyMC
RP61657▲
AddisonTM 3-Function Escutcheon
Chapetón (3 funciones) - AddisonTM
Rosace (3 fonctions)- AddisonMC
RP72559▲
CassidyTM 3-Function Escutcheon
Chapetón (3 funciones) - CassidyTM
Rosace (3 fonctions)- CassidyMC
RP51917
Trim Sleeve
Manga del Accesorio
Manchon de Finition
H595▲
CassidyTM Handle w/Set Screw
Manija con Tornillo de Ajuste - CassidyTM
Manette avec Vis de Calage - CassidyMC
H597▲
CassidyTM Handle w/Set
Screw
Manija con Tornillo de
Ajuste - CassidyTM
Manette avec Vis de
Calage - CassidyMC
H598▲
CassidyTM Handle w/Set Screw
Manija con Tornillo de Ajuste - CassidyTM
Manette avec Vis de Calage - CassidyMC
RP72561▲
Buttons & Set Screws
Botones y Tornillos de Ajuste
Boutons et Vis de Calage
RP72561▲
Buttons & Set Screws
Botones y Tornillos de Ajuste
Boutons et Vis de Calage
RP72561▲
Buttons & Set Screws
Botones y Tornillos de Ajuste
Boutons et Vis de Calage
R11600
RP42410
Cartridge Assembly
Ensamble del Cartucho
Cartouche
RP37902
3 function stem extender
Extensión para la espiga -
Función 3
Rallonge de tige - 3 fonctions
RP37903
6 function stem extender
Extensión para la espiga -
Función 6
Rallonge de tige - 6 fonctions
RP37890
Extension Screw
Tornillos de Extension
Vis de Rallonge
RP42412
Trim Sleeve
Manga del Accesorio
Manchon de Finition
Si vous avez installé l’article R11600,
vous devez commander les articles
RP42410 (cartouche), RP37902
(rallonge de tige pour soupape à 3
fonctions) OU RP37903 (rallonge
de tige pour soupape à 6 fonctions)
et RP37890 (vis de rallonge) et
les utiliser avec la nouvelle finition.
If you have R11600 installed you will
need to order RP42410 (cartridge
assembly), RP37902 (3 function stem
extender) OR RP37903 (6 function
stem extender) and RP37890
(extension screw) to use the new trim.
Si usted tiene instalado la pieza R11600,
necesitará ordenar RP42410 (ensamble
del cartucho), RP37902 (extensión
de espiga de 3 funciones) o RP37903
(extensión de espiga de 6 funciones)
y RP37890 (tornillo de extensión)
para utilizar el accesorio nuevo.
4
▲Specify Finish
Especifíque el Acabado
Précisez le Fini
Note: L’article RP42412 (manchon de
finition) peut être nécessaire pour
les installations présentant un écart
de 3,5 à 4 pouces de profondeur par
rapport à la surface finie du mur.
Nota: La pieza RP42412 (manga
de accesorio) puede ser necesaria
para las instalaciones de 3.5 a 4.0
pulgadas de profundidad desde
la superficial de la pared acabada.
Note: RP42412 (trim sleeve)
may be needed for installations
between 3.5 and 4.0 inches deep
from the finished wall surface.
RP62380▲
Vero® / AraTM
3-Function Escutcheon
Chapetón (3 funciones) -
Vero® / AraTM
Rosace (3 fonctions)-
Vero® / AraMC
51833 Rev. M
Water Flow For 3 Function Diverter / Flujo de agua para Desviadores de 3 posiciones / Écoulement de l’eau
pour les inverseurs à 3 positions
1st Position
1 aposición
1ère position
Outlet 1
Salida 1
Sortie 1
Outlet 3
Salida 3
Sortie 3
Outlet 2
Salida 2
Sortie 2
2nd Position
2 aposición
2e position
3rd Position
3 aposición
3e position
In / Entrada / Entrée In / Entrada / Entrée In / Entrada / Entrée
Outlet 2
Salida 2
Sortie 2
Outlet 3
Salida 3
Sortie 3
Outlet 1
Salida 1
Sortie 1
Outlet 2
Salida 2
Sortie 2
Outlet 3
Salida 3
Sortie 3
Outlet 1
Salida 1
Sortie 1
Shared positions do not exist in non-shared cartridges.
Los ajustes o posiciones compartidas no existen en los cartuchos no-compartidos.
Comme leur nom l’indique, les cartouches sans position partagée ne comportent aucune position partagée.
Water Flow For 6 Function Diverter / Flujo de agua para Desviadores de 6 posiciones / Écoulement de l’eau
pour les inverseurs à 6 positions
1st Position
1 aposición
1ère position
Outlet 1
Salida 1
Sortie 1
2nd Position
2 aposición
2e position
Outlet 1
Salida 1
Sortie 1
3rd Position
3 aposición
3e position
Outlet 1
Salida 1
Sortie 1
Outlet 3
Salida 3
Sortie 3
Outlet 2
Salida 2
Sortie 2
In / Entrada / Entrée
Outlet 3
Salida 3
Sortie 3
Outlet 2
Salida 2
Sortie 2
In / Entrada / Entrée
Outlet 3
Salida 3
Sortie 3
Outlet 2
Salida 2
Sortie 2
In / Entrada / Entrée
4th Position
4 aposición
4e position
5th Position
5 aposición
5e position
6th Position
6 aposición
6e position
Outlet 1
Salida 1
Sortie 1
Outlet 3
Salida 3
Sortie 3
Outlet 2
Salida 2
Sortie 2
In / Entrada / Entrée
Outlet 3
Salida 3
Sortie 3
Outlet 2
Salida 2
Sortie 2
In / Entrada / Entrée
Outlet 1
Salida 1
Sortie 1
Outlet 1
Salida 1
Sortie 1
Outlet 3
Salida 3
Sortie 3
Outlet 2
Salida 2
Sortie 2
In / Entrada / Entrée
Shared positions do not exist in non-shared cartridges.
Los ajustes o posiciones compartidas no existen en los cartuchos no-compartidos.
Comme leur nom l’indique, les cartouches sans position partagée ne comportent aucune position partagée.
CLEANING AND CARE
Care should be given to the cleaning of this product. Although its nish is extremely durable, it can be damaged by harsh abrasives or polish.
To clean, simply wipe gently with a damp cloth and blot dry with a soft towel.
LIMPIEZA Y CUIDADO DE SU LLAVE
Tenga cuidado al ir a limpiar este producto. Aunque su acabado es sumamente durable, puede ser afectado por agentes de limpieza o para pulir abrasivos.
Para limpiar su llave, simplemente frótela con un trapo húmedo y luego séquela con una toalla suave.
INSTRUCTIONS DE NETTOYAGE
Il faut le nettoyer avec soin. Même si son fini est extrêmement durable, il peut être abîmé par des produits fortement abrasifs ou des produits de polissage.
Il faut simplement le frotter doucement avec un chiffon humide et le sécher à l'aide d'un chiffon doux.
551833 Rev. M
6
© 2015 Masco Corporation of Indiana
© 2015 Masco Corporación de Indiana
© 2015 Division de Masco Indiana
www.deltafaucet.com
Parts and Finish
All parts (other than electronic parts and batteries) and finishes of this Delta® faucet are
warranted to the original consumer purchaser to be free from defects in material and
workmanship for as long
as the original consumer purchaser owns the home in which the
faucet was rst installed or, for
commercial users, for 5 years from the date of purchase.
Electronic Parts and Batteries (if applicable)
Electronic parts (other than batteries), if any, of this Delta® faucet are warranted to the
original
consumer purchaser to be free from defects in material and workmanship for
5 years from the
date of purchase or, for commercial users, for one year from the date of
purchase. No warranty is
provided on batteries.
Delta Faucet Company will replace, FREE OF CHARGE, during the applicable warranty
period, any
part or nish that proves defective in material and/or workmanship under normal
installation, use
and service. If repair or replacement is not practical, Delta Faucet Company
may elect to refund
the purchase price in exchange for the return of the product. These are
your exclusive remedies.
Delta Faucet Company recommends using a professional plumber for all installation and repair.
We
also recommend that you use only genuine Delta® replacement parts.
Delta Faucet Company shall not be liable for any damage to the faucet resulting from
misuse,
abuse, neglect or improper or incorrectly performed installation, maintenance or
repair, including
failure to follow the applicable care and cleaning instructions.
Replacement parts may be obtained by calling the applicable number below or by writing to:
In the United States and Mexico:
Delta Faucet Company
Product Service
55 E. 111th Street
Indianapolis, IN 46280
1-800-345-DELTA (3358)
[email protected]
In Canada:
Masco Canada Limited, Plumbing Group
Technical Service Centre
350 South Edgeware Road
St. Thomas, Ontario, Canada N5P 4L1
1-800-345-DELTA (3358)
[email protected]
Proof of purchase (original sales receipt) from the original purchaser must be made available
to
Delta Faucet Company for all warranty claims unless the purchaser has registered the product
with Delta Faucet Company. This warranty applies only to Delta® faucets manufactured after
January 1,
1995 and installed in the United States of America, Canada and Mexico.
DELTA FAUCET COMPANY SHALL NOT BE LIABLE FOR ANY SPECIAL, INCIDENTAL
OR
CONSEQUENTIAL DAMAGES (INCLUDING LABOR CHARGES) FOR BREACH
OF ANY
EXPRESS OR IMPLIED WARRANTY ON THE FAUCET. Some states/provinces do
not allow the
exclusion or limitation of special, incidental or consequential damages, so these
limitations and
exclusions may not apply to you. This warranty gives you special legal rights.
You may also have other rights which vary from state/province to state/province.
This is Delta Faucet Company’s exclusive written warranty and the warranty is not transferable.
If you have any questions or concerns regarding our warranty, please view our Warranty FAQs
at
www.deltafaucet.com, email us at [email protected] or call us at the
applicable
number above.
Limited Warranty on Delta®Faucets
Garantía Limitada de las Llaves de Agua (grifos) Delta®
Piezas y acabado
Todas las piezas
(excepto las piezas electrónicas y las pilas) y los acabados de esta llave de
agua Delta®
están garantizados al consumidor comprador original de estar libres de defectos en
material y
fabricación durante el tiempo que el comprador original posea la vivienda en la que la
llave
de agua fue originalmente instalada o, para los consumidores comerciales, durante 5 años
a
partir de la fecha de compra.
Delta Faucet Company no será responsable por cualquier daño a la llave de agua que resulte
del mal uso, abuso, negligencia o mala instalación o mantenimiento o reparación incorrecta,
incluyendo el no seguir los cuidados aplicables y las instrucciones de limpieza.
Delta Faucet Company reemplazará, SIN CARGO, durante el período de garantía aplicable,
cual
quier pieza o acabado que pruebe tener defectos de material y/o fabricación bajo la
instalación,
uso y servicio normal. Si la reparación o su reemplazo no es práctico, Delta Faucet
Company tiene la opción de reembolsarle su dinero por la cantidad del precio de compra a
cambio de la devolución
del producto. Estos son sus únicos recursos.
Delta Faucet Company recomienda que use los servicios de un plomero profesional para todas
las
instalaciones y reparaciones. También le recomendamos que utilice sólo las piezas de
repuesto
originales de Delta®.
Componentes electrónicos y pilas (si aplicable)
Todas las piezas (salvo las pilas), si hay, de esta llave de agua Delta® están garantizadas al
consumidor comprador original de estar libres de defectos en materiales y fabricación durante
5 años a partir de la fecha de compra o, para los usuarios comerciales, por un año a partir de la
fecha de compra. No se garantizan las pilas.
Las piezas de repuesto se pueden obtener llamando al número correspondiente más abajo, o
escribiendo a:
En los Estados Unidos y México:
Delta Faucet Company
Product Service
55 E. 111th Street
Indianapolis, IN 46280
1 800 345 DELTA (3358)
[email protected]
En Canadá:
Masco Canada Limited, Plumbing Group
Technical Service Centre
350 South Edgeware Road
St. Thomas, Ontario, Canada N5P 4L1
1 800 345 DELTA (3358)
[email protected]
La prueba de compra (recibo original) del comprador original debe ser disponible a Delta
Faucet
Company para todos los reclamos a menos que el comprador haya registrado el
producto con
Delta Faucet Company. Esta garantía le aplica sólo a las llaves de agua
de Delta®fabricadas
después del 1 de enero 1995 e instaladas en los Estados Unidos de
América, Canadá y México.
DELTA FAUCET COMPANY NO SE HACE RESPONSABLE POR CUALQUIER DAÑO
ESPECIAL,
INCIDENTAL O CONSECUENTE (INCLUYENDO LOS GASTOS DE MANO
DE OBRA) POR EL
INCUMPLIMIENTO DE CUALQUIER GARANTÍA EXPRESA O
IMPLÍCITA DE LA LLAVE DE
AGUA. Algunos estados/provincias no permiten la exclusión
o limitación de daños especiales,
incidentales o consecuentes, por lo que estas limitaciones
y exclusiones pueden no aplicarle a
usted. Esta garantía le otorga derechos legales. Usted
también puede tener otros derechos que
varían de estado/provincia a estado/provincia.
Esta es la garantía exclusiva por escrito de Delta Faucet Company y la garantía no es transferible.
Si usted tiene alguna pregunta o inquietud acerca de nuestra garantía, por favor, vea
nuestra
sección de preguntas frecuentes FAQ sobre la garantía en www.deltafaucet.com,
también puede
enviarnos un correo electrónico a [email protected] o llámenos
al número que le
corresponda anteriormente incluido.
Garantie limitée des robinets Delta®
Pièces et nis
Toutes les pièces (à l’exception des composants électroniques et des piles) et tous les nis de
ce
robinet Delta
®
sont protégés contre les défectuosités du matériau et les vices de fabrication
par
une garantie qui est consentie au premier acheteur et qui demeure valide tant que celui-
ci demeure
propriétaire de la maison dans laquelle le robinet a été installé. Dans le cas d’une
utilisation com
merciale, la garantie est de 5 ans à compter de la date d’achat.
Delta Faucet Company se dégage de toute responsabilité à l’égard des dommages causés
au
robinet en raison d’un mauvais usage, d’un usage abusif, de la négligence ou de l’utilisation
d’une
méthode d’installation, de maintenance ou de réparation incorrecte ou inadéquate,
y compris
les dommages résultant du non-respect des instructions de nettoyage et d’entretien
applicables.
Delta Faucet Company recommande de coner l’installation et la réparation à un plombier
pro
fessionnel. Nous vous recommandons également d’utiliser uniquement des pièces de
rechange
authentiques Delta®.
Delta Faucet Company remplacera, GRATUITEMENT, pendant la période de garantie
applicable,
toute pièce ou tout ni qui présentera une défectuosité du matériau et/ou un vice de
fabrication pour
autant que le robinet ait été installé, utilisé et entretenu normalement. S’il est
impossible de réparer
ou de remplacer le robinet, Delta Faucet Company pourra décider de
rembourser le prix d’achat du
produit pour autant que celui-ci lui soit retourné. Il s’agit de vos
seuls recours.
Composants électroniques et piles (le cas échéant)
Si ce robinet Delta® comporte des composants électroniques, ces composants (à l’exception
des
piles) sont protégés contre les défectuosités du matériau et les vices de fabrication par une
garan
t
ie consentie au premier acheteur qui est d’une durée de 5 ans à compter de la date d’
achat. Dans
le cas d’une utilisation commerciale, la garantie est d’un an à compter de la date d’
achat. Aucune
garantie ne couvre les piles.
Pour obtenir des pièces de rechange, veuillez appeler au numéro applicable ci-dessous ou
écrire à l’adresse applicable ci-dessous.
Aux États-Unis et au Mexique :
Delta Faucet Company
Product Service
55 E. 111th Street
Indianapolis, IN 46280
1-800-345-DELTA (3358)
[email protected]
Au Canada:
Masco Canada Limited, Plumbing Group
Technical Service Centre
350 South Edgeware Road
St. Thomas, Ontario, Canada N5P 4L1
1-800-345-DELTA (3358)
[email protected]
La preuve d’achat (reçu original) du premier acheteur doit être présentée à Delta Faucet
Company
pour toutes les demandes en vertu de la garantie, sauf si le produit a été
enregistré auprès de
Delta Faucet Company. La présente garantie s’applique uniquement aux
robinets Delta® fabriqués
après le 1er janvier 1995 et installés aux États-Unis d’Amérique, au
Canada et au Mexique.
DELTA FAUCET COMPANY SE DÉGAGE DE TOUTE RESPONSABILITÉ À L’ÉGARD
DES
DOMMAGES PARTICULIERS, CONSÉCUTIFS OU INDIRECTS (Y COMPRIS
LES FRAIS
DE MAIN-D’OEUVRE) QUI POURRAIENT RÉSULTER DE LA VIOLATION D’
UNE GARANTIE
IMPLICITE OU EXPLICITE QUELCONQUE SUR LE ROBINET. Dans les
États ou les provinces
où il est interdit de limiter ou d’exclure la responsabilité à l’égard des
dommages particuliers, con
sécutifs ou indirects, les limites et les exclusions susmentionnées ne
s’appliquent pas. La présente
garantie vous donne des droits précis qui peuvent varier selon I’État
ou la province où vous résidez.
La présente garantie écrite est la garantie exclusive offerte par Delta Faucet Company et elle n’
est
pas transférable.
Si vous avez des questions ou des préoccupations en ce qui concerne notre garantie,
veuillez
c
onsulter la page Warranty FAQs à www.deltafaucet.com, faire parvenir un courriel à
customerser
[email protected] ou nous appeler au numéro applicable.
CLEANING AND CARE
Care should be given to the cleaning of this product. Although its finish is extremely durable, it can be damaged by harsh abrasives or polish.
To clean, simply wipe gently with a damp cloth and blot dry with a soft towel.
INSTRUCTIONS DE NETTOYAGE
Il faut le nettoyer avec soin. Même si son fini est extrêmement durable, il peut être abîmé par des produits fortement abrasifs ou des produits de polissage.
Il faut simplement le frotter doucement avec un chiffon humide et le sécher à l'aide d'un chiffon doux.
LIMPIEZA Y CUIDADO DE SU LLAVE
Tenga cuidado al ir a limpiar este producto. Aunque su acabado es sumamente durable, puede ser afectado por agentes de limpieza o para pulir abrasivos.
Para limpiar su llave, simplemente frótela con un trapo húmedo y luego séquela con una toalla suave.
51833 Rev. M
MultiChoice®Valve Trim
Installation Instructions
Owners Manual
13/14 Series
Write purchased model number here.
T
E
F
L
O
N
You May Need
Table of Contents:
Warranties ..................................................................................Page 2
Installation Instructions...............................................................Pages 3 - 8
Clean and care ...........................................................................Page 9
Maintenance...............................................................................Page 9
Cartridge Summary Reference Sheet ........................................Page 9
Classic Series Replacement Parts .............................................Page 12
For additional replacement parts, visit www.deltafaucet.com
CAUTION: This system/device must be set by the
installer to ensure safe, maximum temperature.
Any change in the setting may raise the discharge
temperature above the limit considered safe and
may lead to hot water burns.
NOTICE TO INSTALLER: CAUTION! – As the
installer of this valve, it is your responsibility
to properly INSTALL and ADJUST this valve
per the instructions given.This valve does
not automatically adjust for inlet temperature
changes, therefore, someone must make the
necessary Rotational Limit Stop adjustments
at the time of installation and further adjustments
may be necessary due to seasonal water
temperature change.YOU MUST inform the
owner/user of this requirement by following the
instructions. If you or the owner/user are unsure
how to properly make these adjustments please
refer to page 6 and if still uncertain, call us at
1-800-345-DELTA.
After installation and adjustment, you must affix
your name, company name and the date you
adjusted the Rotational Limit Stop to the caution
label provided and apply or attach the label to
the back side of the closest cabinet door and
the warning label to the water heater. Leave
this Instruction Sheet for the owner’s/user’s
reference.
WARNING:This pressure balanced or
thermostatic bath valve is designed
to minimize the effects of outlet water
temperature changes due to inlet pressure
changes, commonly caused by dishwashers,
washing machines, toilets and the like. It may
not provide protection from hot water burns
when there is a failure of other temperature
controlling devices elsewhere in the plumbing
system, if the rotational limit stop is not
properly set or if the hot water temperature is
changed after the settings are made or if the
water inlet changes due to seasonal changes.
WARNING: Do not install a shut-off device on
either outlet of this valve. When this type of
device shuts off the water flow, it can defeat
the ability of the valve to balance the hot and
cold water pressures.
www.deltafaucet.com 8/20/15 Rev. H1
68881
13/14 Series13/14 Series13/14 Series
68881 Rev. H
Lifetime Faucet and Finish Limited Warranty
Parts and Finish
All parts (other than electronic parts and batteries) and
finishes of this Delta®faucet are warranted to the original
consumer purchaser to be free from defects in material
and workmanship for as long as the original consumer
purchaser owns the home in which the faucet was first
installed or, for commercial users, for 5 years from the
date of purchase.
Electronic Parts and Batteries (if applicable)
Electronic parts (other than batteries), if any, of this Delta®
faucet are warranted to the original consumer purchaser
to be free from defects in material and workmanship for 5
years from the date of purchase or, for commercial users,
for one year from the date of purchase. No warranty is
provided on batteries.
Delta Faucet Company will replace, FREE OF CHARGE,
during the applicable warranty period, any part or finish
that proves defective in material and/or workmanship under
normal installation, use and service. If repair or replacement
is not practical, Delta Faucet Company may elect to refund
the purchase price in exchange for the return of the
product. These are your exclusive remedies.
Delta Faucet Company recommends using a professional
plumber for all installatio and repair.We also recommend
that you use only genuine Delta®replacement parts.
Delta Faucet Company shall not be liable for any damage to
the faucet resulting from misuse, abuse, neglect or improper
or incorrectly performed installation, maintenance or repair,
including failure to follow the applicable care and cleaning
instructions.
Replacement parts may be obtained by calling the applicable
number below or by writing to:
In the United States and Mexico:
Delta Faucet Company
Product Service
55 E. 111th Street
Indianapolis, IN 46280
1-800-345-DELTA (3358)
[email protected]
In Canada:
Masco Canada Limited, Plumbing Group
Technical Service Centre
350 South Edgeware Road
St. Thomas, Ontario, Canada N5P 4L1
1-800-345-DELTA (3358)
[email protected]
Proof of purchase (original sales receipt) from the original
purchaser must be made available to Delta Faucet Company
for all warranty claims unless the purchaser has registered
the product with Delta Faucet Company. This warranty
applies only to Delta®faucets manufactured after January
1,1995 and installed in the United States of America,
Canada and Mexico.
DELTA FAUCET COMPANY SHALL NOT BE LIABLE FOR
ANY
SPECIAL, INCIDENTAL OR CONSEQUENTIAL DAMAGES
(INCLUDING LABOR CHARGES) FOR BREACH OF ANY
EXPRESS OR IMPLIED WARRANTY ON THE FAUCET.
Some states/provinces do not allow the exclusion or
limitation of special, incidental or consequential damages,
so these limitations and exclusions may not apply to you.
This warranty gives you special legal rights. You may also
have other rights which vary from state/province to
state/province.
This is Delta Faucet Company’s exclusive written warranty
and the warranty is not transferable.
If you have any questions or concerns regarding our warranty,
please view our Warranty FAQs at www.deltafaucet.com,
email us at [email protected] or call us at
the applicable number above.
Delta HDF Limited Warranty
All parts of the Delta HDF faucet are warranted to the original
consumer purchaser to be free from defects in material and
workmanship for a period of five (5) years. This warranty is
made to the original consumer purchaser and shall be
effective from date of purchase as shown on purchaser’s
receipt.
Delta will replace, FREE OF CHARGE, during the warranty
period, any part which proves defective in material and/or
workmanship under normal installation, use and service.
Replacement parts can be obtained from your local dealer or
distributor listed in the telephone directory or by returning the
part along with the purchaser’s receipt to our factory,
TRANSPORTATION CHARGES PREPAID, at the address
listed. THIS WARRANTY IS THE ONLY EXPRESS
WARRANTY MADE BY DELTA. ANY CLAIMS MADE
UNDER THIS WARRANTY MUST BE MADE DURING THE
FIVE YEAR PERIOD REFERRED TO ABOVE. ANY
IMPLIED WARRANTIES, INCLUDING THE IMPLIED
WARRANTY OF MERCHANTABILITY OR FITNESS FOR A
PARTICULAR PURPOSE, ARE LIMITED IN DURATION TO
THE DURATION OF THIS WARRANTY. LABOR CHARGES
AND/OR DAMAGE INCURRED IN INSTALLATION, REPAIR
OR REPLACEMENT AS WELL AS INCIDENTAL AND
CONSEQUENTIALDAMAGES CONNECTED THEREWITH
ARE EXCLUDED AND WILL NOT BE PAID BY DELTA.
Some states do not allow limitations on how long an implied
warranty lasts, or the exclusion or limitation of incidental or
consequential damages, so the above limitations or
exclusions may not apply to you.
This warranty gives you specific legal rights, and you may
also have other rights which vary from state to state.
This warranty is void for any damage to this faucet due to
misuse, abuse, neglect, accident, improper installation, any
use violative of instructions furnished by us or any use of
replacement parts other than genuine Delta parts.
www.deltafaucet.com © 2015 Masco Corporation of Indiana
2
68881 Rev. H
Installation
1Cartridge Installation
Installation
A. B.
Turn off water supplies. Remove
cover (1), bonnet nut (2) and test cap (3)
from the body. If this is not a thin wall
mounting, the entire plasterguard (4)
may be removed. If screen (5) is in place,
remove before installing cartridge.
Rotate the cartridge (1) so the words
“hot side” (2) appear on the left. Insert
cartridge into valve body as shown. Make
sure the cartridge tubes and O-rings (3)
are properly seated in holes at the base of
the body. Ensure the keys on the body are
fully engaged with the slots in the body (4).
Back to back Installation C.
For back to back or reverse installations
(hot on right and cold on left) insert the
cartridge with the “hot side” on the right.
If you are not making a reverse or back
to back installation skip this step and
continue with step 1C.
Slide bonnet nut (1) over the cartridge
and thread onto the body. Hand tighten
securely.
3
Normal Installation (changes not required)
Reverse
Installation
Cold
Hot
1
2
3
5
4
4
1
4
1
3
2
68881 Rev. H
58045
Installation
2Showerhead and Tub Spout Installation
A. FOR SHOWERHEAD INSTALLATION: Connect top
outlet (1) to shower arm (2) with proper fittings. To
prevent damage to finish on shower arm, insert wall end
of shower arm into shower flange (3) before screwing
arm into riser connection. Thread showerhead (4) onto
shower arm. Apply plumber tape to pipe threads on both
ends. Do not overtighten showerhead.
B.
B. 58045: To combine the two showers, insert the top tab (1) on the handshower into the slot (2) of
the showerhead. Push the handshower into the showerhead until the two parts snap together.
58065: To combine the two showers, push the handshower into the showerhead, then pull down
on the handshower until locked with the showerhead.
If the showerhead moves when removing the handshower, hand tighten the connection between
the showerhead and the shower arm.
To change spray modes, turn the lever (3) left or right to the desired setting. Turn knob (4) to
change between showerhead only, showerhead and handshower or handshower only.
4
58045
B. 58065
1
3
2
4
1
2
3
4
3
4
68881 Rev. H
Installation
2
5
Showerhead and Tub Spout Installation
FOR TUB SPOUT INSTALLATION:
Refer to the installation instructions supplied with your spout. Do not connect deck mount spouts to
in-wall valves. Do not use hand showers connected in lieu of a tub spout to a tub/shower valve. Do not
use PEX tubing for tub spout drop.
Slip-On Installation
The copper tube (1) must be 1/2” nominal
copper. Important: If it is necessary to cut the
copper tube, the end must be chamfered free of
burrs to prevent cutting or nicking O-ring inside
the spout. Slide spout over copper tube flush
with the finished tub or wall surface. Tighten set
screw (2), but do not overtighten.
Iron Pipe Installation
Install threaded pipe nipple (1) to extend past
finished wall. Apply plumber tape to threads on
pipe nipple and screw on tub spout.
Copper Sweat Installation
Remove O-ring (1) from adapter (2). Solder
adapter to tube taking care to keep solder away
from O-ring groove. CAUTION: NO SOLDER
PERMITTED ON OUTSIDE DIAMETER OF
ADAPTER ADJACENT TO O-RING GROOVE.
Cut off tube (3) and replace O-ring on groove of
brass adapter. Thread tub/spout onto adapter,
taking care not to damage O-ring, and hand
tighten until spout is firmly against finished wall
and all slack is taken up behind wall.
Iron Pipe Installation
Installation of easy-on universal tub spout
Install pipe nipple so that end of nipple projects out
from finished wall surface 1/2" to 1 1/4" (13 mm to
32 mm).
Apply plumber tape or pipe dope to pipe threads.
Hand tighten adapter (1) onto pipe nipple (2). Finish
tightening with standard pipe wrench until a positive
seal is implemented. Take care not to damage
O-Ring (3) groove. Back of adapter (1) must not
project more than 1" (25 mm) from finished wall
surface.
Hand tighten tub spout onto adapter (1) taking care
not to damage the O-Ring (3).
C-4
C-3
C-2
C-1
1
2
1
1
2
3
1/2" to 1 1/4"
(13 mm to 32 mm)
1 2
3
68881 Rev. H
Installation
3
IMPORTANT:
The Rotational Limit Stop is used to limit the
amount of hot water available such that, if set
properly, the user will not be scalded if the
handle accidentally is rotated all the way to “hot”
when a person is showering or filling a tub. The
first position allows the LEAST amount of hot
water to mix with the cold water in the system.
In the first position the water will be the coldest
possible when the handle is turned all the way
to hot. As you move the Rotational Limit Stop
counterclockwise, you progressively add more
and more hot water in the mix. The last position
to the left will result in the greatest amount of hot
water to the mix, and the greatest risk of scald
injury if someone accidentally turns the valve
handle all the way to the hot side while showering
or filling a tub.
WARNING: In some instances, setting the
Rotational Limit Stop in the hottest position
(full counterclockwise) could result in scald
injury. It is necessary to adjust the Rotational
Limit Stop so that the water coming out of the
valve will not scald the user when the handle
of the valve is rotated to the hot side.
• According to the majority of industry standards,
the maximum allowable temperature of the water
exiting the valve is 120°F (Your local plumbing
codes may require a water temperature less than
120°F).
• The Rotational Limit Stop may need to be re-
adjusted seasonally if the inlet water temperature
changes. For example, during the winter, the
cold water temperature is colder than it is
during the summer which could result in varying
outlet temperatures. A water temperature for
a comfortable bath or shower is typically
between 90°F - 110°F.
• Run the water so that the cold water is as
cold as it will get and hot water is as hot as
it will get. Place the handle on the stem (see
page 8, step 4C) and rotate the handle coun-
terclockwise until the handle stops.
• Place a thermometer in a plastic tumbler
and hold in the water stream. If the water
temperature is above 120°F, the Rotational
Limit Stop must be repositioned clockwise to
decrease valve outlet water temperature to
be
less than 120°F or to meet the
requirements of
your local plumbing codes.
• To adjust the temperature of the water
coming out of the valve, pull the disc back
to a position where it is possible to remove
the Rotational Limit Stop and readjust the
teeth
engagement position to the desired
temperature. Clockwise will decrease the
outlet temperature, counterclockwise will
increase the outlet temperature.Temperature
change per tooth (notch) could be 4° - 16°F
based on inlet water conditions. Repeat as
necessary. Push disc until fully seated.
WARNING: Failure to re-install Disc after
setting Rotational Limit Stop could result
in scald injury.
• MAKE SURE COLD WATER FLOWS
FROM THE VALVE FIRST. MAKE SURE
WATER FLOWING FROM THE VALVE AT
THE HOTTEST FLOW POSSIBLE DOES
NOT EXCEED 120°F OR THE MAXIMUM
ALLOWED BY YOUR LOCAL PLUMBING
CODE.
6
Adjusting the Rotational Limit Stop
Hotter
Disc
Stem
Rotational Limit Stop
1st Position
A.
68881 Rev. H
Installation
IMPORTANT:
The Rotational Limit Stop is used to limit the
amount of hot water available such that, if set
properly, a scald injury is less likely to occur if the
handle accidentally is rotated all the way to “hot”
when a person is showering or filling a tub. The
first position allows the LEAST amount of hot
water to mix with the cold water in the system.
In the first position the water will be the coldest
possible when the handle is turned all the way
to hot. As you move the Rotational Limit Stop
counterclockwise, you progressively add more
and more hot water in the mix. The last position
to the left will result in the greatest amount of hot
water to the mix, and the greatest risk of scald
injury if someone accidentally turns the valve
handle all the way to the hot side while showering
or filling a tub.
WARNING: In some instances, setting the
Rotational Limit Stop in the hottest position
(full counterclockwise) could result in scald
injury. It is necessary to adjust the Rotational
Limit Stop so that the water coming out of the
valve will not scald the user when the handle
of the valve is rotated to the hot side.
• According to the majority of industry standards,
the maximum allowable temperature of the water
exiting the valve is 120°F (Your local plumbing
codes may require a water temperature less than
120°F).
• The Rotational Limit Stop may need to be re-
adjusted seasonally if the inlet water temperature
changes. For example, during the winter, the
cold water temperature is colder than it is
during the summer which could result in varying
outlet temperatures. A water temperature for
a comfortable bath or shower is typically
between 90°F - 110°F.
• Run the water so that the cold water is as
cold as it will get and hot water is as hot as
it will get. Place the handle on the stem (see
page 8, step 4C) and rotate the handle coun-
terclockwise until the handle stops.
• Place a thermometer in a plastic tumbler
and hold in the water stream. If the water
temperature is above 120°F, the Rotational
Limit Stop must be repositioned clockwise to
decrease valve outlet water temperature to
be
less than 120°F or to meet the
requirements of
your local plumbing codes.
• To adjust the temperature of the water
coming out of the valve, pull the white
Rotational Limit Stop (1) outward and rotate.
Clockwise rotation will decrease the outlet
temperature, counterclockwise rotation will
increase the outlet temperature.Temperature
change per tooth (notch) could be 4° - 16°F
based on inlet water conditions. Repeat as
necessary. When finished, make sure that the
Rotational Limit Stop is fully retracted into the
seated position. WARNING: Do not take the
Rotational Limit Stop apart.
• MAKE SURE COLD WATER FLOWS
FROM THE VALVE FIRST. MAKE SURE
WATER FLOWING FROM THE VALVE AT
THE HOTTEST FLOW POSSIBLE DOES
NOT EXCEED 120°F OR THE MAXIMUM
ALLOWED BY YOUR LOCAL PLUMBING
CODE.
7
Adjusting the Rotational Limit Stop
Hotter Cooler
1
1
3
B.
68881 Rev. H
Installation
4Trim Installation
A.
B.
Escutcheon Installation for
Models T14053,T14253, T14453,
T14067,T14267 & T14467.
Slide O-ring (1) over cartridge and the
bonnet nut (2). The O-ring, which acts as
a spacer to steady the sleeve, should rest
behind the bonnet nut.
If your model requires a spacer (3), insert
it into the sleeve (4) and push it to the
front. Slide the sleeve over the cartridge,
body and O-ring.
Using an Allen wrench to secure the set
screw (1), install the handle (2) onto the
stem. Insert plug button (3) (if your model
has one) into set screw hole.
Secure the escutcheon (1) and backplate (2)
(if your model has one) to the bracket (3) using
the 2 screws provided (4). Do not overtighten
escutcheon screws. If you are installing the
Cassidy models T14097, T14297 & T14497:
Thread the cover (5) onto the escutcheon (1).
For models T14053, T14253,T14453, T14067,
T14267 & T14467:
Install bracket (5) over the cartridge body using
the 2 screws provided (6). Install escutcheon (7)
by placing it over the bracket as shown and
rotating it to lock the tabs (8). Secure the
escutcheon to the bracket using set screw (9).
C.
3
8
1
1
1
2
3
3
4
2
4
32
1
4
5
6
75
9
88
68881 Rev. H
Clean and Care
Care should be given to the cleaning
of this product. Although its finish is
extremely durable, it can be damaged by
harsh abrasives or polish. To clean, simply
wipe gently with a damp cloth and blot dry
with a soft towel.
Warning: Scrubbing Bubbles®Bathroom
Cleaner and Lysol®Basin Tub and Tile
Cleaner must not be used on the clear knob
handles and levers. Use of these cleaners
can result in cracked or severely damaged
handles. If overspray gets onto the handles,
immediately wipe them dry with a soft
cotton cloth.
Maintenance
Faucet leaks from tub spout/showerhead:
SHUT OFF WATER SUPPLIES.
Replace seats and springs–Repair
Kit RP4993. Check condition of lower O-rings and
replace if necessary RP14414. See Helpful Hints 1,
2, & 3.
If leak persists:
SHUT OFF WATER SUPPLIES.
Replace valve cartridge RP46074.
See Helpful Hints 1, 2, 3, 4 & 5
Unable to maintain constant
water temperature:
Replace housing assembly with RP46074 or follow
instructions in Helpful Hints 1, 2, 3, 4 & 5.
Helpful Hints:
1. Before removing valve cartridge assembly for any
maintenance, be sure to note the position of the
rotational limit stop on the cap.The valve cartridge
assembly must always be put back in the same
position. BE SAFE! After you have finished the
installation, turn on valve to make sure COLD
WATER FLOWS FIRST.
2. To remove valve cartridge from body, shut off
water supplies and remove handle and bonnet nut.
Do not pry the valve cartridge out of the body with
a screwdriver. Place handle on stem and rotate
counterclockwise approximately 1/4 turn after the
stop has been contacted. Lift valve cartridge out
of body.
3. To remove seats and springs.
Remove valve cartridge. Separate cap assembly
from the housing assembly by rotating the cap
assembly counterclockwise 90 o (degrees).
Separate cap and housing assemblies.
4. If the water in your area has lime, rust, sand
or other contaminants in it, your pressure
balance valve will require periodic inspection.
The frequency of the inspection will depend
on the amount of contaminants in the water.To
inspect valve cartridge remove it and follow the
steps in note 1 above. Turn the valve to the full
mix position and shake the cartridge vigorously.
If there is a rattling sound, the unit is functional
and can be reinstalled following instructions given
in note 1 above. If there is no rattle, replace the
housing assembly with the proper R P.
5. Push disc until fully seated. See page 6 for
more details
9
Escutcheon Installation for
Models T14053,T14253, T14453,
T14067,T14267 & T14467.
68881 Rev. H
Cartridge Summary Reference Sheet
Monitor®Series 1300/1400
Cartridge shipped before March 2006. Cartridge shipped in July 2006 and after
(prior to MultiChoice®transition).
Order RP19804 to replace cartridge. Order RP19804 to replace cartridge.
MultiChoice®13/14
Cartridge shipped from March 2006 to August 2014. Cartridge shipped in August 2014 and after.
Order RP46074 to replace cartridge. Order RP46074 to replace cartridge.
NOTE: A running change for MultiChoice®13/14 valves began August 2014, and
features a new Rotational Limit Stop.
MultiChoice®13/14 (Ceramic)
Cartridge shipping in select models (-CER).
Order RP74236 to replace cartridge.
10
Longer lower
housing
Shorter lower
housing
Longer lower
housing
Shorter lower
housing
Grey
Grey
Grey
Off-white
Blue or
off-white
White
Off-white
Blue
White
White
Instrucciones para la
Instalación del Accesorio
para Válvulas MultiChoice®
Manual para los
Propietarios
13/14 Series
Escriba aquí el número del modelo comprado.
Usted puede necesitar
Contenido:
Garantías....................................................................................Page 2
Instrucciones de Instalación .......................................................Pages 3 - 8
Limpieza y Cuidado de su Liave.................................................Page 9
Mantenimiento............................................................................Page 9
Hoja resumen de referencia para el cartucho ............................Page 9
Piezas de Repuesto ...................................................................Page 12
Para las piezas de repuesto adicionales, visite www.deltafaucet.com
Límite Rotacional y aplicar o fijar la etiqueta al
dorso de la puerta del gabinete más cercano y la
etiqueta de aviso al calentador de agua. Deje la
Hoja de Instrucciones para referencia del dueño/
usuario.
ADVERTENCIA: Esta válvula de presión
balanceada y termostática está diseñada
para minimizar los efectos de los cambios de
temperatura de agua por causa de los cambios
de presión en el agua de entrada, comúnmente
causados por lavadoras de platos, lavadoras
de ropa, inodoros, y otros aparatos por el
estilo. Puede no proporcionar protección de
quemaduras de agua caliente cuando hay
alguna falla de otros aparatos para el control
de temperatura en otro sitio en el sistema de
plomería.También no proporcionará protección
si el tope del límite rotacional la temperatura
no está apropiadamente fijo o si cambia la
temperatura del agua caliente después de
hacer los ajustes o si los cambios del gua de
entrada son por los cambios estacionales.
ADVERTENCIA: No instale un aparato de corte
o cierre en cualquiera de las tomas de esta
válvula. Cuando este tipo de aparato cierra el
flujo de agua, puede hacer fallar la habilidad de
la válvula de balancear las presiones del agua
caliente y fría.
El instalador debe apostar este systema/divisa para
garantizar temperatura maximo y seguro. Cualqueir
cambio en el ajuste puede subir la temperatura
del agua de descarga sobre el límite considerado
seguro y puede resultar en quemaduras de agua
caliente.
AVISO PARA EL INSTALADOR:
PRECAUCIÓN – Como instalador de esta
válvula, es su responsabilidad de INSTALAR Y
AJUSTAR apropiadamente esta válvula como
se describe en las instrucciones, por lo tanto,
debe haber una persona para hacer los ajustes
necesarios del Tope del Límite Rotacional y del
pomo para la temperatura en el momento que
se haga la instalación y pueda necesitar ajustes
adicionales por los cambios estacionales de la
temperatura del agua. USTED DEBE informarle
al dueño/usuario sobre este requisito siguiendo
las instrucciones. Si usted o el dueño/usuario
no están seguros como hacer estos ajustes
apropiadamente, por favor refiérase al Página
6 y si todavía no está seguro, llámenos al
1-800-345-DELTA.
Después de hacer la instalación y el ajuste,
usted puede agregarle a la etiqueta de aviso
proporcionada, su nombre, el nombre de
lacompañía y la fecha cuando ajustó el Tope del
compañía y la fecha cuando ajustó el Tope del
T
E
F
L
O
N
68881 Rev. H 1 8/20/15 Rev. H
68881 Rev. H
Garantía Limitada De Por Vida de la Llave y su Acabado
Piezas y acabado
Todas las piezas (excepto las piezas electrónicas y las
pilas) y los acabados de esta llave de agua Delta®
están garantizados al consumidor comprador original de
estar libres de defectos en material y fabricación
durante el tiempo que el comprador original posea la
vivienda en la que la llave de agua fue originalmente
instalada o, para los consumidores comerciales, durante
5 años a partir de la fecha de compra.
Componentes electrónicos y pilas (si aplicable)
Todas las piezas (salvo las pilas), si hay, de esta llave
de agua Delta® están garantizadas al consumidor
comprador original de estar libres de defectos en
materiales y fabricación durante 5 años a partir de la
fecha de compra o, para los usuarios comerciales, por
un año a partir de la fecha de compra. No se garantizan
las pilas.
Delta Faucet Company reemplazará, SIN CARGO,
durante el período de garantía aplicable, cualquier pieza
o acabado que pruebe tener defectos de material y/o
fabricación bajo la instalación, uso y servicio normal. Si
la reparación o su reemplazo no es práctico, Delta
Faucet Company tiene la opción de reembolsarle su
dinero por la cantidad del precio de compra a cambio de
la devolución del producto. Estos son sus únicos
recursos.
Delta Faucet Company recomienda que use los
servicios de un plomero profesional para todas las
instalaciones y reparaciones.También le recomendamos
que utilice sólo las piezas de repuesto
originales de Delta®.
Delta Faucet Company no será responsable por
cualquier daño a la llave de agua que resulte del
mal uso, abuso, negligencia o mala instalación o
mantenimiento o reparación incorrecta, incluyendo
el no seguir los cuidados aplicables y las instrucciones
de limpieza.
Las piezas de repuesto se pueden obtener llamando al
número correspondiente más abajo, o
escribiendo a:
En los Estados Unidos y México:
Delta Faucet Company
Product Service
55 E. 111th Street
Indianapolis, IN 46280
1 800 345 DELTA (3358)
[email protected]
En Canadá:
Masco Canada Limited, Plumbing Group
Technical Service Centre
350 South Edgeware Road
St. Thomas, Ontario, Canada N5P 4L1
1 800 345 DELTA (3358)
[email protected]
La prueba de compra (recibo original) del comprador
original debe ser disponible a Delta Faucet Company para
todos los reclamos a menos que el comprador haya
registrado el producto con Delta Faucet Company. Esta
garantía le aplica sólo a las llaves de agua de Delta®
fabricadas después del 1 de enero 1995 e instaladas en los
Estados Unidos de América, Canadá y México.
DELTA FAUCET COMPANY NO SE HACE RESPONSABLE
POR CUALQUIER DAÑO ESPECIAL, INCIDENTAL
O CONSECUENTE (INCLUYENDO LOS GASTOS DE
MANO DE OBRA) POR EL INCUMPLIMIENTO DE
CUALQUIER GARANTÍA EXPRESA O IMPLÍCITA DE LA
LLAVE DE AGUA. Algunos estados/provincias no permiten la
exclusión o limitación de daños especiales, incidentales o
consecuentes, por lo que estas limitaciones y exclusiones
pueden no aplicarle a usted. Esta garantía le otorga
derechos legales. Usted también puede tener otros
derechos que varían de estado/provincia a estado/provincia.
Esta es la garantía exclusiva por escrito de Delta Faucet
Company y la garantía no es transferible.
Si usted tiene alguna pregunta o inquietud acerca de
nuestra garantía, por favor, vea nuestra sección de
preguntas frecuentes FAQ sobre la garantía en
www.deltafaucet.com, también puede enviarnos un correo
electrónico a [email protected] o llámenos
al número que le corresponda anteriormente incluido.
Garantia Limitada de Delta HDF
Todas las piezas de la llave Delta HDF están
garantizadas al dueño original de estar libres de
defectos en materiales y en la mano de obra por un
período de cinco (5) años. Esta garantía se hace al
dueño original y será efectiva el día de la compra como
se ve en el recibo de compra.
Delta reemplazará, LIBRE DE CARGO, durante el
período de la garantía, cualquier pieza que resulte
defectuosa en materiales y/o en la mano de obra bajo
instalación, uso y servicio normal. Las piezas de
repuesto pueden ser obtenidas de su comerciante o
distribuidor local que se encuentran en la guía telefónica
o si usted devuelve la pieza con el recibo de compra
a nuestra fabrica, Y LOS CARGOS DE TRANSPORTE
PAGADOS CON ANTELACION, a la dirección dada.
ESTA GARANTIA ES LA UNICA GARANTIA EXPRESA
DE DELTA. CUALQUIER RECLAMO HECHO BAJO
ESTA GARANTIA TIENE QUE SER HECHO DURANTE
EL PERIODO DE CINCO AÑOS A QUE SE REFIERE
ARRIBA. CUALQUIER GARANTIA IMPLICITA,
INCLUYENDO LA GARANTIA IMPLICITA DE
COMERCIALIZACION O CONVENIENCIA PARA UN
PROPOSITO PARTICULAR, SON LIMITADOS EN
DURACION A LA DURACION DE ESTA GARANTIA.
LOS CARGOS PARA LA MANO DE OBRA Y/O DAÑOS
INCURRIDOS EN LA INSTALACION, REPARACION O
REEMPLAZO, ASI COMO LOS DAÑOS INCIDENTALES
O CONSECUENTES CONECTADOS CON
ELLOS SON EXCLUIDOS Y NO SERAN PAGADOS
POR DELTA.
Algunos estados no permiten limitaciones al tiempo que
dura la garantía implícita, o la exclusión o limitación de
los daños incidentales o consecuentes, así que la
limitación o exclusión expresada arriba puede no ser
aplicable a usted.
Esta garantía le da a usted derechos legales específicos
y usted puede también tener otros derechos que varían
de estado a estado.
Esta garantía es nula por cualquier daño a esta llave
que sea el resultado del mal uso, abuso, negligencia,
accidente, instalación impropia, cualquier uso en
violación de las instrucciones suministradas por
nosotros o cualquier uso de piezas de repuesto que no
sean piezas genuinas Delta.
www.deltafaucet.com © 2015 Masco Corporación de Indiana
2

This manual suits for next models

57

Other Delta Plumbing Product manuals

Delta Dryden 2551 Series User manual

Delta

Delta Dryden 2551 Series User manual

Delta 24T26 Series User manual

Delta

Delta 24T26 Series User manual

Delta DEMD-301 User manual

Delta

Delta DEMD-301 User manual

Delta 505LF User manual

Delta

Delta 505LF User manual

Delta Lahara Series User manual

Delta

Delta Lahara Series User manual

Delta 51105 Series User manual

Delta

Delta 51105 Series User manual

Delta 142913 User manual

Delta

Delta 142913 User manual

Delta 14 Series User manual

Delta

Delta 14 Series User manual

Delta MultiChoice T17255-H2O User manual

Delta

Delta MultiChoice T17255-H2O User manual

Delta RP13938 User manual

Delta

Delta RP13938 User manual

Delta Casey 471LF Series User manual

Delta

Delta Casey 471LF Series User manual

Delta 500 Series User manual

Delta

Delta 500 Series User manual

Delta 2540 Series User manual

Delta

Delta 2540 Series User manual

Delta Vero Series User manual

Delta

Delta Vero Series User manual

Delta 2457 User manual

Delta

Delta 2457 User manual

Delta Tommy 691LF User manual

Delta

Delta Tommy 691LF User manual

Delta WATERFALL 172 User manual

Delta

Delta WATERFALL 172 User manual

Delta 74018 User manual

Delta

Delta 74018 User manual

Delta 2555 Series User manual

Delta

Delta 2555 Series User manual

Delta 51105 Series User manual

Delta

Delta 51105 Series User manual

Delta 2705 Series User manual

Delta

Delta 2705 Series User manual

Delta STEAMSCAPE 5CH-250T-PR User manual

Delta

Delta STEAMSCAPE 5CH-250T-PR User manual

Delta 40204 User manual

Delta

Delta 40204 User manual

Delta 2155-DST User manual

Delta

Delta 2155-DST User manual

Popular Plumbing Product manuals by other brands

Grohe LADYLUX 3 CAFE FOOT CONTROL 30 313 manual

Grohe

Grohe LADYLUX 3 CAFE FOOT CONTROL 30 313 manual

Fricosmos 061204 quick guide

Fricosmos

Fricosmos 061204 quick guide

Hans Grohe Fixfit Stop 27452000 Instructions for use

Hans Grohe

Hans Grohe Fixfit Stop 27452000 Instructions for use

ShowHouse Savvy S492 Series user manual

ShowHouse

ShowHouse Savvy S492 Series user manual

Oras HANSA VARIO 5786 0100 Installation and maintenance guide

Oras

Oras HANSA VARIO 5786 0100 Installation and maintenance guide

MRdirect 720 installation guide

MRdirect

MRdirect 720 installation guide

iComfort SAU1455-H user manual

iComfort

iComfort SAU1455-H user manual

KWC F5EV1017 Installation and operating instructions

KWC

KWC F5EV1017 Installation and operating instructions

Toto PLANO TX474SPN quick start guide

Toto

Toto PLANO TX474SPN quick start guide

Kohler K-11660 Homeowner's guide

Kohler

Kohler K-11660 Homeowner's guide

Moen Eva T6420 series Specifications

Moen

Moen Eva T6420 series Specifications

Spectrum Brands Pfister Kai GT529-IHC Quick installation guide

Spectrum Brands

Spectrum Brands Pfister Kai GT529-IHC Quick installation guide

Plumbline AP60 installation instructions

Plumbline

Plumbline AP60 installation instructions

DXV EQUILITY D12536-004 installation instructions

DXV

DXV EQUILITY D12536-004 installation instructions

Xylem McDonnell & Miller 64 Series instruction manual

Xylem

Xylem McDonnell & Miller 64 Series instruction manual

Swann Alcove BA-3060 installation instructions

Swann

Swann Alcove BA-3060 installation instructions

Spectrum Brands Pfister Park Avenue LG40-FE Quick installation guide

Spectrum Brands

Spectrum Brands Pfister Park Avenue LG40-FE Quick installation guide

Helvex E-50 installation guide

Helvex

Helvex E-50 installation guide

manuals.online logo
manuals.online logoBrands
  • About & Mission
  • Contact us
  • Privacy Policy
  • Terms and Conditions

Copyright 2025 Manuals.Online. All Rights Reserved.