DENAGO KM3209 LED User manual

CRUISER Monito/Display Manual made by King Meter (KM3209)
USERS GUIDE
KM3209 LED

Denago eBikes
3700 W Royal Lane #120
Irving, Texas 75063
www,denago.com
2

Denago eBikes
3700 W Royal Lane #120
Irving, Texas 75063
www,denago.com
I
Content
Preface.....................................................................................................................1
1.Appearance and Size............................................................................................2
1.1 Material and Color........................................................................................2
2.Function Summary and Button Definition..............................................................3
2.1 Function Summary.......................................................................................3
2.2 Normal Display Area ....................................................................................4
2.3 Button Definition...........................................................................................4
3. Operation Cautions ..............................................................................................5
4. Installation Instruction ..........................................................................................5
5. User Setting .........................................................................................................6
5.1 Power On/Off ...............................................................................................6
5.2 Display Interface ..........................................................................................6
5.3 Speed/Trip/ODO ..........................................................................................7
5.3.1 Trip Clearance ....................................................................................7
5.4 Walk Assist ..................................................................................................8
5.5 Turn On Headlight........................................................................................9
5.6 PAS Level Setting ......................................................................................10
5.7 Battery Indicator.........................................................................................11
6. Error Code..........................................................................................................12
7. USB Charging Function......................................................................................13

Denago eBikes
3700 W Royal Lane #120
Irving, Texas 75063
www,denago.com
II
8. Preparation before Power On.............................................................................13
9. General Settings ................................................................................................13
9.1 Speed Limit Setting....................................................................................14
9.2 Wheel Size Setting.....................................................................................15
10.FAQ Answers ....................................................................................................16
11.Quality Warranty And Coverage ........................................................................16
12.Version ..............................................................................................................17
Appendix1: Error Code List ....................................................................................17

Denago eBikes
3700 W Royal Lane #120
Irving, Texas 75063
www,denago.com
1
Preface
Dear users,
To ensure better performance of your e-bike, please read through the
KM3209 product introduction carefully before using it. We will use the brief words
to inform you of all the details (including hardware installation, setting and normal
use of the display) when using our display. Meanwhile, the introduction will also
help you solve possible confusion and barriers.

Denago eBikes
3700 W Royal Lane #120
Irving, Texas 75063
www,denago.com
2
1.Appearance and Size
1.1 Material and Color
KM3209 uses PC materials. Under the temperature of -20℃to 60℃, the
housing material can ensure normal use and good mechanical performance of the
product.
Display Size and Installation Size (Unit: mm)

Denago eBikes
3700 W Royal Lane #120
Irving, Texas 75063
www,denago.com
3
2.Function Summary and Button Definition
2.1 Function Summary
KM3209 offers plenty of functions and showing to meet your requirements.
The indicated contents are as following:
◆Battery indication
◆Real time speed
◆Trip distance and ODO
◆PAS level
◆Headlight
◆Error code
◆Parameter setting
◆USB charging function(only when the display is with USB port)


Denago eBikes
3700 W Royal Lane #120
Irving, Texas 75063
www,denago.com
5
3. Operation Cautions
Avoid collision.
Pay attention to safety use, do not connect or disconnect the display
when power is on.
The housing of display is made of waterproof technology, please do not
disassemble it, so as not to affect the waterproof performance.
Please do not modify system parameters to avoid parameter disorder.
Make the display repaired immediately when not working properly.
4. Installation Instruction
Fix the display on the handlebar, adjust the angel. Plug the two connectors
from display and controller when off power supply.

Denago eBikes
3700 W Royal Lane #120
Irving, Texas 75063
www,denago.com
6
5. User Setting
5.1 Power On/Off
Hold MODE button to start the display and supply power to the controller.
When at working state, press and hold MODE to shut off E-bike power. In the off
state, the display no longer uses the battery's power supply; leakage current is
less than 1uA.
If you do not use the E-bike for more than 10 minutes, the display will turn
off automatically.
5.2 Display Interface
Denago eBikes
3700 W Royal Lane #120
Irving, Texas 75063
www,denago.com
7
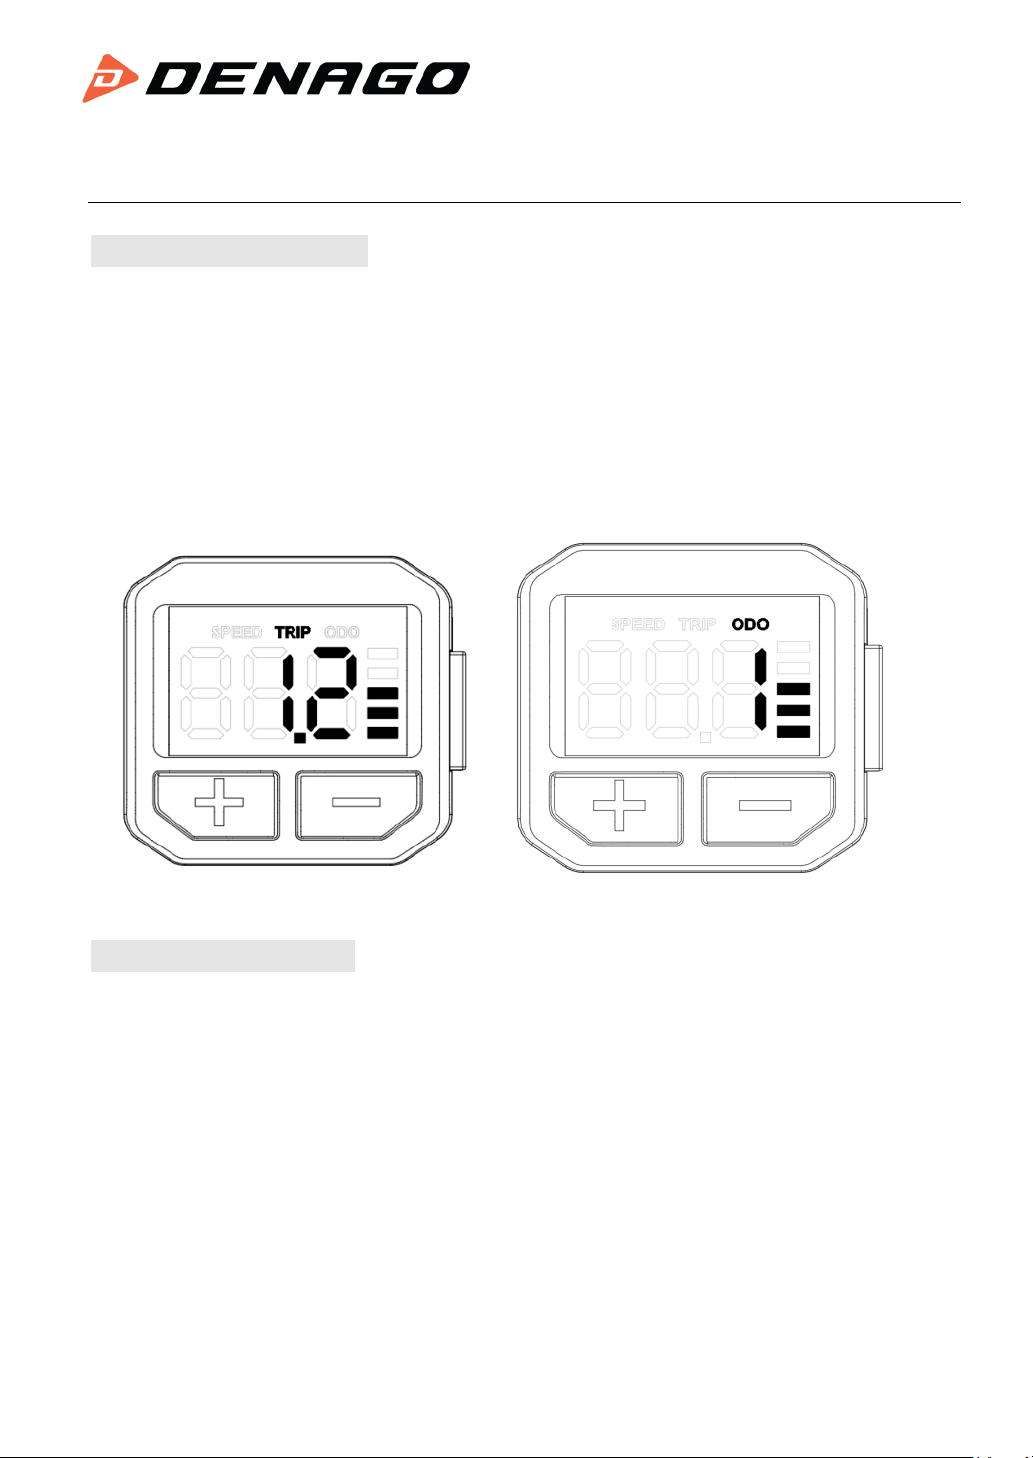
5.3 Speed/Trip/ODO
After turning on display, it shows real time speed.Press MODE to choose the
display information.
Displayed in sequence: real-time speed (SPEED) →single mileage (TRP) →
accumulated mileage (ODO).
5.3.1 Trip Clearance
There are two ways of Trip clearance: automatic clearance and manual
clearance. When the display is automatic clearance, the Trip info. of display will
return to zero after shutting down and restarting. When manual clearance, hold
the MODE and DOWN buttons on the Trip interface for 2 seconds, and the
indicator Trip data returns to zero.

Denago eBikes
3700 W Royal Lane #120
Irving, Texas 75063
www,denago.com
8
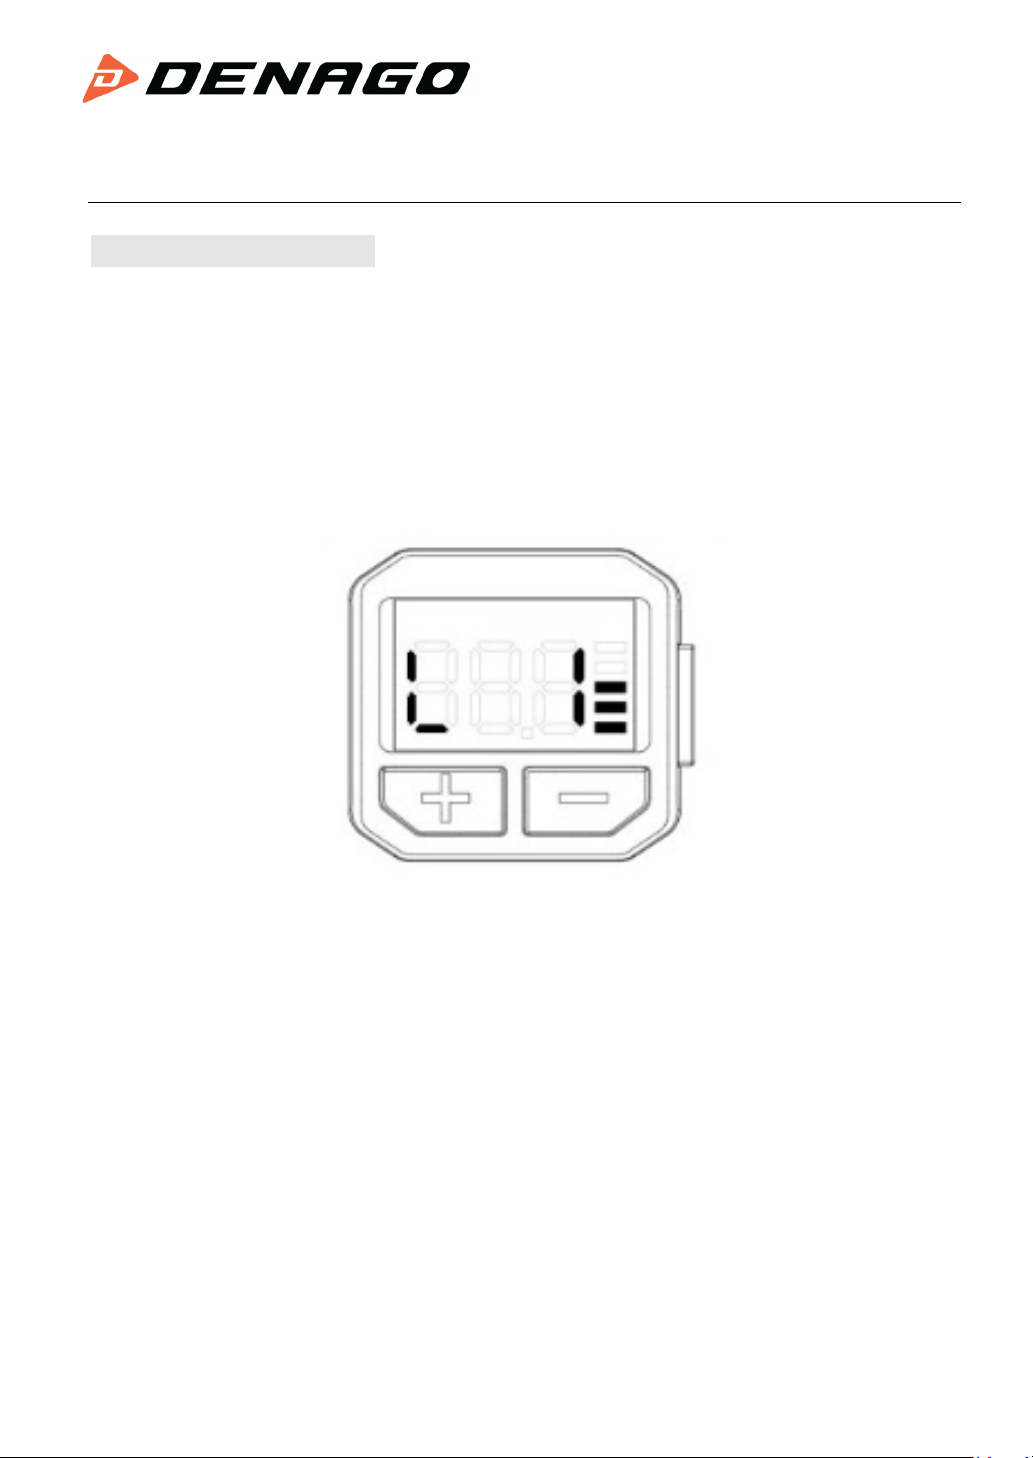
5.4 Walk Assist
Hold DOWN for 3 seconds to start walk assist status. The bike will keep at an
even speed output 6km/h,the screen shows PUS.
The walk assist function can only be used when the user pushes the electric
vehicle, please do not use it in the riding state.

Denago eBikes
3700 W Royal Lane #120
Irving, Texas 75063
www,denago.com
9
5.5 Turn On Headlight
When the external light is insufficient, the headlight can be turned on.
Hold UP for 3 seconds, the display notifies the controller to turn on headlight.
Hold UP again for 3 seconds to turn off the headlight.
Denago eBikes
3700 W Royal Lane #120
Irving, Texas 75063
www,denago.com
10
5.6 PAS Level Setting
Press UP or DOWN to adjust the PAS levels and change output power of the
motor. The default level range is 0-5, level 1 is the lowest power, level 5 is the
highest power, and default level when the display is turned on is 1.
Denago eBikes
3700 W Royal Lane #120
Irving, Texas 75063
www,denago.com
11
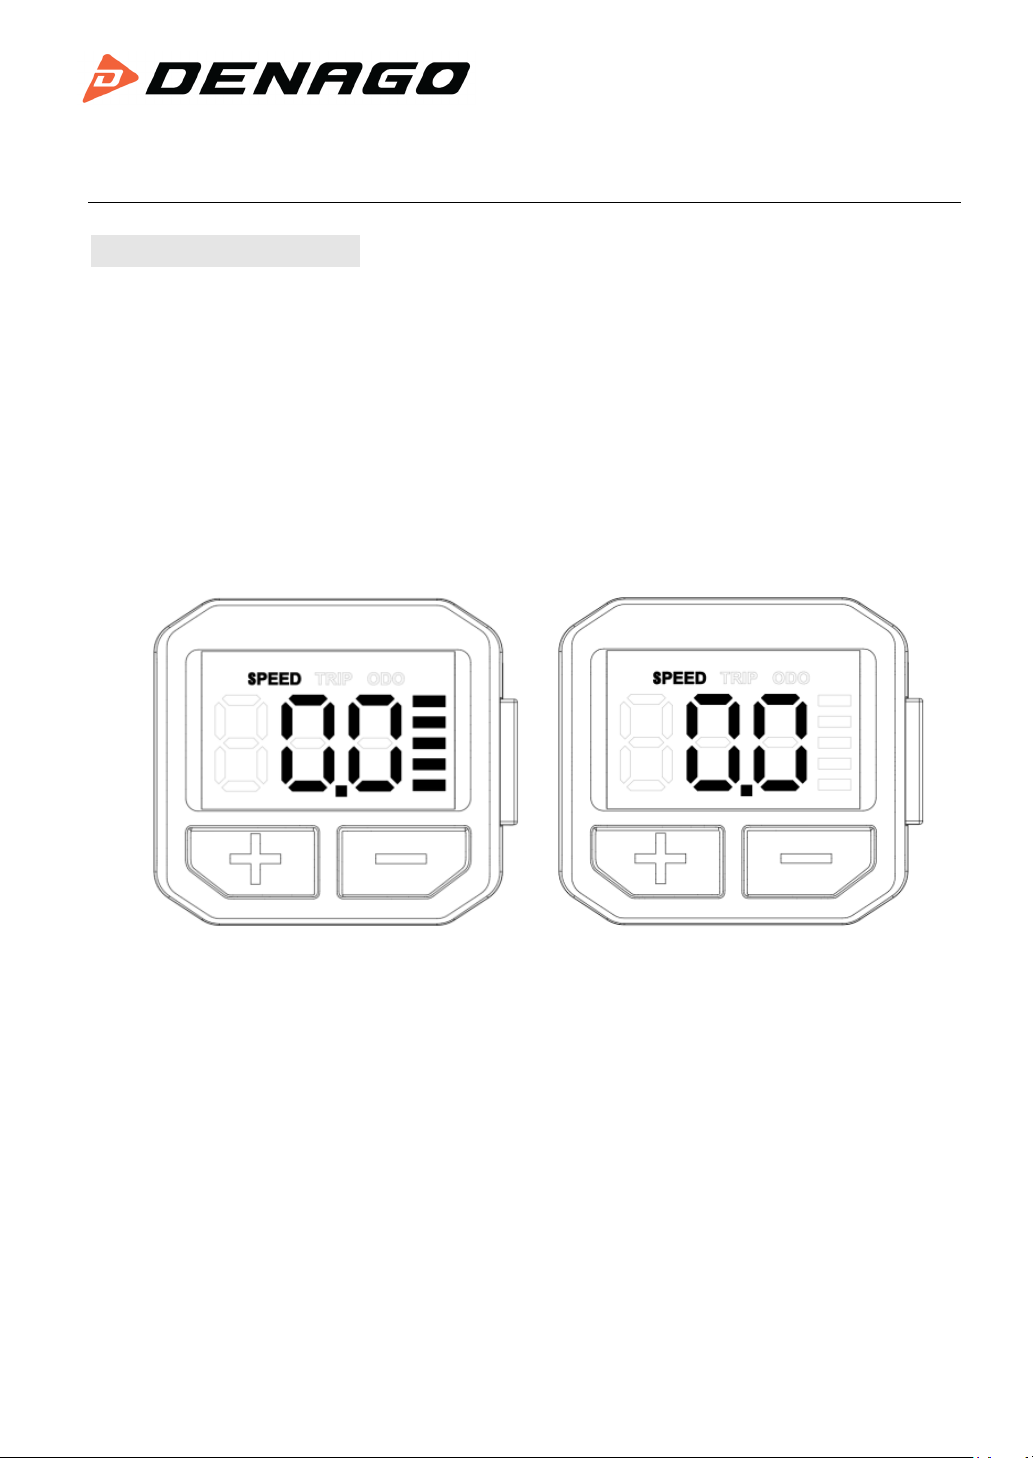
5.7 Battery Indicator
When the battery voltage is high, the five-segment LCD is on. When the
battery is low voltage, the last indicator flashes, indicating that the battery needs to
be charged immediately.
Battery full power Battery under voltage

Denago eBikes
3700 W Royal Lane #120
Irving, Texas 75063
www,denago.com
12
6. Error Code
When the electric vehicle electronic control system fails, the display will
automatically display an error code. For the definition of the detailed error code,
see Appendix 1.
The error display interface can only be exited when the fault is eliminated, and the
electric vehicle cannot continue to drive after a fault occurs.

Denago eBikes
3700 W Royal Lane #120
Irving, Texas 75063
www,denago.com
13
7. USB Charging Function
The display with USB interface provides charging power for the mobile phone,
output 5VDC/500mA. When the display is turned off, please connect the data
cable between the display and the phone, and then turn on the display to start to
charge the phone. If the display is turned off at this time, the USB interface can still
provide charging to the phone. In any state, disconnect the power supply of the
phone, charging will automatically terminate.
When the display is powered on, hold MODE, DOWN and UP simultaneously
for 2 seconds to start the USB charging function, and the display will charge the
mobile phone.
8. Preparation before Power On
Ensure that the connectors are firmly connected, and turn on the power of the
electric vehicle.
9. General Settings
Hold MODE to power-on the display, in the power-on state, hold UP and
DOWN at the same time for 2 seconds, the display enters the setting state.

Denago eBikes
3700 W Royal Lane #120
Irving, Texas 75063
www,denago.com
14
9.1 Speed Limit Setting
The default maximum riding speed is 25Km/h. Change this value to set the
maximum riding speed of the e-bike. When the electric motor exceeds the set
value, the controller will stop supplying power to the motor to protect the rider's
safety.
The maximum speed setting can be selected from 12Km/h to 40Km/h. It can
be set by UP/DOWN. After the modification is completed, hold MODE button to
save the confirmation and exit the setting.

Denago eBikes
3700 W Royal Lane #120
Irving, Texas 75063
www,denago.com
15
9.2 Wheel Size Setting
Available values are: 16inch, 18 inch, 20 inch, 22 inch, 24 inch, 26 inch, 700C,
28 inch. Use UP/DOWN to select the wheel size corresponding to the e-bike to
ensure the accuracy of the speed display and mileage display. Press MODE to
confirm and enter the speed limit setting interface.

Denago eBikes
3700 W Royal Lane #120
Irving, Texas 75063
www,denago.com
16
10.FAQ Answers
Q: Why can’t turn on the display?
A: Check if the battery power is turned on, the outer leakage cable is broken or
not.
Q: What should I do if the display shows an error code?
A: Timely repair at the e-bike repair shop.
11.Quality Warranty and Coverage
I. Warranty:
1. In the case of normal use, due to the quality problems caused by the product
itself, the company will be responsible for the warranty during the warranty period.
2. The warranty: 24 months since the display out of the factory.
II. The following conditions are not covered by the warranty:
1. The casing is opened
2. Connector is broken
3.The display leaves the factory, the casing is scratched or the casing is damaged.
4. Scratch or break of the display lead wire
5. Failure or damage caused by force majeure (such as fire, earthquake, etc.) or
natural disasters (such as lightning strikes)
6. Product is out of warranty.
Table of contents
Other DENAGO Bicycle Accessories manuals


Popular Bicycle Accessories manuals by other brands


Shimano
Shimano Ultegra FD-6703 Technical Service Instructions

Basil
Basil Universal Bridge System manual

Shimano
Shimano Alfine CJ-8S20 Service instructions

Shimano
Shimano METREA SL-U5000 Dealer's manual

Iget
Iget CYCLO ACAD70 quick start guide

Burley
Burley Nomad Cargo Rack Owner's instruction & safety manual