Preparing The Denali Cooler:!
Bottleless,com. xowater.com
© 2018 XO Water, LLC. All rights reserved.
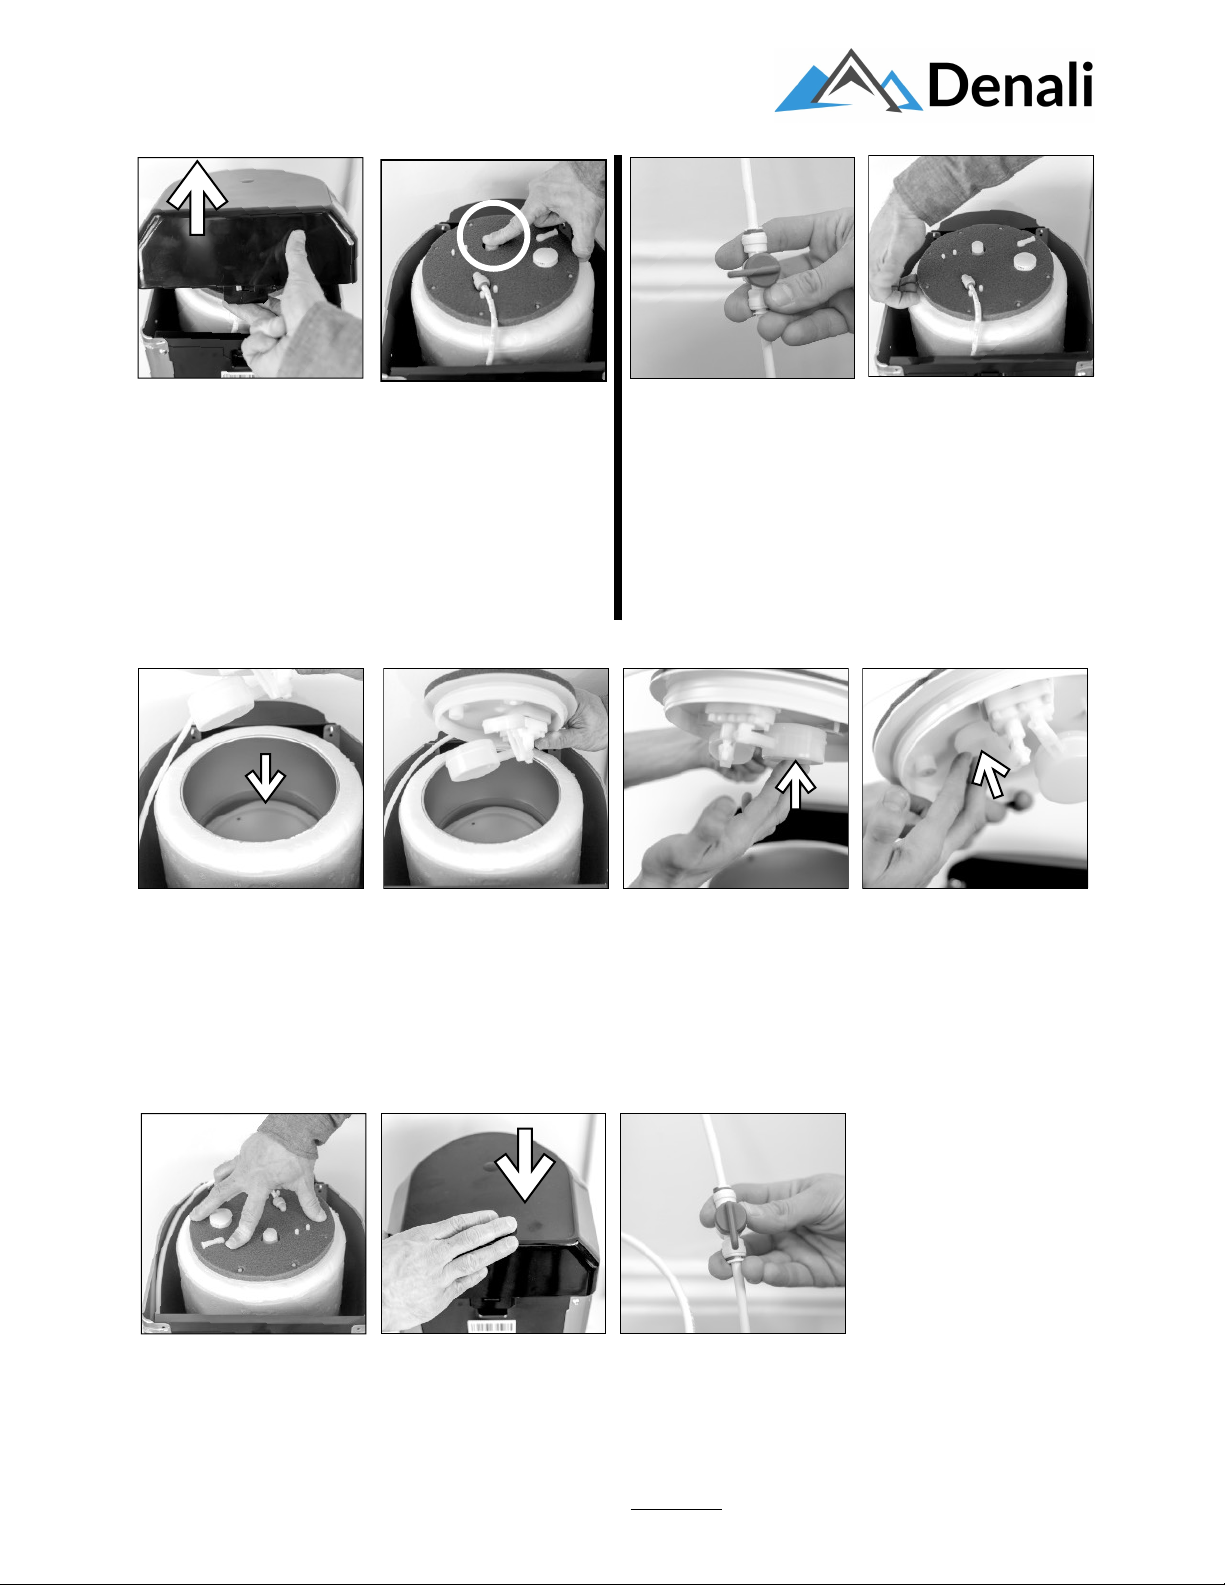
Pull out on tab on
the back of the lid
You need to rotate cooler
around so you can access
the back. Then pull on the
back of the lid so that the
tab is released.
Remove plug
The electrical plug is located
under the lid.
6’ feet from outlet
The Denali power cord is 6
feet long - so it’s best to
locate within 6 feet of
electrical outlet. You just
need a standard 3-prong
electrical outlet for the
Denali cooler.
Check baffle
Inside the stainless steel
reservoir, you’ll find a baffle.
Occasionally, this can come
loose in transport. If loose,
it can rise up and trip the
floats. If dislodged, push it
into the center hole in the
bottom of reservoir.
Remove float kit lid
You need to remove the
float kit lid so that you can
check everything
underneath & inside
reservoir. Just grab the tab
on side & lift up
Remove external lid
and set aside
Remove the lid on the Denali
cooler to expose the top of
the Float Kit (it is gray and
covers the reservoir).
Check the floats
See the 2 air-filled “floats” - a
main “float” (larger) that
shuts offthe water flow
when reservoir is full - and a
smaller backup float that
shuts offwater if the first
float were to not activate.
Test secondary
float
Now, press up on the
Secondary Float to make
sure that it moves up and
down.
Test main float
With clean hands (or with a
clean utensil), press up on
the Main Float to make sure
that it moves up and down. If
it doesn’t move or if it’s not
attached, just click it into
place.
Press down on float
kit lid to replace
Press down on float kit lid
to replace it. Make sure it’s
pressed all the way down to
seal the reservoir.
Tools You’ll Need
You will need a bucket or a
trashcan, a Phillips-head
screwdriver and a pair of
scissors to complete the set
up of your Denali cooler.
Press reset button
If the backup float is tripped,
it shuts offall water to the
cooler as a safety precaution.
(Can happen in transport - or
if cooler gets bumped after it
is installed). In the future, if
water does not dispense,
pushing the reset button
usually fixes the issue.