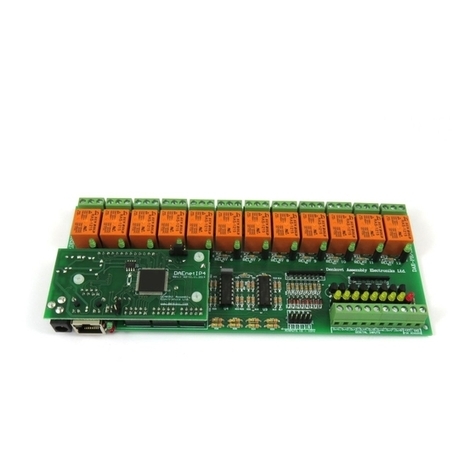
Denkovi smartDEN IP-16R-MT User manual

smartDEN IP-16R-MT User Manual
7 July 2020
-1-
smartDEN IP-16R-MT
Web enabled 16 Relay Module with Modbus TCP
User Manual
Date: 7 July 2020
For firmware version: v1.21 / July 2020

smartDEN IP-16R-MT User Manual
7 July 2020
-2-
Content
1. Features............................................................................................................. 3
2. Application examples ......................................................................................... 4
3. Technical parameters......................................................................................... 5
4. Connectors, ports and led indicators.................................................................. 6
5. Installation.......................................................................................................... 7
6. Default Settings................................................................................................ 14
7. Web access...................................................................................................... 16
8. HTTP/XML/JSON access................................................................................. 32
9. Modbus TCP .................................................................................................... 38
10. Security considerations................................................................................ 50
11. PCB mechanical drawing............................................................................. 51
12. DIN Rail BOX dimensions............................................................................ 52

smartDEN IP-16R-MT User Manual
7 July 2020
-3-
1. Features
smartDEN IP-16R-MT is a LAN relay module with 16 SPDT relays for remote
control with integrated web server for set-up, Modbus-TCP protocol and http/xml/json
support for embedding in other systems. The built-in real time clock allows organizing
schedule stand-alone work without connection to computer. The module is able to act
like network watch-dog in order to monitor and reboot network equipment
automatically.
10 Mb Ethernet interface with Link/Activity Led;
Auto-MDIX;
16 SPDT relays (with NO and NC contacts);
Led for each relay;
Pulse function (timer) for every relay;
Built-in hardware Real Time Clock (RTC) for schedule (calendar) stand-alone
work;
Weekly schedule table with up to 30 events;
Web server with secure login authorization;
Modbus-TCP protocol;
Secure HTTP/XML/JSON API protocols support for read/write relays status;
Supported protocols: ARP, IP, ICMP (ping), DHCP, DNS;
Watch-Dog Auto-Reboot ICMP (outgoing) function;
Access protection (by IP and MAC address);
Option for relays states saving and loading on reset.

smartDEN IP-16R-MT User Manual
7 July 2020
-4-
2. Application examples
Remote control of electrical appliances
Industrial automation
Home automation
Watchdog monitoring of network equipment and auto-reboot

smartDEN IP-16R-MT User Manual
7 July 2020
-5-
3. Technical parameters Table 1. Technical parameters
Parameter
Value
Box size, mm
210 x 85 x 58
PCB size, mm
203 x 82
Box weight, g
420
PCB weight, g
285
Power supply voltage,VDC
12 or 24 (depends on the model) ±2
Maximum current consumption at 12VDC
(when all relays are ON), mA
600
Maximum current consumption at 24VDC
(when all relays are ON), mA
400
Operating temperature, °C
0 to 70
Relays maximum switchable current /
voltage
10A / 250VAC, 15A / 120VAC, 10A /
28VDC

smartDEN IP-16R-MT User Manual
7 July 2020
-6-
4. Connectors, ports and led indicators
Bellow is shown a picture with the device connectors, ports and led indicators.
Figure 1. Device overview

smartDEN IP-16R-MT User Manual
7 July 2020
-7-
5. Installation
This device must be installed by qualified personnel;
This device must not be installed directly outdoors;
Installation consists of mounting the device, connecting to an IP network,
connecting the relays, providing power and configuring via a web browser.
5.1. Box mounting
Figure 2. Mounting the device to DIN rail
smartDEN IP-16R-MT can be mounted to a standard (35mm by 7.55mm) DIN rail.
Attach the module to the DIN rail by hooking the hook on the back of the enclosure to
the DIN rail and then snap the bottom hook into place.

smartDEN IP-16R-MT User Manual
7 July 2020
-8-
5.2. Power supply
Figure 3. smartDEN IP-16R-MT power supply
Depending on the selected model during purchase the power supply source for
smartDEN IP-16R-MT must be with voltage either 12VDC or 24VDC stabilized and
filtered. After power on, the power led must be on and Led1 indicator must start
blinking in 5 seconds which means the controller is running normally.
Figure 4. Connecting a LAN cable
Please keep the polarity and supply voltage range!
smartDEN IP-16R-MT does not accept AC supply voltage. It is highly
recommended to check the power supply source parameters before supply
the module.
The power supply equipment shall be resistant to short circuit and
overload in secondary circuit.
When in use, do not place the equipment so that it is difficult to disconnect
the device from the power supply.

smartDEN IP-16R-MT User Manual
7 July 2020
-9-
5.3. Relay connection
Figure 5. Connecting a lamp to relay
smartDEN IP-16R-MT has 16 SPDT relays with parameters specified in the
technical parameters section. Every relay channel has normally open (NO) and
normally closed (NC) contacts connected directly to the terminals.
If you are connecting inductive loads to the relays an extra measures must
be taken in order to ensure the proper work of the device. For more
information please refer to this link:
http://denkovi.com/controlling-inductive-devices

smartDEN IP-16R-MT User Manual
7 July 2020
-10-
5.4. Network connection
smartDEN IP-16R-MT supports AUTO-MDIX so either "crossover" or "straight-
through" network cable can be used.
Figure 6. Connecting smartDEN IP-16R-MT to a computer directly. This is the
recommend initial connection.
Figure 7. Connecting smartDEN IP-16R-MT to a wireless router.

smartDEN IP-16R-MT User Manual
7 July 2020
-11-
5.5. Communication setup
smartDEN IP-16R-MT is shipped with the following default parameters:
IP address: 192.168.1.100
Subnet mask: 255.255.255.0
Gateway: 192.168.1.1
Web password: admin
Initially it is recommended to connect the module directly to the computer.
Next you have to change your PC‟s IP address.
You can google how to change you computer IP settings or just visit this
web page: http://www.howtochangeipaddress.com/changeip.php
For Windows 7 OS for example you can do that in the following way:
Navigate to Control Panel -> Network and Internet -> View network and status
tasks -> Change adapter settings
Then just select the local area connection with right click and select Properties:
Figure 8. LAN card properties

smartDEN IP-16R-MT User Manual
7 July 2020
-12-
The next step is to enter into IPv4 properties.
Figure 9. Enter in IPv4 properties section
Set the IP address of your PC to be in the same network.
Figure 10. Set the IP address

smartDEN IP-16R-MT User Manual
7 July 2020
-13-
Finally, in order to access smartDEN IP-16R-MT just type in your browser
192.168.1.100
Figure 11. Open the device via browser
If the network settings are O‟K, the log-in page should appear:
Figure 12. Login page
smartDEN IP-16R-MT modules connected locally can be easily scanned
and found via the tool Denkovi Finder as well.
Figure 13. Denkovi Finder

smartDEN IP-16R-MT User Manual
7 July 2020
-14-
6. Default Settings
6.1. Table with default settings
The smartDEN IP-16R-MT module is shipped with default (factory) settings shown in
Table 2. The default settings can be reloaded, if necessary (see point 6.2).
Table 2. Default settings
Settings group
Parameter
(according Web pages)
Value
General Settings
Device Name
SMARTDEN-IP-16R
Save Outputs
No
Password
admin
Network Settings
DHCP
Disabled
IP Address
192.168.1.100
Gateway
192.168.1.1
Subnet Mask
255.255.255.0
Primary DNS
192.168.1.1
Secondary DNS
0.0.0.0
HTTP/XML/JSON
Access
HTTP Port
80
Access IP Address
192.168.1.0
Access Mask
0.0.0.0
Access MAC Address
00:00:00:00:00:00
Session Timeout, min
3
Enable Access
Yes
Encrypt Password
No
Multiple Access
Yes
Modbus-TCP
Enable Modbus-TCP
Yes
Modbus-TCP Port
502
Idle Timeout, min
5

smartDEN IP-16R-MT User Manual
7 July 2020
-15-
6.2. Steps for loading default settings
When necessary, the factory (default settings) may be applied so the module
parameters will be returned back as those in point 6.1 from the current document.
Figure 14. Loading the default settings
1. Turn off the power supply of the device;
2. Press and hold the default button;
3. Turn on the power supply of the device;
4. Wait for until both led indicators (led1 and led2) become ON (approximately 10
sec);
5. Release the default button;
6. The module is configured with default settings.

smartDEN IP-16R-MT User Manual
7 July 2020
-16-
7. Web access
Figure 15. Web access
To access the setup pages, run a web browser (Internet Explorer, Mozilla Firefox or
similar), and enter the smartDEN IP-16R-MT IP address, for example:
http://192.168.1.100
Figure 16. Open via browser
Note: You will need to have JavaScript enabled in your browser.

smartDEN IP-16R-MT User Manual
7 July 2020
-17-
7.1. Login
Figure 17. Login page
Enter the password and click "Login" button. This will bring you to the smartDEN IP-
16R-MT main configuration page which contains details for the current firmware
version and build date and provides buttons and links to obtain further details.
Note: The default password is admin (passwords are case sensitive).
Note: When the password is entered, it is transmitted across the network in
encrypted form, so eavesdropping on the data transmission will not reveal the
password.
Note: In order to prevent setup/control conflicts, at any given moment, only one user
can be logged in.
Note: If there is no data traffic between the Web-browser and the smartDEN IP-16R-
MT for time, specified by Session Timeout parameter, the session "times out" and a
new login is required.

smartDEN IP-16R-MT User Manual
7 July 2020
-18-
7.2. Menu
The main menu consists of the following items, located in the left window frame:
Figure 18. Navigation menu
7.3. General Settings
Figure 19. General settings
Device Name: The name of the module (max 15 symbols). Every module can
have different name in your network so they can be distinguished;

smartDEN IP-16R-MT User Manual
7 July 2020
-19-
Save Outputs: When checked, each time the relays state is changed, it will
be saved in non-volatile memory (EEPROM), so after reboot/restart it will be
restored;
This option should be used with care in dynamic systems because of
restriction in maximum write cycles of the EEPROM (usually 100 000
write/erase cycles).
Password: The password used for logging into the web admin and XML
operation (max. 10 chars);
When typed. the password in this screen is not hidden. Only in this case,
when the password is being changed, it is transmitted across the network
"in the open". Therefore, set passwords in a secure environment where
you can make sure that no one is "eavesdropping". Subsequent
transmissions of the password to "login" onto the device are encrypted and
"safe".
Save button: Once you have changed the settings as required, click this
button.
7.4. Network settings
Figure 20. Network settings
This menu lets you configure the network settings of smartDEN IP-16R-MT relay
module:

smartDEN IP-16R-MT User Manual
7 July 2020
-20-
Enable DHCP: This option allows DHCP to be enabled or disabled. If DHCP
is set to Enabled, the Network page must be saved and smartDEN IP-16R-
MT must be rebooted before obtaining an IP address;
IP address: This is the IP address of the smartDEN IP-16R-MT. It needs to
be manually assigned only if DHCP is disabled. With DHCP enabled, this field
displays the currently assigned address;
Gateway: This specifies the IP address of the gateway router. It is used for
accessing public time servers for automatic time synchronization;
Subnet Mask: This is the subnet mask for the network on which the
smartDEN IP-16R-MT is installed;
Primary DNS: Primary DNS (Domain Name Service) address;
Secondary DNS: Secondary DNS address;
Save button: Once you have changed the settings as required, click this
button.
You have to reboot the device for these settings to apply.
Table of contents
Other Denkovi Control Unit manuals
Popular Control Unit manuals by other brands
Metso
Metso Mapag BAR Series Installation maintenance and operating instructions
Infineon
Infineon Cypress CYBLE-212020-01 manual

Kallista
Kallista P23083-CR installation instructions
IMTH.de
IMTH.de SST1 Installation guide and user's manual

Genius
Genius JA592 Use and Installation Instructions

Dualsky
Dualsky VR Pro Duo instruction manual

Vestamatic
Vestamatic MC BS4 Installation and operating instructions
Spectrum Controls
Spectrum Controls 1762sc-IF4OF4 user manual
EMG
EMG F-MF SET Installation information
IFM Electronic
IFM Electronic DN0301 instruction manual
Firmtech
Firmtech FBL770BC quick guide
Raychem
Raychem TraceTek TTDM-2 Operation and maintenance manual
