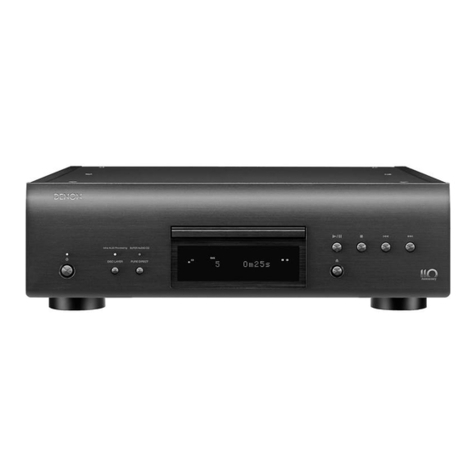
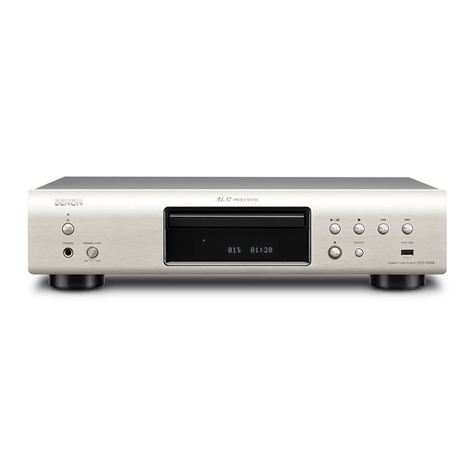
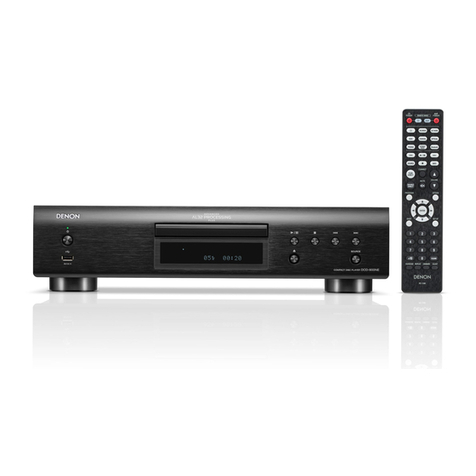
Denon DCD-1520AE User manual

Appendix
TipsSettingsPlaybackConnections
Contents
Front panel Display Rear panel IndexRemote
DCD-1520AE
SUPER AUDIO CD PLAYER
Owner’s Manual
You can print more than one page of a PDF onto a single sheet of paper.

2
Appendix
TipsSettingsPlaybackConnections
Front panel Display Rear panel IndexRemote
Contents
Accessories························································································ 4
Inserting the batteries ······································································ 5
Operating range of the remote control unit ····································· 5
Features······························································································ 6
High quality sound············································································ 6
High performance ············································································ 7
Part names and functions
Front panel ························································································ 8
Display ······························································································ 10
Rear panel························································································ 11
Remote control unit······································································ 12
CD player operation········································································ 12
Amplifier and Tuner operations ······················································ 15
Network audio player operation ····················································· 16
Connections
Connecting an amplifier ······························································ 18
Connecting a device equipped with digital audio input
connectors ························································································ 19
Connecting a device equipped with digital audio output
connectors······················································································· 20
Connecting a PC or Mac ······························································ 21
Connecting an iPod or USB memory device
to the USB port·············································································· 22
Connecting the timer device······················································ 24
Connecting the power cord························································ 25
Contents
Playback
Basic operation ·············································································· 27
Turning the power on····································································· 27
Select the playback media mode ··················································· 28
Switching the display’s brightness················································· 28
Switching the Pure Direct mode ···················································· 28
Setting the top priority playback layer for Super Audio CDs ·········· 29
Playing CDs/Super Audio CDs··················································· 30
Playing CDs and Super Audio CDs················································· 30
Playing tracks in a specific order (Program playback)····················· 32
Playing DATA CDs········································································· 33
Playing files ···················································································· 34
Playing an iPod··············································································· 36
Listening to music on an iPod ························································ 37
Setting operation mode
(Browse iPod mode)······································································· 38
Playing a USB memory device ················································· 39
Playing files stored on USB memory device ·································· 40
Using as a D/A converter···························································· 42
Connecting and playing back from a computer (USB-DAC) ··········· 43
Connect and playback from a digital device (Coaxial/Optical) ········ 49
Using the timer play function···················································· 50
Using the timer play function ························································· 50
3
Appendix
TipsSettingsPlaybackConnections
Front panel Display Rear panel IndexRemote
Contents
Settings
Setting the Auto Standby mode··············································· 51
Turning Auto Standby mode o ····················································· 51
Turning Auto Standby mode on ····················································· 51
Tips
Contents··························································································· 52
Tips································································································· 53
Troubleshooting ············································································· 54
Appendix
Playable media ················································································· 58
Discs ······························································································ 58
DATA CD························································································ 59
USB memory device ······································································ 59
Playback order of MP3/WMA/AAC/WAV files································ 61
D/A converter ················································································· 61
About Discs and Files····································································· 62
Cautions on using media································································ 63
Inserting a disc ··············································································· 63
How to handle media ···································································· 64
Cleaning discs ················································································ 64
Explanation of terms ······································································· 65
Specifications ··················································································· 67
Index ·································································································· 68

4
Appendix
TipsSettingsPlaybackConnections
Contents
Front panel Display Rear panel IndexRemote
Accessories
Check that the following parts are supplied with the product.
qGetting Started wCD-ROM (Owner’s Manual) eSafety Instructions rPower cord
tRemote control unit (RC-1186) yR03/AAA batteries uAudio cable
Thank you for purchasing this Denon product. To ensure proper operation, please read this owner’s manual carefully before using the product.
After reading them, be sure to keep them for future reference.

5
Appendix
TipsSettingsPlaybackConnections
Contents
Front panel Display Rear panel IndexRemote
Inserting the batteries
qRemove the rear lid in the
direction of the arrow and remove
it.
wLoad the two batteries properly as
indicated by the qand wmarks in
the battery compartment.
R03/AAA
batteries
ePut the rear cover back on.
NOTE
•When inserting the batteries, be sure to do so in the proper direction, following the
qand wmarks in the battery compartment.
•To prevent damage or leakage of battery fluid:
•Do not use a new battery together with an old one.
•Do not use two dierent types of batteries.
•Remove the batteries from the remote control unit if it will not be in use for long
periods.
•If the battery fluid should leak, carefully wipe the fluid o the inside of the battery
compartment and insert new batteries.
Operating range of the remote control
unit
Point the remote control unit at the remote sensor when operating it.
SUPERAUDIO CD PLAYER DCD-1520AE
MIN MAX
30°30°
Approx. 7 m

6
Appendix
TipsSettingsPlaybackConnections
Contents
Front panel Display Rear panel IndexRemote
High quality sound
•Advanced AL32 Processing and High-precision 32 bit D/A Converter
Equipped with Advanced AL32 Processing, Denon’s own analog
waveform reproduction technology.
The reproducibility of weak signals is enhanced by expanding 16 bit
digital data to 32 bit.
Also equipped with a high-performance, 32 bit/192 kHz-compatible D/A
Converter for analog signal conversion of the digital data expanded with
Advanced AL32 Processing.
•Advanced S.V.H. Mechanism & Direct Mechanical Ground
Construction
In the newly developed Advanced S.V.H. Mechanism, each individual
part, including the disc tray made of Xylon with 2 metal damper plates, is
composed of dierent metallic materials each designed for their specific
purpose. This produces outstanding vibration-damping properties,
including damping enhancement and diusion of the resonance point
due to the high mass. The mechanism is designed with a low center of
gravity, reducing vibration from the inner area during disc rotation, and its
structure is also highly resistant to external vibration.
It also employs Direct Mechanical Ground Construction, which completely
eliminates the impact of internal and external vibration, for example by
locating the power transformer close to the foot. This prevents the
transmission of unwanted vibration as well as noise outflow.
Features

7
Appendix
TipsSettingsPlaybackConnections
Contents
Front panel Display Rear panel IndexRemote
High performance
•Equipped with a USB-DAC function to support DSD file playback
This unit is equipped with a USB-DAC function that supports DSD
signals and 192 kHz/24 bit PCM signals. You can enjoy high-quality audio
playback from the D/A converter built in to this unit by inputting PCM
signal or DSD signal music files into this unit from a computer via USB
connection.
•Install the dedicated driver software onto the computer before use
(“Installing the driver software” (vpage43).
•You can use whichever commercially available or downloadable player
software you like to playback files on your computer.
•Can be used as a D/A convertor
Digital audio signals input from an external device or computer into this
unit can be converted and output as analog signals using this unit’s D/A
converter.
•Plays USB memory devices (MP3/WMA/AAC/WAV) and iPod®/
iPhone®
This unit can playback music stored on an USB memory device or iPod ∕
iPhone.
•Reduced power consumption during standby
In consideration of the environment, power consumption during standby
has been reduced to 0.1 Watts or better.
•Supports MP3 and WMA file playback (vpage33)
MP3 and WMA files that have been recorded onto CD-R or CD-RW discs
can be played back on this CD player.

8
Appendix
TipsSettingsPlaybackConnections
Contents
Front panel Display Rear panel IndexRemote
Part names and functions
Front panel
SUPER AUDIO CD PLAYER DCD-1520AE
MIN MAX
SOURCE
PURE DIRECTDISC LAYER
PHONES LEVELPHONES
Q2Q3Q4Q5Q6
we r t y iu o Q0 Q1q

9
Appendix
TipsSettingsPlaybackConnections
Contents
Front panel Display Rear panel IndexRemote
qPower indicator
This is lit as follows according to the power status :
•Power “On” : Green
•Standby (Auto Standby mode “O”) : Red
•Standby (Auto Standby mode “On”) : O
•iPod charge standby : Orange
•Power “O” : O
wPower operation button (X)
Turns power to this unit on and o (vpage27).
eHeadphones jack (PHONES)
Used to connect headphones.
NOTE
•To prevent hearing loss, do not raise the volume level excessively when using
headphones.
rHeadphone volume control knob (PHONES LEVEL)
Adjusts the headphone volume.
tDISC LAYER button
This switches the Super Audio CD layer (vpage29).
yPURE DIRECT button
This switches the Pure Direct mode (vpage28).
uRemote control sensor
This receives signals from the remote control unit (vpage5).
iDisplay
This displays various pieces of information (vpage10).
oDisc tray open/close button (5)
Used to open/close the disc tray (vpage30,34,63).
Q0 SOURCE button
Used to select the playback media (vpage28,30).
Q1 USB port
Used to connect USB storages (such as USB memory devices) and the
USB cable supplied with iPod (vpage22).
Q2 Forward-skip button (9)
Skip to next track (vpage31,34,38,40).
Q3 Reverse-skip button (8)
Skip to previous track (vpage31,34,38,40).
Q4 Stop button (2)
Stop playback (vpage31,34,38,40).
Q5 Play/Pause button (1/3)
Starts / Pauses playback (vpage31,34,38,40).
Q6 Disc tray
Tray used to insert a disc (vpage30,34,63).
SUPER AUDIO CD PLAYER DCD-1520AE
MIN MAX
SOURCE
PURE DIRECTDISC LAYER
PHONES LEVELPHONES
Q2
we r t y u i o Q0 Q1
q
Q3Q4Q5Q6

10
Appendix
TipsSettingsPlaybackConnections
Contents
Front panel Display Rear panel IndexRemote
Display
wq e r
Q0 o i u y
t
qPlayback mode indicators
1: Lights up during playback.
3: Lights up during pause.
wRepeat mode indicator
Lights to match the repeat mode settings.
eInformation display
Displays various information or playback elapsed time and so on of
the disc.
rPlayback format indicators
Lights up while an WAV/MP3/WMA file is being played back.
tInput signal indicators
The respective indicator will light corresponding to the input signal.
L: Front left LFE : Subwoofer
C: Center SL : Surround left
R: Front right SR : Surround right
yTime display indicators
SING REM : Lights up when displaying the remaining time in single-
track playback.
TOTAL REM : Lights up when displaying the remaining time in all-track
playback.
uRandom indicator
Lights during random playback.
iProgram indicator
Lights up during program playback.
oTrack number indicator
Lights up when displaying the track number.
Q0 Disc media indicators
Displays the type of disc that is being played back.

11
Appendix
TipsSettingsPlaybackConnections
Contents
Front panel Display Rear panel IndexRemote
Rear panel
wert
q
qAUDIO OUT connectors
Used to connect devices equipped with analog audio inputs connectors
or an external power amplifier (vpage18).
wAC inlet (AC IN)
Used to connect the power cord (vpage25).
eREMOTE CONTROL IN/OUT connectors
Extension jack for future use.
rDIGITAL AUDIO IN connectors
Used to connect devices equipped with digital audio output connectors
(vpage20, 21).
tDIGITAL AUDIO OUT connectors
Used to connect an AV receiver or D/A converter equipped with digital
audio input connectors (vpage19).

12
Appendix
TipsSettingsPlaybackConnections
Contents
Front panel Display Rear panel IndexRemote
Remote control unit
CD player operation
To operate CD player, press REMOTE MODE CD button to switch the
remote control to the CD operation mode.
•REMOTE MODE CD button lights for approximately two seconds.
t
w
e
r
q
e
w
qPOWER button (X)
Turns power to this unit on and o (standby) (vpage27,51).
wReverse-skip / Forward-skip buttons (8, 9)
Skip to previous track or next track (vpage31,34,38,40).
eFast-reverse/Fast-forward buttons (6, 7)
Fast-reverse / fast-forward playback (vpage31,34,38,40).
rStop button (2)
Stop playback (vpage31,34,38,40).
tInformation button (INFO)
This switches the track information shown in the display during
playback (vpage31,35,38,41).

13
Appendix
TipsSettingsPlaybackConnections
Contents
Front panel Display Rear panel IndexRemote
ySOURCE button
Used to select the playback media mode (vpage28,30).
uRANDOM button
Switches the random playback (vpage31,34,38,40).
iREPEAT button
Switches the repeat playback (vpage31,34,38,40).
oRemote mode select button (CD)
This switches the remote control operating mode to CD (vpage12).
Q0 1/3button
Starts / Pauses playback (vpage31,34,38,40).
Q1 MODE button
This switches the playback mode (vpage34,38,40).
Q2 Cursor buttons (uio p)
These select items (vpage34,37,40).
Q3 ENTER button
This determines the selection (vpage34,37,40).
i
u
y
Q1
Q0
o
Q2
Q3

14
Appendix
TipsSettingsPlaybackConnections
Contents
Front panel Display Rear panel IndexRemote
Q4 Number buttons (0 – 9, +10)
These enter numbers into the unit (vpage31,32).
Q5 CLEAR button
This clears the program registration (vpage32).
Q6 DIMMER button
Adjust the display brightness of this unit (vpage28).
Q7 PROGRAM button
This sets program playback (vpage32).
%
•The amplifier can be operated with the amplifier operation buttons even when the
remote control mode is CD.
Q4
Q5
Q6
Q7

15
Appendix
TipsSettingsPlaybackConnections
Contents
Front panel Display Rear panel IndexRemote
Amplifier and Tuner operations
The included remote control unit can be used to operate Denon amplifiers
and tuners.
qPRESET buttons (+, –)
wAMP POWER button (X)
eInput source select buttons (AMP)
rVOLUME buttons (df)
tMUTE button (:)
t
w
e
r
q

16
Appendix
TipsSettingsPlaybackConnections
Contents
Front panel Display Rear panel IndexRemote
qPOWER button (X)
wINTERNET RADIO PRESET
buttons (1 – 3)
e Reverse-skip/Forward-skip
buttons (8, 9)
rFast-reverse/Fast-forward
buttons (6, 7)
tStop button (2)
yPRESET buttons (+, –)
uInformation button (INFO)
iSOURCE button
oRANDOM button
Q0 REPEAT button
Q0
o
u
i
w
e
r
t
y
q
Q8
Q9
W0
Q4
r
e
Q2
Q1
Q5
Q7
Q6
W1
Q3
Q1 Remote mode select button
(NET)
Q2 1/3button
Q3 FAVORITE button
Q4 MODE button
Q5 Cursor buttons (uio p)
Q6 ENTER button
Q7 MENU button
Q8 Number buttons (0 – 9, +10)
Q9 CLEAR button
W0 DIMMER button
W1 SEARCH button
%
•The amplifier can be operated with the amplifier operation buttons even
when the remote control mode is NET.
•The included remote control unit can be used to operate Denon network
audio players.
•When using it, also refer to the operating instructions of the other
devices.
Network audio player operation
To operate network audio player, press REMOTE MODE NET button to
switch the remote control to the NETWORK operation mode.
•REMOTE MODE NET button lights for approximately two seconds.

Connections
17
Appendix
TipsSettingsPlayback
Contents
Front panel Display Rear panel IndexRemote
Connections
Connecting an amplifier (vpage18)
Connecting a device equipped with digital audio input
connectors (vpage19)
Connecting a device equipped with digital audio output
connectors (vpage20)
Connecting a PC or Mac (vpage21)
Connecting an iPod or USB memory device to the USB
port (vpage22)
Connecting the timer device (vpage24)
Connecting the power cord (vpage25)
NOTE
•Do not plug in the power cord until all connections have been completed.
•Do not bundle power cords together with connection cables. Doing so can result
in humming or noise.
2Cables used for connections
Provide necessary cables according to the devices you want to connect.
Audio cable R
L
R
L
Optical cable
Coaxial digital cable
iPod cable
R
L
R
L
USB cable
R
L
R
L

18
Appendix
TipsSettingsPlayback
Contents
Front panel Display Rear panel IndexRemote
Connections
Connecting an amplifier
Use this connection for audio playback via an amplifier.
RL
RL
AUDIO
LR
IN
Amplifier

19
Appendix
TipsSettingsPlayback
Contents
Front panel Display Rear panel IndexRemote
Connections
Connecting a device equipped with digital audio input connectors
Use this connection to output digital audio signals from this unit, and convert the signals for playback using the D/A converter of a connected device.
OPTICAL
IN
COAXIAL
IN
AV receiver /
D/A converter
NOTE
•Signals on the HD layer of the Super Audio CD
cannot be output in digital output.
•Signals that can be output using digital output are
digital audio signals from the CD layer of the Super
Audio CD, CD, USB (front), USB-DAC, COAXIAL,
and OPTICAL.
•Digital audio output is stopped during DSD signal
playback.

20
Appendix
TipsSettingsPlayback
Contents
Front panel Display Rear panel IndexRemote
Connections
Connecting a device equipped with digital audio output connectors
Use this connection to input digital audio signals to this unit, and convert the signals for playback using the D/A converter of this unit (vpage42).
OPTICAL
OUT
COAXIAL
OUT
CD player /
Satellite receiver
etc.
Other manuals for DCD-1520AE
4
Table of contents
Other Denon CD Player manuals

Denon
Denon DCD-1500 User manual

Denon
Denon DCD-1500 User manual

Denon
Denon DVD-1940CI User manual

Denon
Denon DN-C635 User manual

Denon
Denon DVM-1835 - DVD Changer User manual

Denon
Denon DCD-510AE User manual

Denon
Denon Nippon DN-600F User manual

Denon
Denon DVM 1845 User manual

Denon
Denon DCM-290 User manual

Denon
Denon DCM-390 User manual

Denon
Denon DCD-F109 User manual

Denon
Denon DN-S3000 User manual

Denon
Denon DCD-860 User manual

Denon
Denon DN-C680 User manual

Denon
Denon DN-C680 User manual

Denon
Denon DVM-745 User manual

Denon
Denon DCD-A110 User manual

Denon
Denon DCD-100 User manual

Denon
Denon DCM-65/35 User manual

Denon
Denon DN-961FA User manual