26
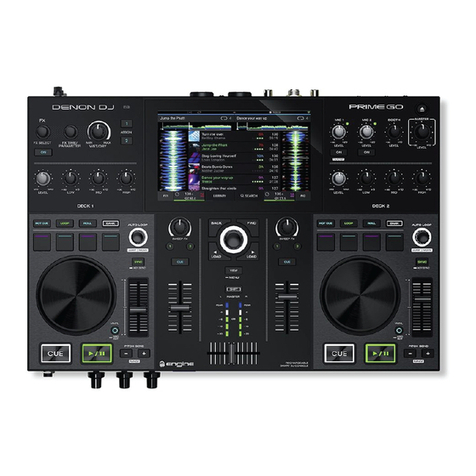
11. Channel EQ: Turn these knobs to boost or cut the low,
mid-range, and high frequencies for the channel.
12. Channel Cue: Press this button to send the channel’s
pre-fader signal to the headphones’ cue channel.
13. Channel Faders: Use these faders to adjust the
channel’s volume level.
14. Crossfader Assign: Routes the audio playing on the
corresponding channel to either side of the crossfader
(Aor B), or bypasses the crossfader and sends the
audio directly to the program mix (center, Thru).
15. Crossfader: Use the crossfader to mix between Deck A
and Deck B.
16. Main Volume: Turn this knob to adjust the volume level
of the Main Outputs.
17. Main Level Meters: These LEDs display the audio signal
level of the overall mix (sent out of the Main Outputs).
18. Speaker: Mutes or unmutes the internal speakers.
19. Speaker/Booth Level: Adjusts the volume of the
internal speakers and Booth Output.
20. Talkover: Press this button to turn talkover on or off,
which automatically reduces the volume level of the
master mix when you speak into the microphone.
21. Mic 1 / Aux/Mic 2 Level: Turn this knob to adjust the volume level for the Microphone 1–2and Aux inputs. The
Peak light next to each knob indicates the current signal level by its color: green (low), amber (normal/optimal),
or red (maximum/peak). You can adjust additional microphone and aux settings in the Settings menu.
22. Cue Mix: Turn this knob to adjust the blend of the pre-fader and main mix together in the headphones.
23. Headphones Level: Turn this knob to adjust the volume of the cue level in the headphones.
24. Split Cue: When this switch is On, the headphone audio will be “split” such that all channels sent to cue channel
are summed to mono and sent to the left headphone channel and the master mix is summed to mono and sent
to the right channel. When this switch is Off, the cue channel and main mix will be “blended” together. You can
swap the left/right position of these channels in the Settings menu.
25. Sweep FX: Press these buttons to select the active Sweep FX. The available selections are:
•Filter: This effect applies a filter to the channel. Starting from the center (12:00) position, turn a Sweep FX
knob counter-clockwise to apply a low-pass filter, or turn it clockwise to apply a high-pass filter.
•Noise: This effect adds noise to the signal. Starting from the center (12:00) position, turn a Sweep FX knob
counterclockwise to add pink noise, or turn it clockwise to add white noise.
•Echo: This effect is a brief echo. Starting from the center (12:00) position, turn a Sweep FX knob
counterclockwise to decrease the length of the delay and increase the feedback, or turn it clockwise to
increase the length of the delay as well as the feedback.
•Wash Out: This creates a transition effect. Turn a Sweep FX knob to its most counter-clockwise (minimum)
position to apply a 1-beat echo that will also mute the channel’s normal audio signal, or turn it to its most
clockwise (maximum) position to apply a 1/2-beat echo.
26. Sweep FX A/B: Turn these knobs to control the active Sweep FX A or FX B.
27. BPM FX Select: Turn this knob to select the active effect for FX 1 and FX 2.
28. BPM FX Channel Assign: Adjust this switch to assign effect routing from Deck 1, Deck 2, Deck 3, Deck 4, or
the Main Outputs.
29. BPM FX Time/Parameter: Turn this knob to decrease or increase the rate of time-based effects on that deck.
Press this knob to toggle between FX Time and FX Parameter control, and then turn the knob to adjust the
parameter.
30. BPM FX Amount: Turn this knob to adjust the wet/dry mix of the effects.
31. BPM FX On/Off: Press this button to enable or disable the selected effect.
9
15
10
12
13
14
11
11
16
17
18
19
20
20
21
22
24
23
25 26
27
28
29
30
31
